> ## Documentation Index
> Fetch the complete documentation index at: https://docs.rocket.new/llms.txt
> Use this file to discover all available pages before exploring further.
# Jira
> Connect Jira to Rocket and build from your tickets. Rocket reads descriptions, acceptance criteria, sprint data, and epics to generate aligned code.
export const LlmsDirective = () =>
For the complete documentation index, see llms.txt.
For a lightweight markdown version of this page, append .md to the URL.
;
Connect Jira and your tickets become build context. Rocket reads issue descriptions, acceptance criteria, epics, and sprint data directly from your board, then generates code that reflects your actual project requirements.
This connector is only available for **Next.js TypeScript** web build tasks.
## What you can do
Paste a Jira issue URL into chat. Rocket reads the summary, description, and acceptance criteria, then generates the implementation.
Paste a Jira epic URL. Rocket reads all child stories and the epic description, then builds the full scope.
Reference your current sprint. Rocket reads active stories and priorities to understand what you are building right now.
Paste a bug ticket URL. Rocket reads the steps to reproduce, expected vs actual behavior, and generates a targeted fix.
Use feature descriptions, value propositions, and requirements text from tickets directly in your app's UI.
Rocket understands Jira workflow states. It generates code that maps to your ticket statuses and transitions.
## Connect Jira
Jira uses OAuth 2.0 via Atlassian, so no API key is needed. It is a **workspace-level** connector — connect it once and it is available across all tasks.
The connection flow has two steps:
Authorize access to your Atlassian account.
Select a **Jira App** (cloud instance) and a **Project** within that app.
You can connect from three places. All do the same thing.
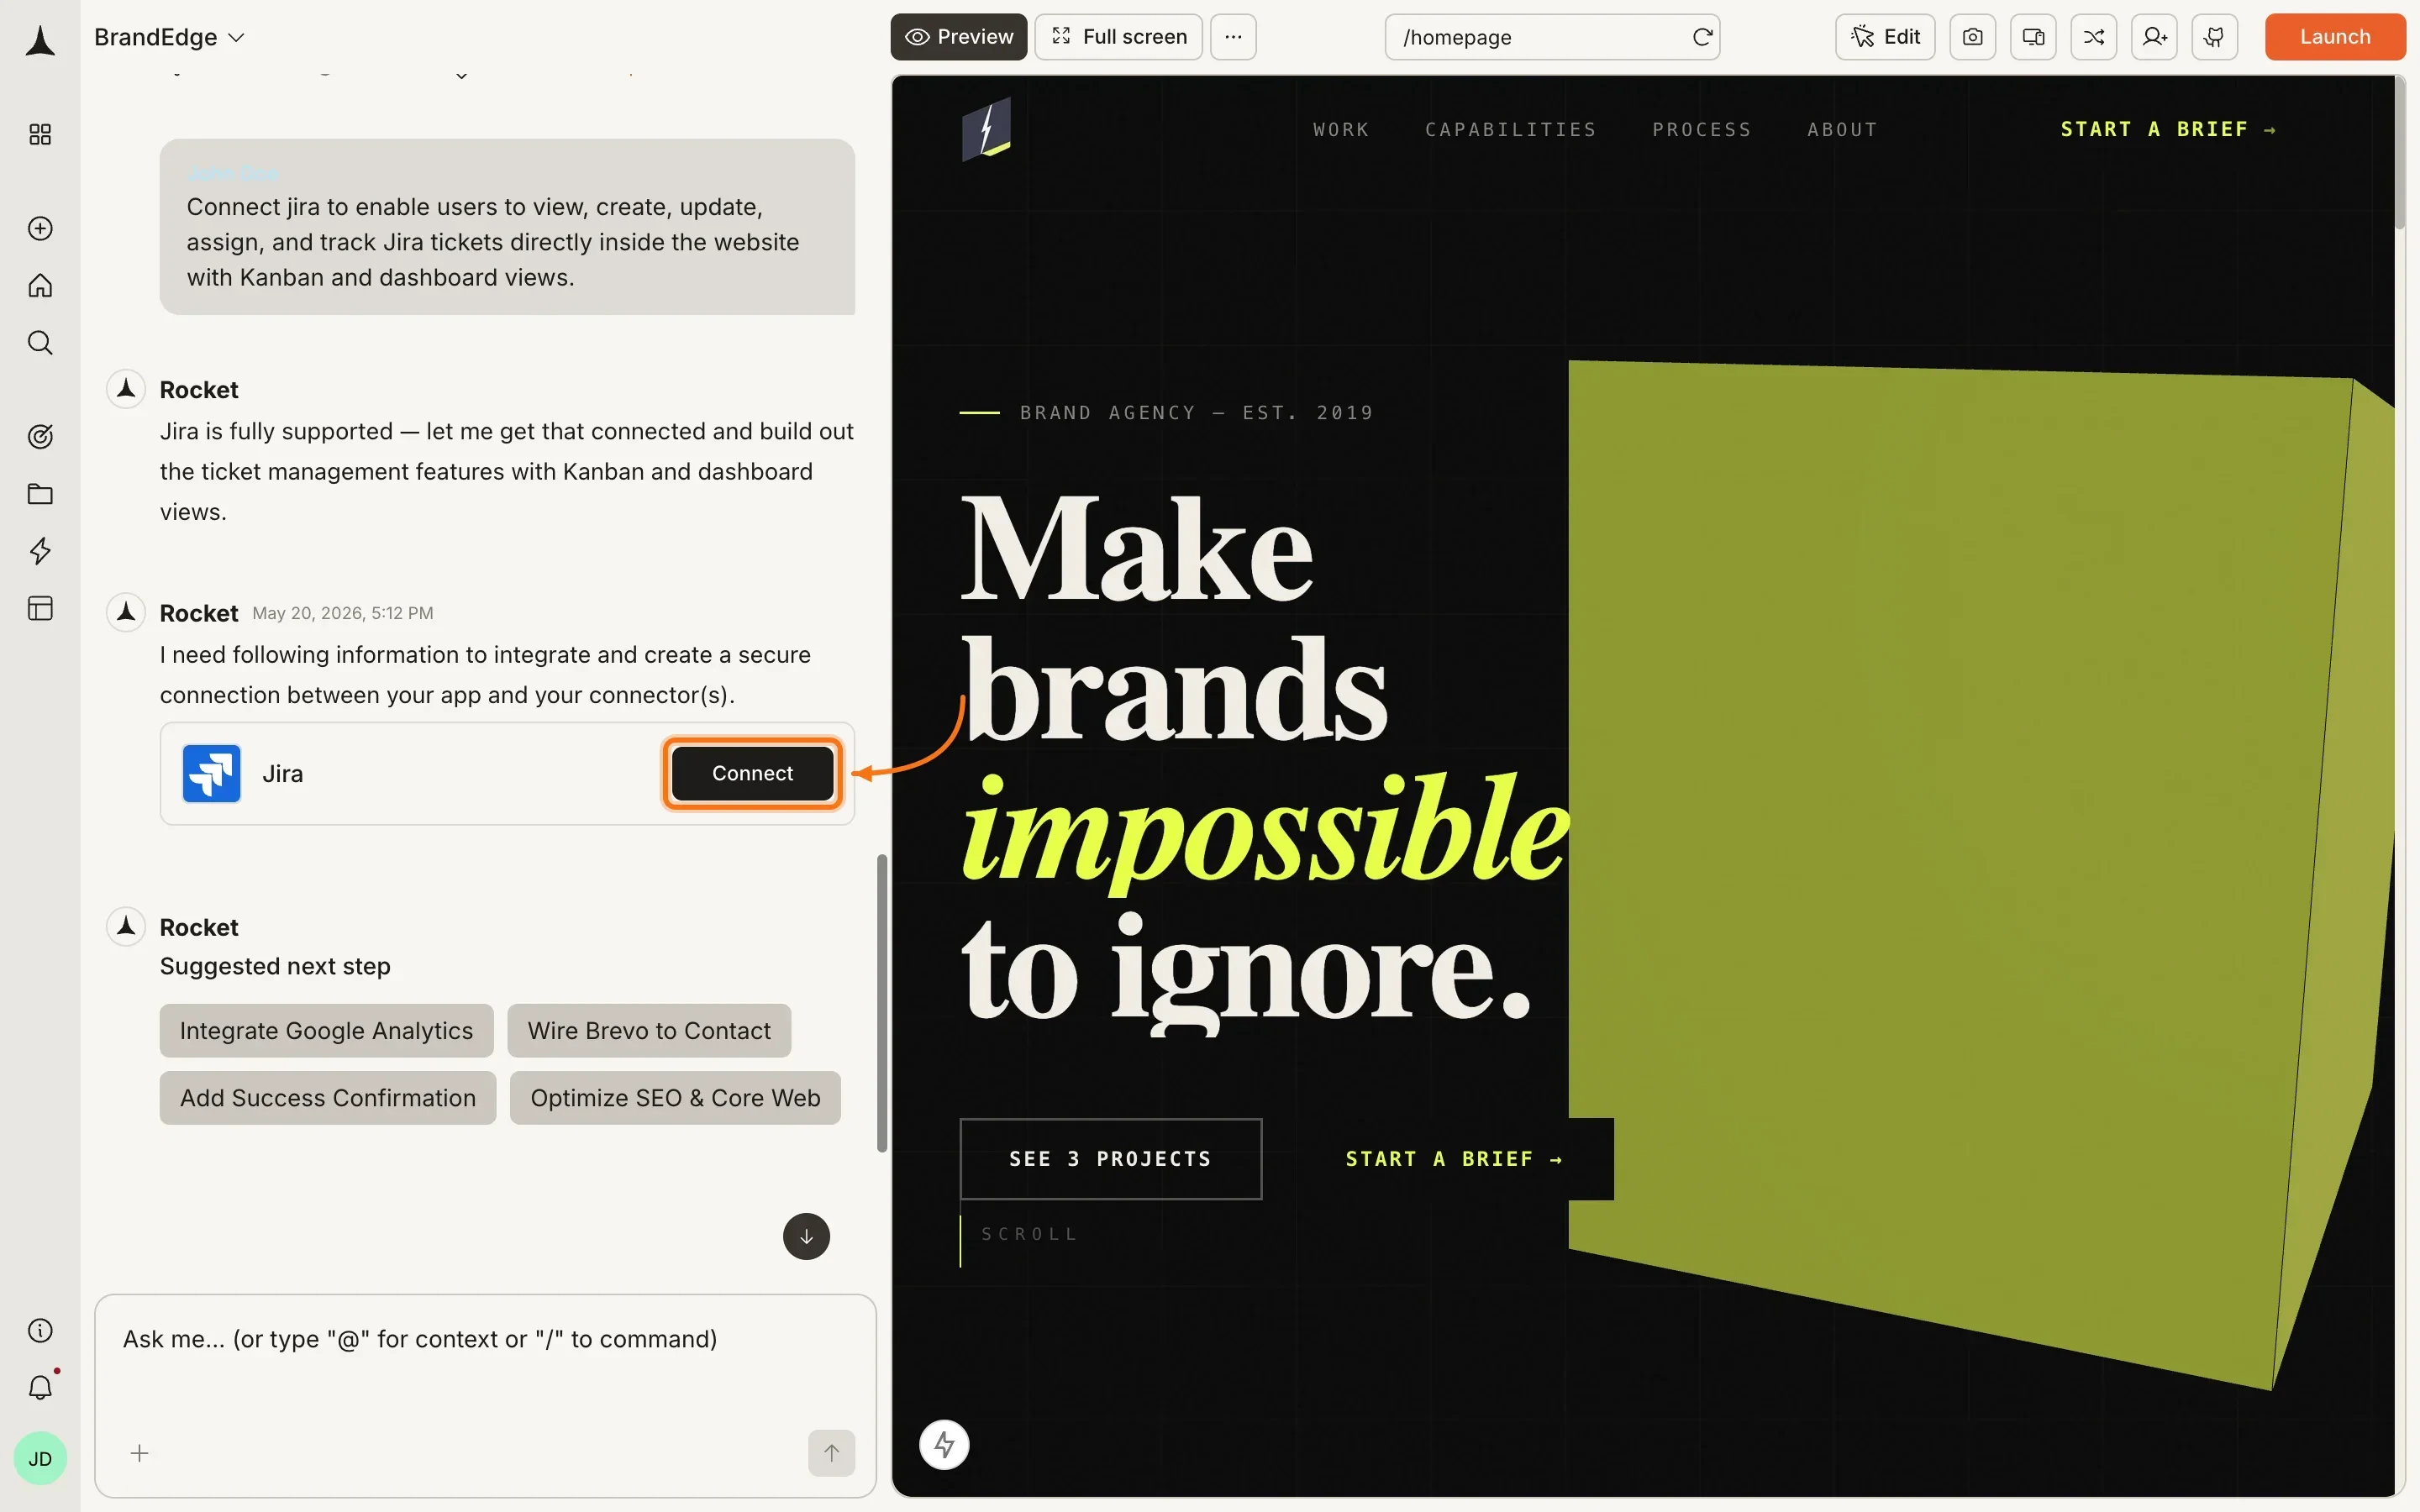
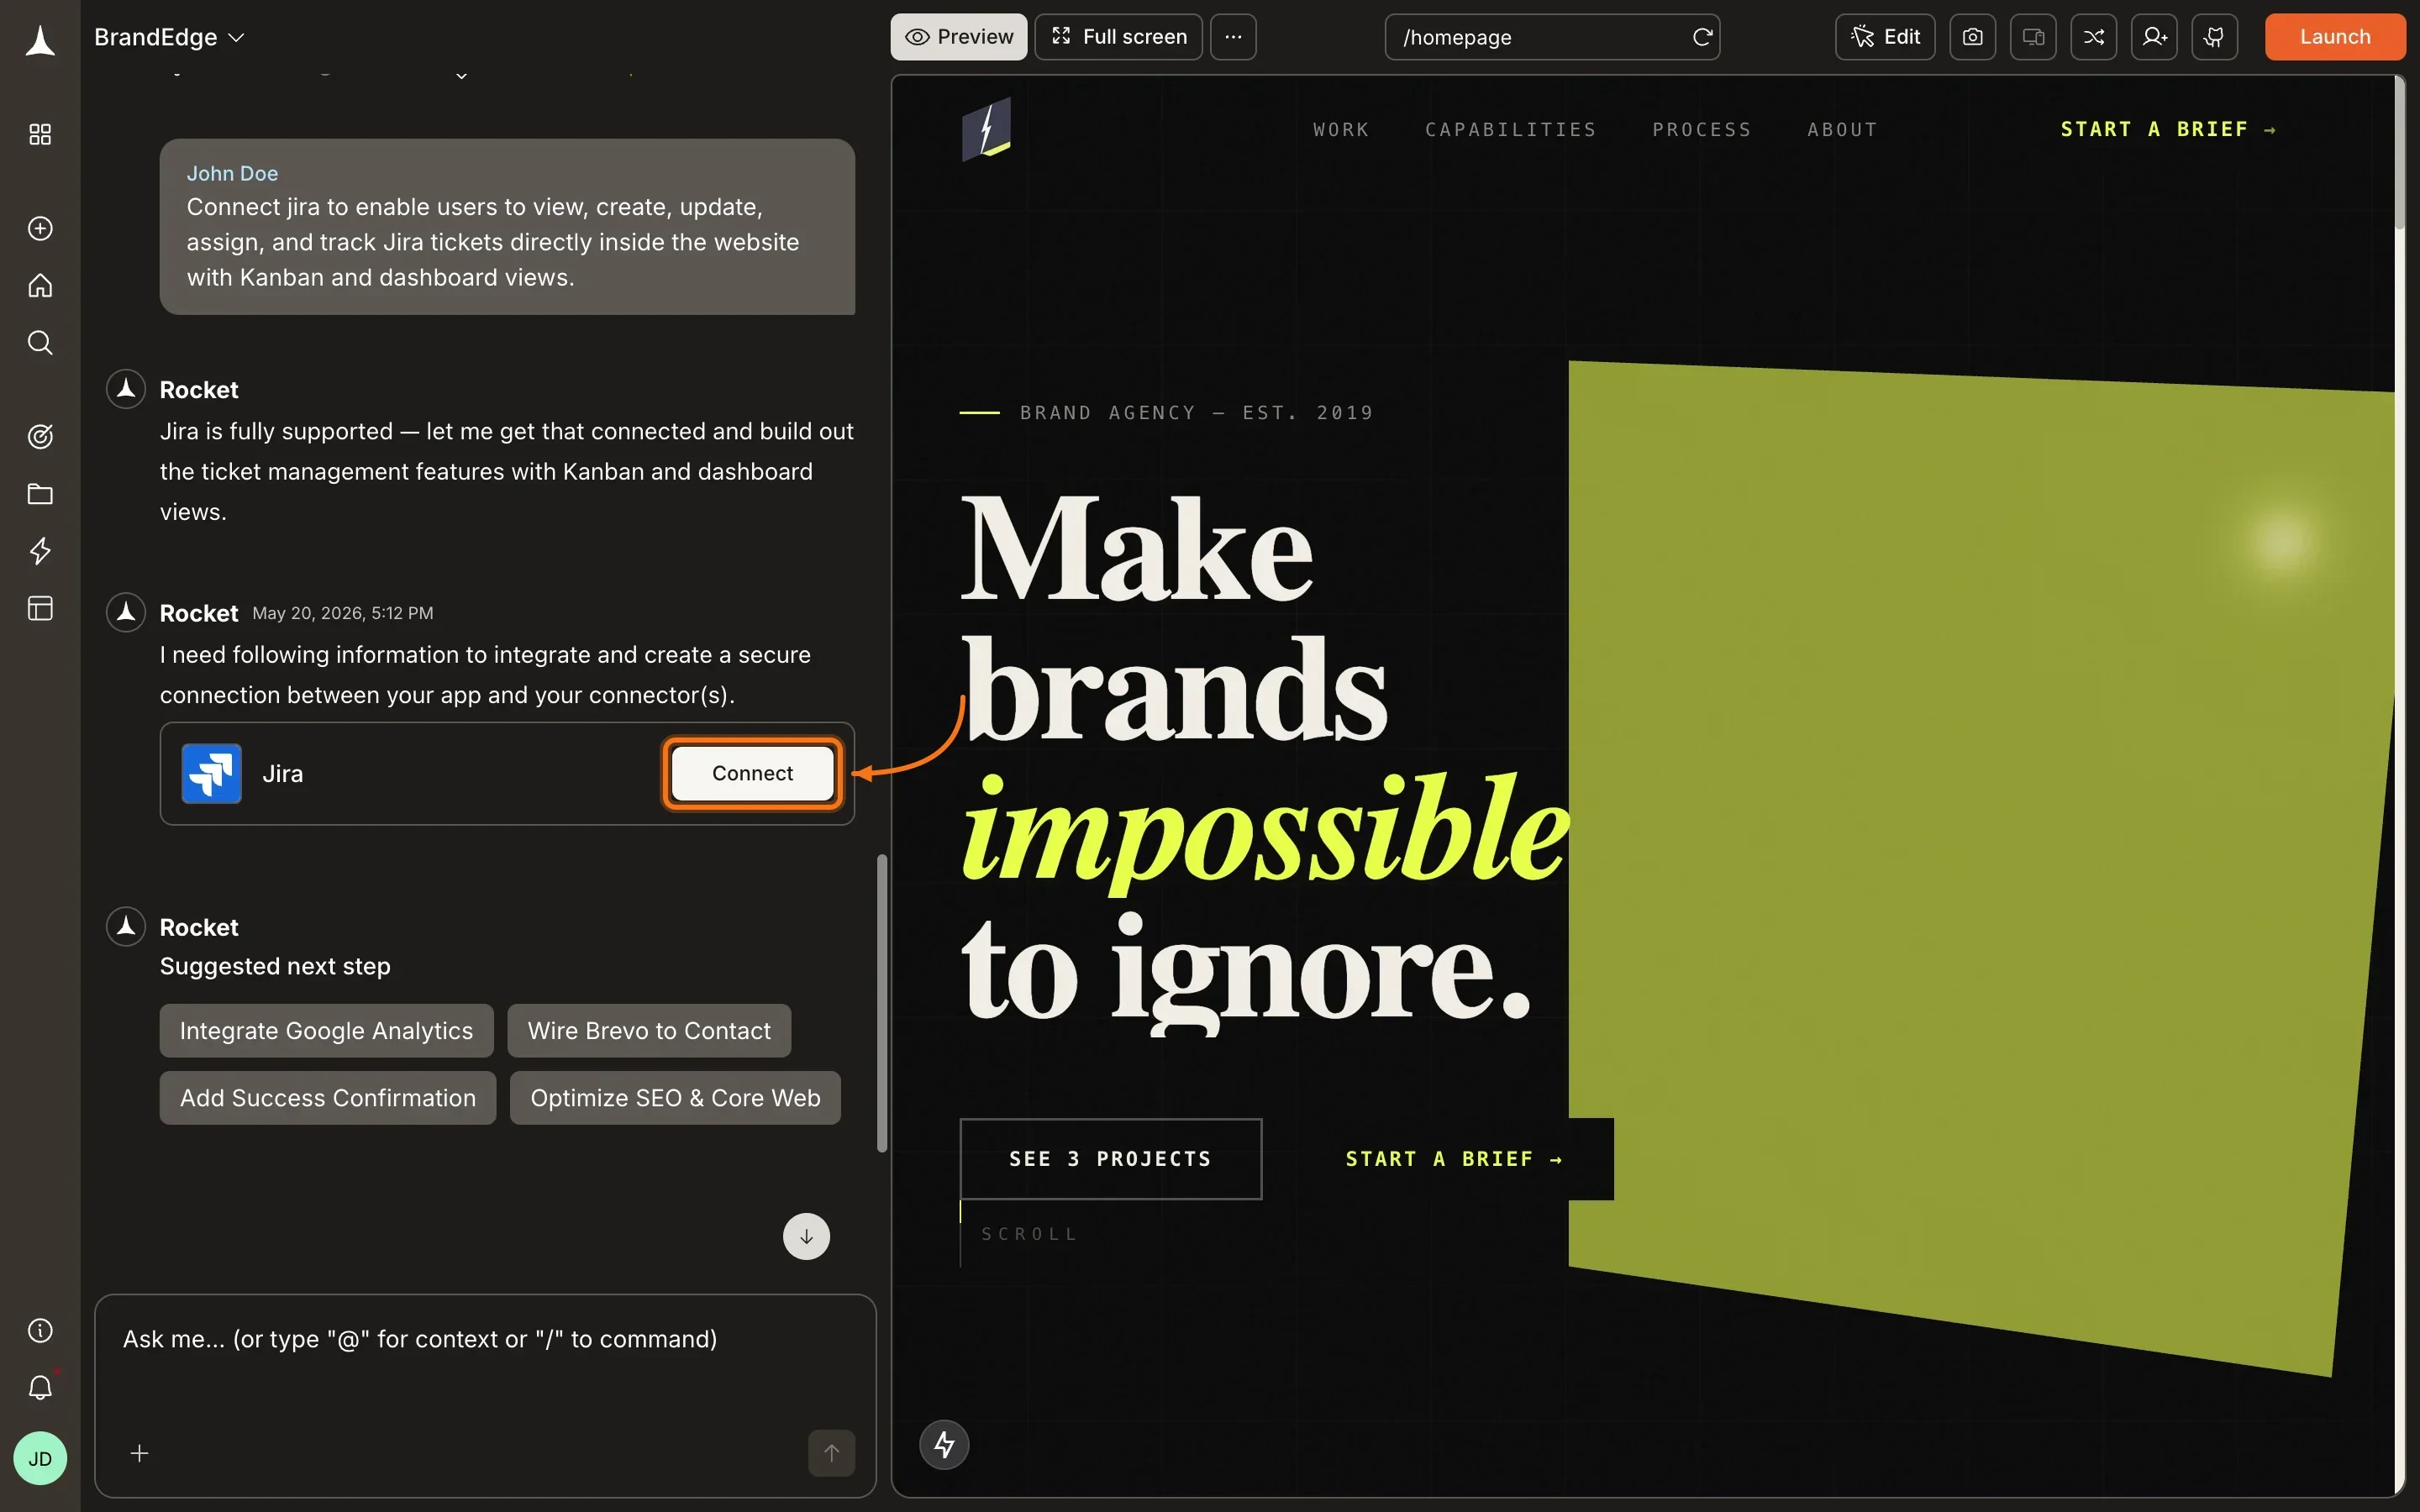
**Option 1: From chat**
Paste a Jira ticket URL or ask Rocket to pull tickets. Rocket detects the intent and shows a **Connect** button inline. Click it to start the authorization flow.
 **Option 2: From the Connectors tab**
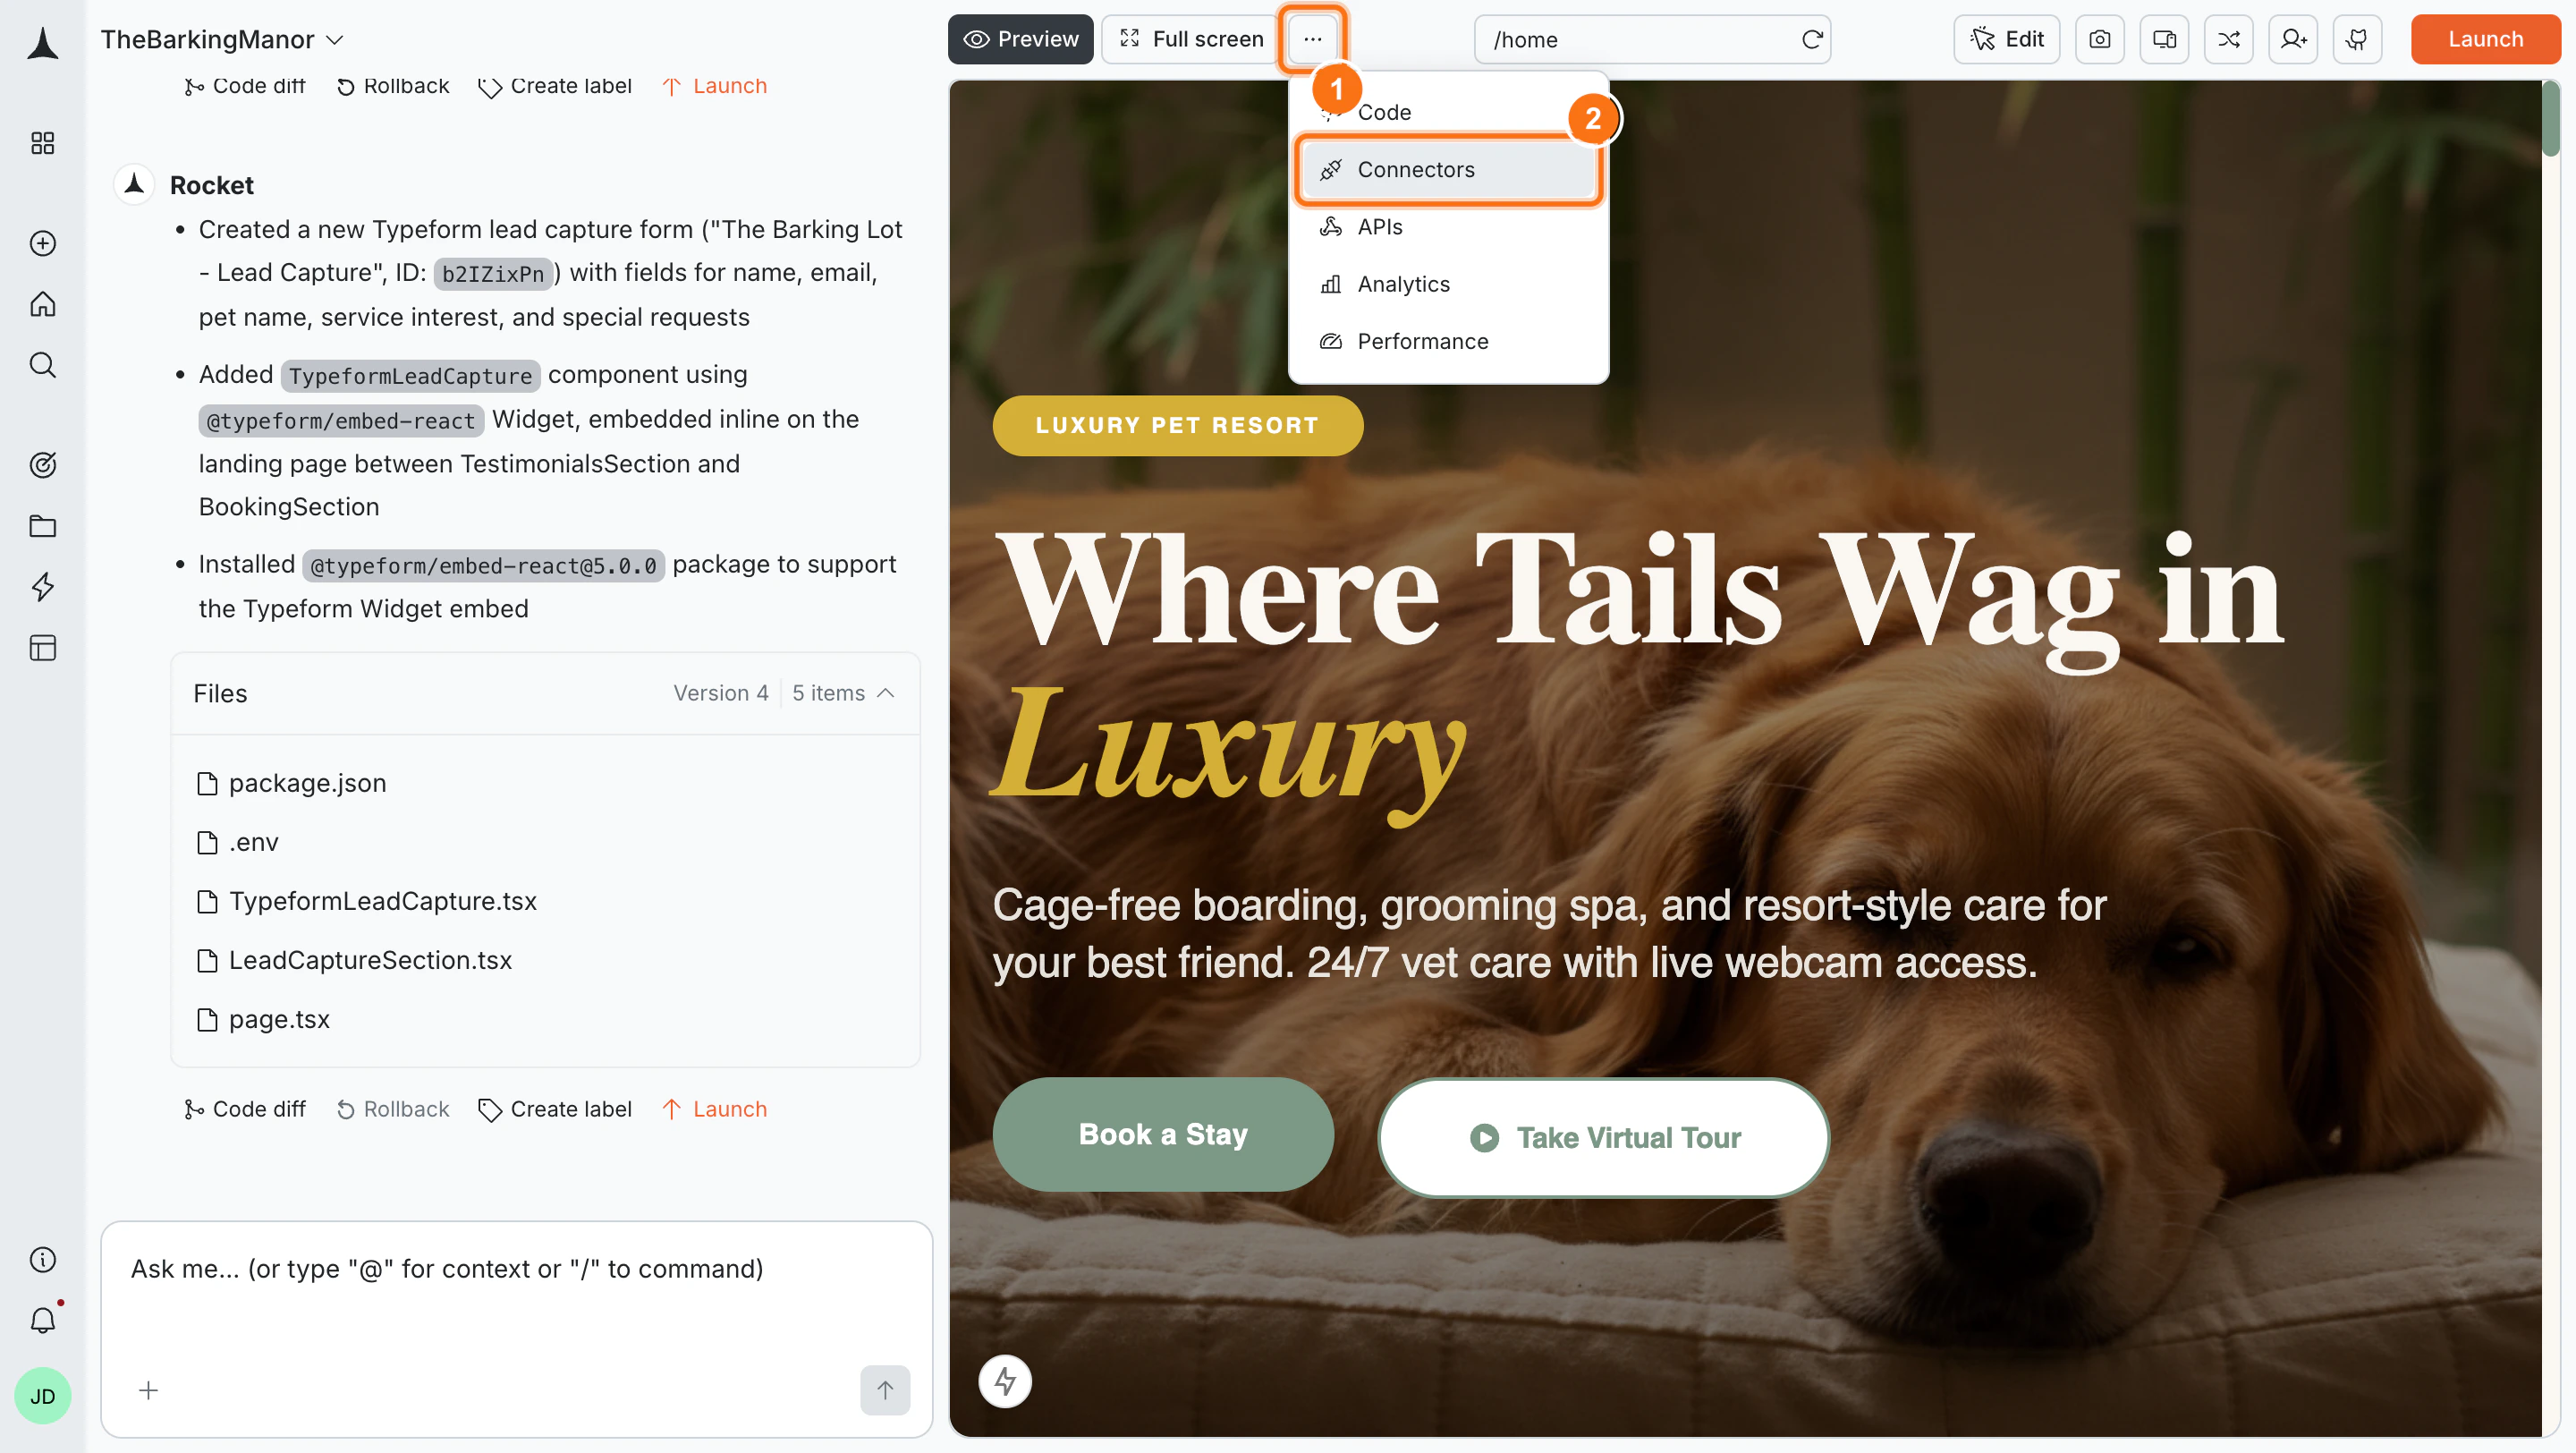
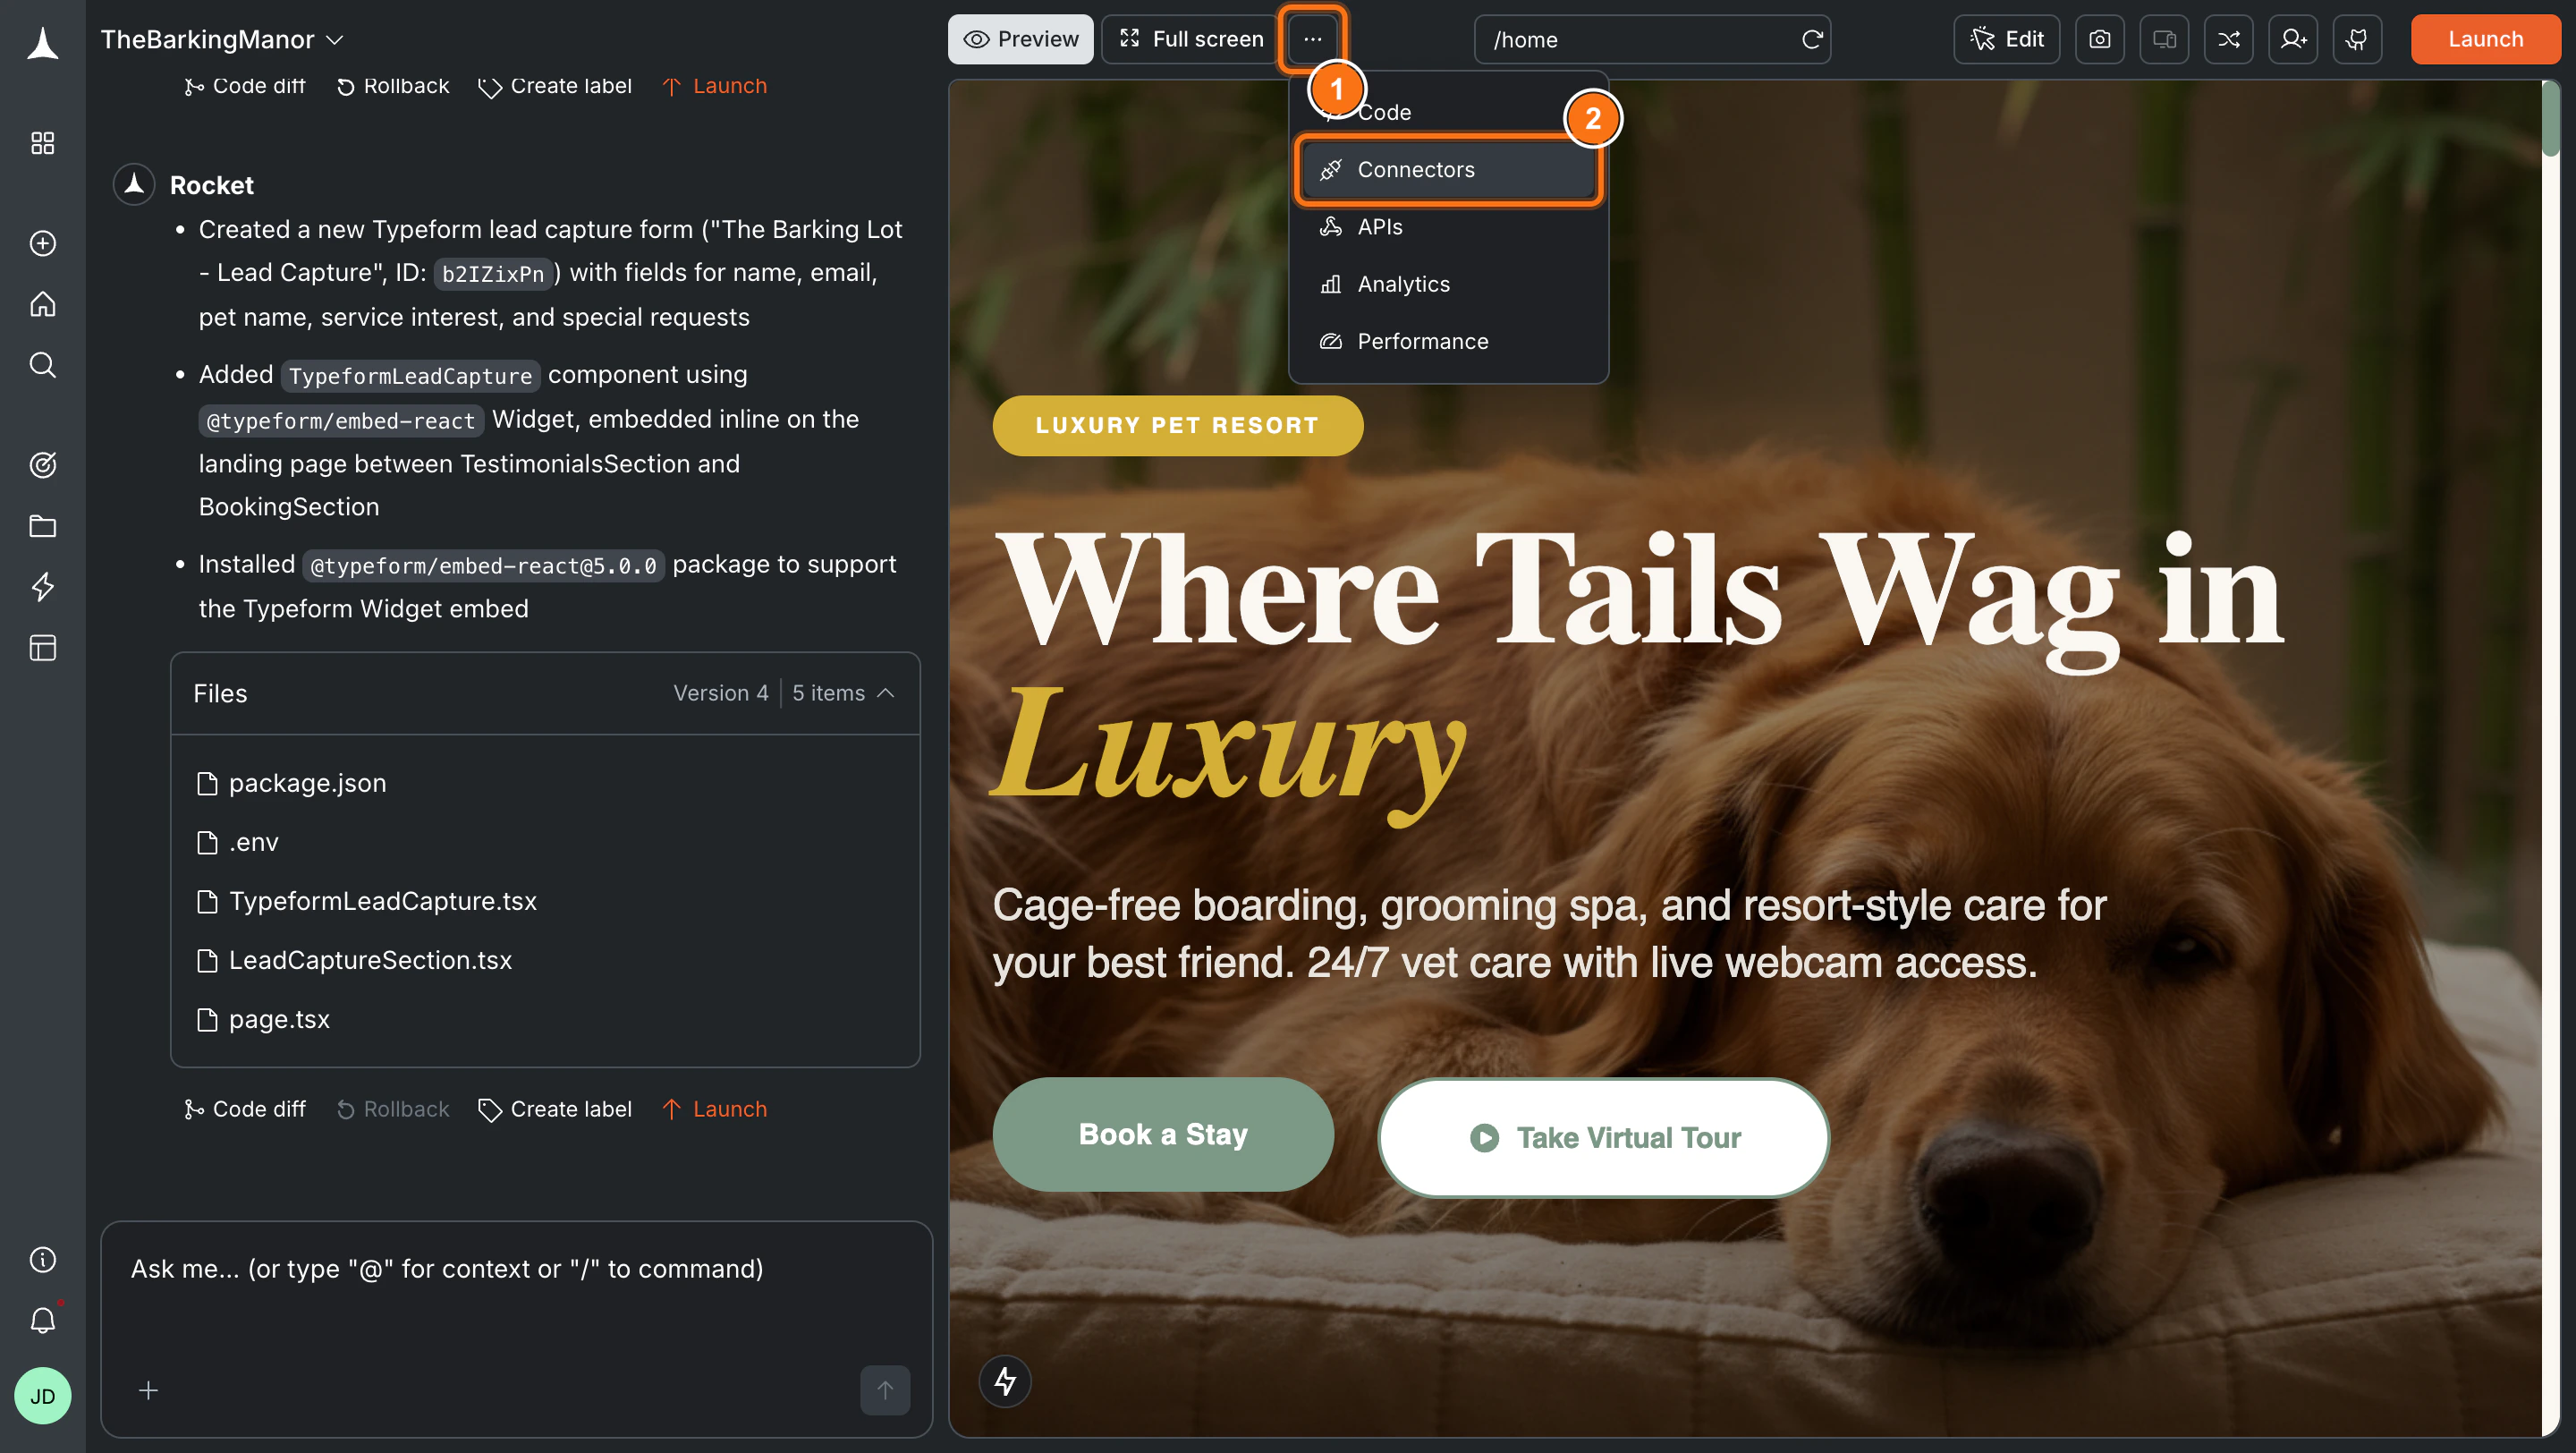
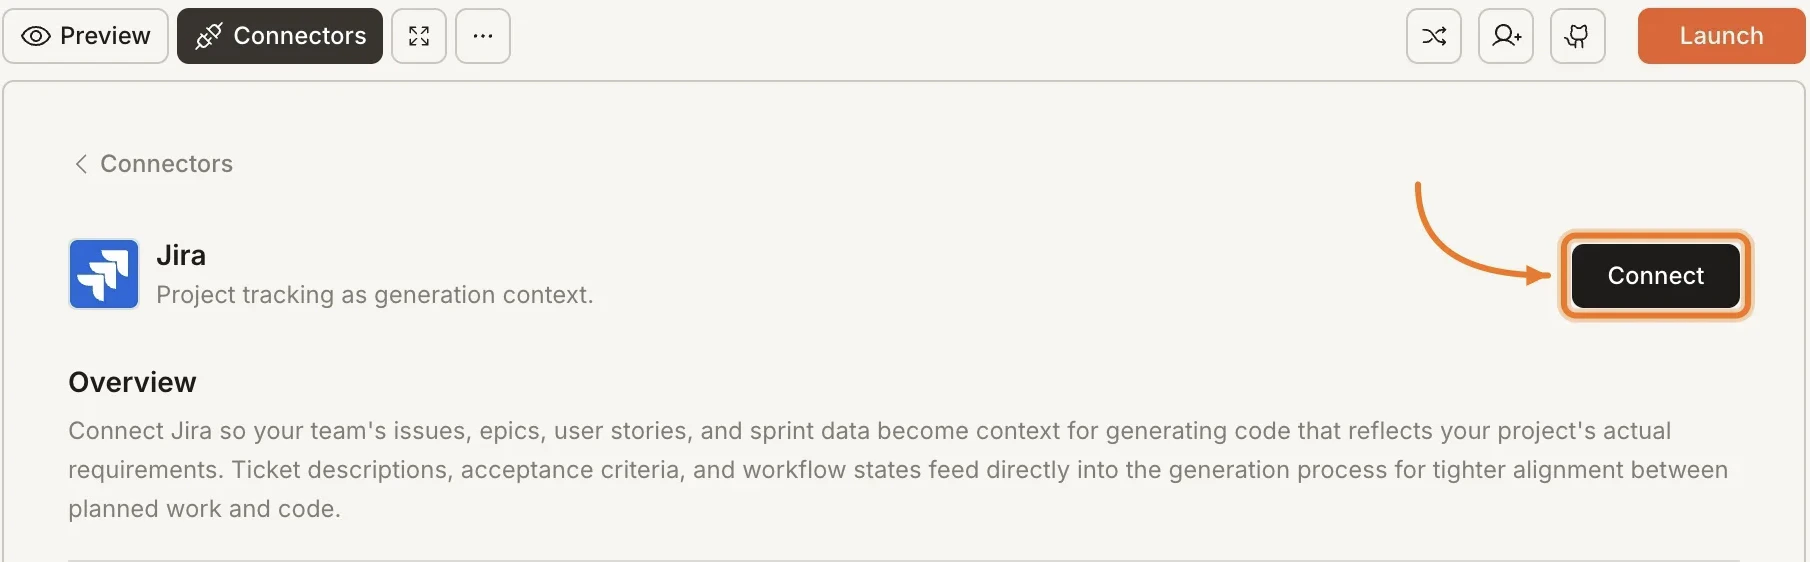
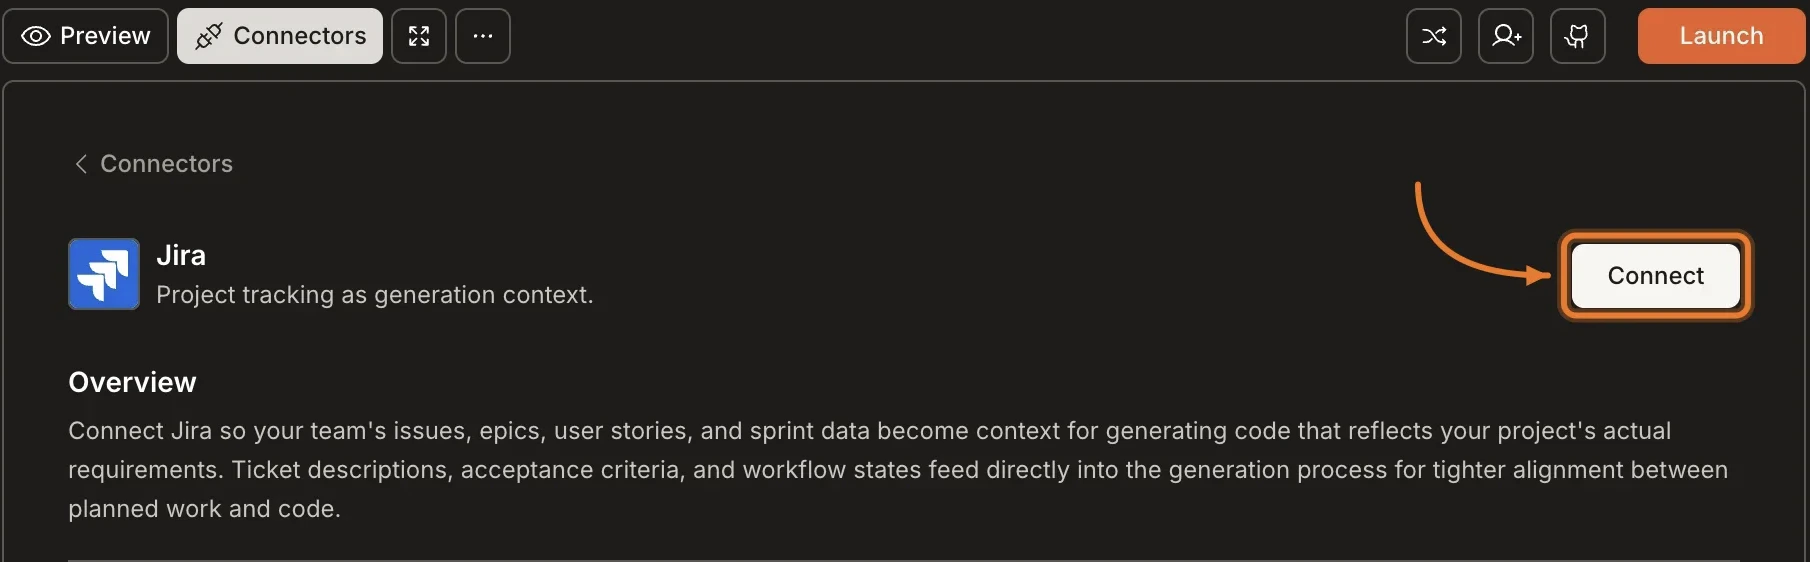
Click the **`...`** button in the preview toolbar, then select **Connectors**.
**Option 2: From the Connectors tab**
Click the **`...`** button in the preview toolbar, then select **Connectors**.
 Click the **Jira** card, then click **Connect**.
 **Option 3: From workspace Settings**
Connect once from Settings and it is available across all tasks.
**After clicking Connect**
An Atlassian authorization screen opens. Select your Jira cloud instance (App) from the **Use app on** dropdown, review the permissions, and click **Accept**.
**Option 3: From workspace Settings**
Connect once from Settings and it is available across all tasks.
**After clicking Connect**
An Atlassian authorization screen opens. Select your Jira cloud instance (App) from the **Use app on** dropdown, review the permissions, and click **Accept**.
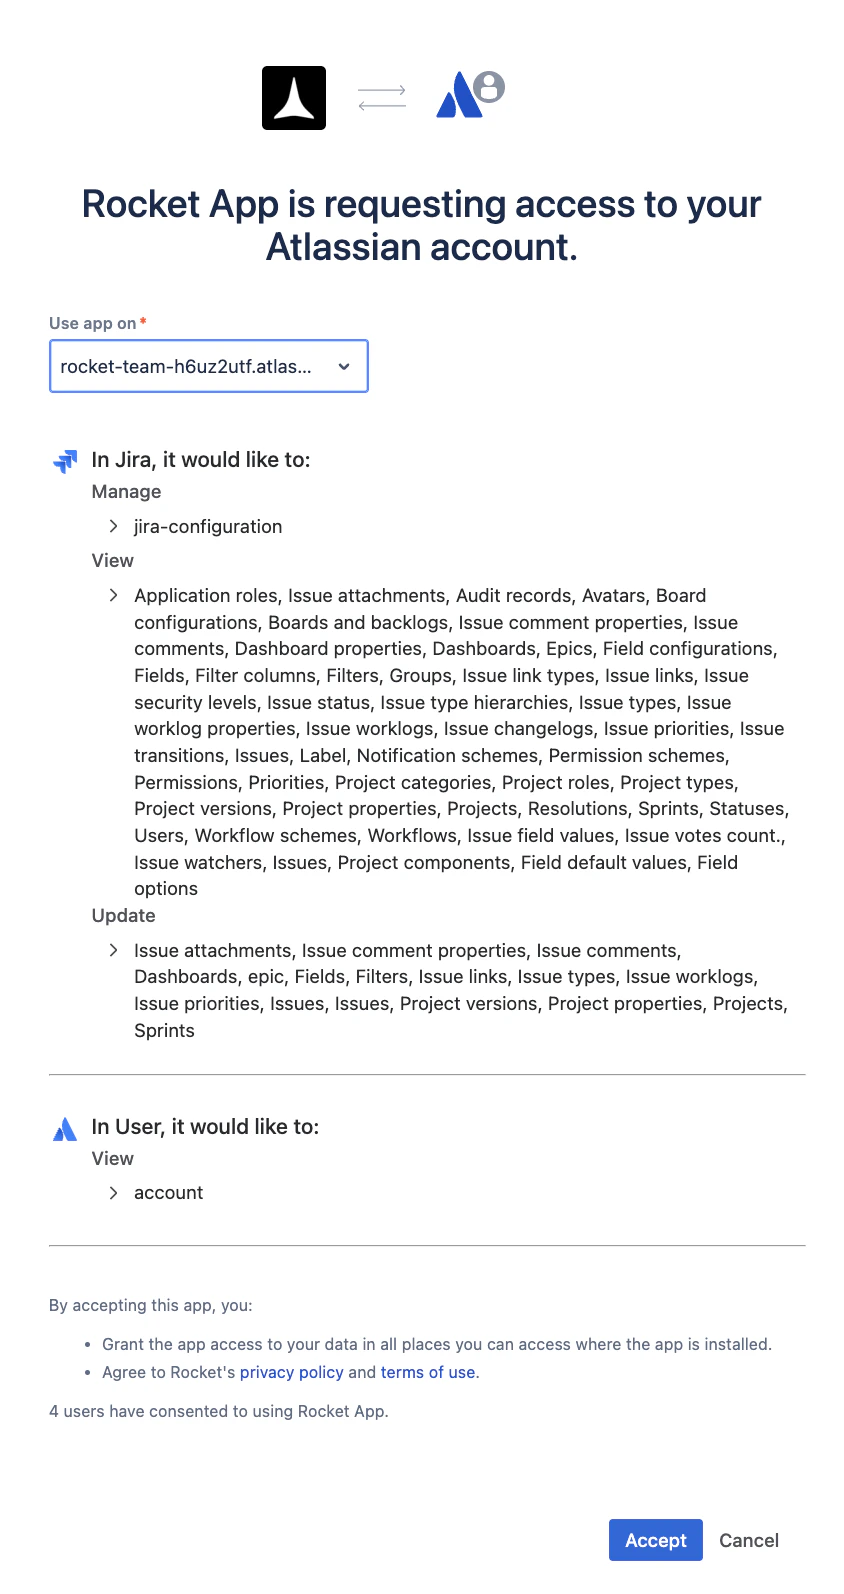 After authorizing, select the **Project** you want Rocket to read from.
A green dot appears next to Jira when the connection is active.
**Disconnect**
Disconnect or switch accounts from workspace Settings.
You can connect from two places. Both do the same thing.
**Option 1: From chat**
Paste a Jira ticket URL or ask Rocket to pull issues. Rocket shows a **Connect** button inline. Tap it to start the authorization flow.
**Option 2: From the Connectors tab**
Tap the **More** button in the header.
Tap **Integrations**.
Tap the **Jira** card, then tap **Connect**.
**After tapping Connect**
An Atlassian authorization screen opens. Review the permissions and tap **Accept**.
**Select your App and Project**
After authorizing, select your Jira cloud instance (App) and the Project you want Rocket to read from.
A green dot appears next to Jira when the connection is active.
## Example prompts
Replace `[JIRA_URL]` with your actual issue, epic, or board URL.
### Reading from Jira
| What you want | Prompt to use |
| :---------------------------- | :-------------------------------------------------------------------------------------------------------------------------------------- |
| Build a feature from a ticket | `Build the feature described in [JIRA_URL]. Read the full requirements, acceptance criteria, and subtasks before generating.` |
| Build from an epic | `Read the Jira epic at [JIRA_URL] and build all the screens and features described in its child stories.` |
| Fix a bug from a report | `Fix the bug described in [JIRA_URL]. Read the steps to reproduce, expected behavior, and actual behavior and generate a targeted fix.` |
| Pull sprint context | `Read my current sprint tickets and build the highest-priority story first.` |
| Apply requirement changes | `The requirements changed in [JIRA_URL]. Read the updated description and modify the relevant parts of the app.` |
| Display a project board | `Pull my Jira tickets into a dashboard that shows the current sprint board with status columns.` |
## Tips
* **Be specific in your tickets.** Rocket builds from what is written. Tickets with detailed descriptions, clear acceptance criteria, and story points produce better output than vague ones.
* **Use issue URLs, not ticket keys alone.** Pasting a direct URL gives Rocket unambiguous context. Referring to a ticket by key alone can be ambiguous across projects.
* **Scope to a single project.** During connection you select one project. If you need to reference a different project, reconnect from workspace Settings.
* **Permissions apply.** Rocket respects Jira's access controls. It can only read issues and data that the connected Atlassian account has permission to access.
* **Works with Jira Cloud only.** This connector uses Atlassian's cloud OAuth. Self-hosted Jira Server and Data Center instances are not supported.
## What's next?
Already using Linear? Connect it for bi-directional ticket integration.
Connect Confluence to pull product specs and documentation as build context.
Push your code to a repository and keep version history.
Browse every available integration.
After authorizing, select the **Project** you want Rocket to read from.
A green dot appears next to Jira when the connection is active.
**Disconnect**
Disconnect or switch accounts from workspace Settings.
You can connect from two places. Both do the same thing.
**Option 1: From chat**
Paste a Jira ticket URL or ask Rocket to pull issues. Rocket shows a **Connect** button inline. Tap it to start the authorization flow.
**Option 2: From the Connectors tab**
Tap the **More** button in the header.
Tap **Integrations**.
Tap the **Jira** card, then tap **Connect**.
**After tapping Connect**
An Atlassian authorization screen opens. Review the permissions and tap **Accept**.
**Select your App and Project**
After authorizing, select your Jira cloud instance (App) and the Project you want Rocket to read from.
A green dot appears next to Jira when the connection is active.
## Example prompts
Replace `[JIRA_URL]` with your actual issue, epic, or board URL.
### Reading from Jira
| What you want | Prompt to use |
| :---------------------------- | :-------------------------------------------------------------------------------------------------------------------------------------- |
| Build a feature from a ticket | `Build the feature described in [JIRA_URL]. Read the full requirements, acceptance criteria, and subtasks before generating.` |
| Build from an epic | `Read the Jira epic at [JIRA_URL] and build all the screens and features described in its child stories.` |
| Fix a bug from a report | `Fix the bug described in [JIRA_URL]. Read the steps to reproduce, expected behavior, and actual behavior and generate a targeted fix.` |
| Pull sprint context | `Read my current sprint tickets and build the highest-priority story first.` |
| Apply requirement changes | `The requirements changed in [JIRA_URL]. Read the updated description and modify the relevant parts of the app.` |
| Display a project board | `Pull my Jira tickets into a dashboard that shows the current sprint board with status columns.` |
## Tips
* **Be specific in your tickets.** Rocket builds from what is written. Tickets with detailed descriptions, clear acceptance criteria, and story points produce better output than vague ones.
* **Use issue URLs, not ticket keys alone.** Pasting a direct URL gives Rocket unambiguous context. Referring to a ticket by key alone can be ambiguous across projects.
* **Scope to a single project.** During connection you select one project. If you need to reference a different project, reconnect from workspace Settings.
* **Permissions apply.** Rocket respects Jira's access controls. It can only read issues and data that the connected Atlassian account has permission to access.
* **Works with Jira Cloud only.** This connector uses Atlassian's cloud OAuth. Self-hosted Jira Server and Data Center instances are not supported.
## What's next?
Already using Linear? Connect it for bi-directional ticket integration.
Connect Confluence to pull product specs and documentation as build context.
Push your code to a repository and keep version history.
Browse every available integration.