> ## Documentation Index
> Fetch the complete documentation index at: https://docs.rocket.new/llms.txt
> Use this file to discover all available pages before exploring further.
# Email templates
> Customize Supabase email templates in your Rocket.new app - brand confirmation, reset, and magic link emails.
export const LlmsDirective = () =>
For the complete documentation index, see llms.txt.
For a lightweight markdown version of this page, append .md to the URL.
;
Customize the email templates Supabase sends for sign-up confirmation, password reset, and magic links. This guide covers editing subject lines and body content while keeping the required placeholders intact.
The built-in Supabase email service is intended for development use only and has rate limits. For production apps, connect a custom SMTP provider.
## Edit email templates in Supabase
1. In your Supabase project, go to **Authentication** in the left sidebar.
2. Under **Configuration**, choose **Emails**.
3. Switch to the **Templates** tab.
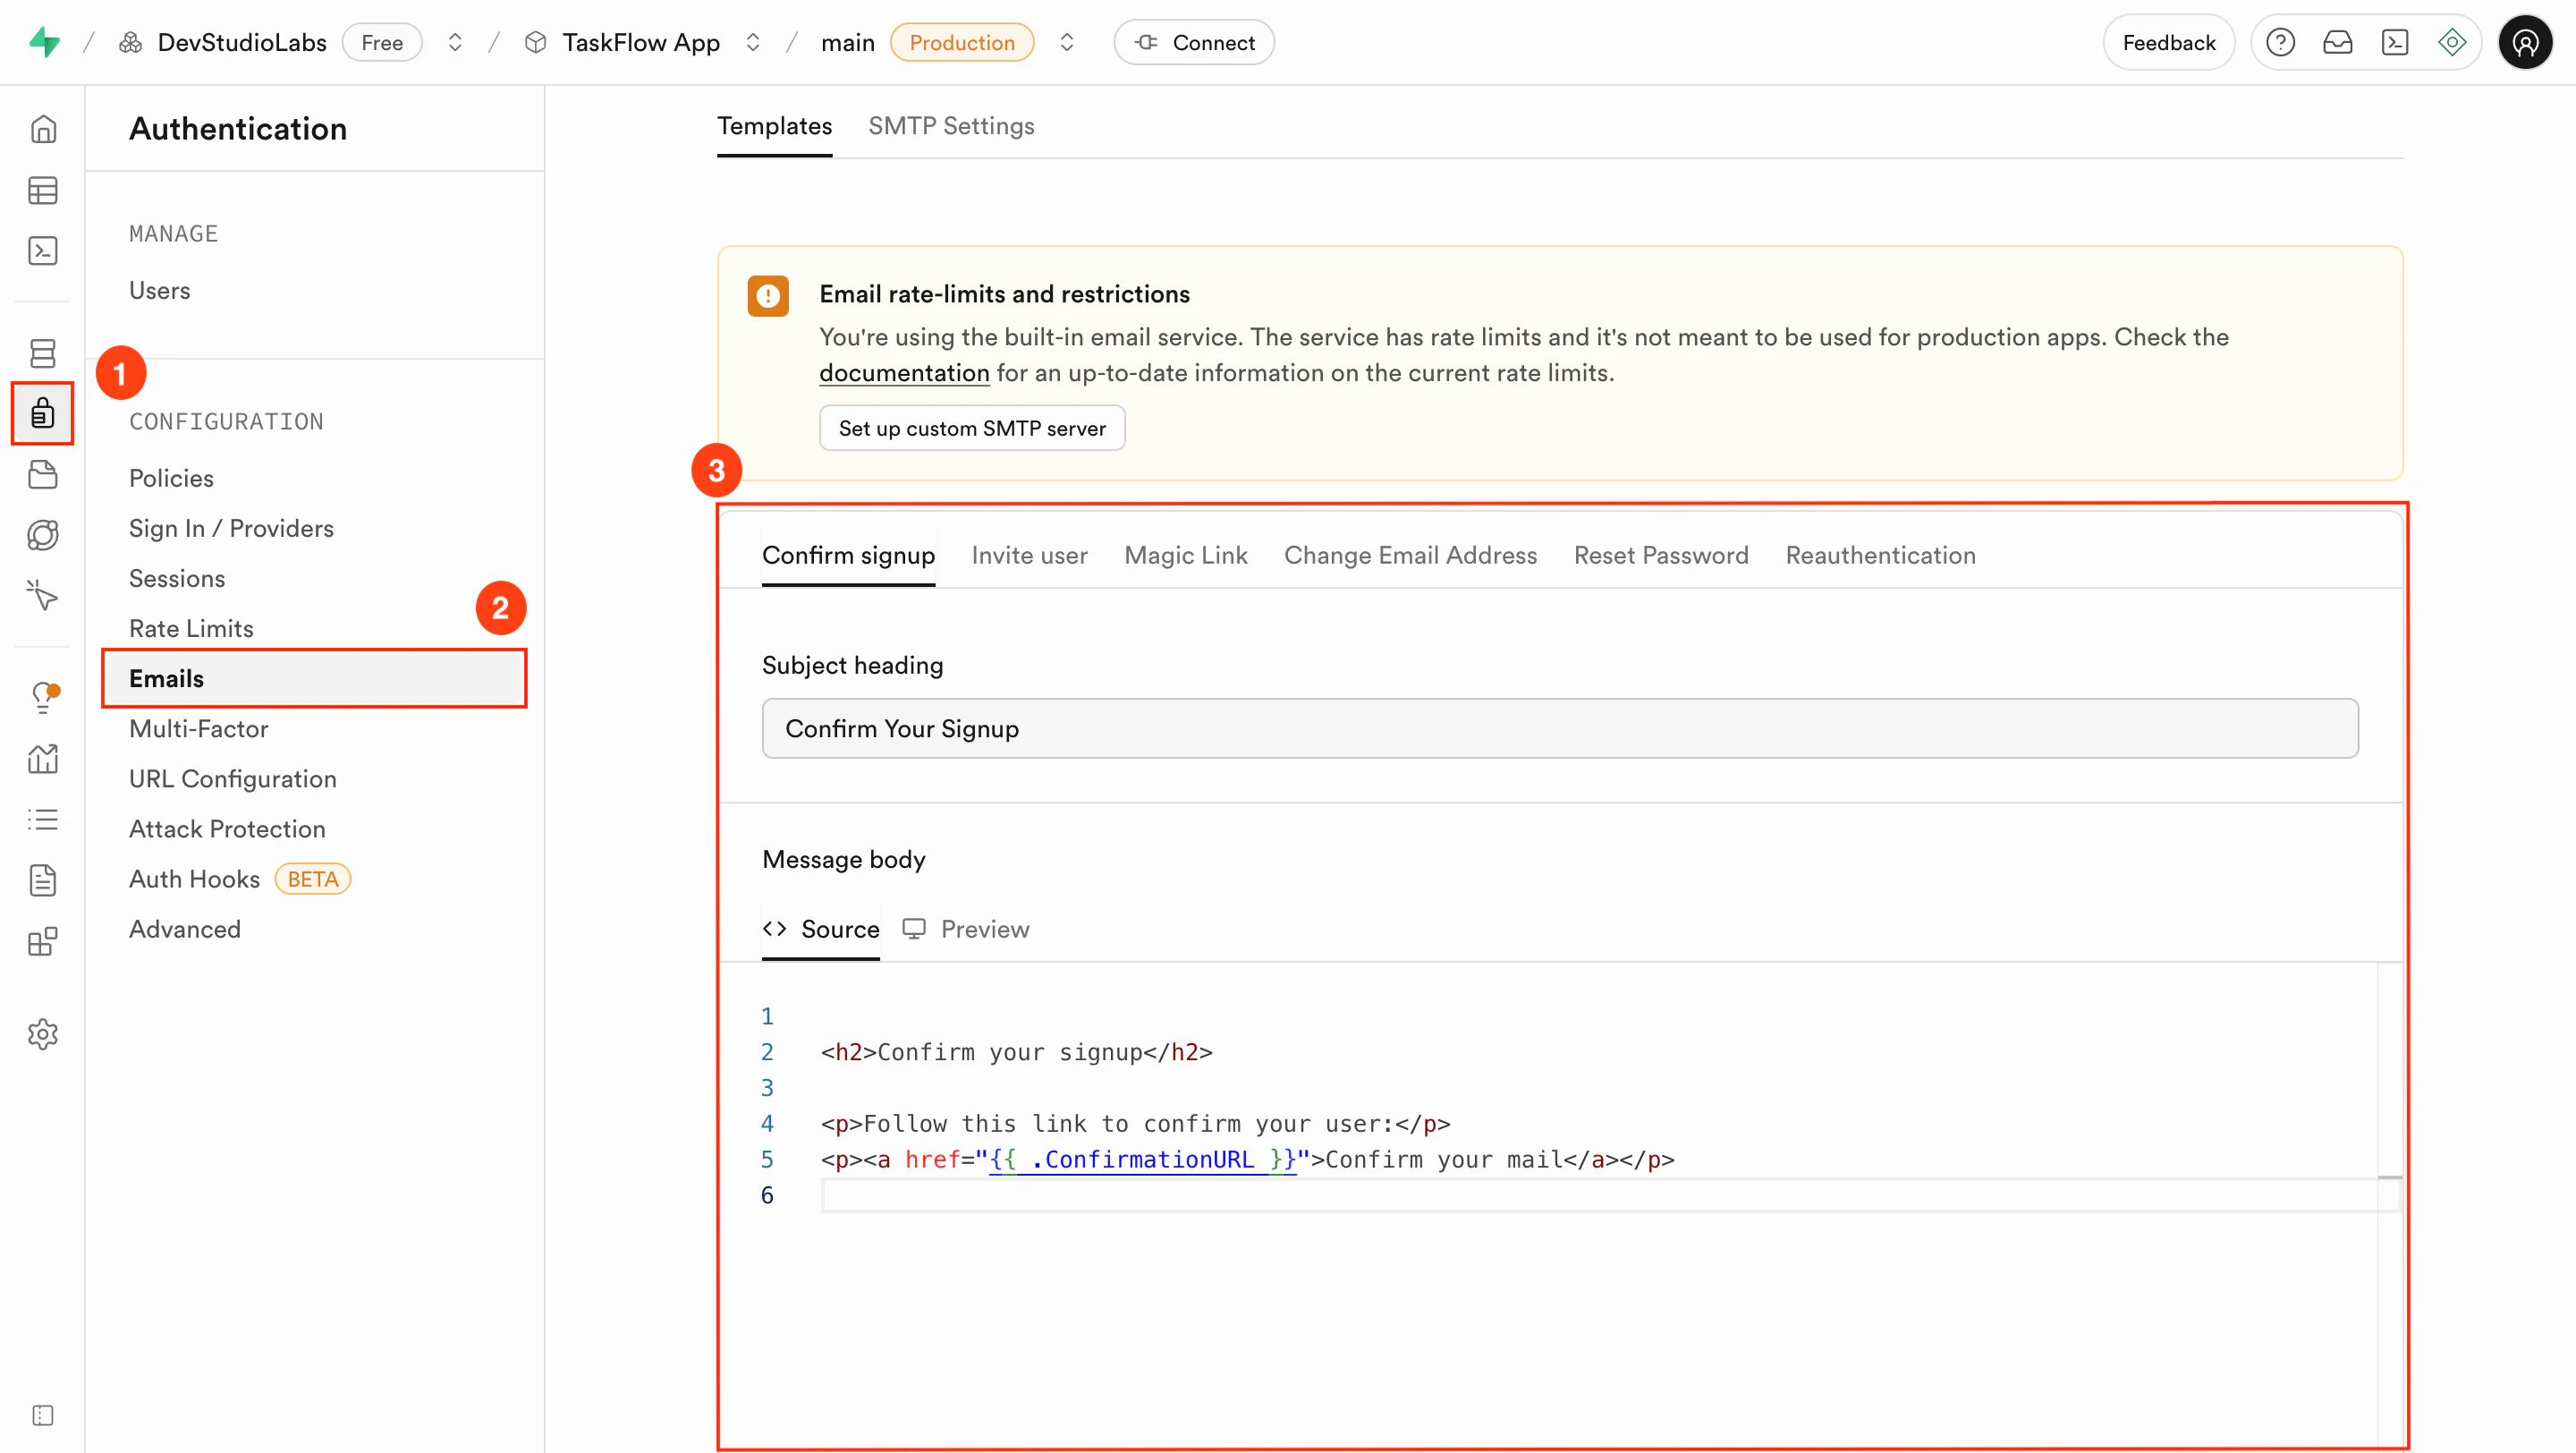
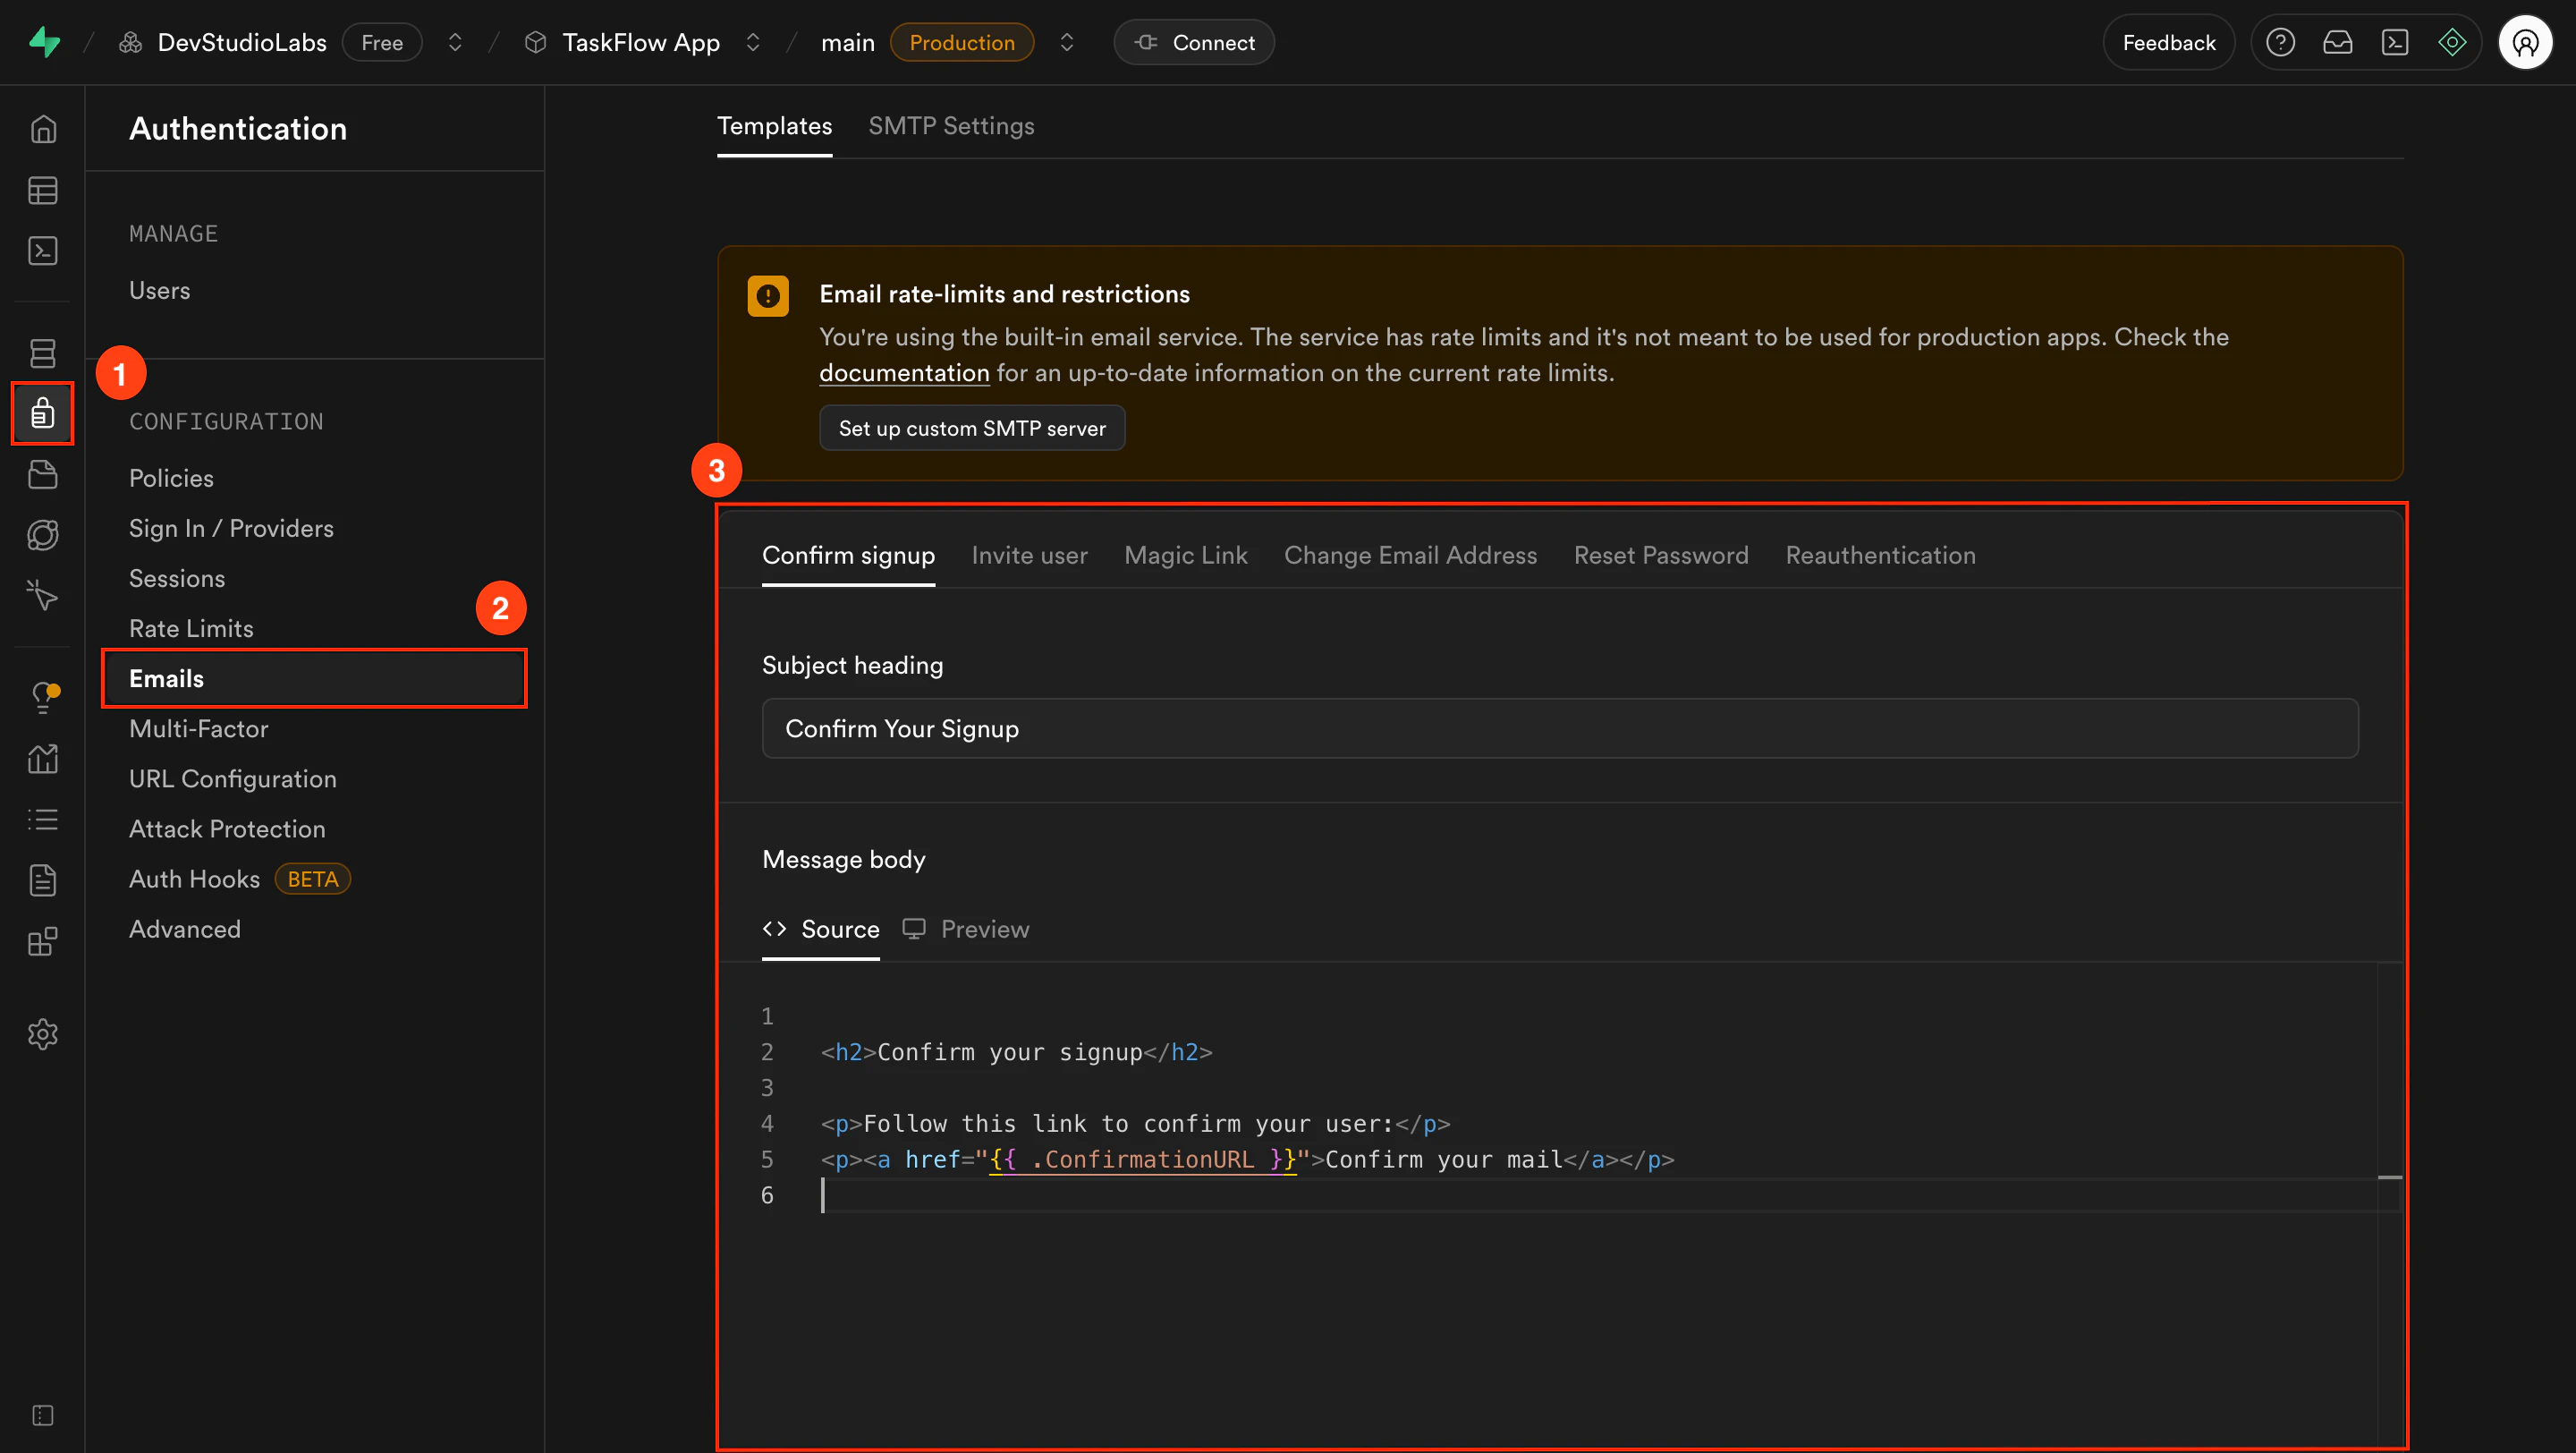 You should now see templates like Confirm Signup, Magic Link, and Reset Password.
Click the template you want to customize, such as **Confirm signup**.
You can update the following:
* **Subject line**: What appears in the user's inbox.
* **Email body**: The message content, written in HTML or plain text.
Keep placeholders like `{{ .ConfirmationURL }}`. If removed, the email will not work as expected.
Click **Save** at the bottom of the editor.
Then test your update by triggering that email type in Rocket. For example, sign up to test the confirmation email. The email you receive should reflect your custom content, and all links should work correctly.
## Troubleshooting
### 1. Email still shows old content
What you will see:
You updated the template, but the email still shows the old message.
To fix this:
* Make sure you clicked **Save** in Supabase.
* Clear your email client's cache (especially in webmail).
* Trigger a new signup or password reset. Old links will not refresh.
### 2. Links in the email are broken
What you will see:
The email arrives, but the link is missing or unclickable.
To fix this:
* Confirm you kept the placeholder variable like `{{ .ConfirmationURL }}` in the template.
* Double-check the **Site URL** in Supabase. It must match your Rocket app's live domain.
Your Rocket app now sends custom, branded emails through Supabase that look right and function reliably.
You should now see templates like Confirm Signup, Magic Link, and Reset Password.
Click the template you want to customize, such as **Confirm signup**.
You can update the following:
* **Subject line**: What appears in the user's inbox.
* **Email body**: The message content, written in HTML or plain text.
Keep placeholders like `{{ .ConfirmationURL }}`. If removed, the email will not work as expected.
Click **Save** at the bottom of the editor.
Then test your update by triggering that email type in Rocket. For example, sign up to test the confirmation email. The email you receive should reflect your custom content, and all links should work correctly.
## Troubleshooting
### 1. Email still shows old content
What you will see:
You updated the template, but the email still shows the old message.
To fix this:
* Make sure you clicked **Save** in Supabase.
* Clear your email client's cache (especially in webmail).
* Trigger a new signup or password reset. Old links will not refresh.
### 2. Links in the email are broken
What you will see:
The email arrives, but the link is missing or unclickable.
To fix this:
* Confirm you kept the placeholder variable like `{{ .ConfirmationURL }}` in the template.
* Double-check the **Site URL** in Supabase. It must match your Rocket app's live domain.
Your Rocket app now sends custom, branded emails through Supabase that look right and function reliably.