> ## Documentation Index
> Fetch the complete documentation index at: https://docs.rocket.new/llms.txt
> Use this file to discover all available pages before exploring further.
# Create a mobile app
> Convert Figma designs into deployable Flutter mobile apps using Rocket.new's Figma-to-code pipeline.
export const LlmsDirective = () =>
For the complete documentation index, see llms.txt.
For a lightweight markdown version of this page, append .md to the URL.
;
**Figma to Flutter mobile app in minutes.** Import your mobile screen designs and Rocket generates a complete Flutter app for iOS and Android with native navigation, styled components, and clean Dart code. Then iterate with chat to add state management, connect APIs, and submit to app stores.
Figma import is only available on the web browser at [rocket.new](https://rocket.new). It is not available in the Rocket mobile app.
## What you can build
Turn your social, fitness, food, or lifestyle app designs into working Flutter apps with real navigation and data.
**Try this prompt after import:**
```plaintext wrap theme={null}
Add pull-to-refresh on the feed screen, a bottom navigation bar, and connect Supabase for user profiles and authentication.
```
Convert CRM, task management, or internal tool designs into functional mobile apps.
**Try this prompt after import:**
```plaintext wrap theme={null}
Make the task list sortable by date and priority. Add swipe-to-delete and connect Firebase for real-time sync across devices.
```
Build mobile shopping experiences from your Figma product catalog and checkout designs.
**Try this prompt after import:**
```plaintext wrap theme={null}
Add a working shopping cart with quantity controls. Connect Stripe for mobile checkout and add order confirmation with push notifications.
```
## Before you begin
**You will need:**
* Access to [rocket.new](https://rocket.new).
* A Figma account and a design file with **view or edit permission**.
Not sure how to get your Figma link? **Follow this quick guide to grab the right URL.**
## Launch your mobile app
Click the **+** button at the lower left of the input box and select **Add from Figma**.
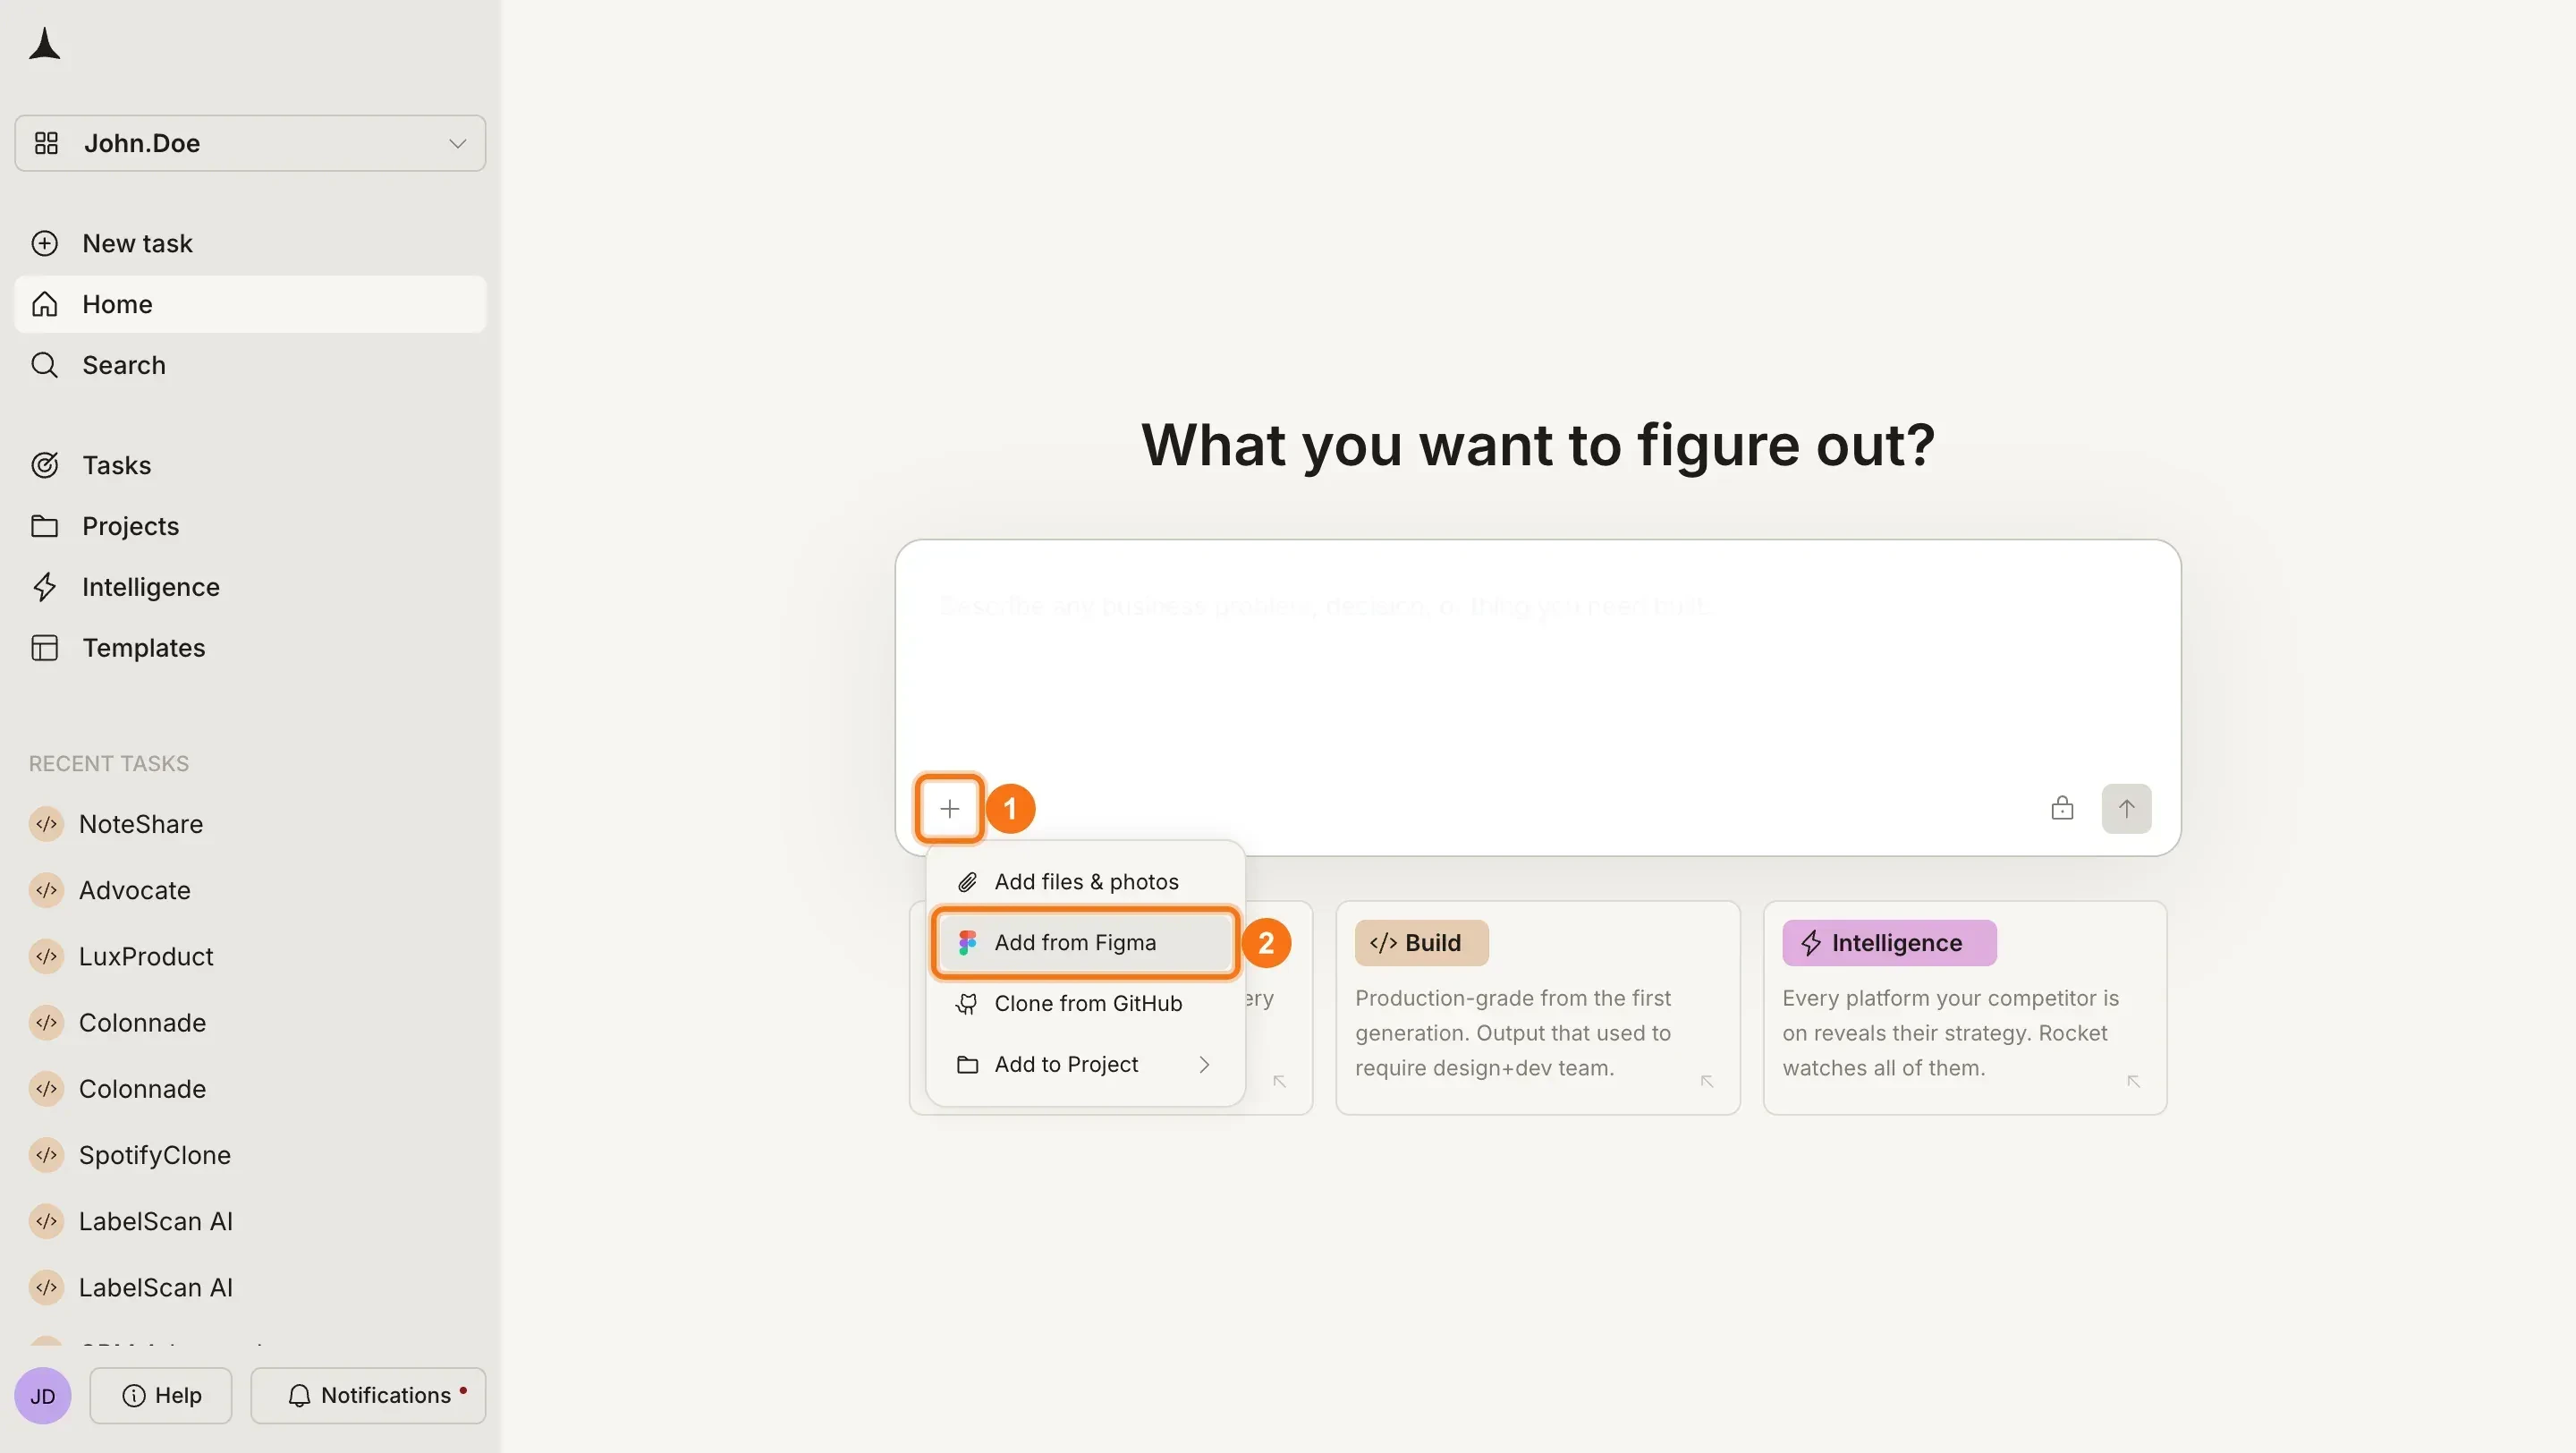
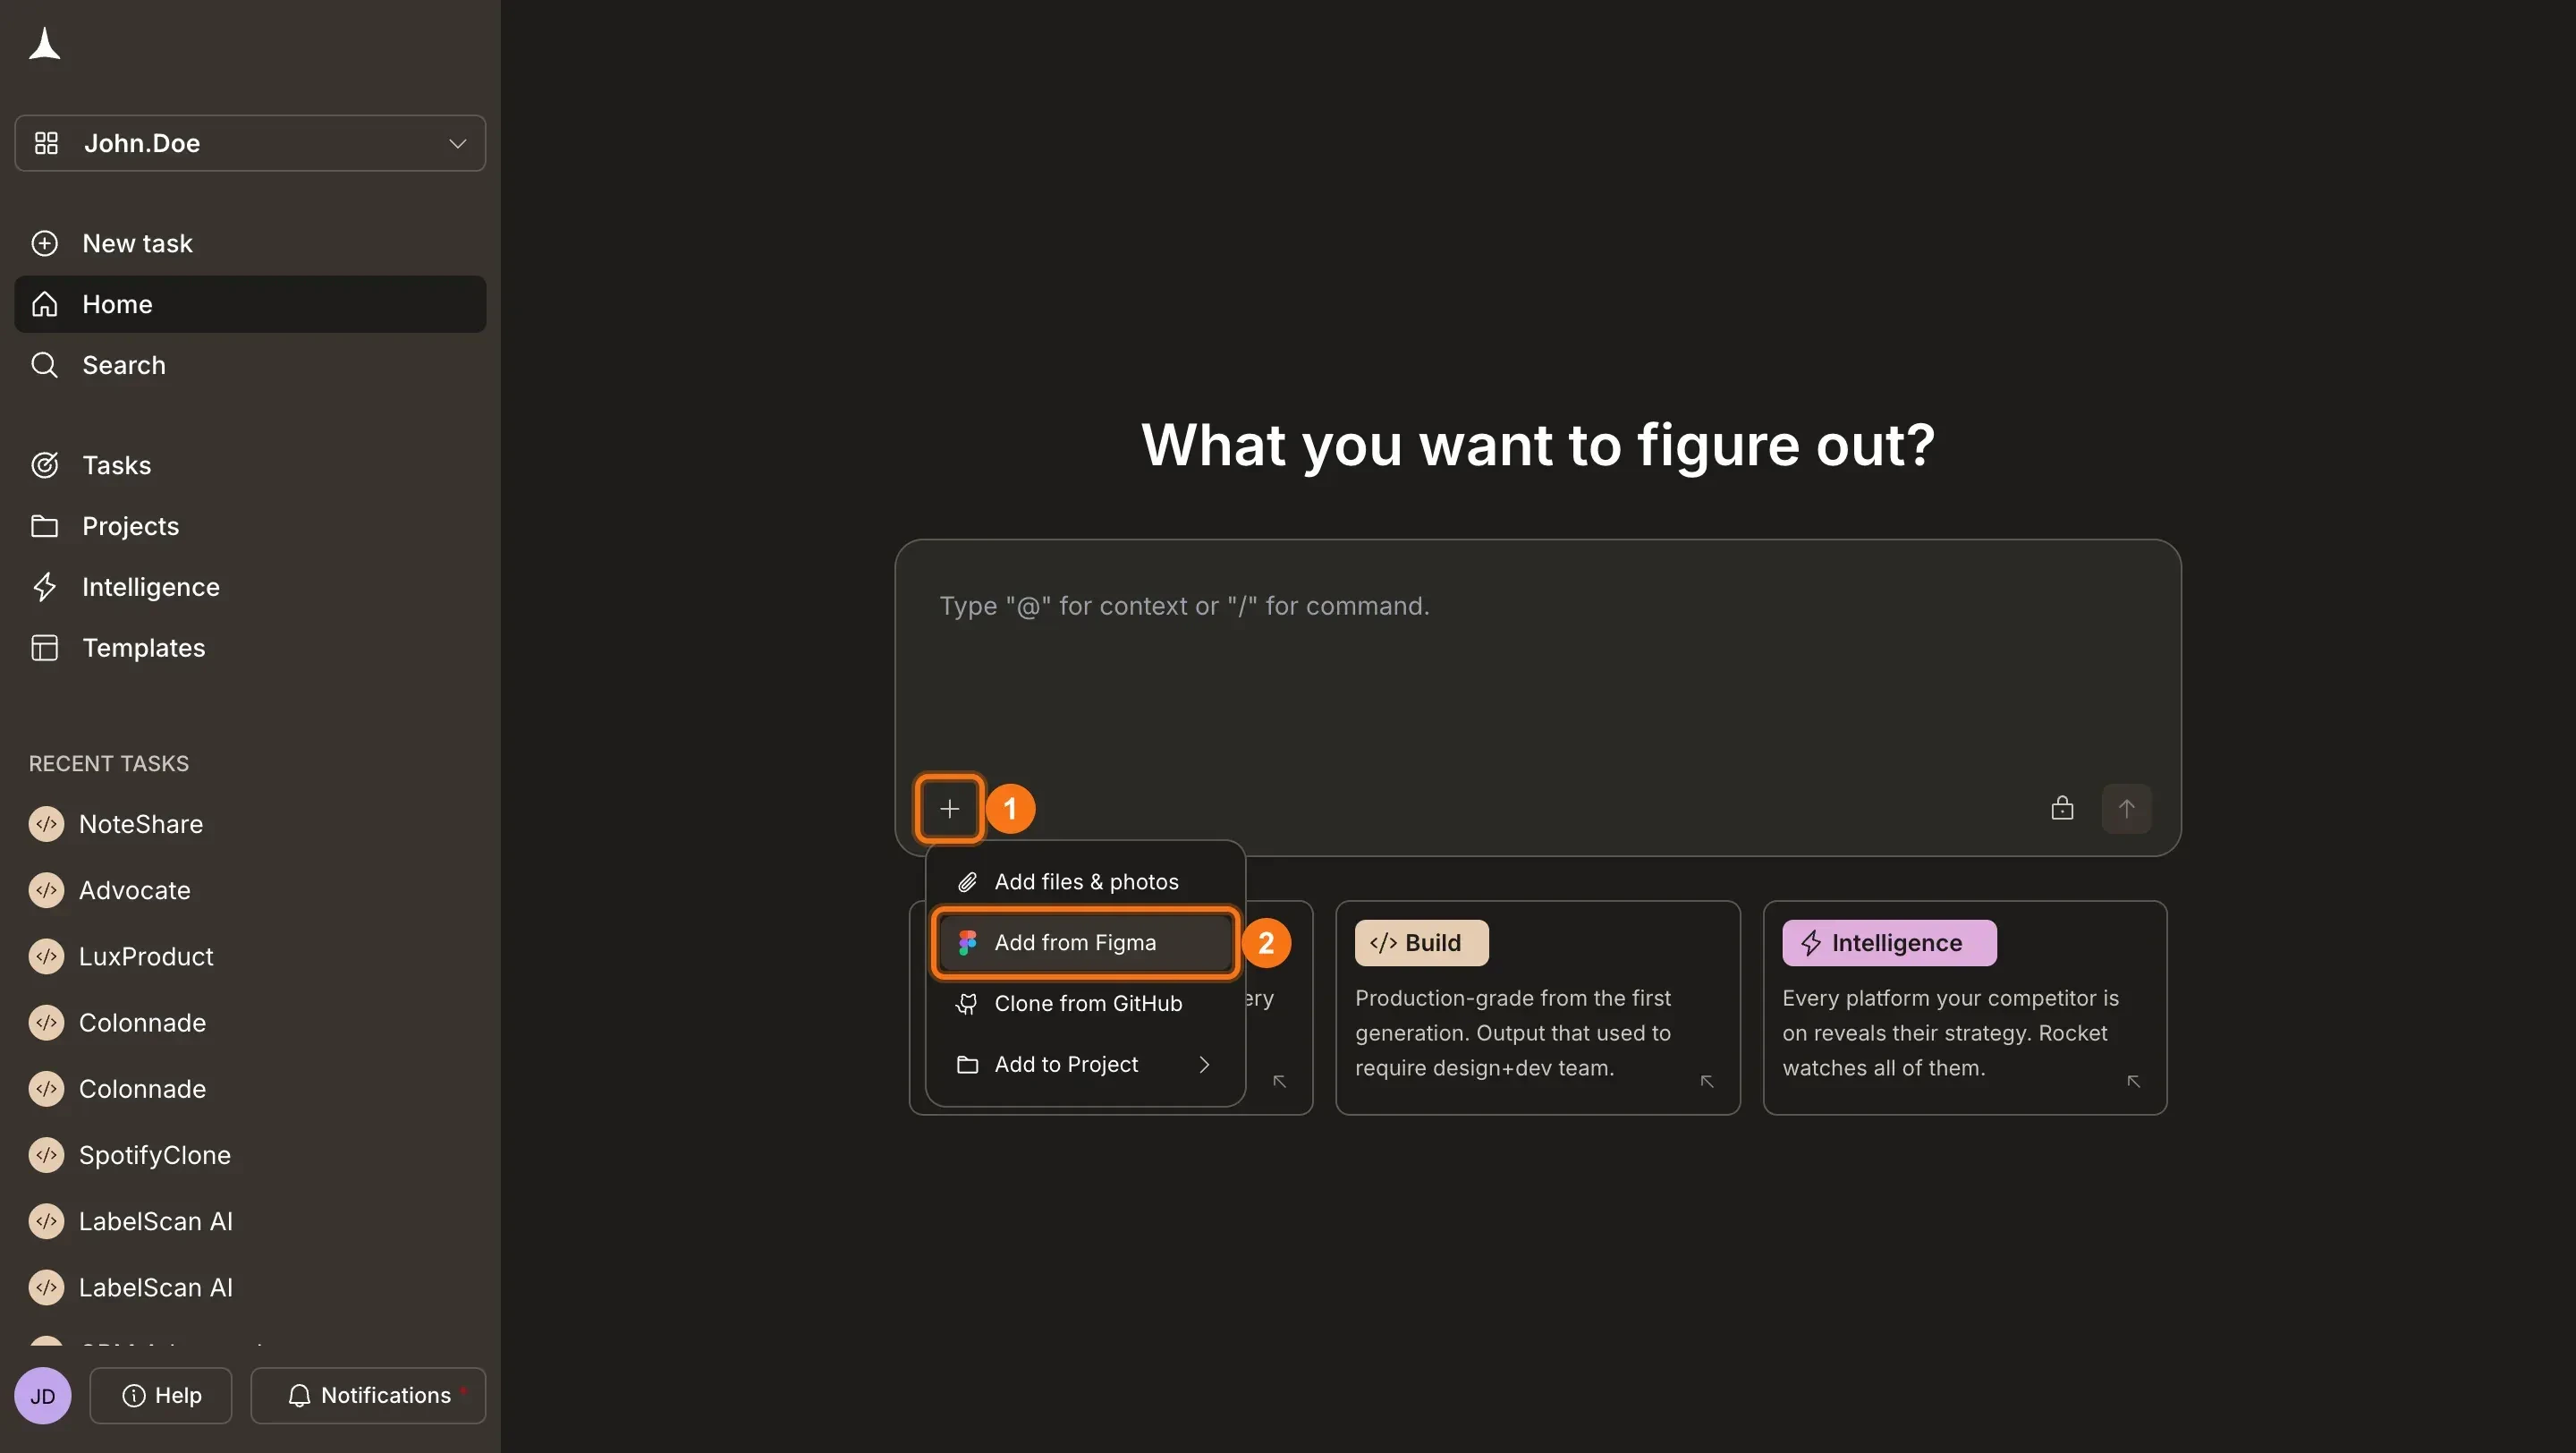 First time? **Connect your Figma account to Rocket** before importing.
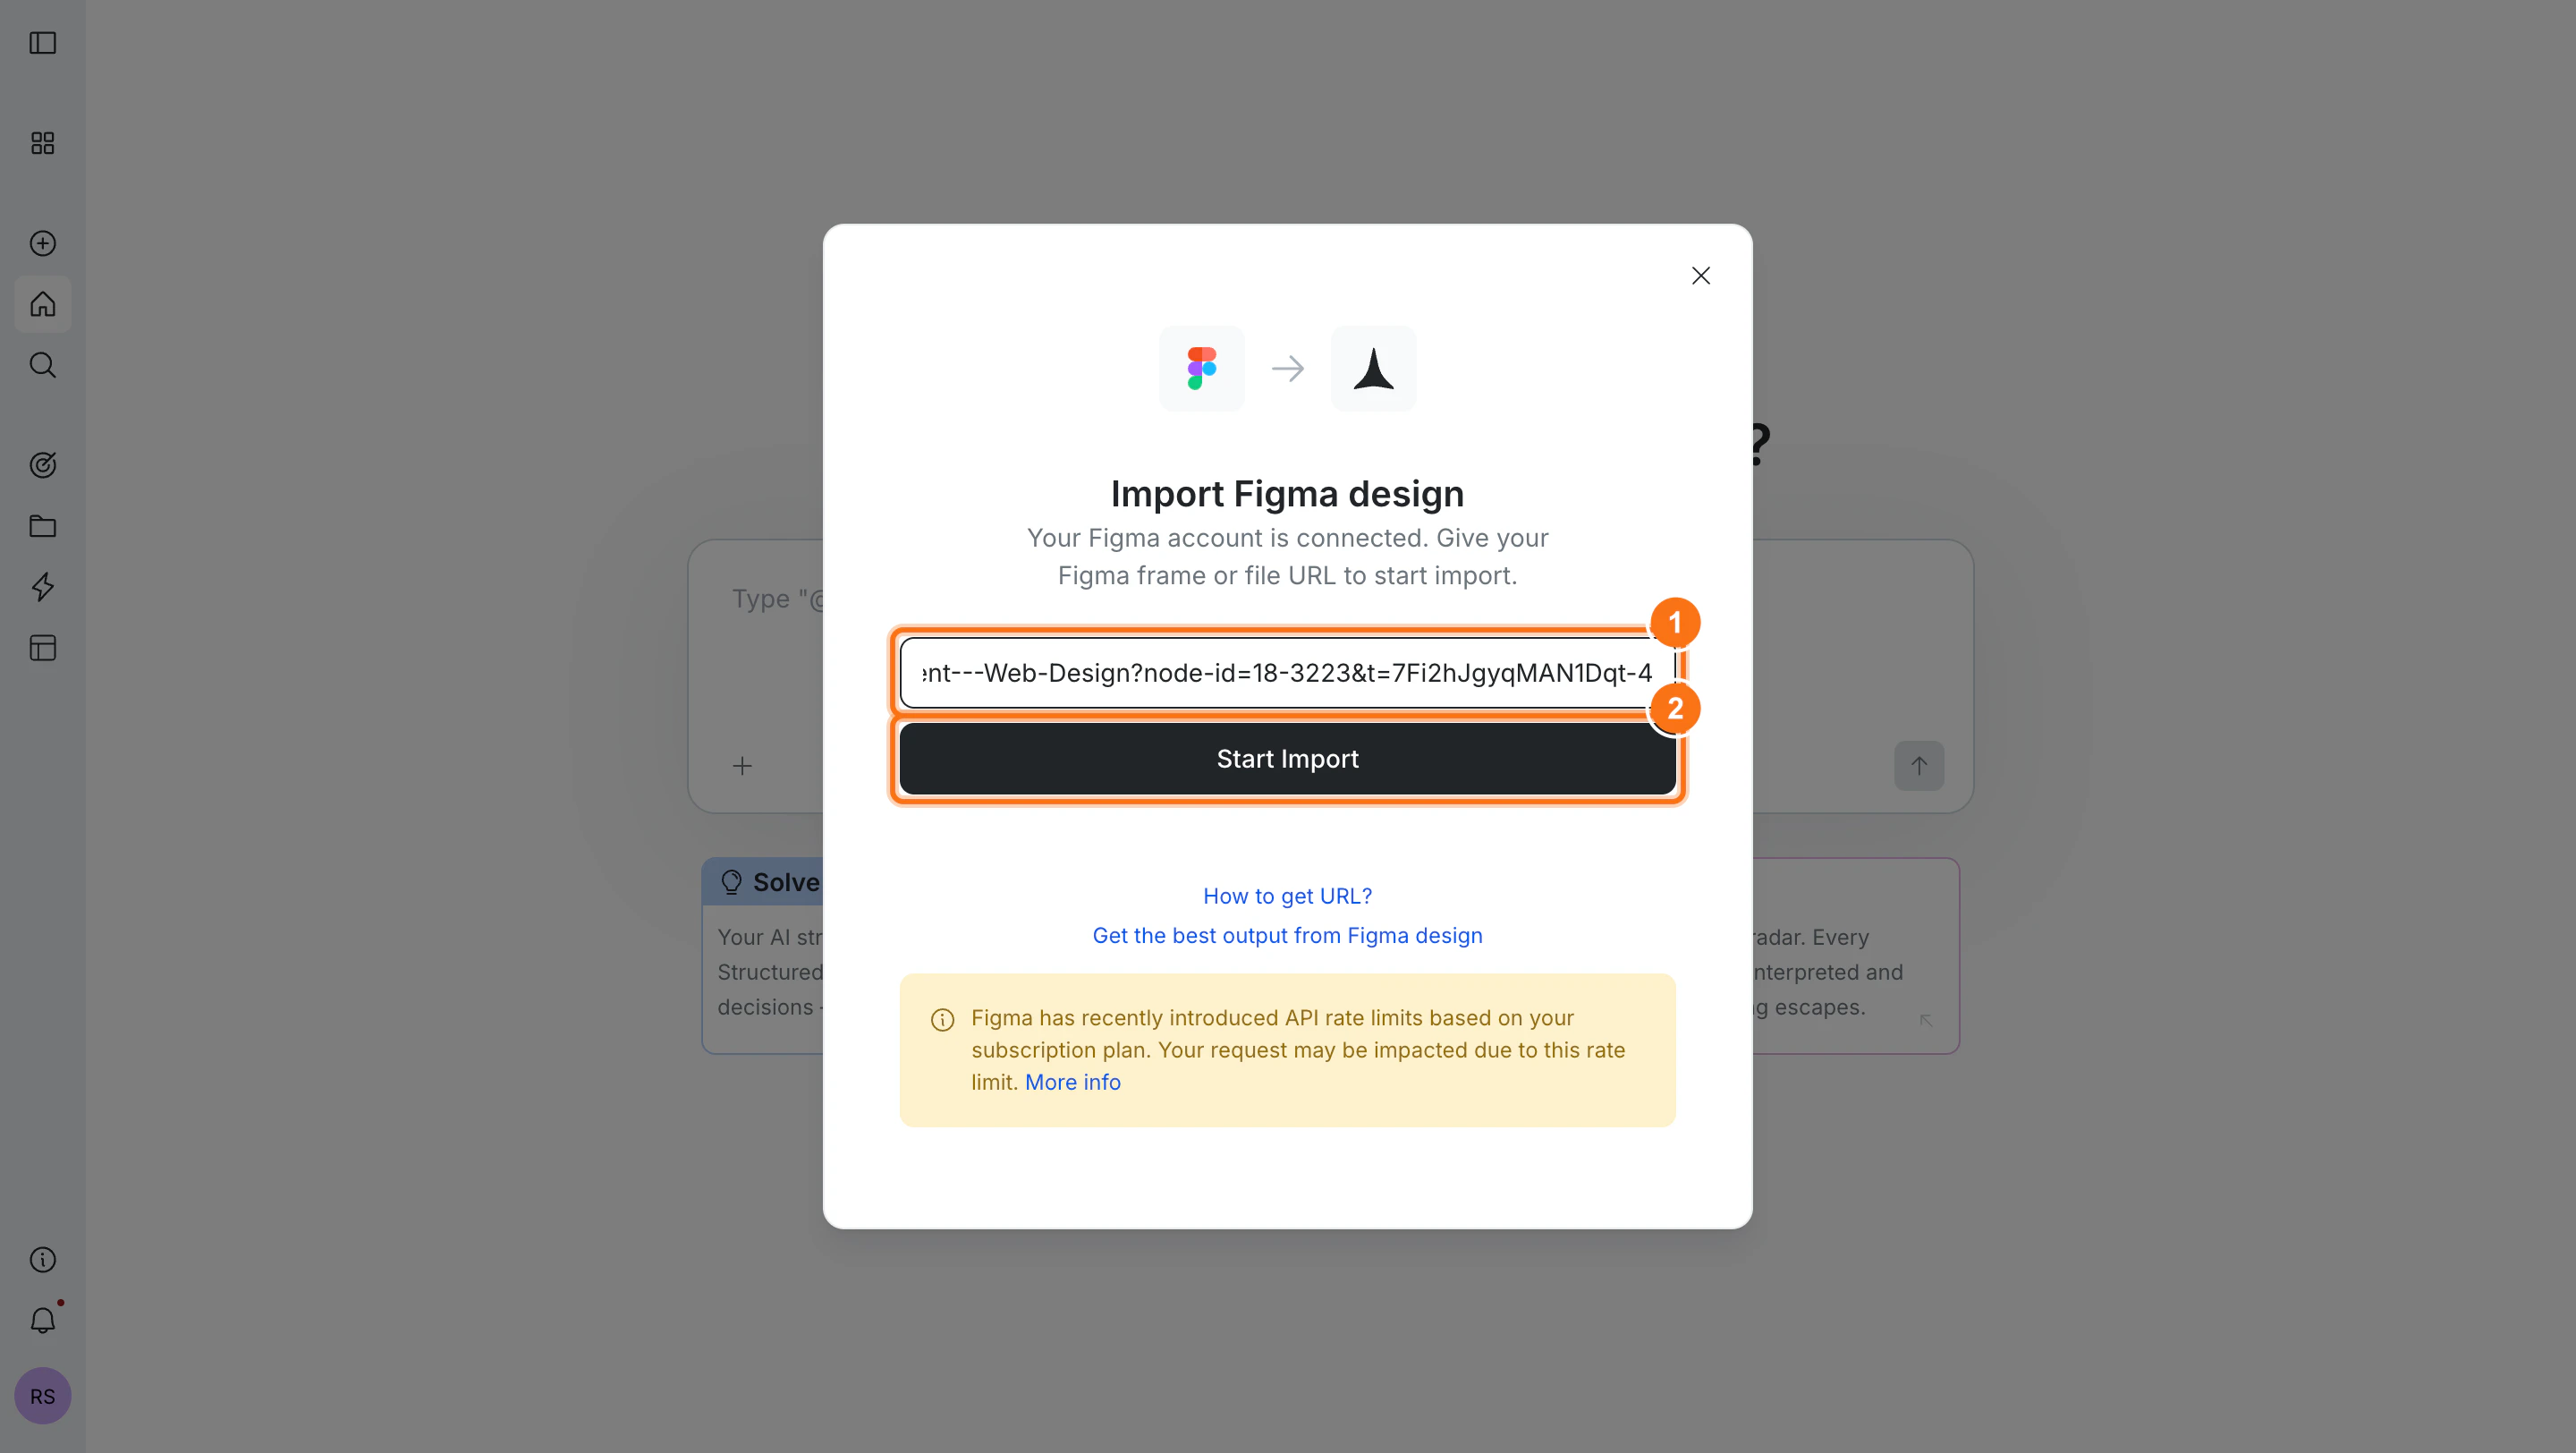
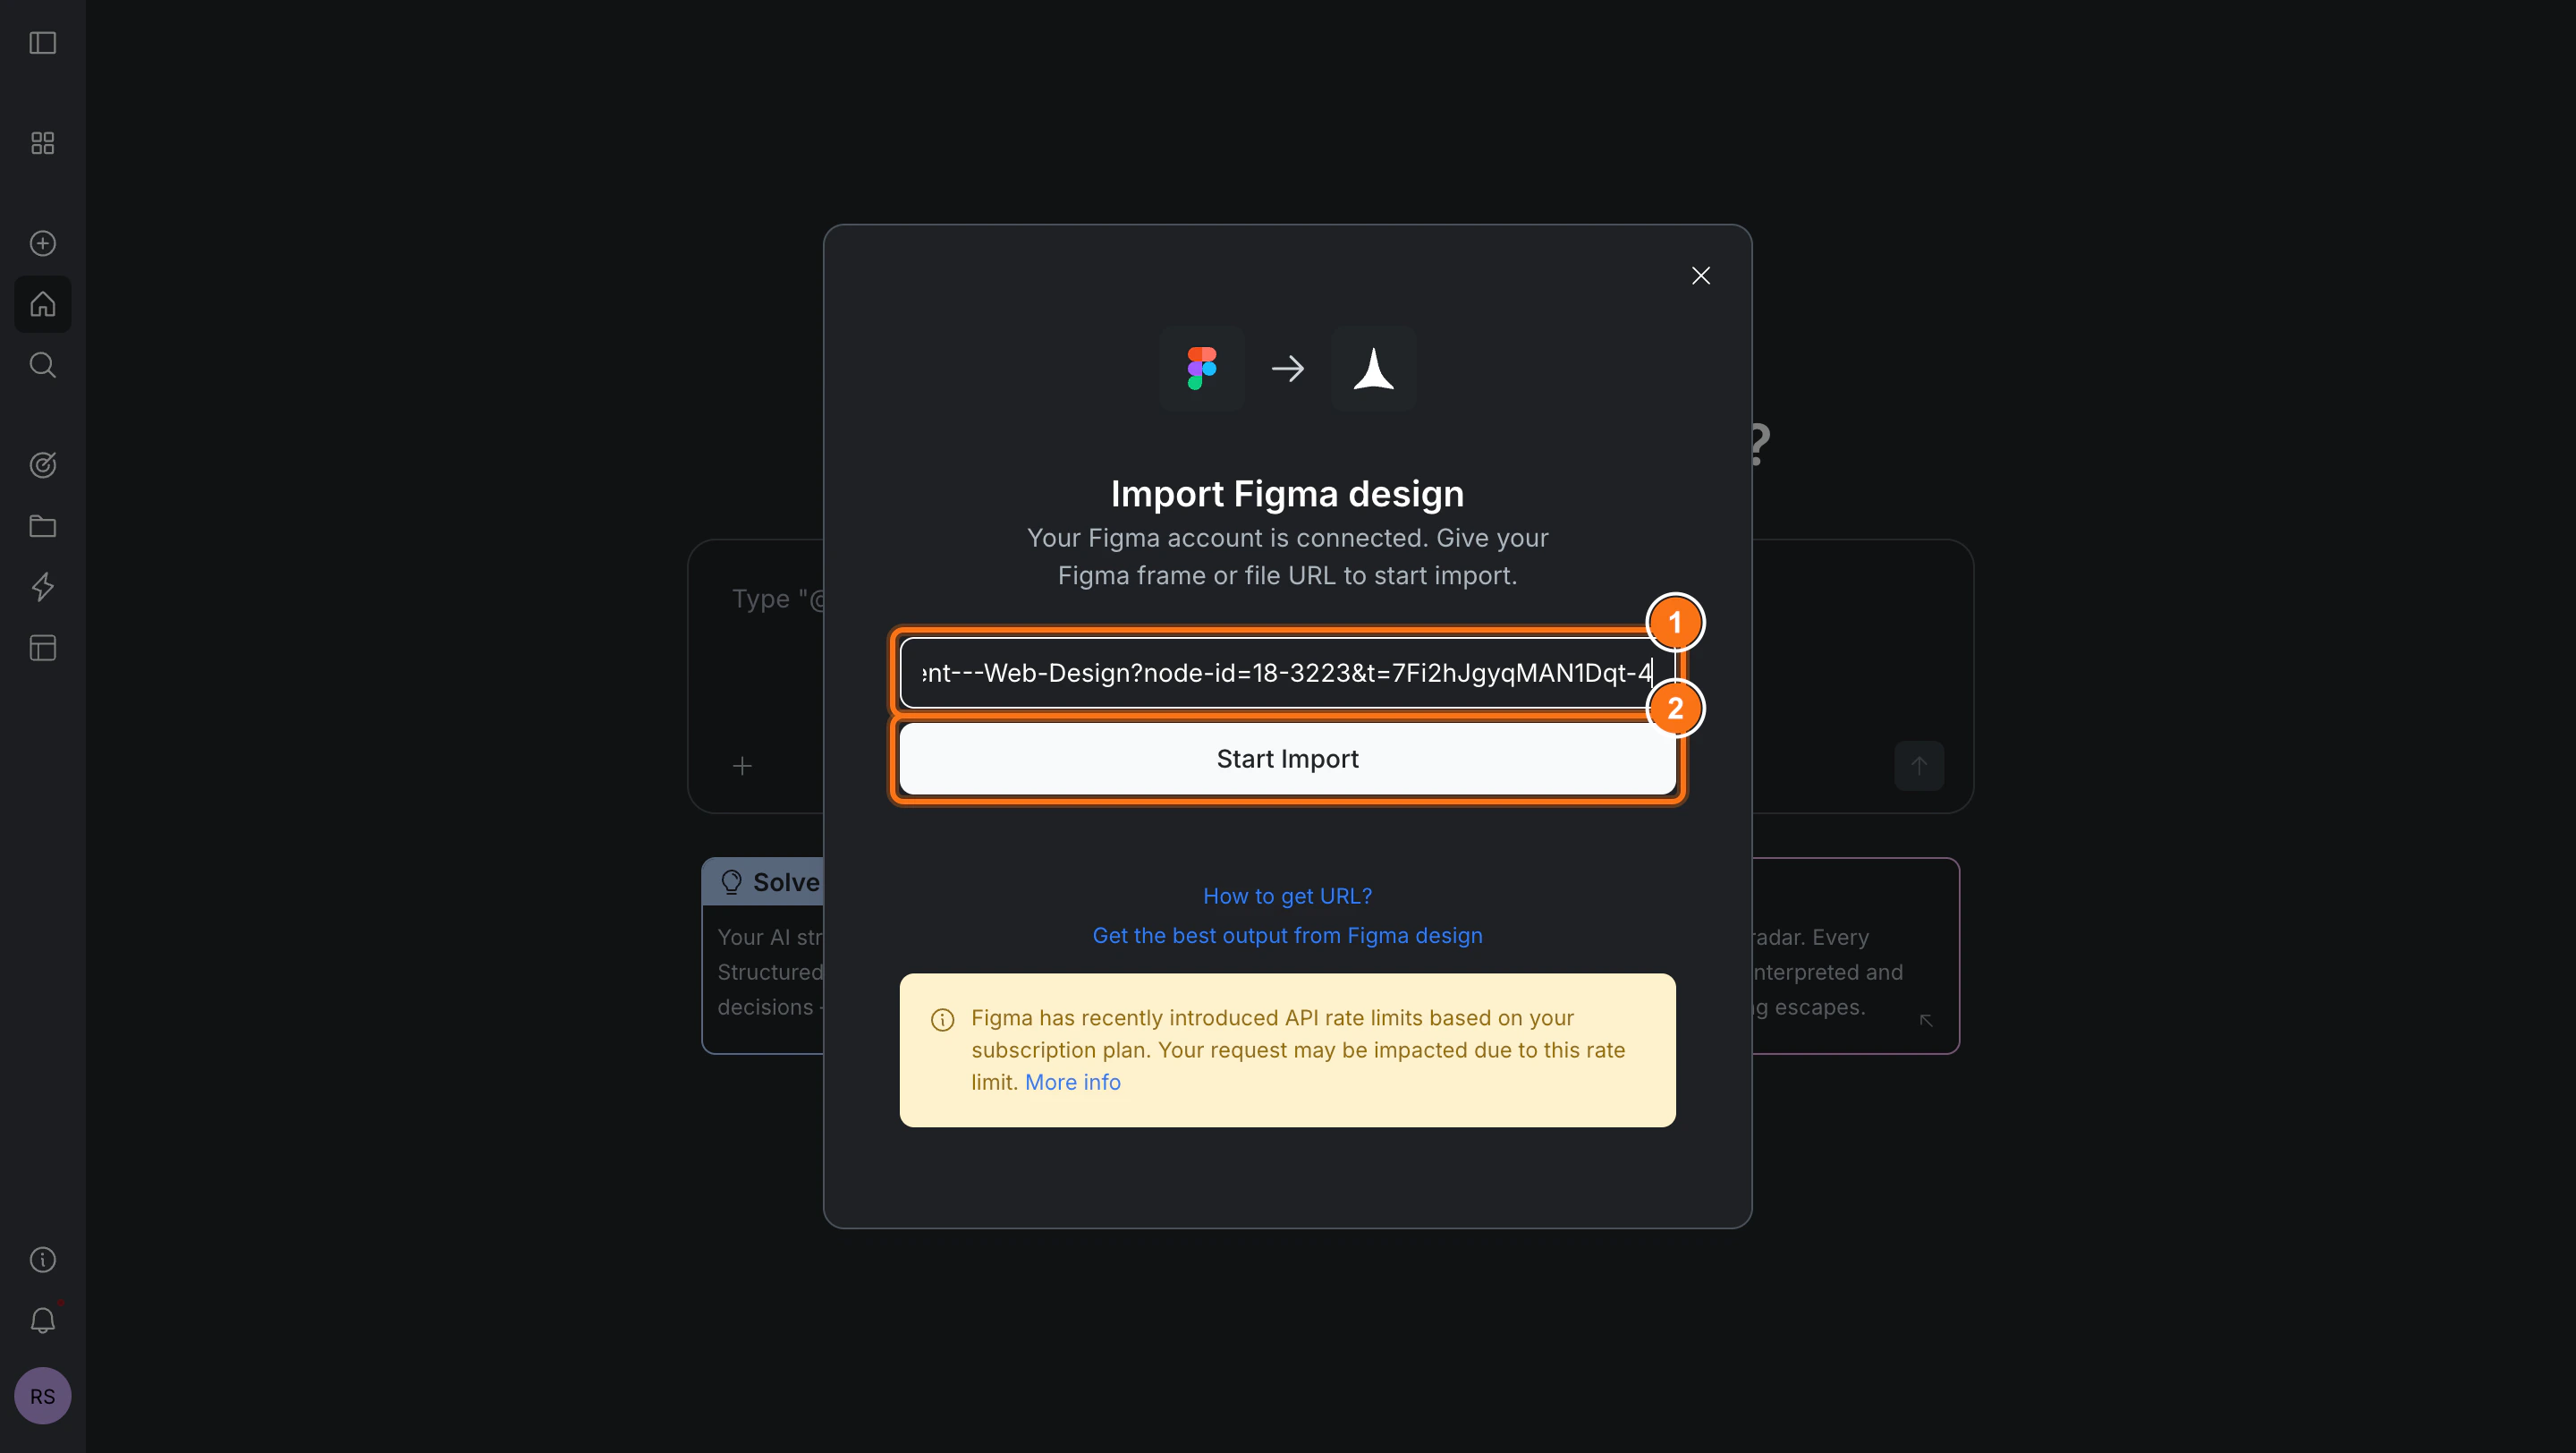
In the **Import Figma design** dialog, paste your Figma frame or file URL and click **Start import**.
First time? **Connect your Figma account to Rocket** before importing.
In the **Import Figma design** dialog, paste your Figma frame or file URL and click **Start import**.
 You can import up to **40 screens** at a time.
Select the mobile screens you want to import:
You can import up to **40 screens** at a time.
Select the mobile screens you want to import:
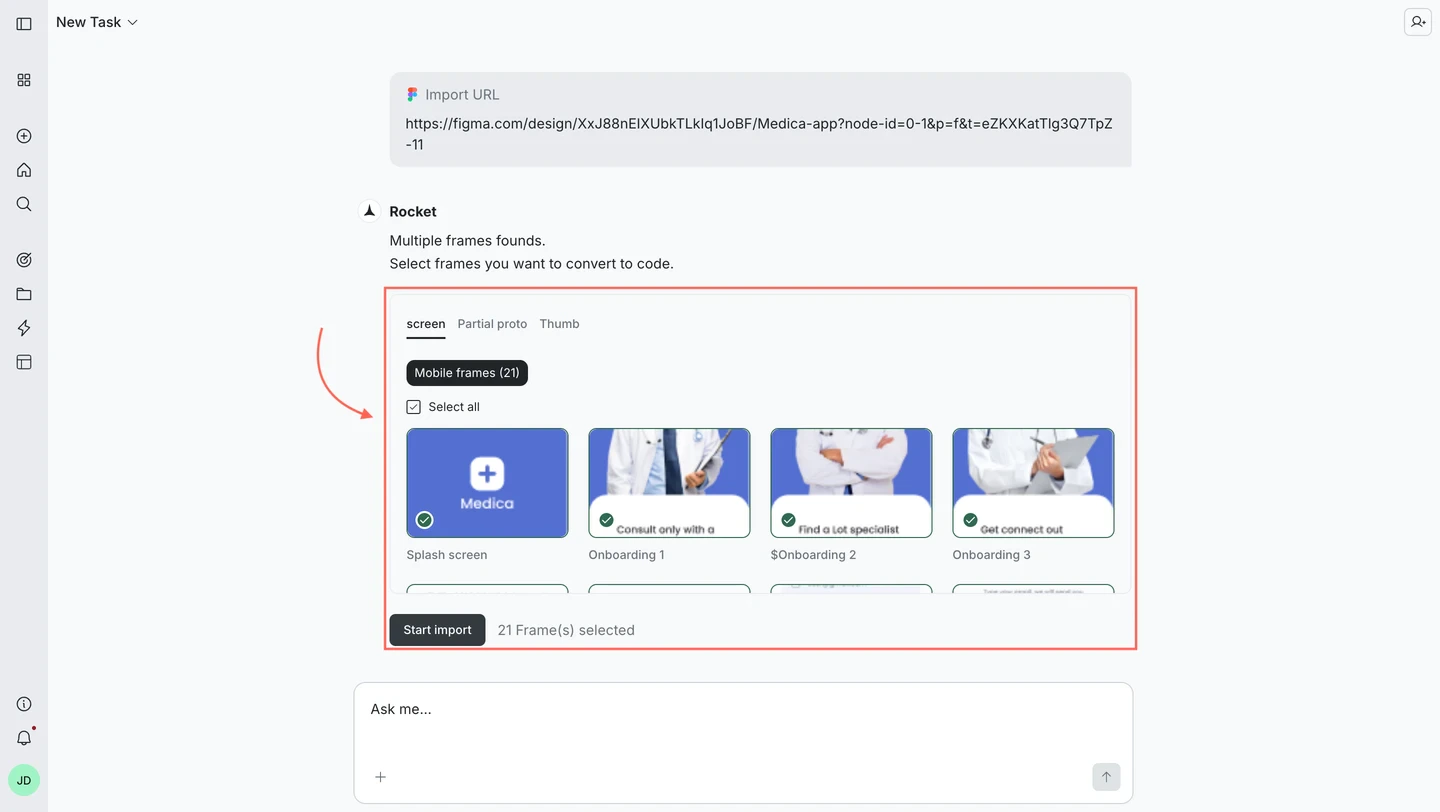
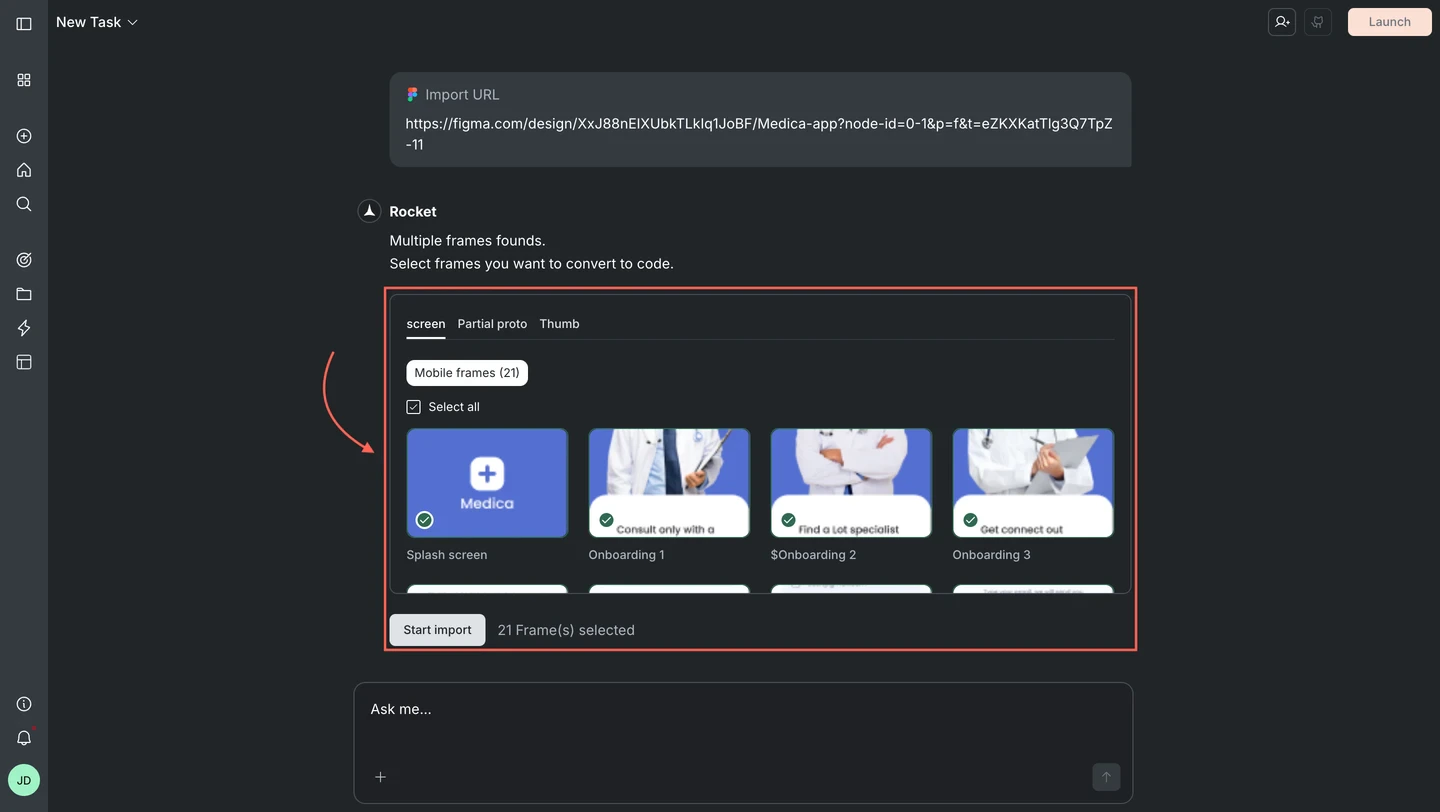 **Using the free plan?** Some features may be limited. Upgrade to keep generating without interruptions.
Click **Start import**, then select **Flutter** as your framework:
**Using the free plan?** Some features may be limited. Upgrade to keep generating without interruptions.
Click **Start import**, then select **Flutter** as your framework:
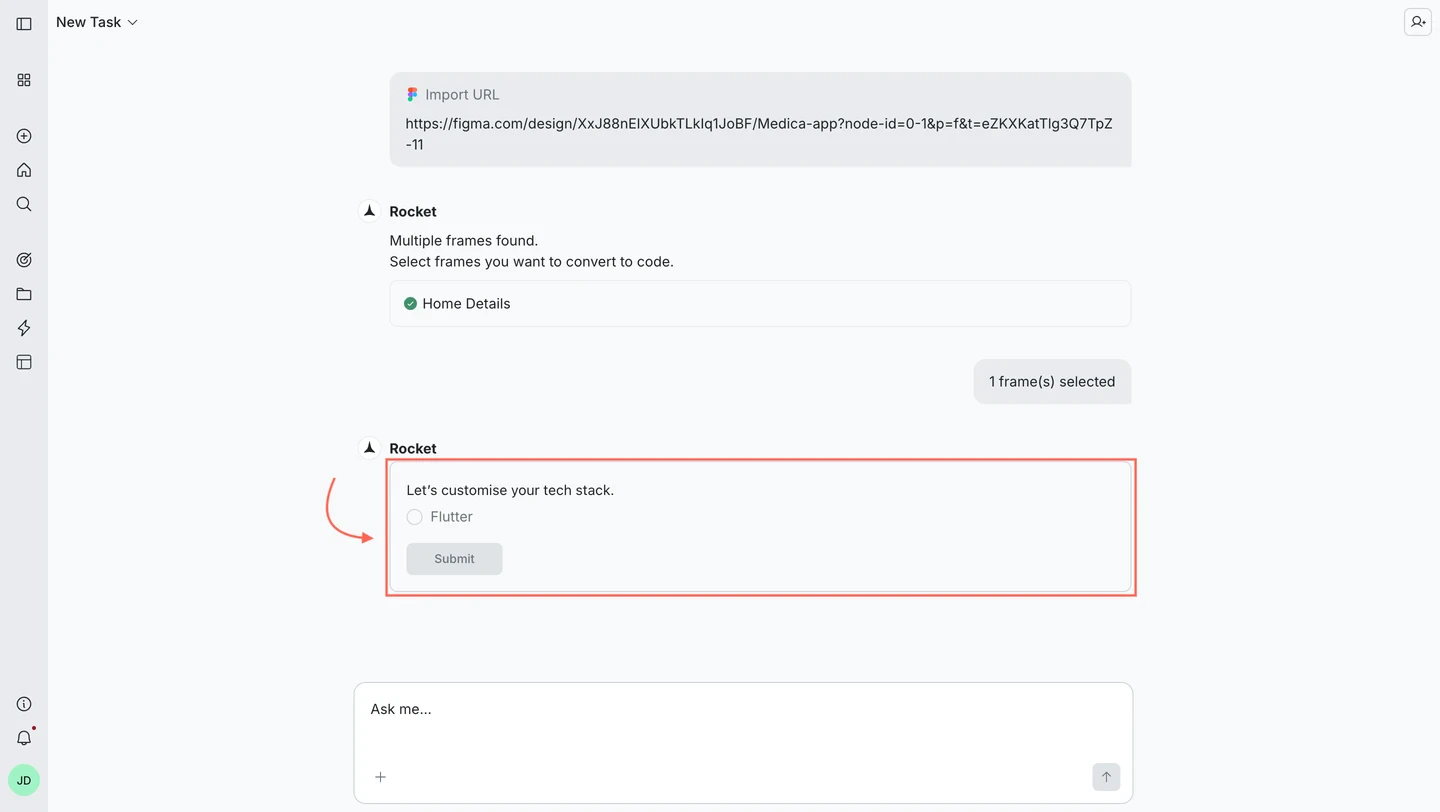
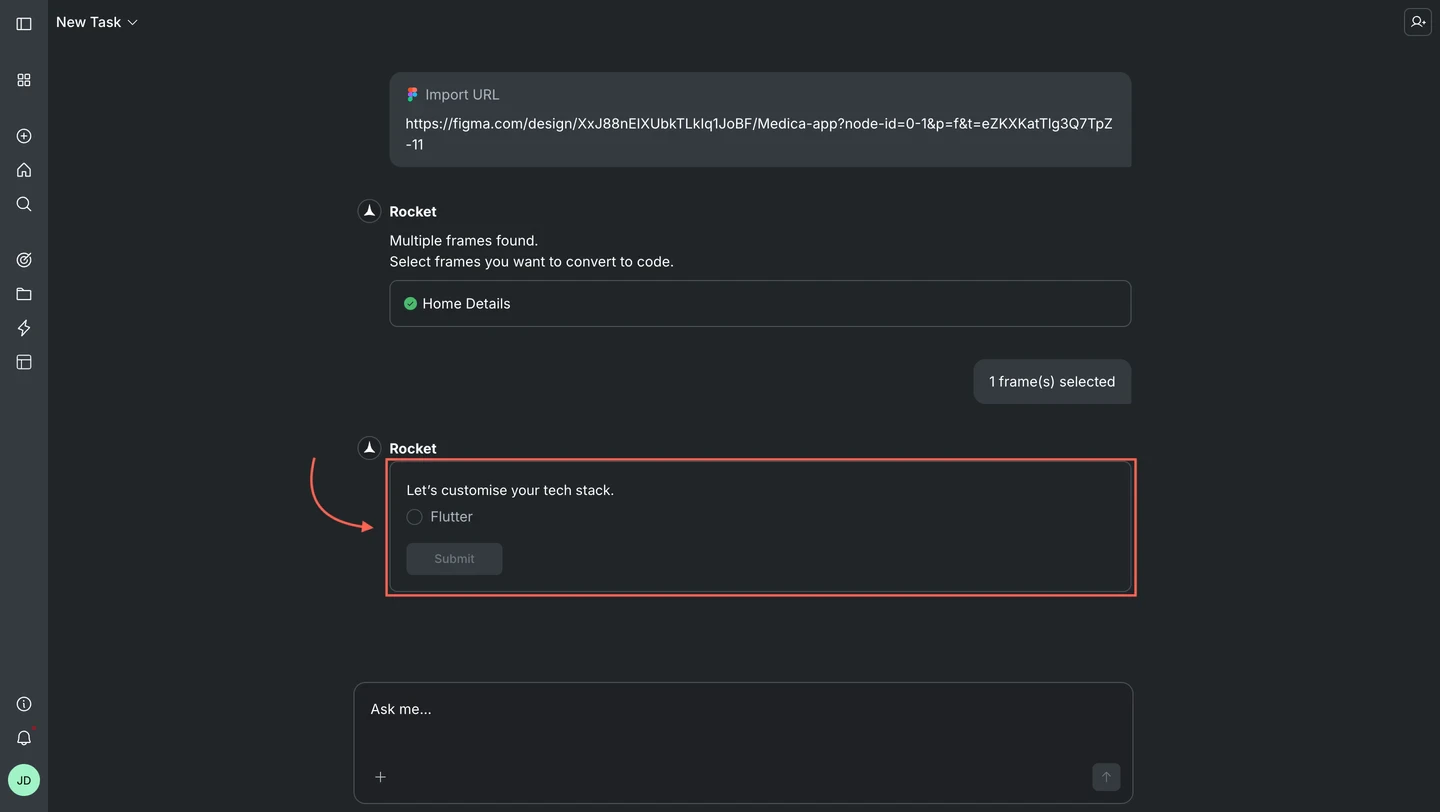 Rocket asks how your app should manage user actions and screen changes.
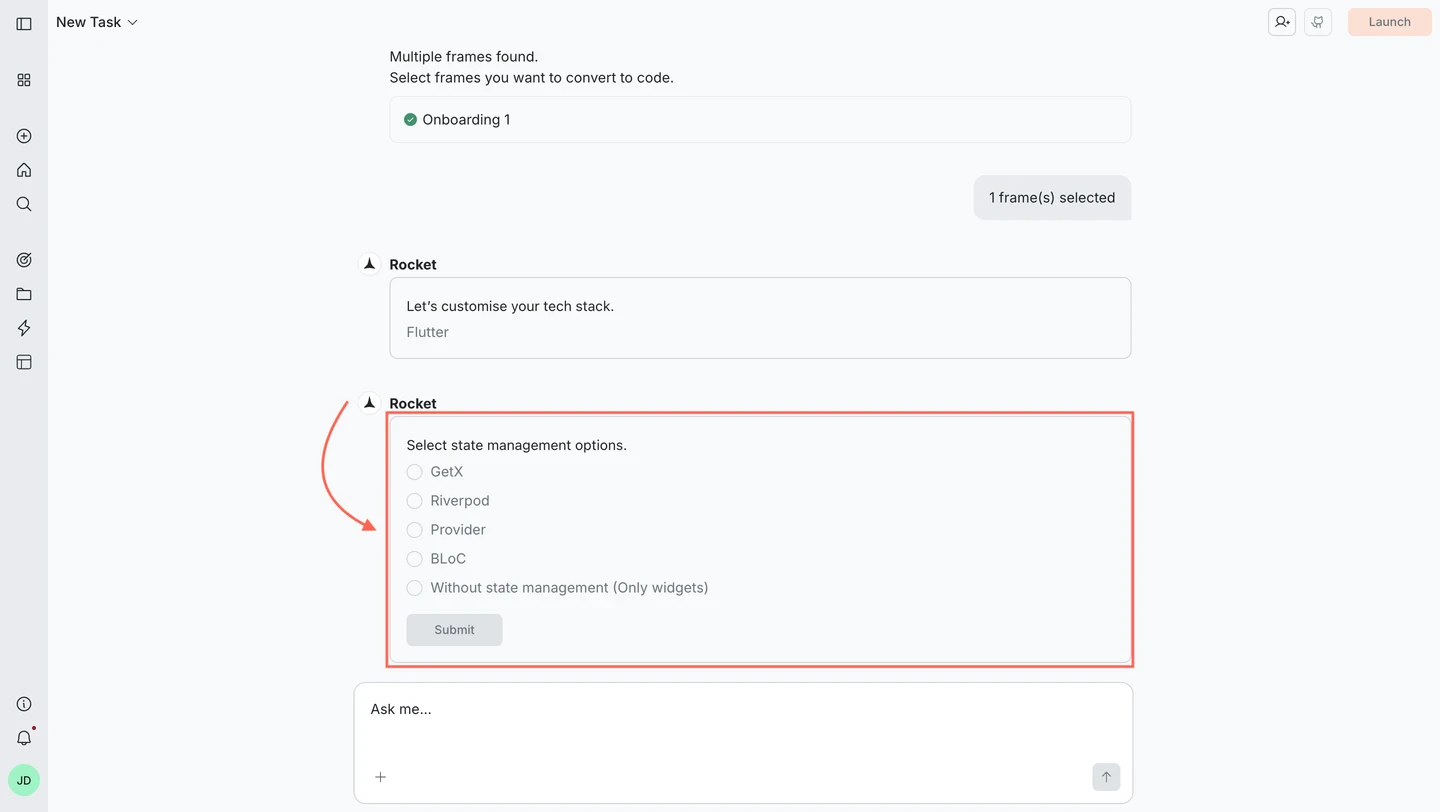
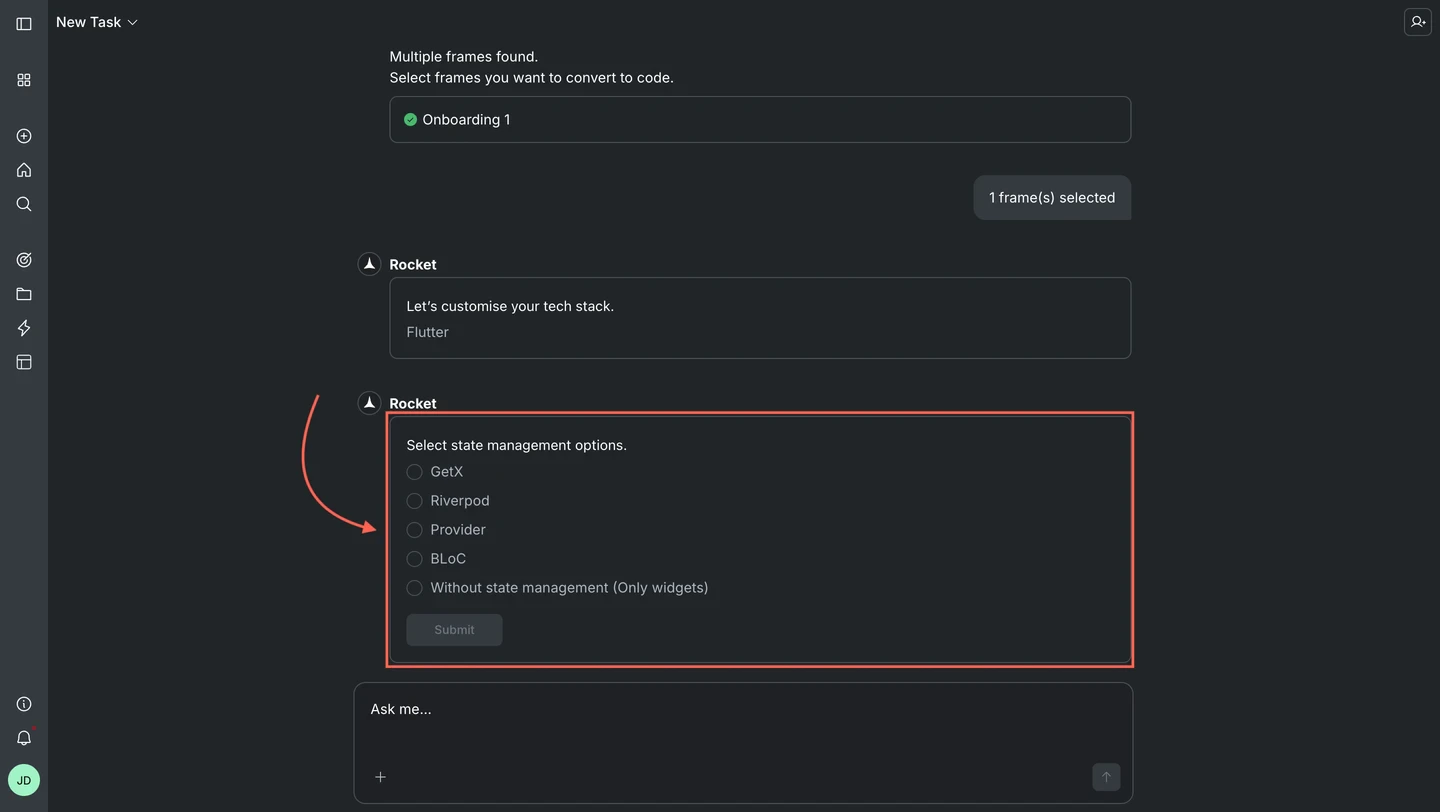 Pick the option that fits your app:
* **BLoC** - Great for apps with complex logic and data flows
* **GetX** - Lightweight and fast, ideal for quick builds
* **Provider** - Simple and reliable for most apps
* **Riverpod** - A flexible upgrade to Provider, great for scaling
* **Without state management** - Use only widgets (best for basic apps or prototypes)
Rocket parses your Figma file, optimizes images and layout, and generates clean Flutter code.
Pick the option that fits your app:
* **BLoC** - Great for apps with complex logic and data flows
* **GetX** - Lightweight and fast, ideal for quick builds
* **Provider** - Simple and reliable for most apps
* **Riverpod** - A flexible upgrade to Provider, great for scaling
* **Without state management** - Use only widgets (best for basic apps or prototypes)
Rocket parses your Figma file, optimizes images and layout, and generates clean Flutter code.
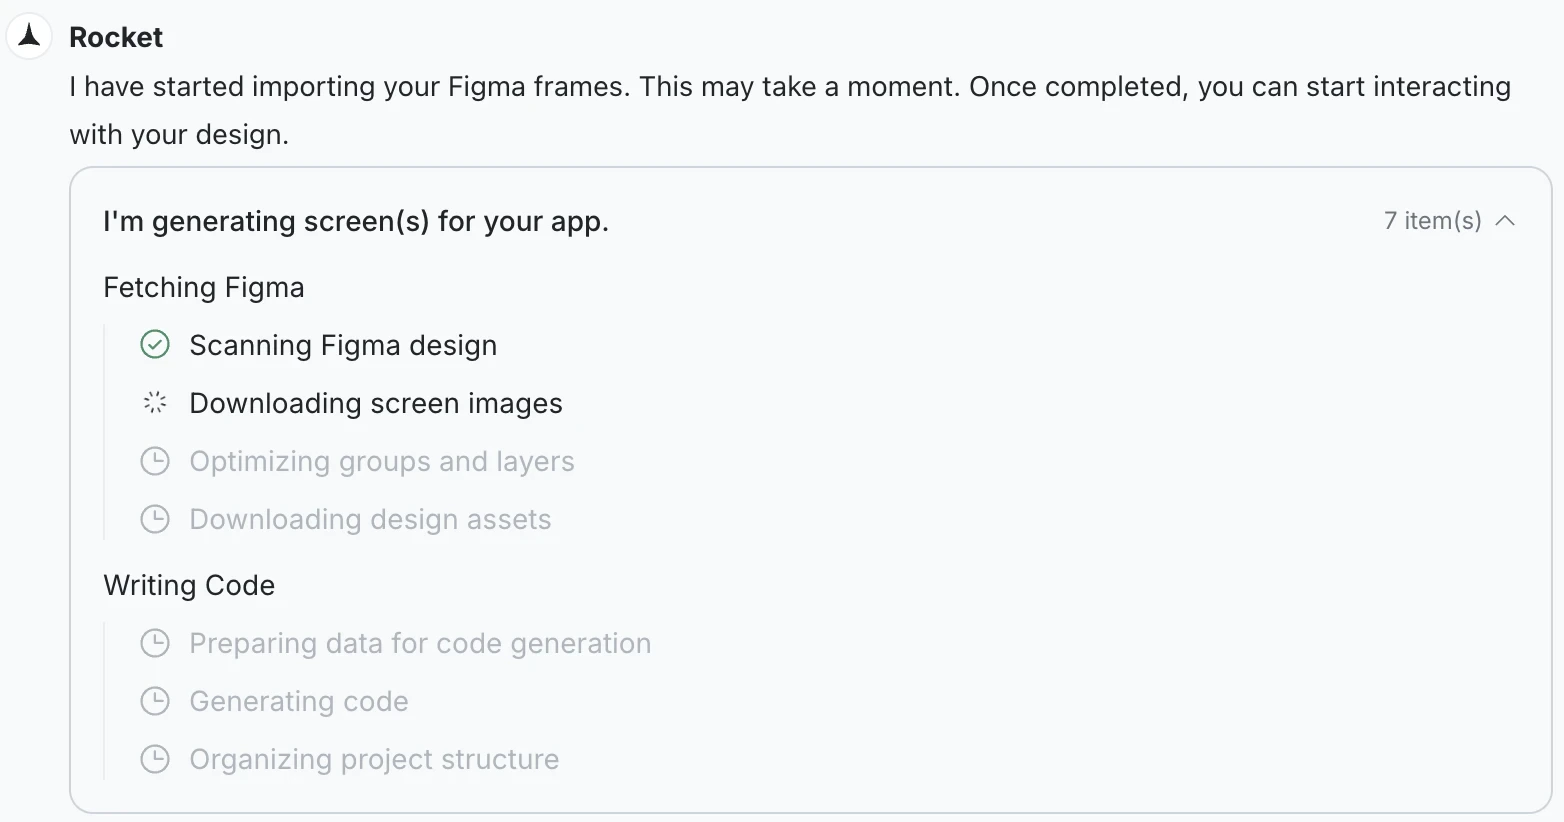
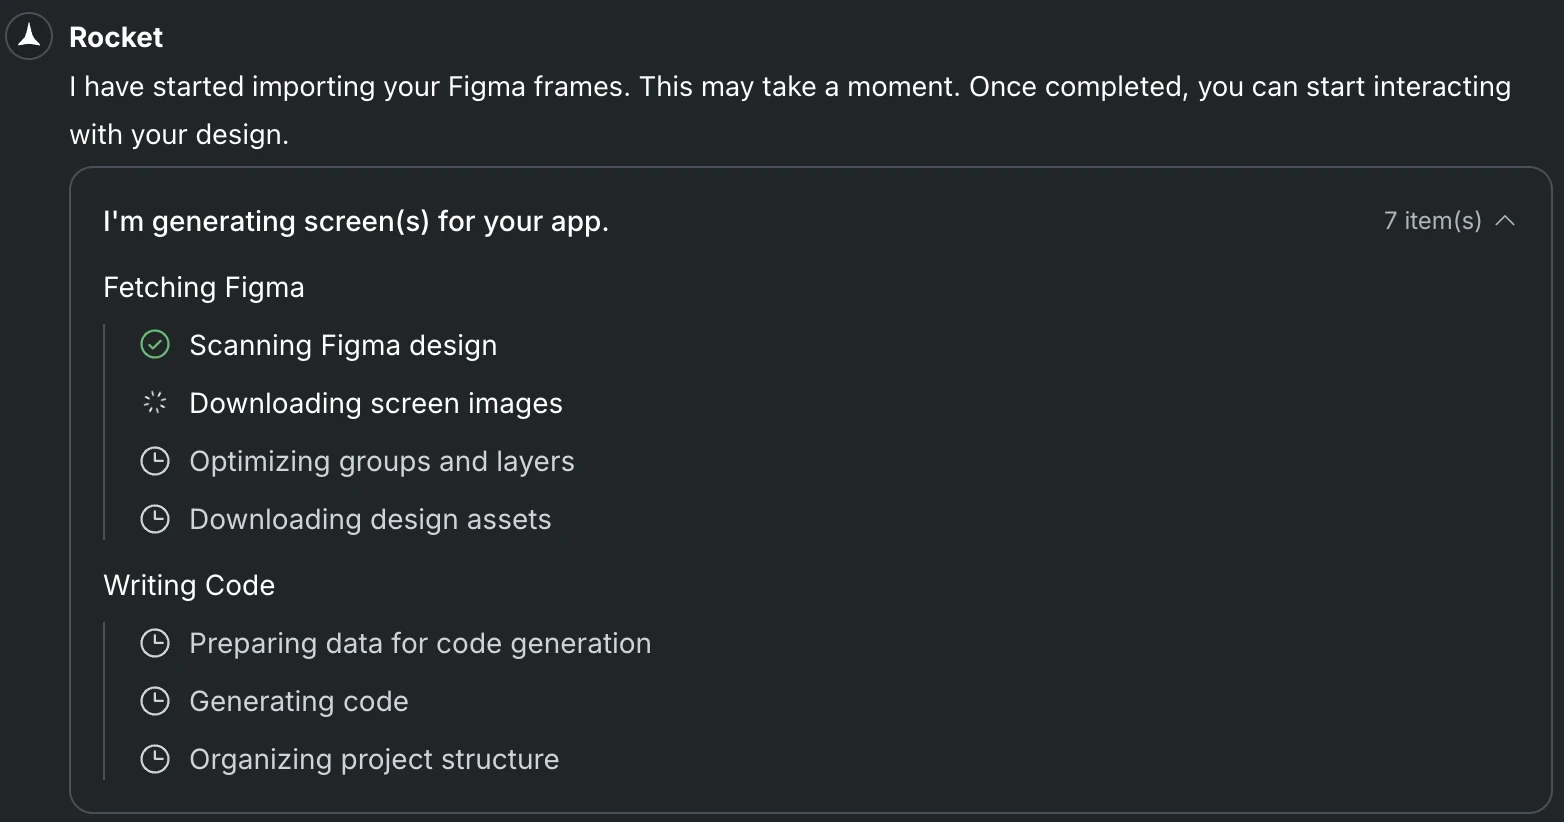 All status indicators turn green when your app is ready.
Once generation is complete, use the **Preview** tab at the top of the editor to view your Rocket-generated mobile app.
To view your original Figma design directly in Rocket, click the **** icon in the top-right navbar. This opens the Figma preview panel, showing your source design alongside the chat panel.
All status indicators turn green when your app is ready.
Once generation is complete, use the **Preview** tab at the top of the editor to view your Rocket-generated mobile app.
To view your original Figma design directly in Rocket, click the **** icon in the top-right navbar. This opens the Figma preview panel, showing your source design alongside the chat panel.
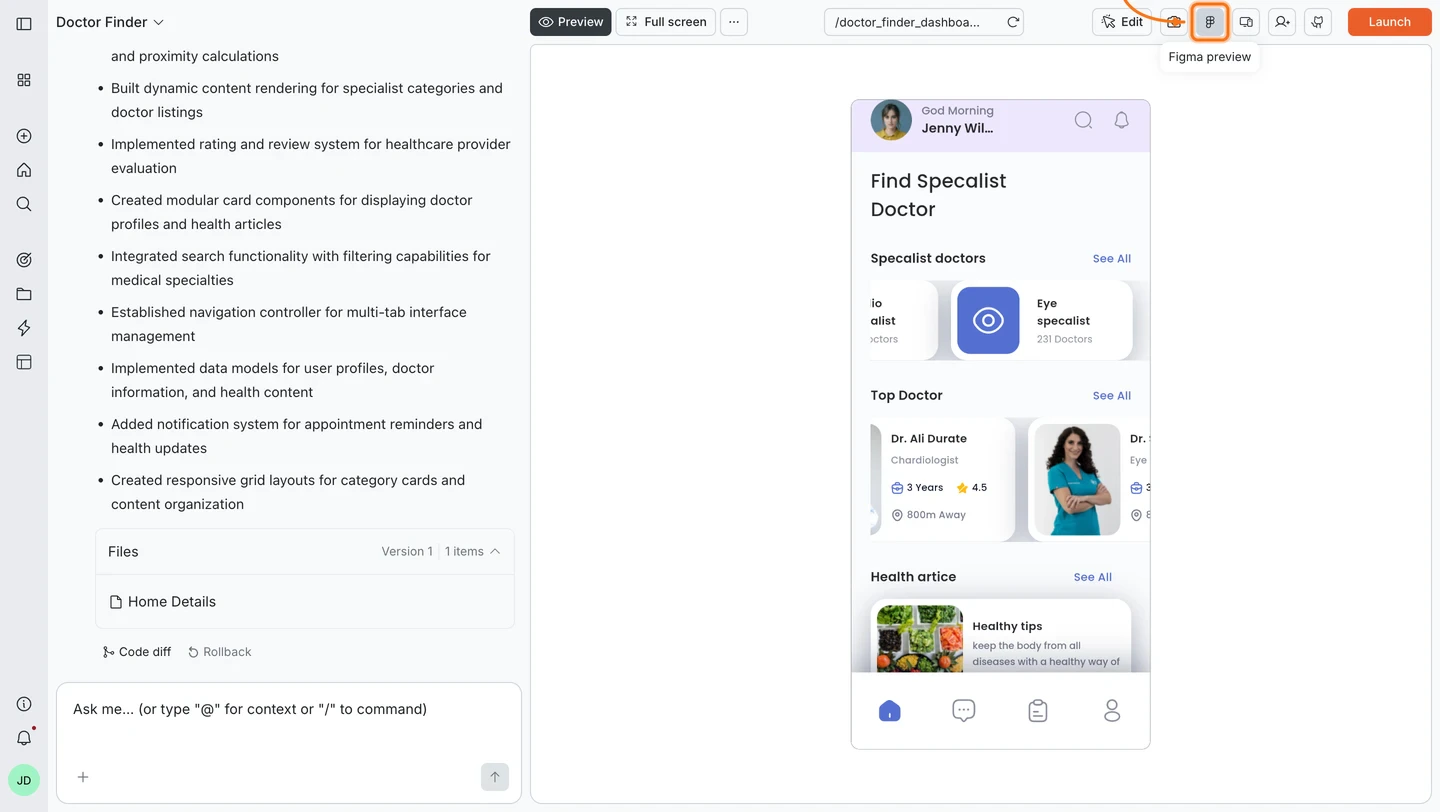
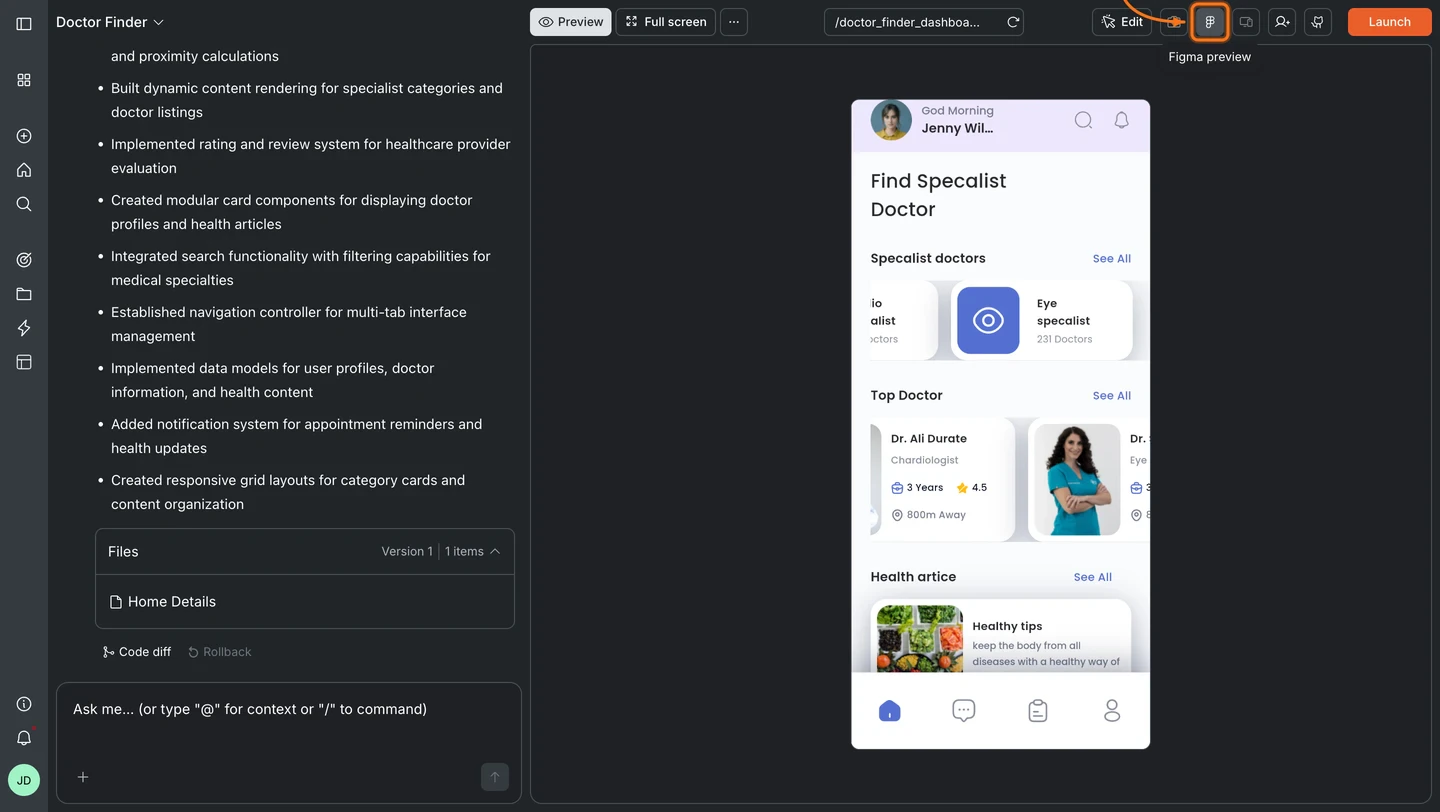 If your design looks slightly off, fine-tune it using chat. For example:
* **What you see:** The card has a shadow that does not appear in the original design
* **What Figma shows:** No shadow on the card
* **Fix it:** `"Remove the shadow from the product cards on the Home screen"`
Need to bring in more screens after the initial import?
Click the **+** button at the bottom of the chat, then select **Add new screen**.
If your design looks slightly off, fine-tune it using chat. For example:
* **What you see:** The card has a shadow that does not appear in the original design
* **What Figma shows:** No shadow on the card
* **Fix it:** `"Remove the shadow from the product cards on the Home screen"`
Need to bring in more screens after the initial import?
Click the **+** button at the bottom of the chat, then select **Add new screen**.
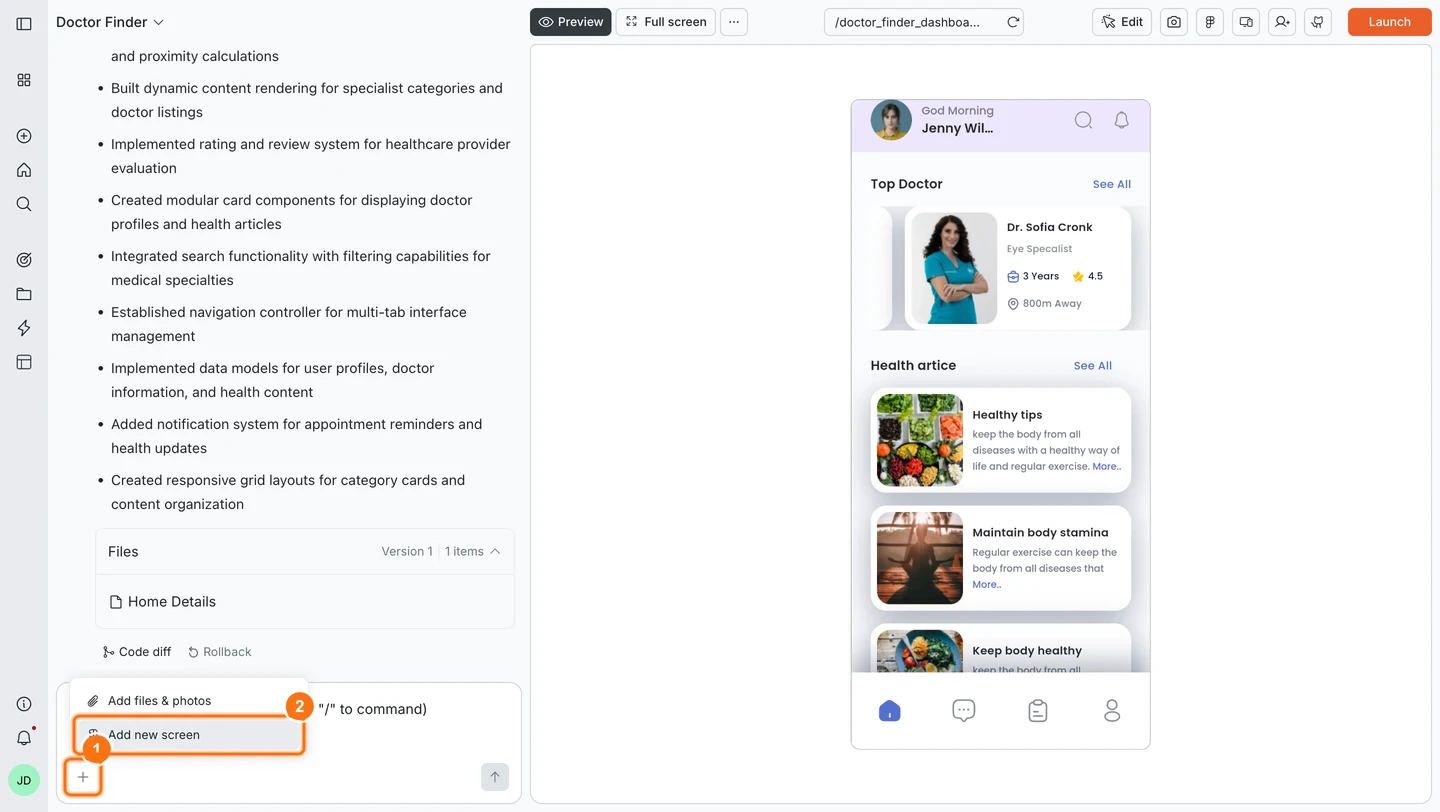
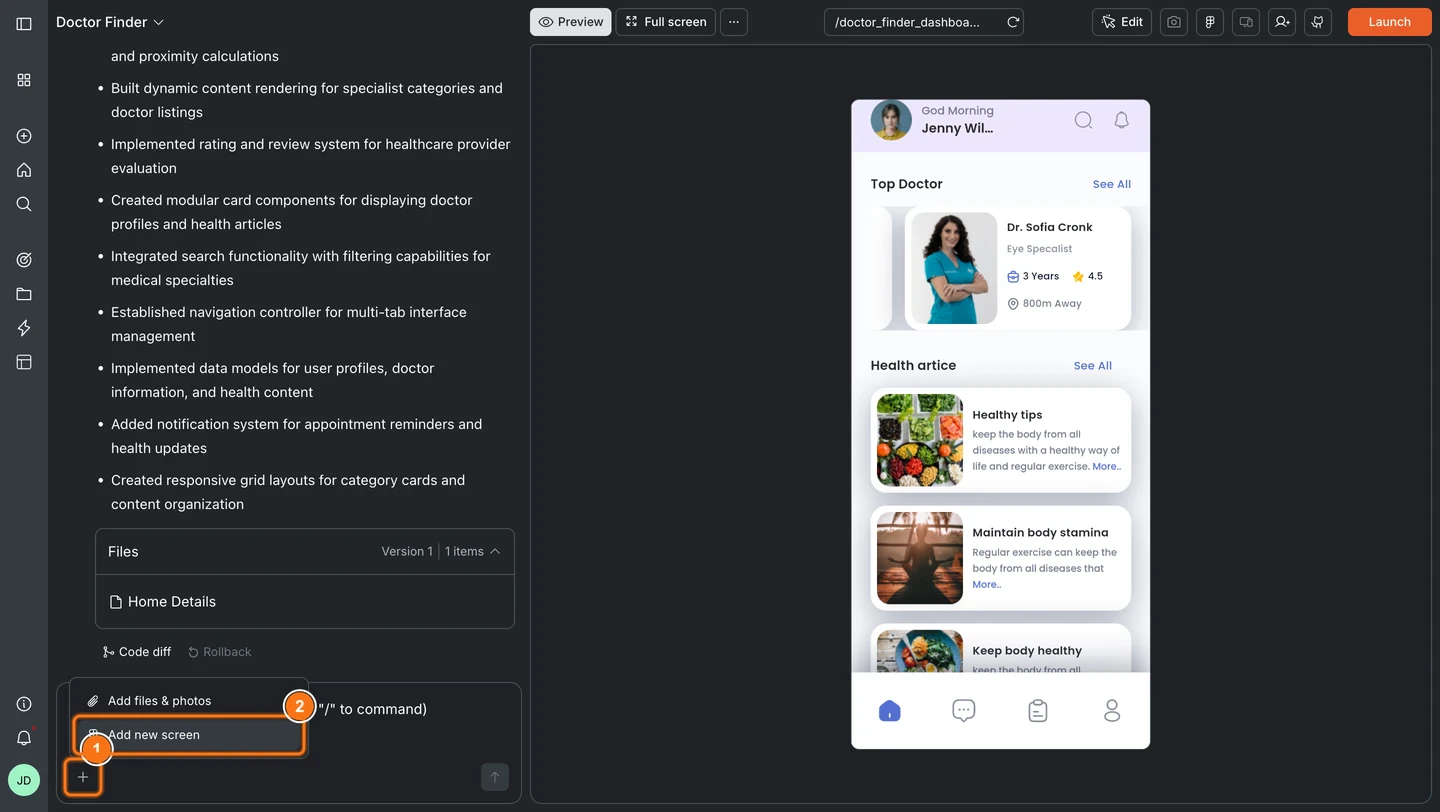 * **From the same file:** Select from the list of available screens (already-imported ones are marked) and click **Start import**.
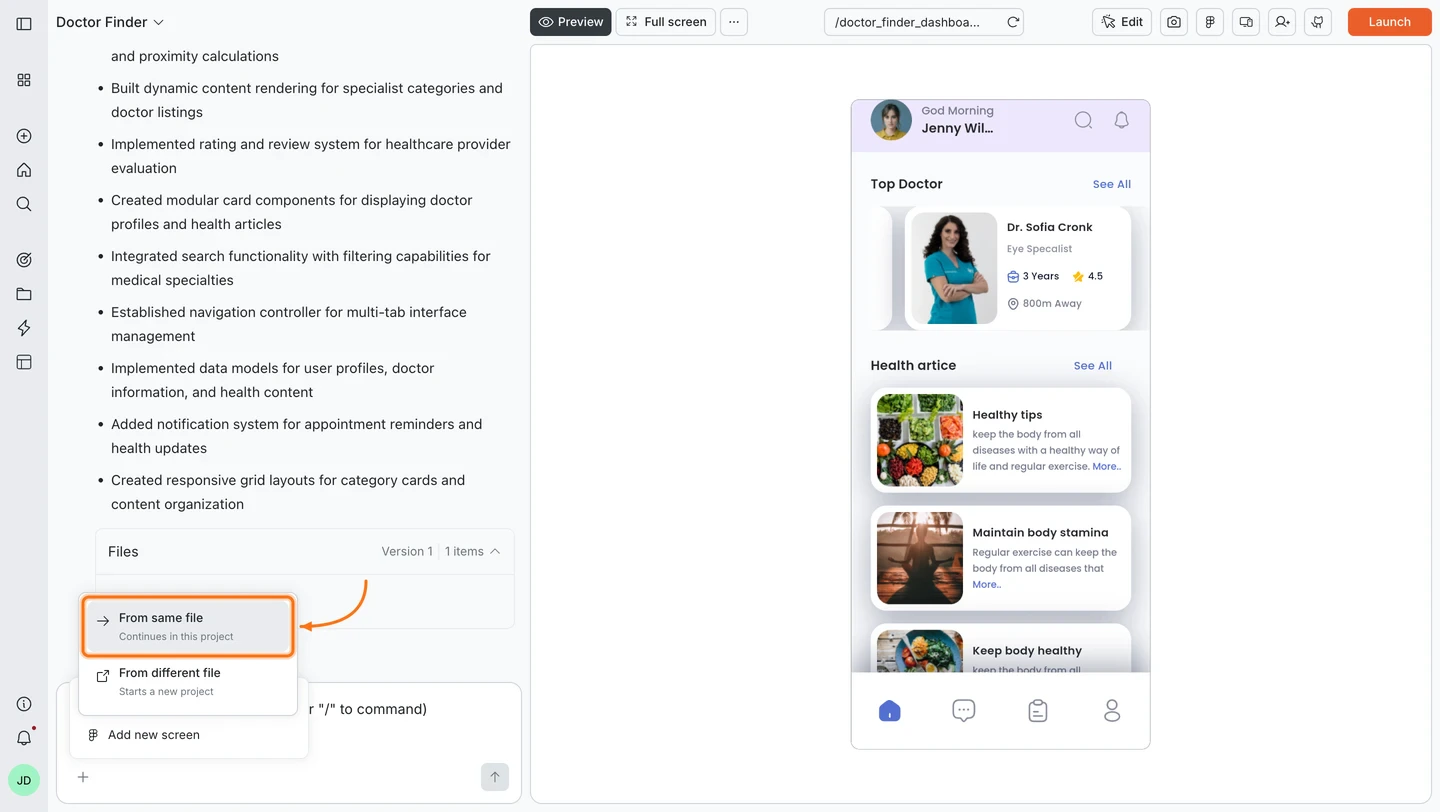
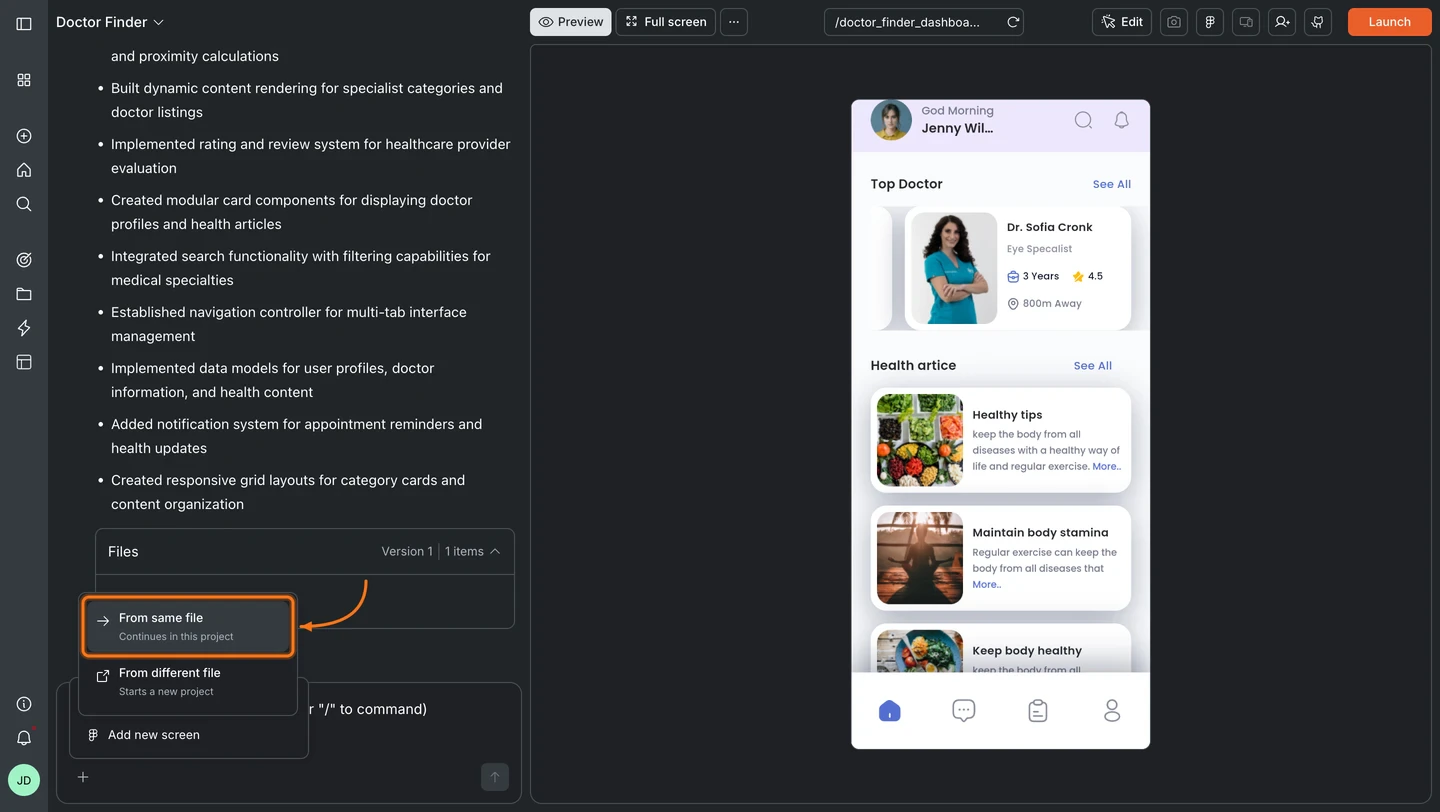 Select the screens you want to add and click **Start import**.
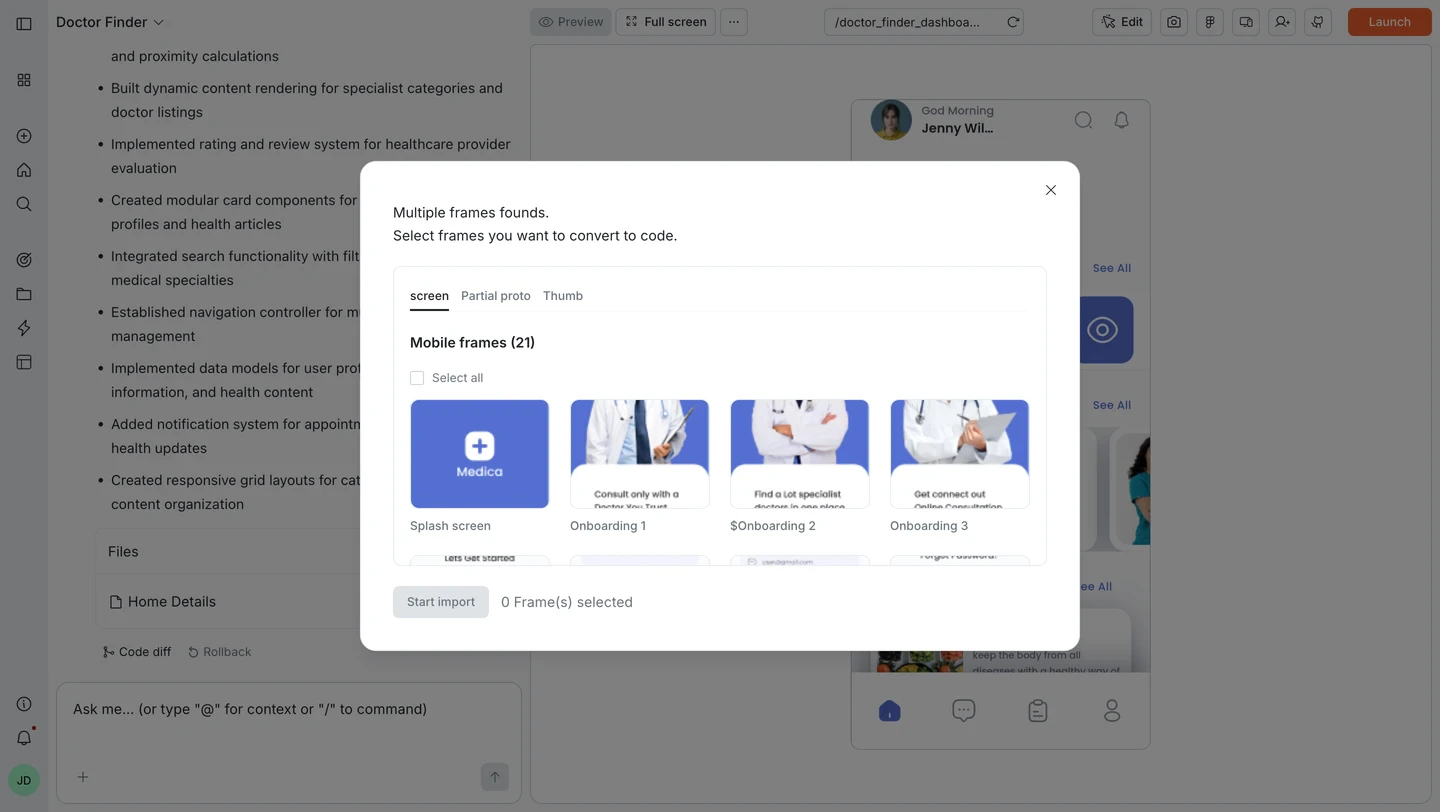
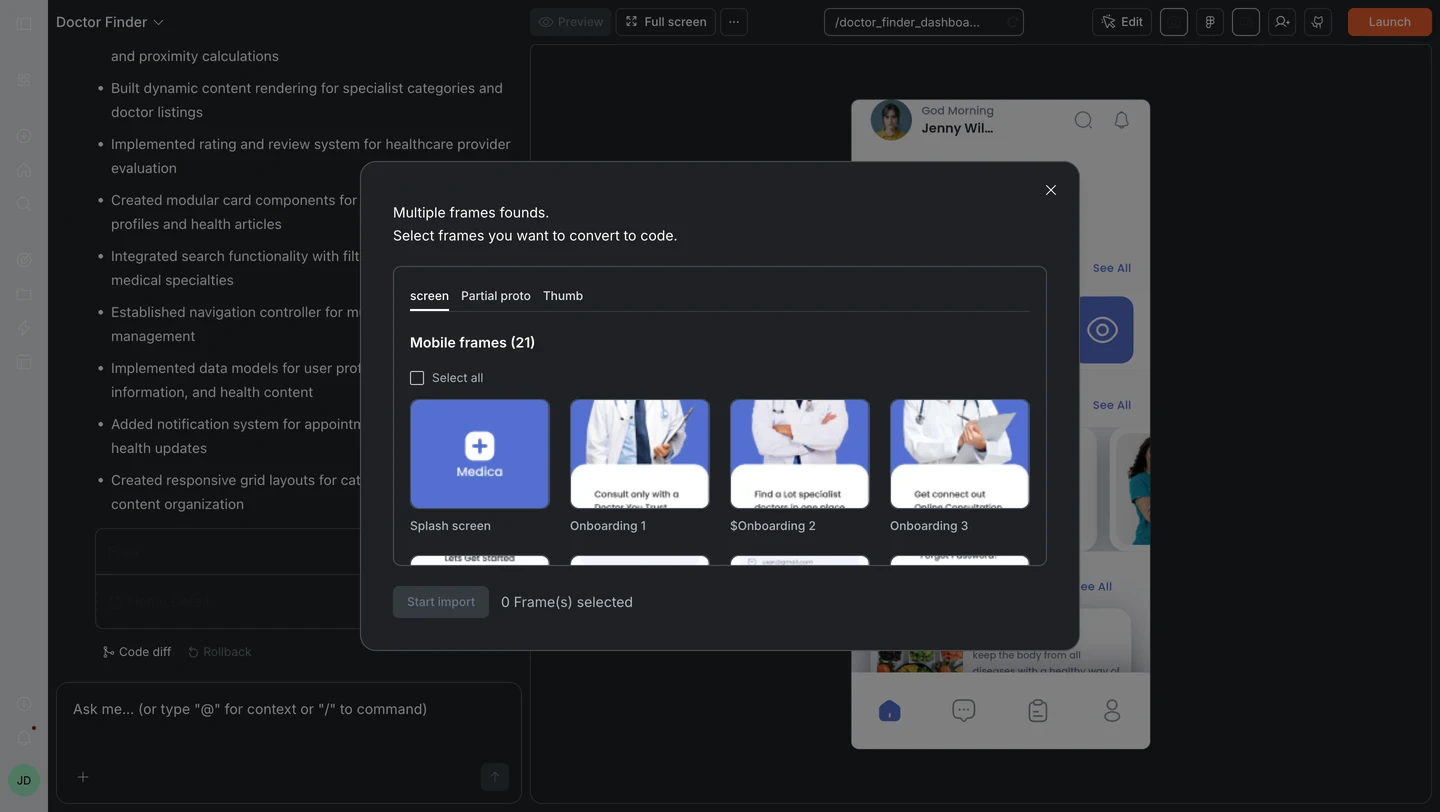 * **From a different file:** Choose **From different file**, then paste a new Figma URL. This starts a new task. Your current task is not affected.
## After your import
Once Rocket generates your Flutter app, iterate with chat to add functionality:
| Goal | Prompt |
| :--------------------- | :---------------------------------------------------------------------------- |
| Add navigation | `Add a bottom tab bar with Home, Search, Favorites, and Profile tabs.` |
| Connect a database | `Connect Supabase and load the product list from a "products" table.` |
| Add authentication | `Add login and signup screens with email/password auth and a splash screen.` |
| Fix visual differences | `The card shadow is too dark. Match the shadow from my Figma design exactly.` |
| Add animations | `Add a slide-in animation when navigating between screens.` |
| Push notifications | `Connect Firebase and add push notification support for order updates.` |
## Tips
* **Start with key screens.** Import your most important 5-10 screens first, then add more incrementally.
* **Choose the right state management.** For simple apps, Provider or no state management works fine. For complex apps with lots of data flow, use BLoC or Riverpod.
* **Use the Figma preview.** Click the icon in the top-right navbar to view your original Figma design directly in Rocket. Use the **Preview** tab to see the Rocket-generated app.
* **Fix visual mismatches in chat.** If a shadow, spacing, or color does not match, describe the difference and Rocket corrects it.
* **Follow the design guidelines.** Mobile frames should be between 200px and 800px wide. See the [guidelines](/build/create/figma/figma-design-guidelines/overview).
* **Prototype links do not work.** Use file or frame URLs, not prototype links.
## What's next?
Refine your imported app with natural language prompts.
Add payments, databases, AI, email, and analytics.
Test your Flutter app on real devices or emulators.
Publish your Flutter app to the App Store and Google Play.
* **From a different file:** Choose **From different file**, then paste a new Figma URL. This starts a new task. Your current task is not affected.
## After your import
Once Rocket generates your Flutter app, iterate with chat to add functionality:
| Goal | Prompt |
| :--------------------- | :---------------------------------------------------------------------------- |
| Add navigation | `Add a bottom tab bar with Home, Search, Favorites, and Profile tabs.` |
| Connect a database | `Connect Supabase and load the product list from a "products" table.` |
| Add authentication | `Add login and signup screens with email/password auth and a splash screen.` |
| Fix visual differences | `The card shadow is too dark. Match the shadow from my Figma design exactly.` |
| Add animations | `Add a slide-in animation when navigating between screens.` |
| Push notifications | `Connect Firebase and add push notification support for order updates.` |
## Tips
* **Start with key screens.** Import your most important 5-10 screens first, then add more incrementally.
* **Choose the right state management.** For simple apps, Provider or no state management works fine. For complex apps with lots of data flow, use BLoC or Riverpod.
* **Use the Figma preview.** Click the icon in the top-right navbar to view your original Figma design directly in Rocket. Use the **Preview** tab to see the Rocket-generated app.
* **Fix visual mismatches in chat.** If a shadow, spacing, or color does not match, describe the difference and Rocket corrects it.
* **Follow the design guidelines.** Mobile frames should be between 200px and 800px wide. See the [guidelines](/build/create/figma/figma-design-guidelines/overview).
* **Prototype links do not work.** Use file or frame URLs, not prototype links.
## What's next?
Refine your imported app with natural language prompts.
Add payments, databases, AI, email, and analytics.
Test your Flutter app on real devices or emulators.
Publish your Flutter app to the App Store and Google Play.