> ## Documentation Index
> Fetch the complete documentation index at: https://docs.rocket.new/llms.txt
> Use this file to discover all available pages before exploring further.
# Environment variables
> Store API keys and secrets securely in Rocket without hardcoding them.
export const LlmsDirective = () =>
For the complete documentation index, see llms.txt.
For a lightweight markdown version of this page, append .md to the URL.
;
Environment variables let you store API keys, database URLs, and other secrets without hardcoding them in your app. Rocket keeps separate values for staging (while you build) and production (when you launch).
The Environment settings panel is only available for **web** build tasks, which use a `.env` file. For mobile tasks, variables are stored in `env.json` - update them directly in that file or inside the connector's value field.
## Open Environment settings
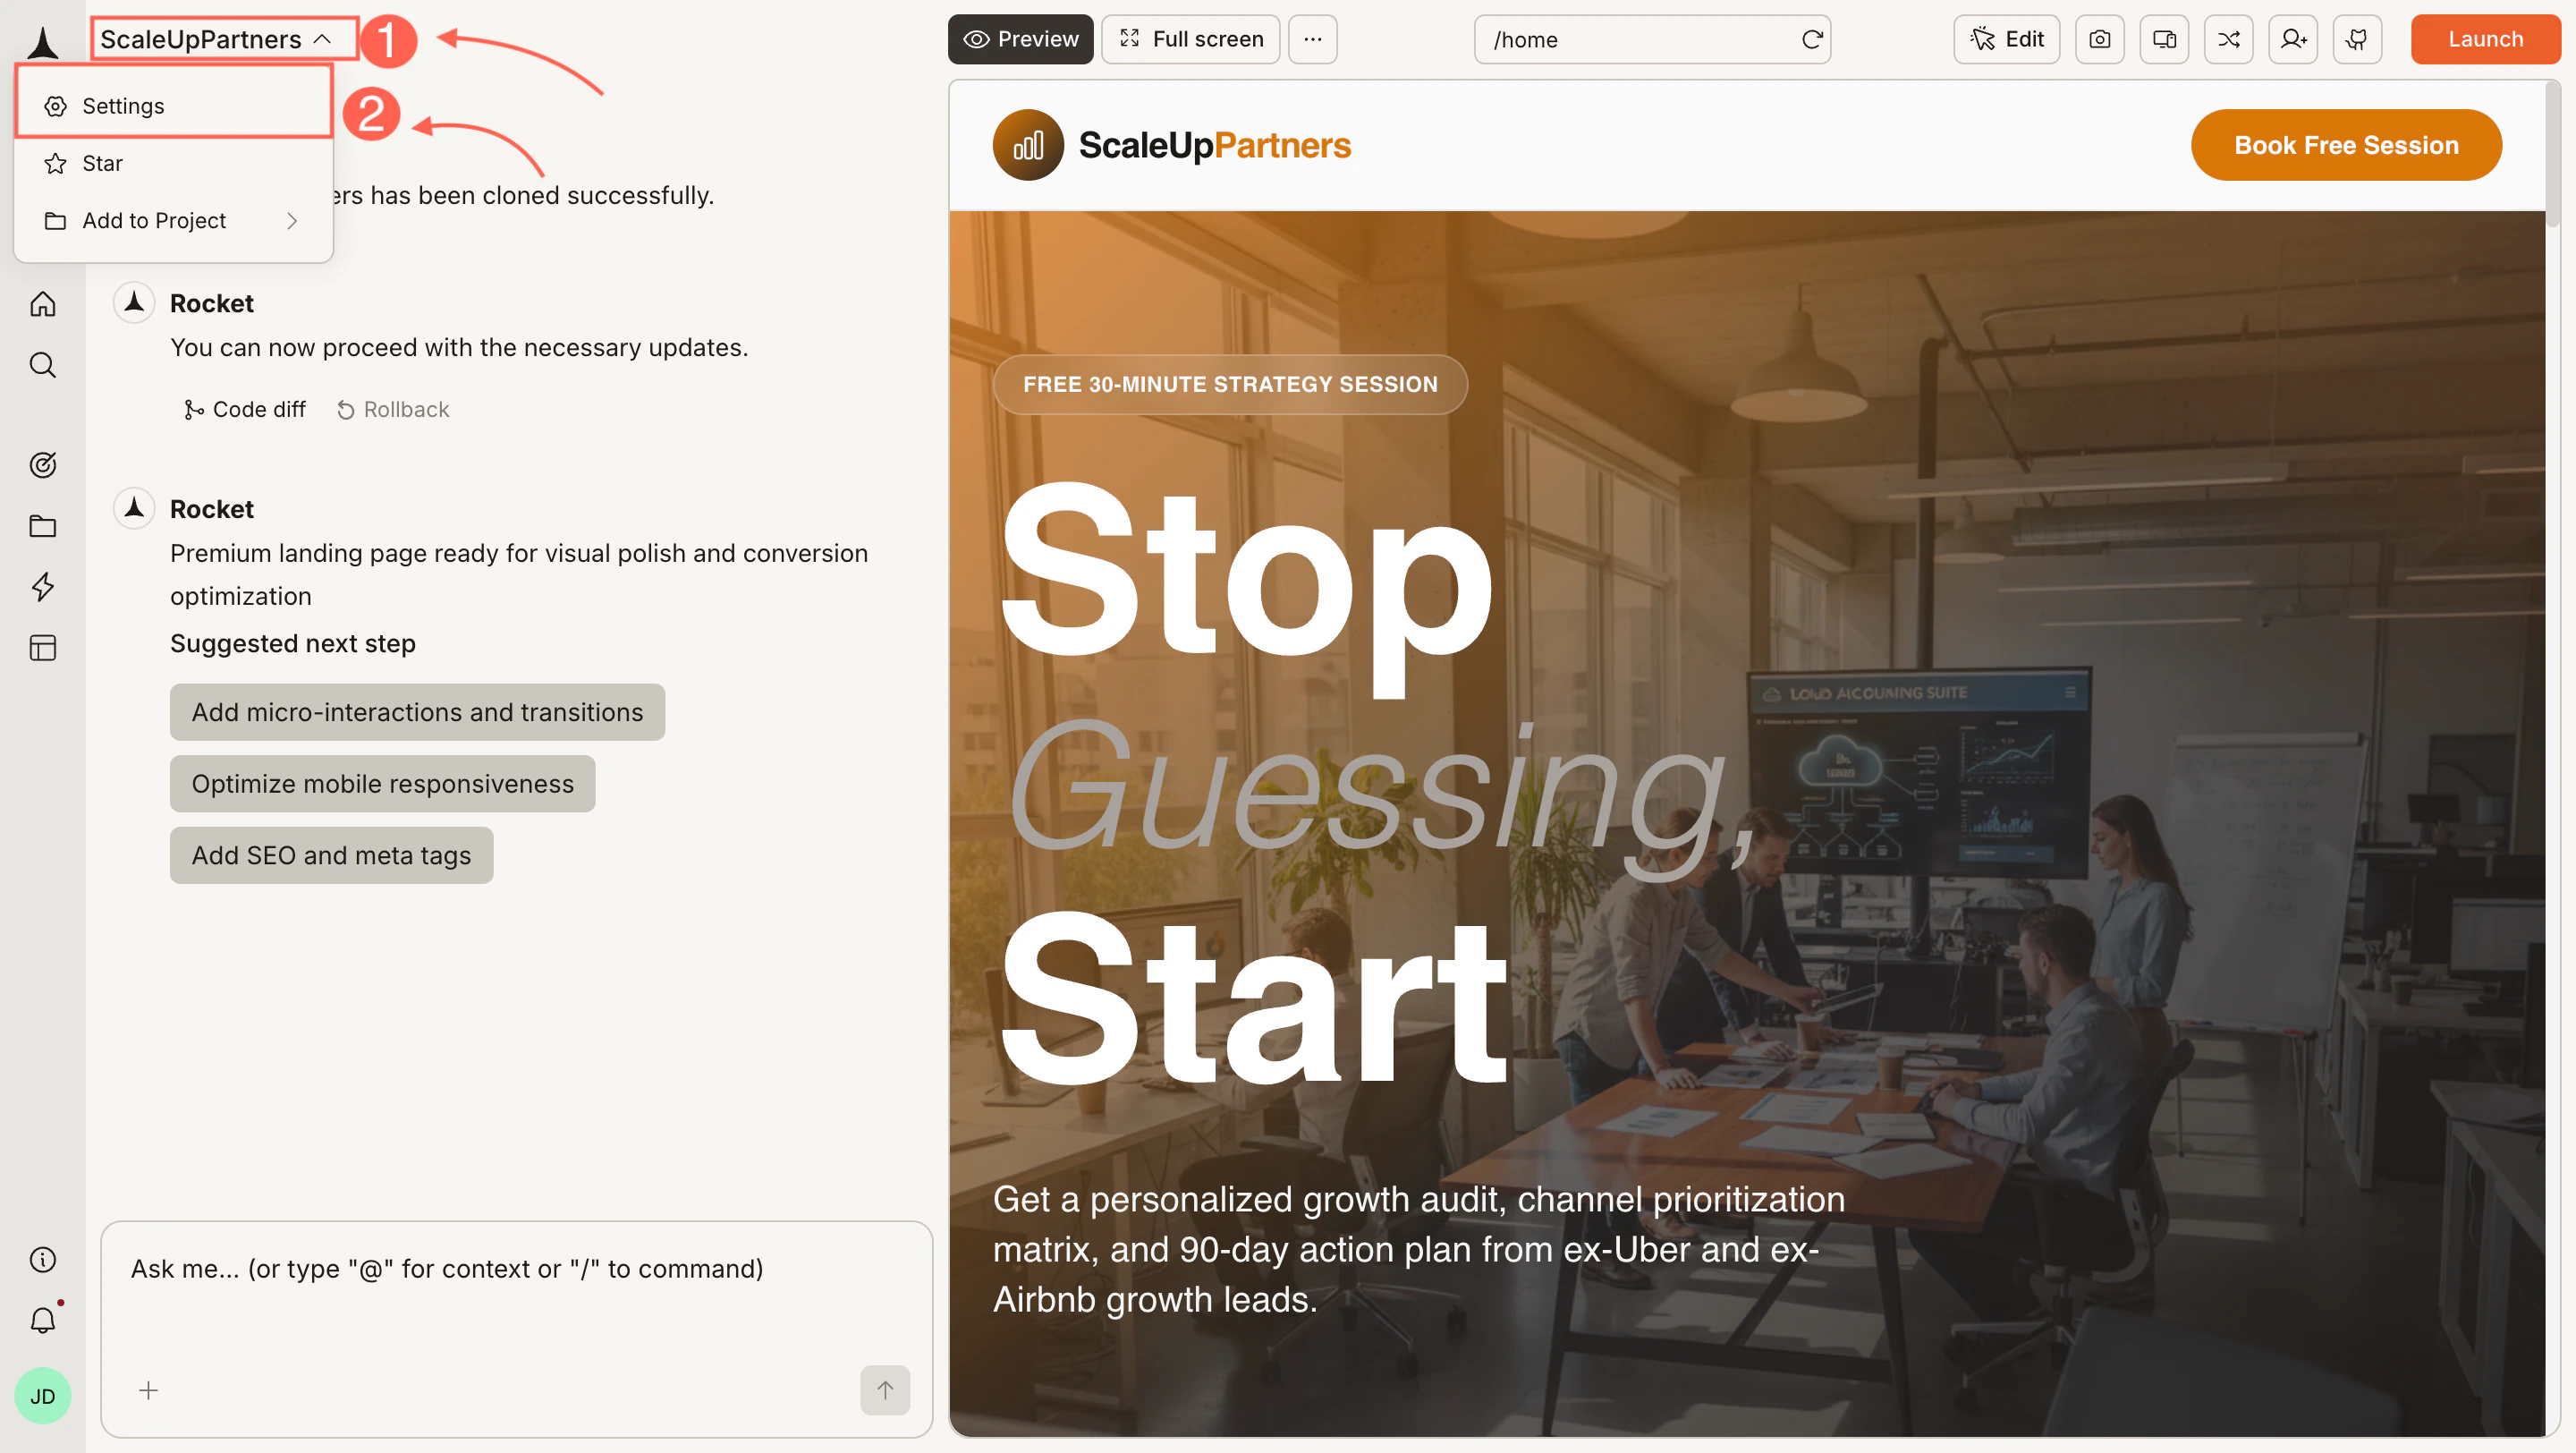
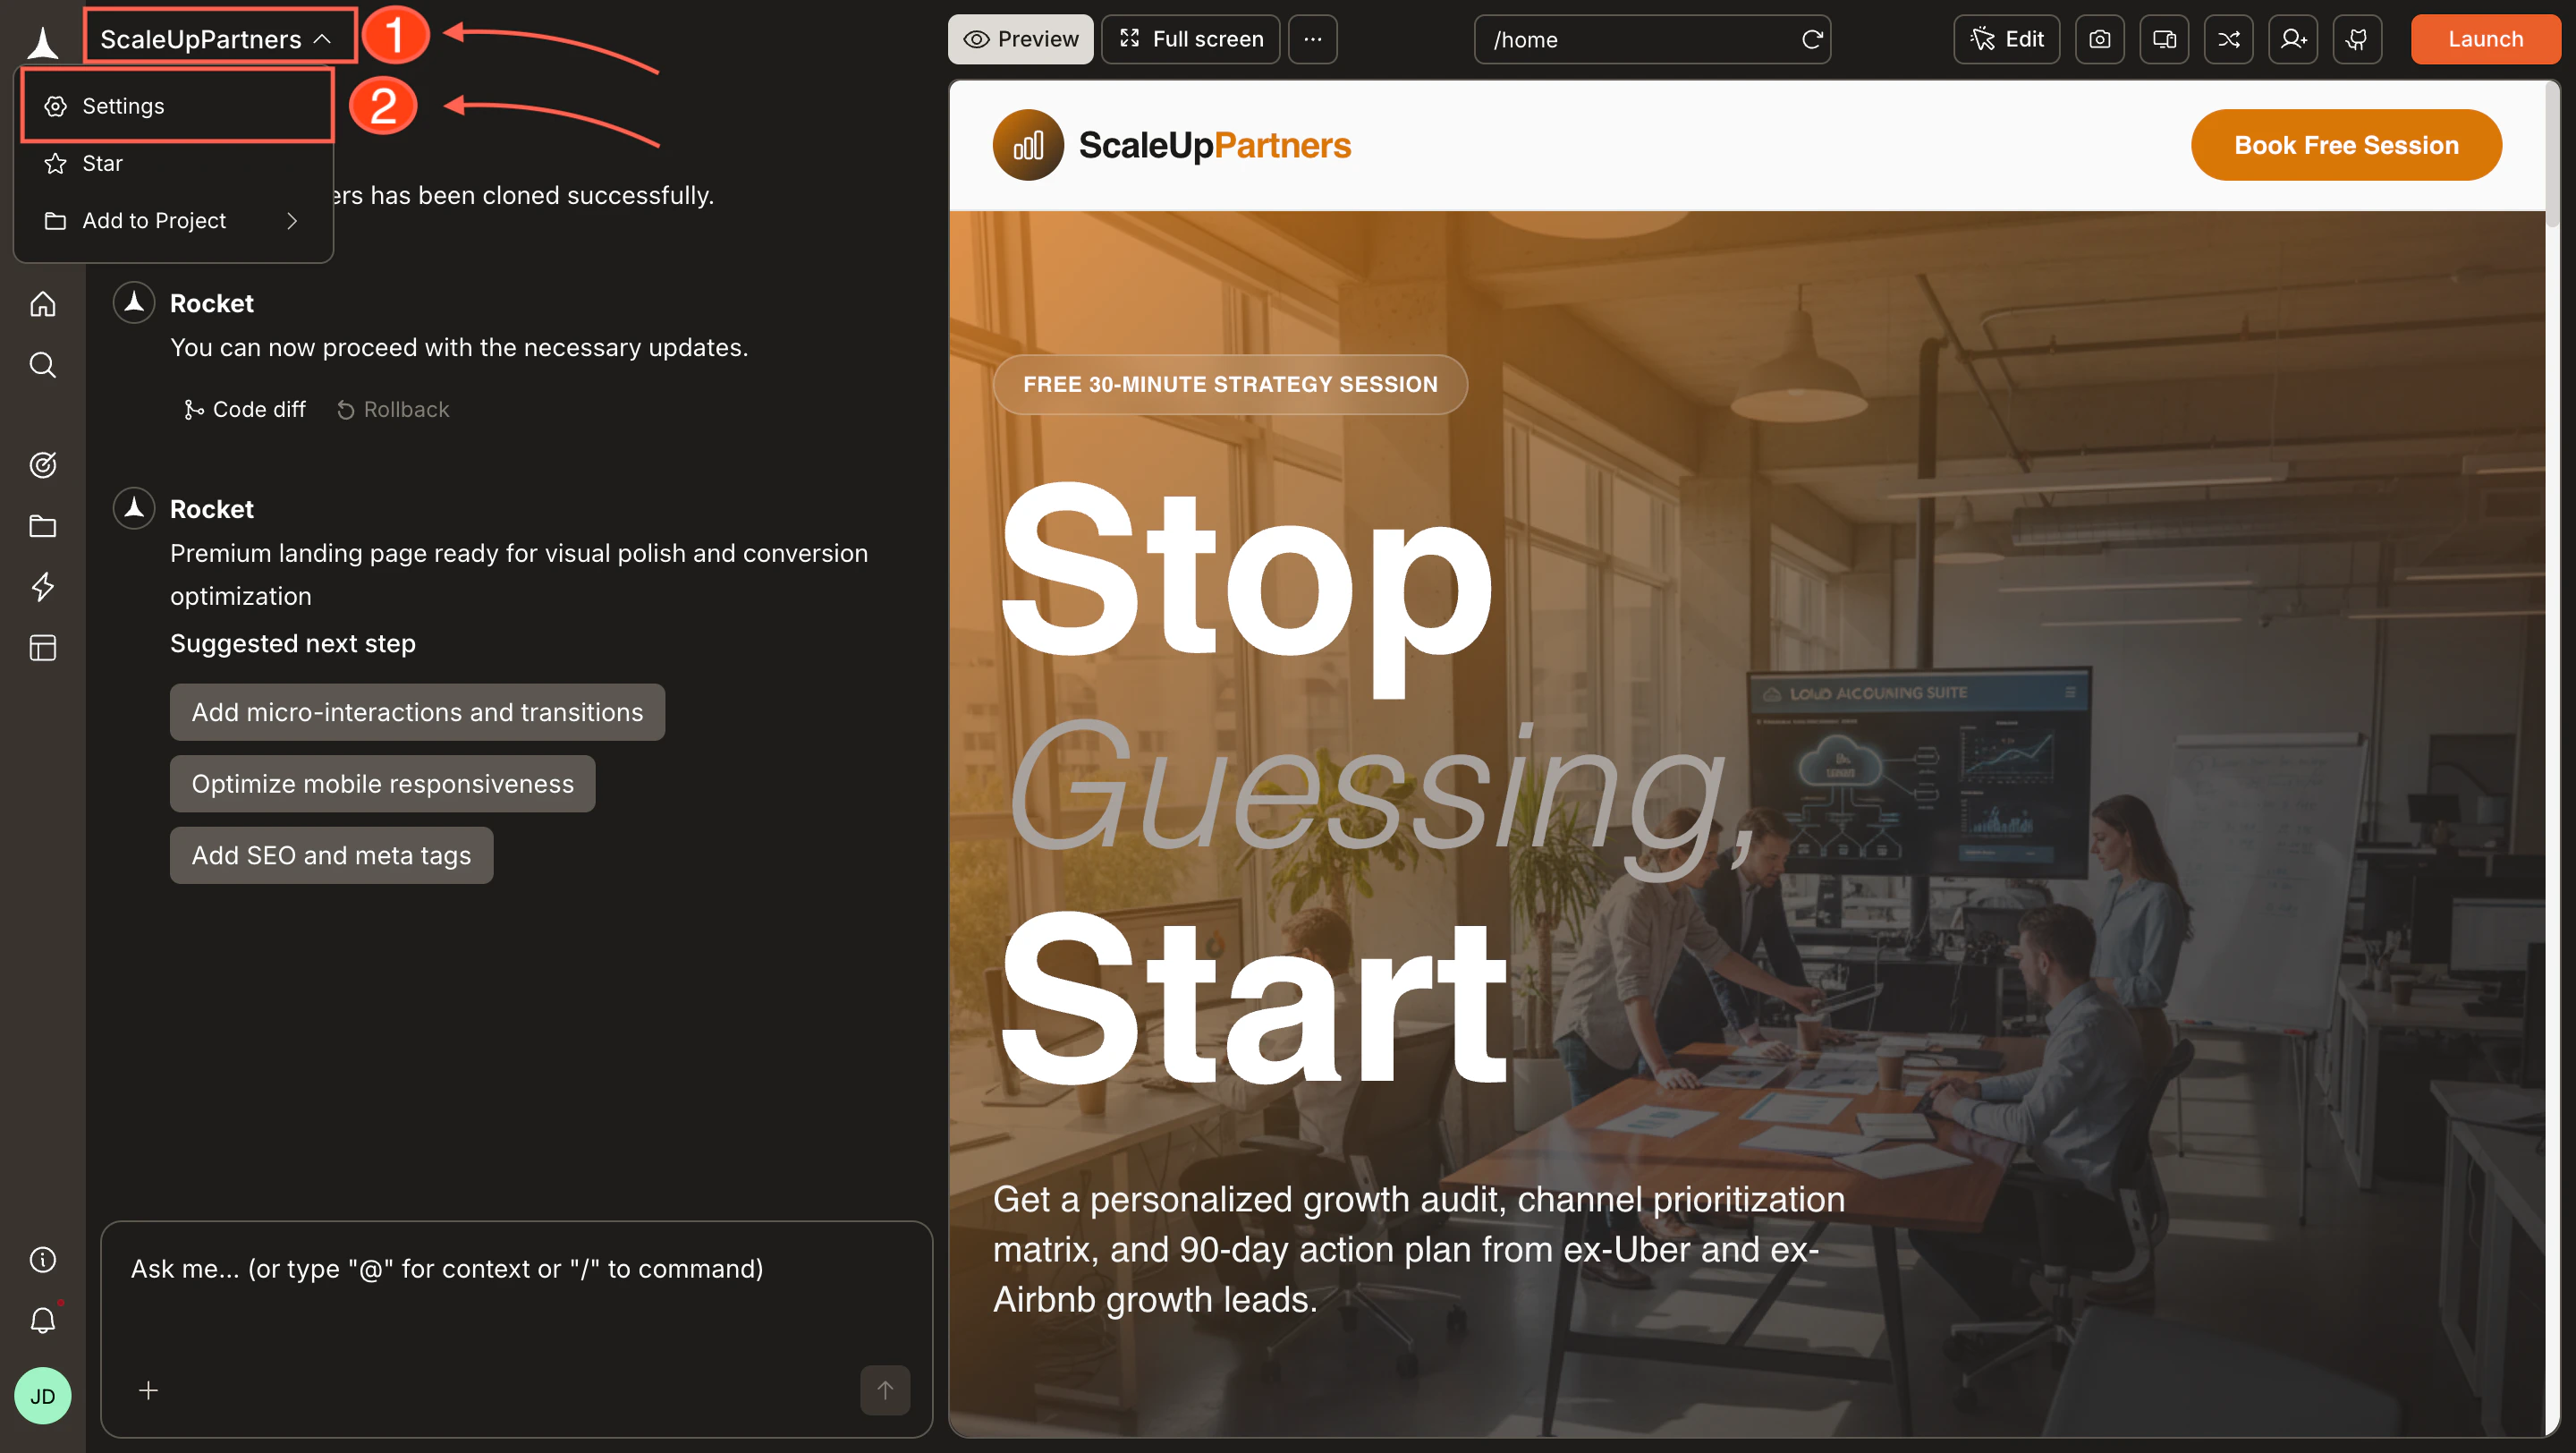
Click your **task name** in the top-left corner of the editor, then click **Settings**.
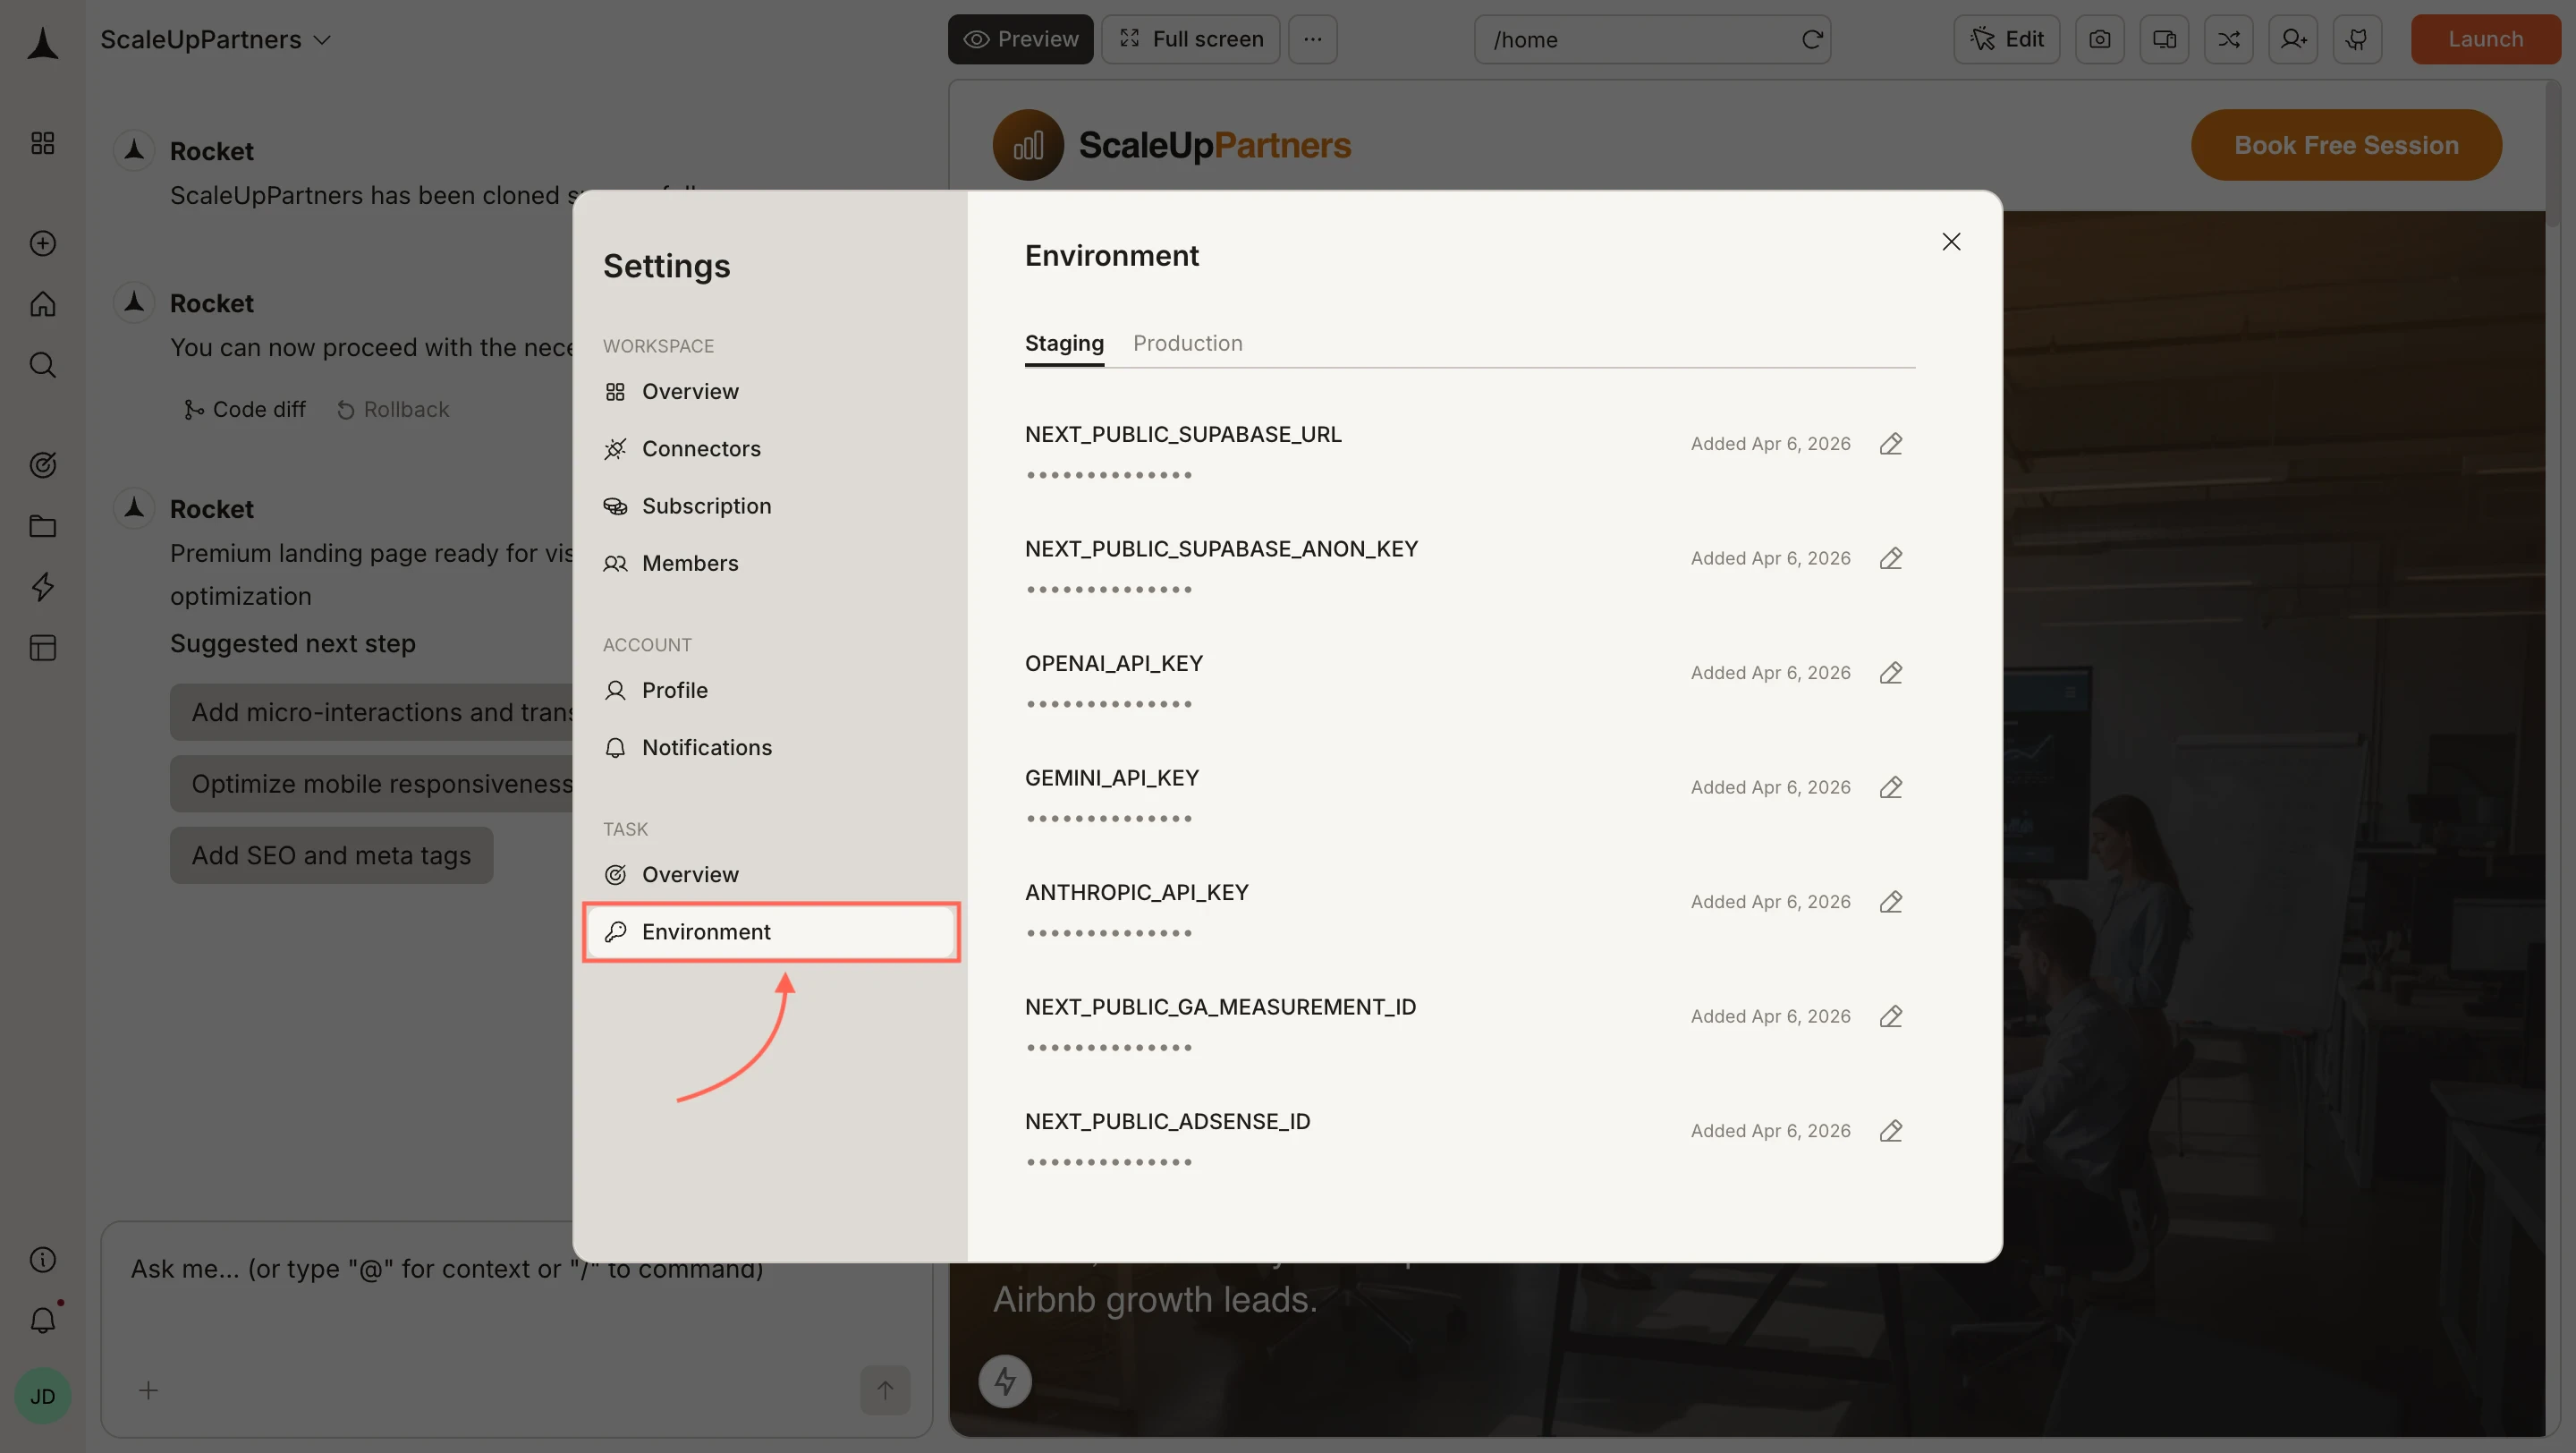
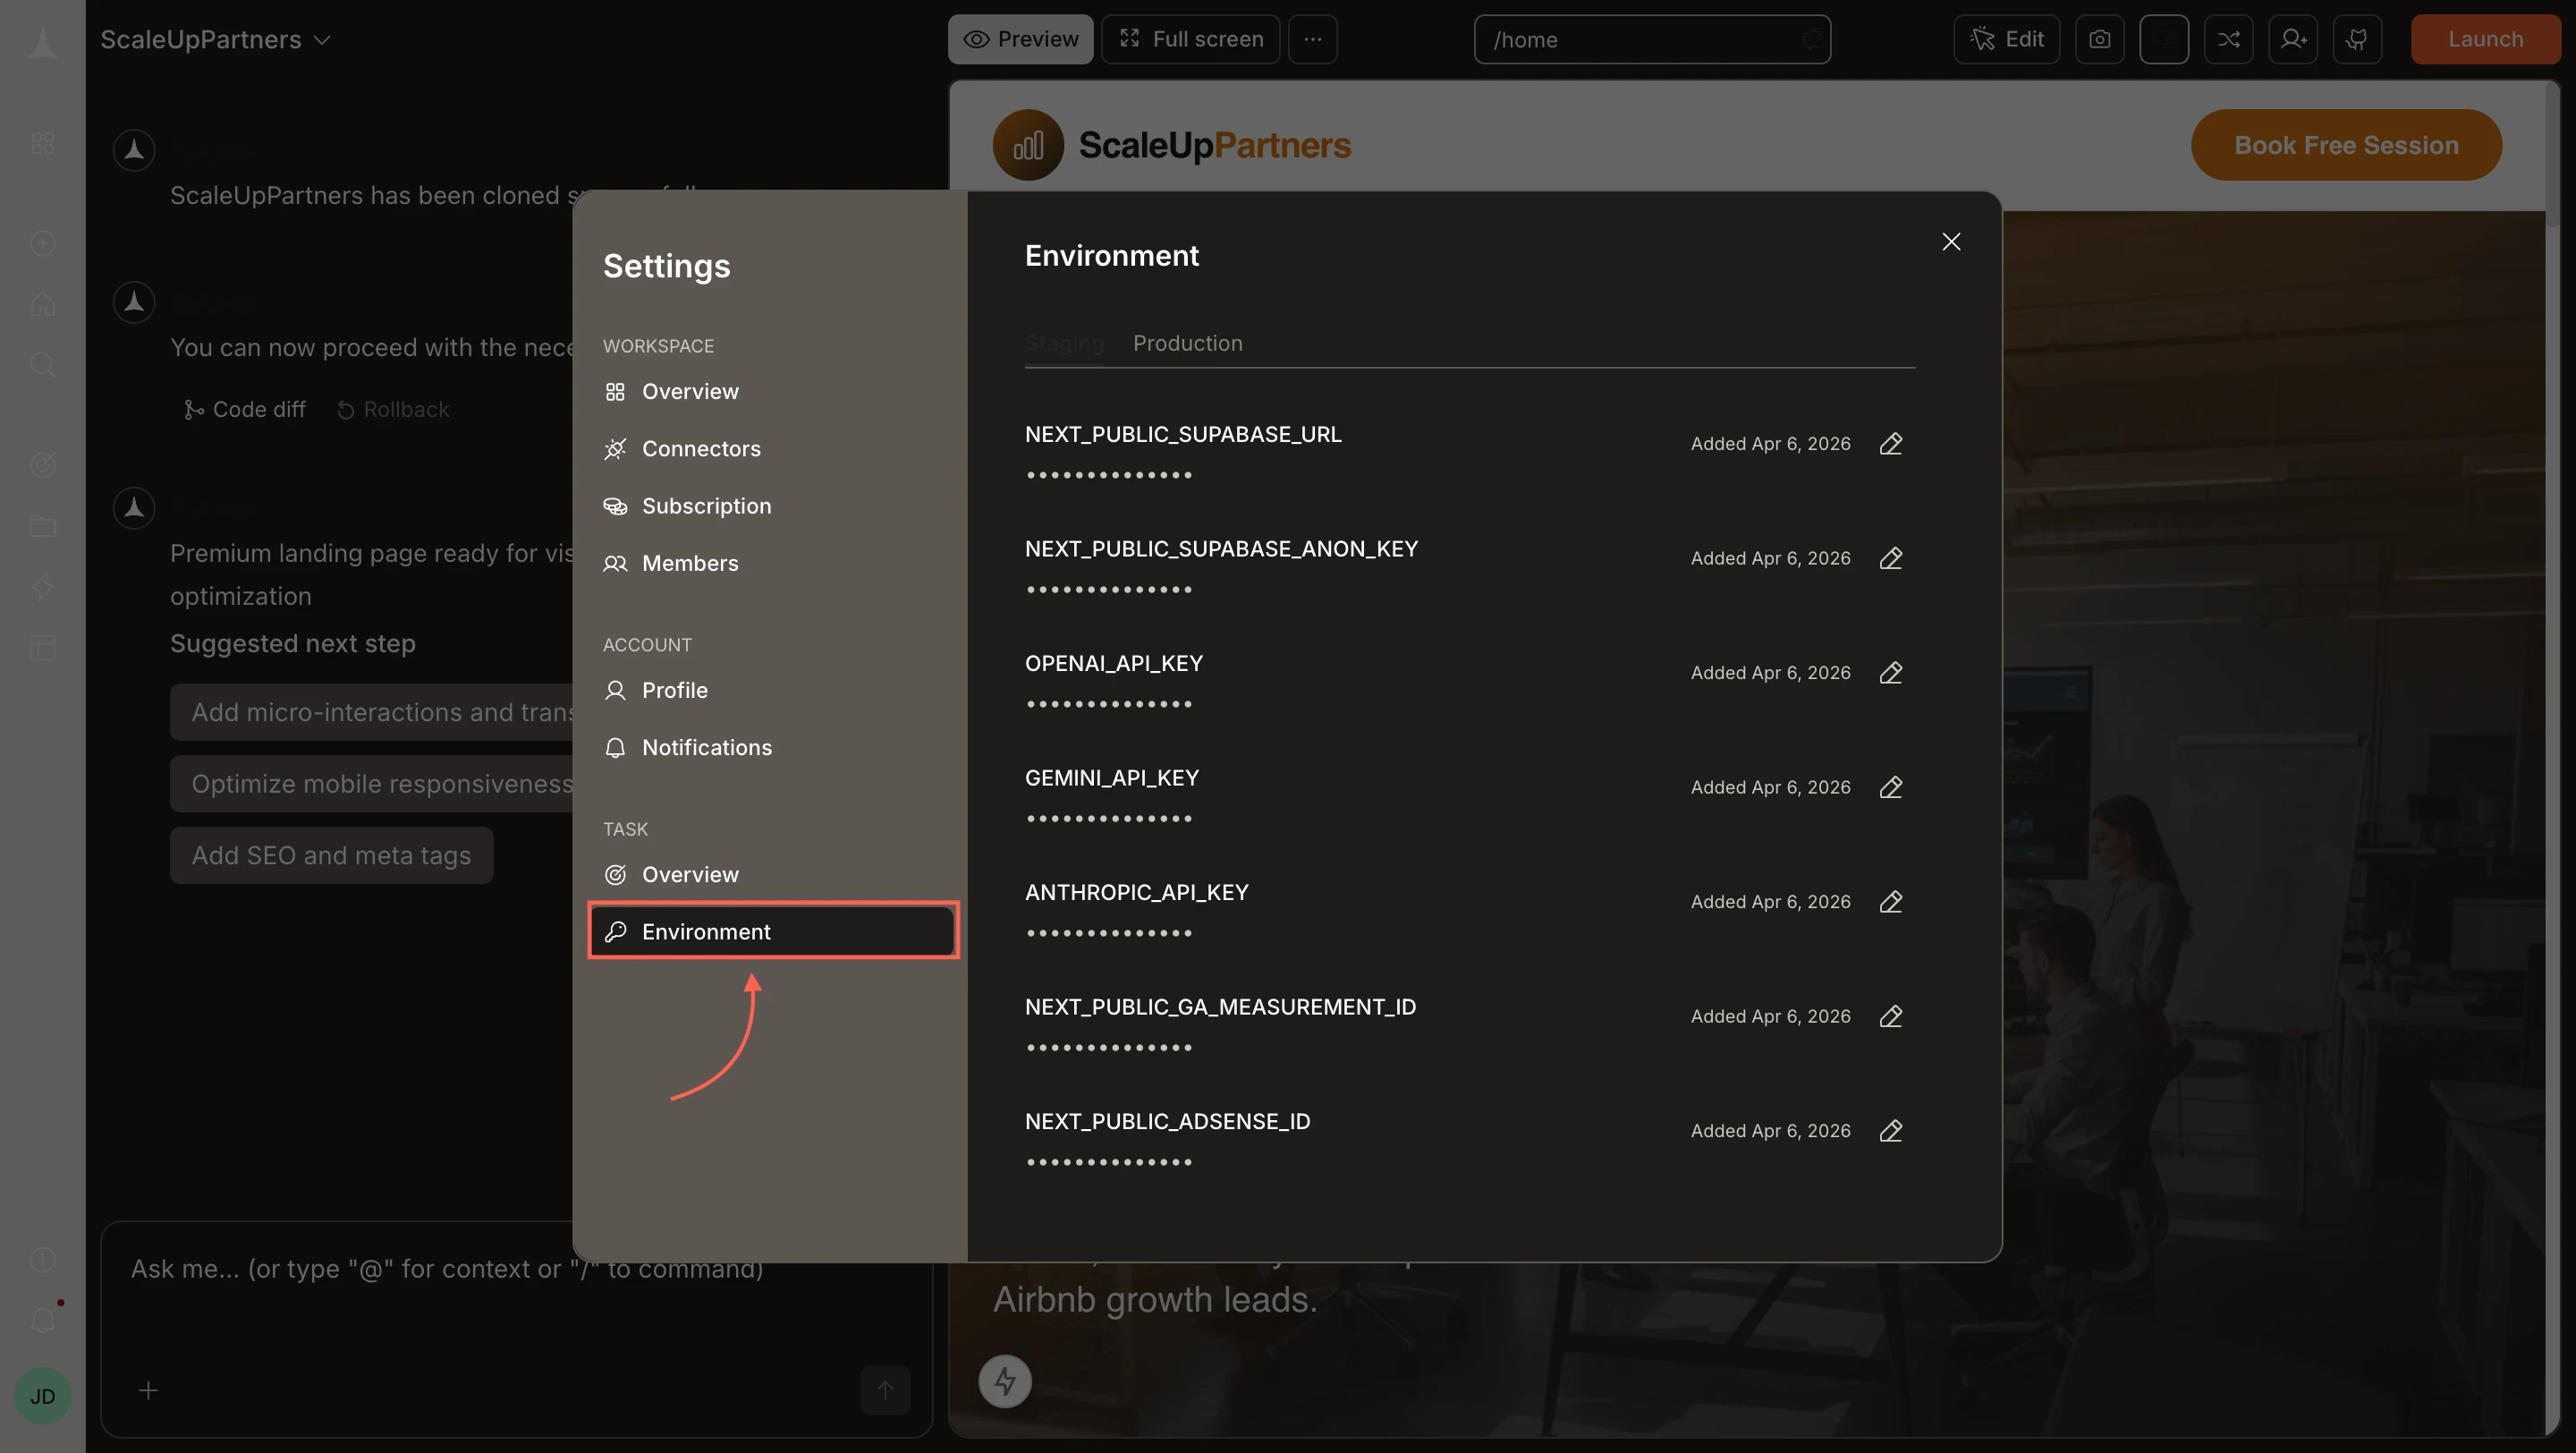
 In the Settings sidebar under **Task**, click **Environment**. The panel opens showing your existing variables across **Staging** and **Production** tabs.
 ## Staging and Production
The Environment panel has two tabs:
* **Staging** - values used while you are building and testing inside Rocket.
* **Production** - values used when your app is live and publicly launched.
Make sure both tabs are filled in so your app behaves correctly in each environment.
If you set a value directly in your code or in a connector's value field instead of using this panel, Rocket treats it as a staging value by default.
## Add a variable
New environment variables are added through your **`.env` file in code**, not through the Settings UI.
Click **Code** in the editor toolbar to open the file explorer.
Use placeholder values (like `your-key-here`) in code files. Set your real secrets only in the Environment panel. Never commit actual keys to a repository.
Open `.env` at the root of your project and add your variable:
```plaintext wrap theme={null}
OPENAI_API_KEY=your-key-here
NEXT_PUBLIC_SUPABASE_URL=https://your-project.supabase.co
```
Save the file. The variable is now available to your app and will appear in the Environment panel under the relevant tab.
For **mobile tasks**, variables are stored in `env.json` instead. Open it in the Code tab and add your key-value pairs there directly.
## Edit an existing variable
To update the value of an existing variable, open the Environment panel (Settings > Environment) and click the **edit icon** on the right side of any variable row. Make your change and save.
Changes take effect on the next build or generation in that environment.
## Use variables in your app
Reference variables in server-side code using standard patterns:
```plaintext wrap theme={null}
process.env.OPENAI_API_KEY
process.env.NEXT_PUBLIC_SUPABASE_URL
```
You can also ask Rocket to wire them up directly in chat:
```plaintext wrap theme={null}
Use the OPENAI_API_KEY environment variable to set up the AI chat feature.
```
## Common variables
Variables prefixed with `NEXT_PUBLIC_` are exposed to the browser (client side). All others stay server-side only. Never put secrets in `NEXT_PUBLIC_` variables.
| Variable | Service |
| :------------------------------ | :--------------- |
| `NEXT_PUBLIC_SUPABASE_URL` | Supabase |
| `NEXT_PUBLIC_SUPABASE_ANON_KEY` | Supabase |
| `STRIPE_SECRET_KEY` | Stripe |
| `OPENAI_API_KEY` | OpenAI |
| `GEMINI_API_KEY` | Google Gemini |
| `ANTHROPIC_API_KEY` | Anthropic |
| `RESEND_API_KEY` | Resend |
| `NEXT_PUBLIC_GA_MEASUREMENT_ID` | Google Analytics |
| `NEXT_PUBLIC_ADSENSE_ID` | Google AdSense |
## What's next?
Import and integrate API endpoints that use your environment variables.
Connect services like Supabase, Stripe, and OpenAI with dedicated integrations.
Inject scripts and styles that reference your environment configuration.
Ask Rocket to use your variables when building features.
## Staging and Production
The Environment panel has two tabs:
* **Staging** - values used while you are building and testing inside Rocket.
* **Production** - values used when your app is live and publicly launched.
Make sure both tabs are filled in so your app behaves correctly in each environment.
If you set a value directly in your code or in a connector's value field instead of using this panel, Rocket treats it as a staging value by default.
## Add a variable
New environment variables are added through your **`.env` file in code**, not through the Settings UI.
Click **Code** in the editor toolbar to open the file explorer.
Use placeholder values (like `your-key-here`) in code files. Set your real secrets only in the Environment panel. Never commit actual keys to a repository.
Open `.env` at the root of your project and add your variable:
```plaintext wrap theme={null}
OPENAI_API_KEY=your-key-here
NEXT_PUBLIC_SUPABASE_URL=https://your-project.supabase.co
```
Save the file. The variable is now available to your app and will appear in the Environment panel under the relevant tab.
For **mobile tasks**, variables are stored in `env.json` instead. Open it in the Code tab and add your key-value pairs there directly.
## Edit an existing variable
To update the value of an existing variable, open the Environment panel (Settings > Environment) and click the **edit icon** on the right side of any variable row. Make your change and save.
Changes take effect on the next build or generation in that environment.
## Use variables in your app
Reference variables in server-side code using standard patterns:
```plaintext wrap theme={null}
process.env.OPENAI_API_KEY
process.env.NEXT_PUBLIC_SUPABASE_URL
```
You can also ask Rocket to wire them up directly in chat:
```plaintext wrap theme={null}
Use the OPENAI_API_KEY environment variable to set up the AI chat feature.
```
## Common variables
Variables prefixed with `NEXT_PUBLIC_` are exposed to the browser (client side). All others stay server-side only. Never put secrets in `NEXT_PUBLIC_` variables.
| Variable | Service |
| :------------------------------ | :--------------- |
| `NEXT_PUBLIC_SUPABASE_URL` | Supabase |
| `NEXT_PUBLIC_SUPABASE_ANON_KEY` | Supabase |
| `STRIPE_SECRET_KEY` | Stripe |
| `OPENAI_API_KEY` | OpenAI |
| `GEMINI_API_KEY` | Google Gemini |
| `ANTHROPIC_API_KEY` | Anthropic |
| `RESEND_API_KEY` | Resend |
| `NEXT_PUBLIC_GA_MEASUREMENT_ID` | Google Analytics |
| `NEXT_PUBLIC_ADSENSE_ID` | Google AdSense |
## What's next?
Import and integrate API endpoints that use your environment variables.
Connect services like Supabase, Stripe, and OpenAI with dedicated integrations.
Inject scripts and styles that reference your environment configuration.
Ask Rocket to use your variables when building features.