> ## Documentation Index
> Fetch the complete documentation index at: https://docs.rocket.new/llms.txt
> Use this file to discover all available pages before exploring further.
# Theme
> Change fonts, colors, logo, and images across your Rocket.new site from one panel - no code needed.
export const LlmsDirective = () =>
For the complete documentation index, see llms.txt.
For a lightweight markdown version of this page, append .md to the URL.
;
The Theme panel is where you control your site's visual identity. Update fonts, colors, logo, and images from one place - every change applies site-wide when you save.
Theme is only available for **Website** and **Landing page** build types, on the **web browser**. It is not available for other build types or in the Rocket mobile app.
Theme changes apply site-wide but do not overwrite element-level changes you have made with Visual edit. Both co-exist: Visual edits take precedence on the individual elements you changed, while Theme governs everything else.
## How to open Theme
In the preview toolbar, click **Edit**.
Select **Theme** from the dropdown.
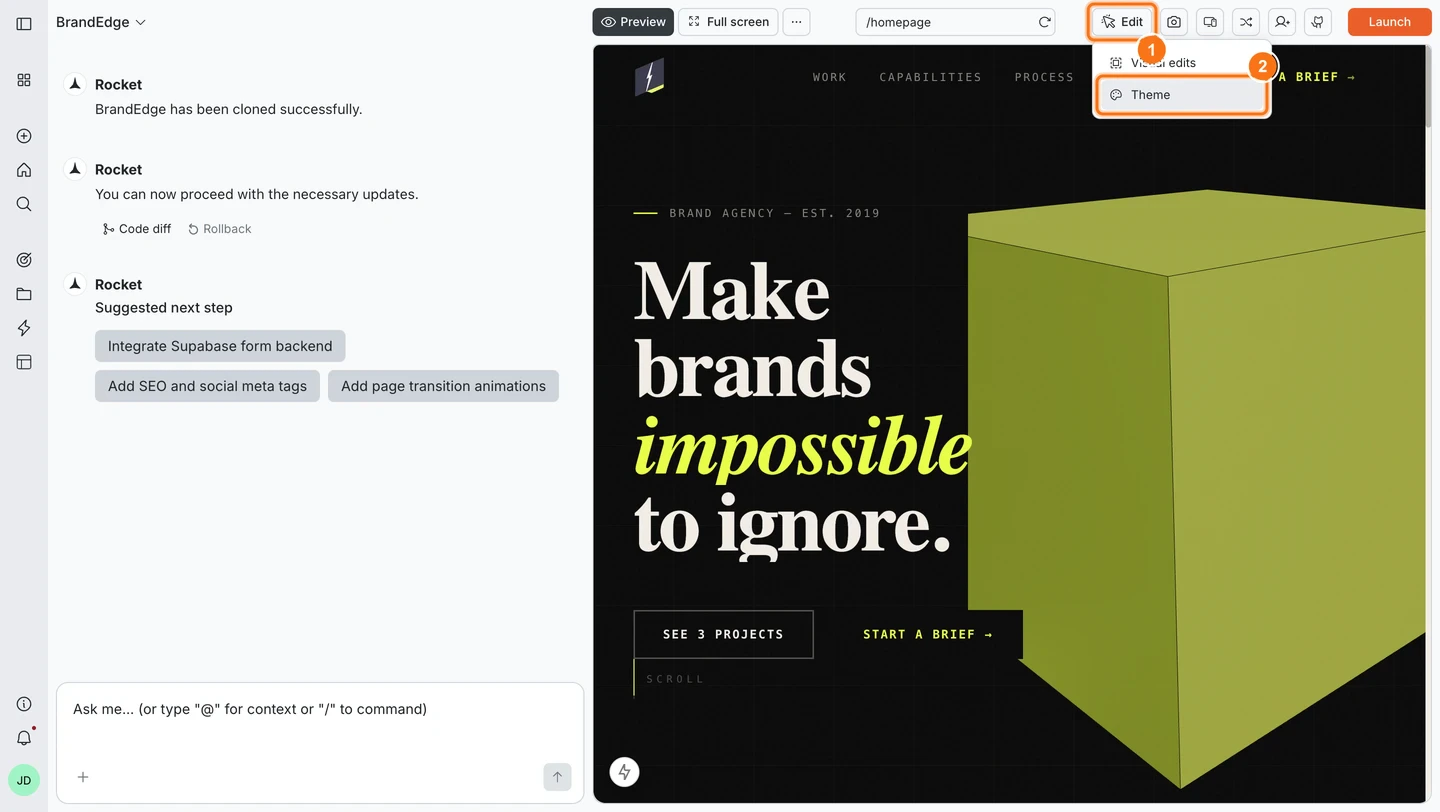 The Theme panel opens over the preview. Make changes across any section, then click **Save changes** at the bottom to apply everything at once.
## Fonts
Each typeface role in your site - primary, secondary, and any others - has its own dropdown.
The Theme panel opens over the preview. Make changes across any section, then click **Save changes** at the bottom to apply everything at once.
## Fonts
Each typeface role in your site - primary, secondary, and any others - has its own dropdown.
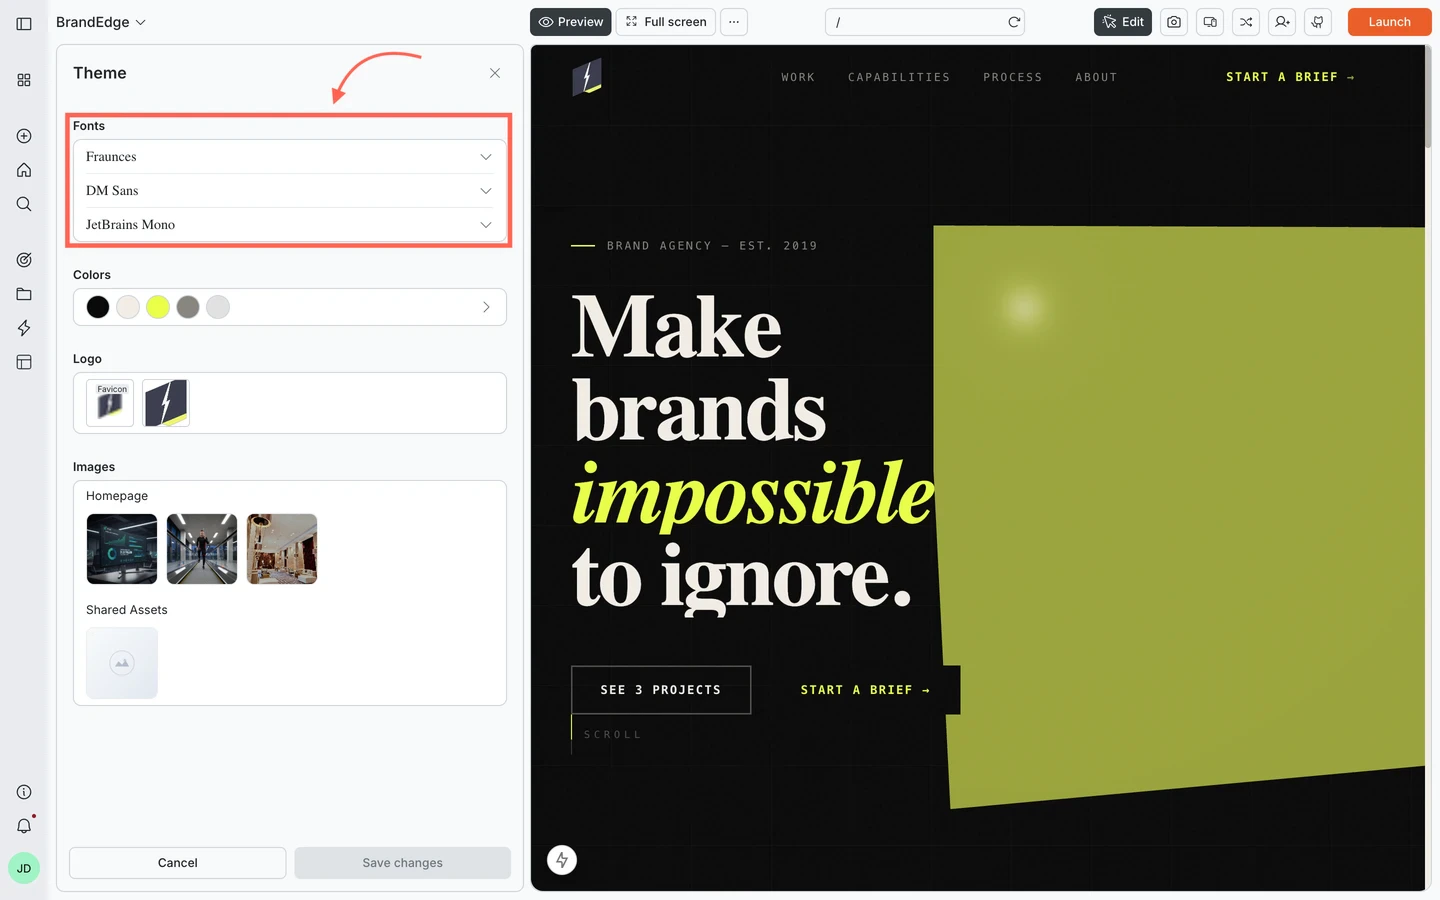 **To change a font:**
Open the dropdown for the role you want to update.
Pick a font from the list (Inter, Geist, DM Sans, Plus Jakarta Sans, Manrope, Space Grotesk, Poppins, Montserrat, Roboto, Outfit, and more).
Click **Save changes**.
Font changes are not applied to the preview until you save.
## Colors
The Colors section shows your palette as a row of swatches.
**To change a font:**
Open the dropdown for the role you want to update.
Pick a font from the list (Inter, Geist, DM Sans, Plus Jakarta Sans, Manrope, Space Grotesk, Poppins, Montserrat, Roboto, Outfit, and more).
Click **Save changes**.
Font changes are not applied to the preview until you save.
## Colors
The Colors section shows your palette as a row of swatches.
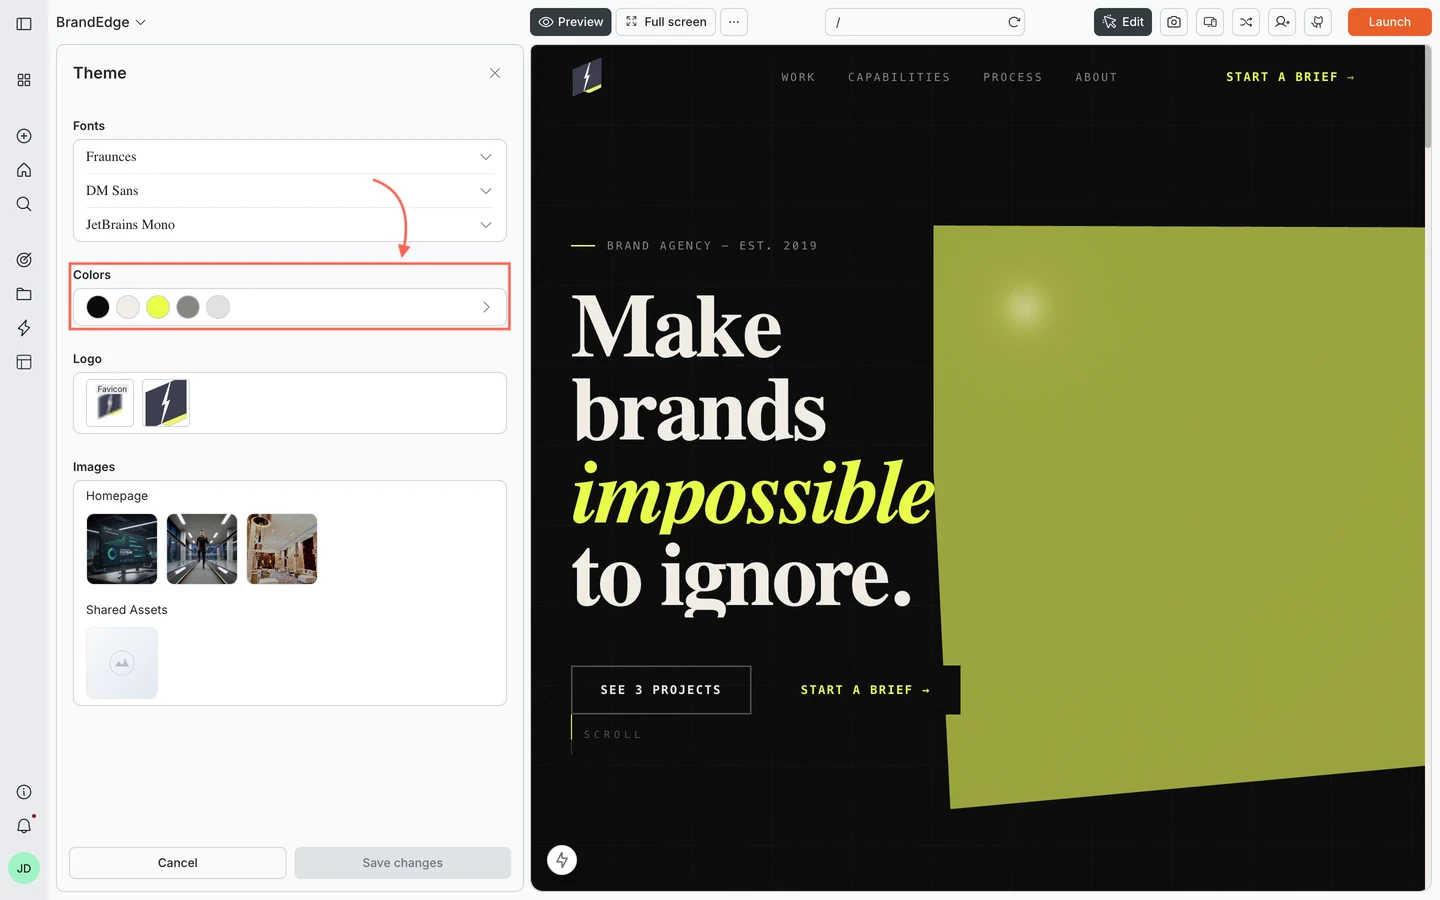 **To edit a color:**
Click the swatches row or the arrow to open the color editor.
Find the role you want to change - Background, Foreground, Primary, Secondary, Accent, Muted, Card, Border, Input, Focus Ring, and others are all listed individually.
Click the role and set it to any color.
Click **Save changes**.
Color changes update every page and component that uses those roles.
## Logo
The Logo section has upload slots for your site's brand marks.
**To edit a color:**
Click the swatches row or the arrow to open the color editor.
Find the role you want to change - Background, Foreground, Primary, Secondary, Accent, Muted, Card, Border, Input, Focus Ring, and others are all listed individually.
Click the role and set it to any color.
Click **Save changes**.
Color changes update every page and component that uses those roles.
## Logo
The Logo section has upload slots for your site's brand marks.
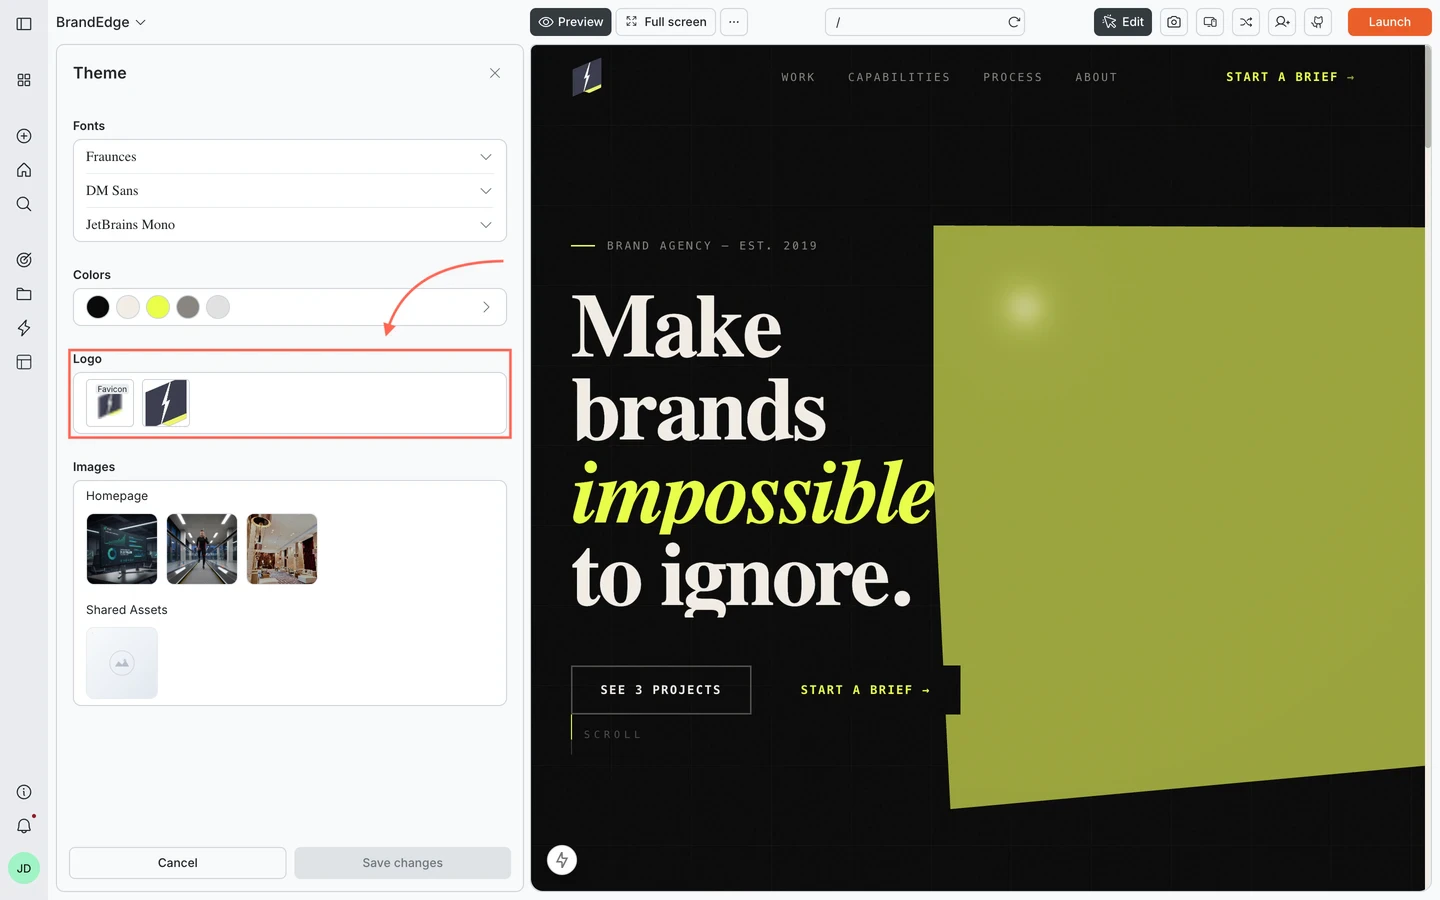 | Slot | What it is |
| :----------- | :--------------------------------------------------------------- |
| **Favicon** | The small icon shown in browser tabs and bookmarks |
| **App logo** | Your primary logo, used in the navbar and other brand placements |
**To upload:**
Click the slot you want to fill.
Select a file from your device.
Click **Save changes**.
Transparent PNGs work best for logos. For the favicon, use a square image - ICO and PNG formats are both supported.
## Images
The Images section shows every image in your site, organized by page.
| Slot | What it is |
| :----------- | :--------------------------------------------------------------- |
| **Favicon** | The small icon shown in browser tabs and bookmarks |
| **App logo** | Your primary logo, used in the navbar and other brand placements |
**To upload:**
Click the slot you want to fill.
Select a file from your device.
Click **Save changes**.
Transparent PNGs work best for logos. For the favicon, use a square image - ICO and PNG formats are both supported.
## Images
The Images section shows every image in your site, organized by page.
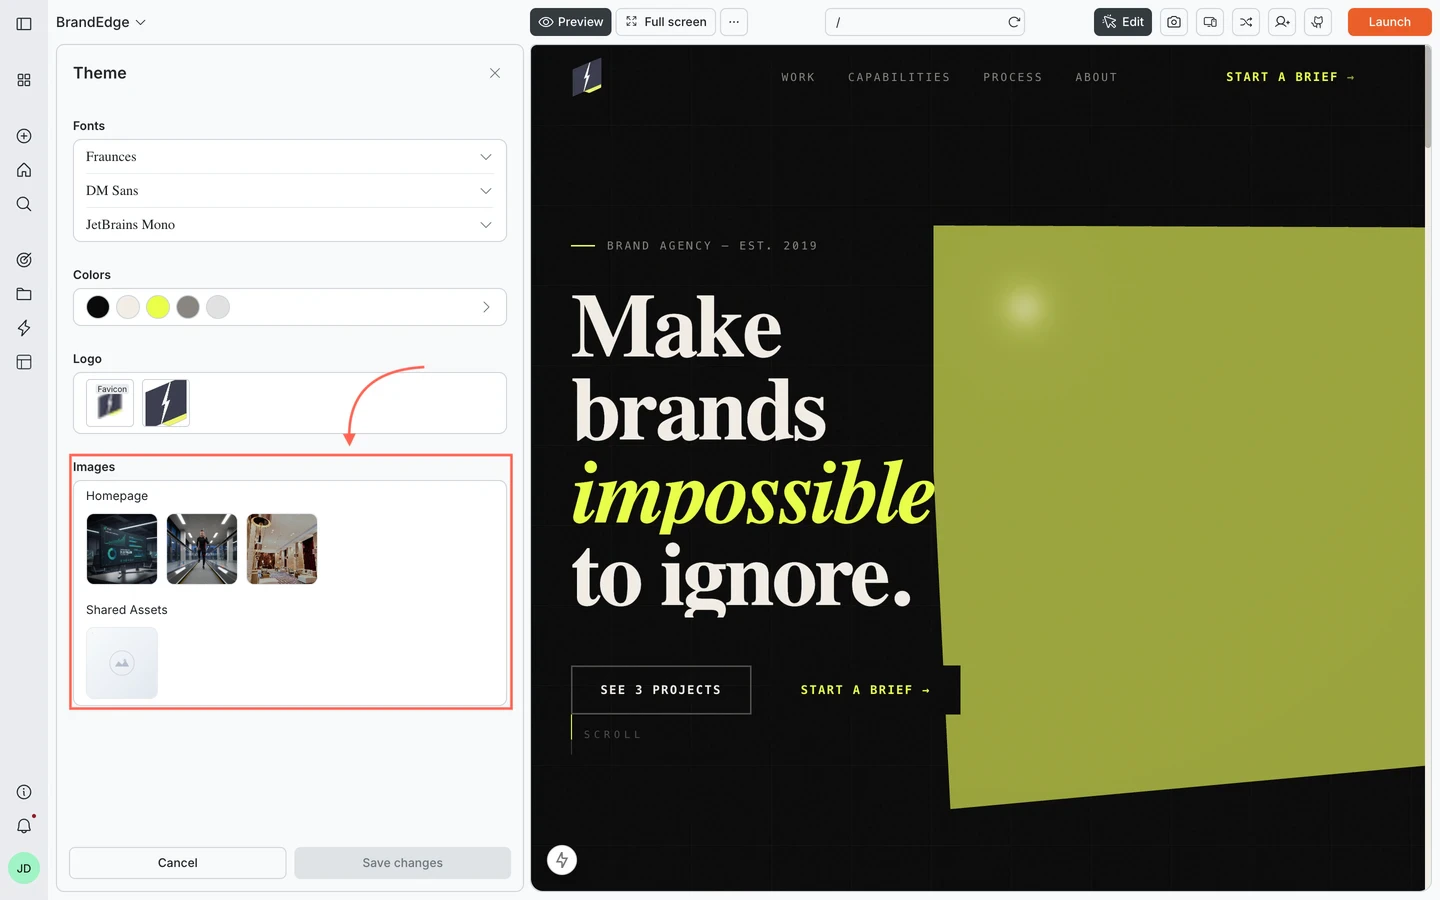 * **Page groups** - images listed under a page name only appear on that page
* **Shared Assets** - images used across multiple pages; replacing one here updates it everywhere
Click any thumbnail to replace it with a new file.
## What's next?
Click any element to change its text, style, or spacing directly in the preview.
Use slash commands like /Change App Theme and /Update App Logo for AI-driven brand changes.
Describe broader design changes in chat and Rocket applies them across your site.
Browse and edit your task source files directly.
* **Page groups** - images listed under a page name only appear on that page
* **Shared Assets** - images used across multiple pages; replacing one here updates it everywhere
Click any thumbnail to replace it with a new file.
## What's next?
Click any element to change its text, style, or spacing directly in the preview.
Use slash commands like /Change App Theme and /Update App Logo for AI-driven brand changes.
Describe broader design changes in chat and Rocket applies them across your site.
Browse and edit your task source files directly.