> ## Documentation Index
> Fetch the complete documentation index at: https://docs.rocket.new/llms.txt
> Use this file to discover all available pages before exploring further.

# Project

> Invite teammates to a Rocket.new project. Assign editor or viewer roles, and remove access when collaborators no longer need the project.

export const LlmsDirective = () => <blockquote className="llms-directive">
    For the complete documentation index, see <a href="/llms.txt">llms.txt</a>.
    For a lightweight markdown version of this page, append .md to the URL.
  </blockquote>;

<LlmsDirective />

Project level collaboration lets you invite teammates directly into a project. Collaborators are added to the workspace so they can create new threads and other work according to their role, and they can access shared context and connected services within that project. Access to existing tasks depends on the **Grant access** checkbox when you invite them. Use this for day to day teamwork on a specific initiative: a product launch, a research sprint, or a website redesign.

<Note>
  Inviting a collaborator adds them to the workspace. They get access to all existing tasks in the project **only if** the **Grant access** checkbox is ticked. If it is unticked, they join the project without seeing existing tasks unless you share those tasks individually. Tasks created after the invitation are never shared automatically. Share them at the [task level](/getting-started/collaboration/task) if needed.
</Note>

## Steps

<Steps>
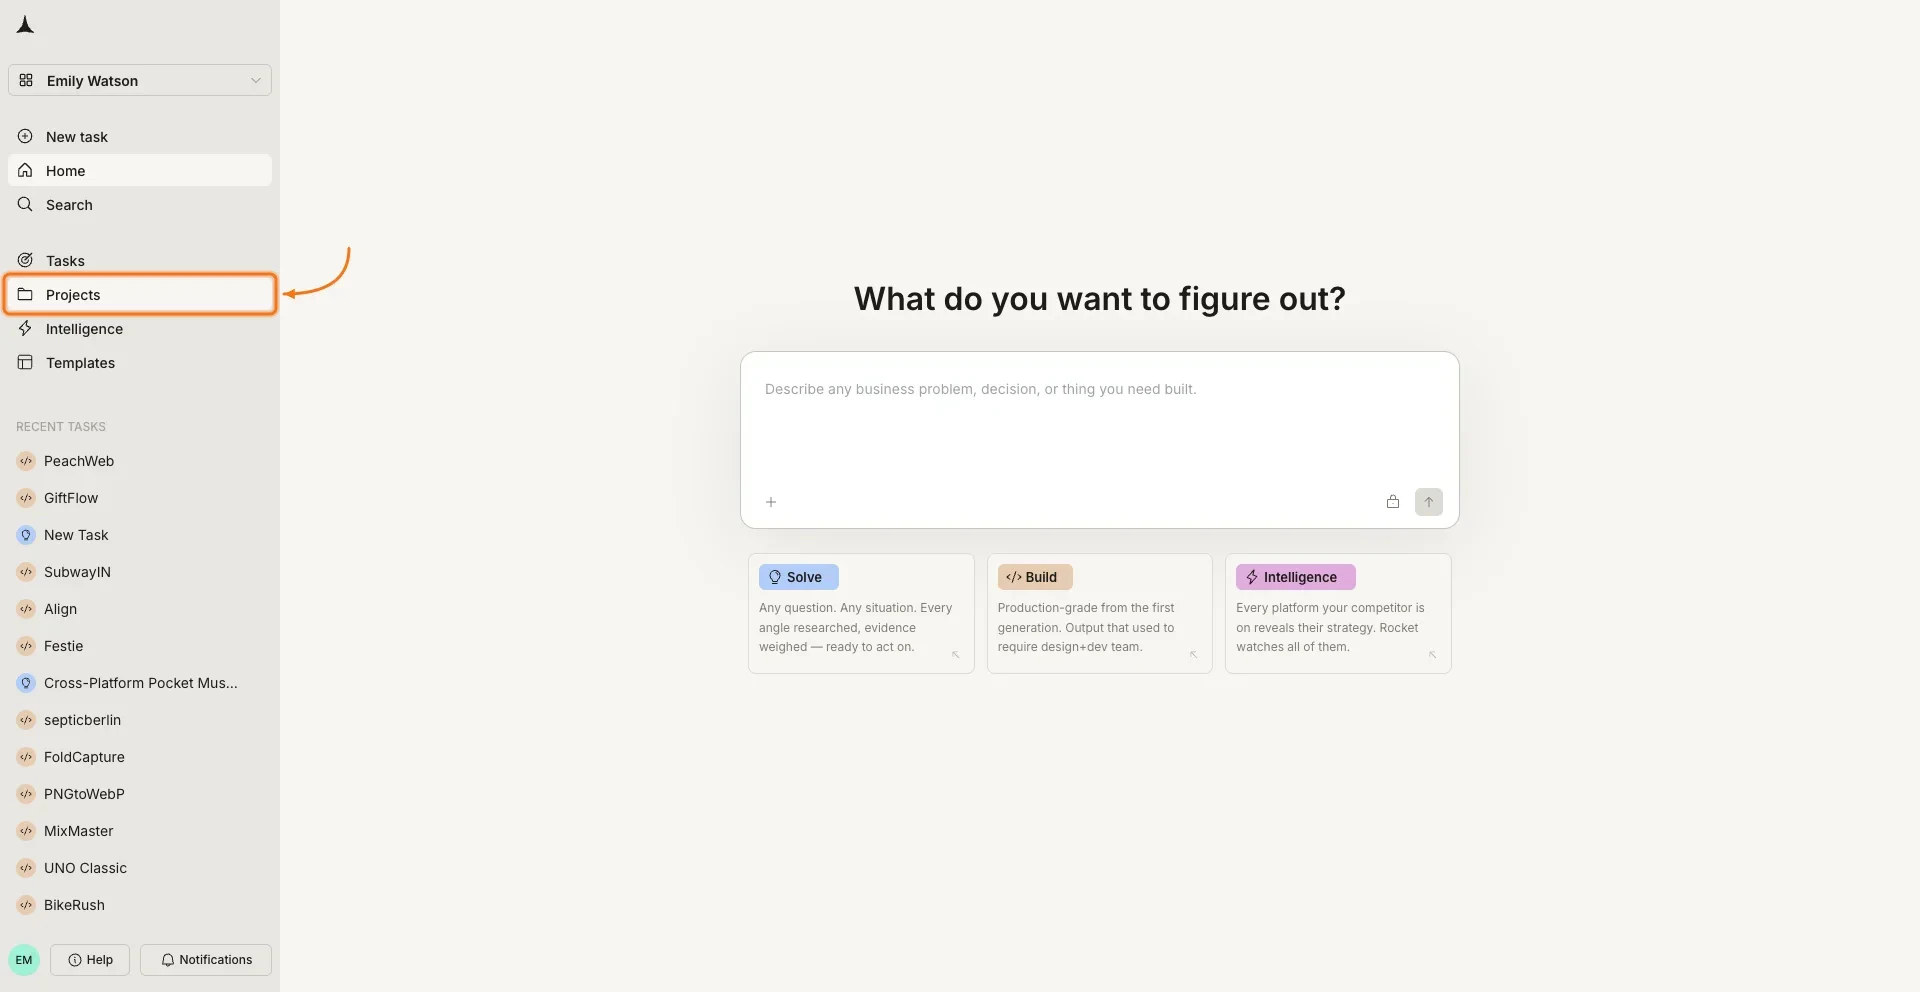
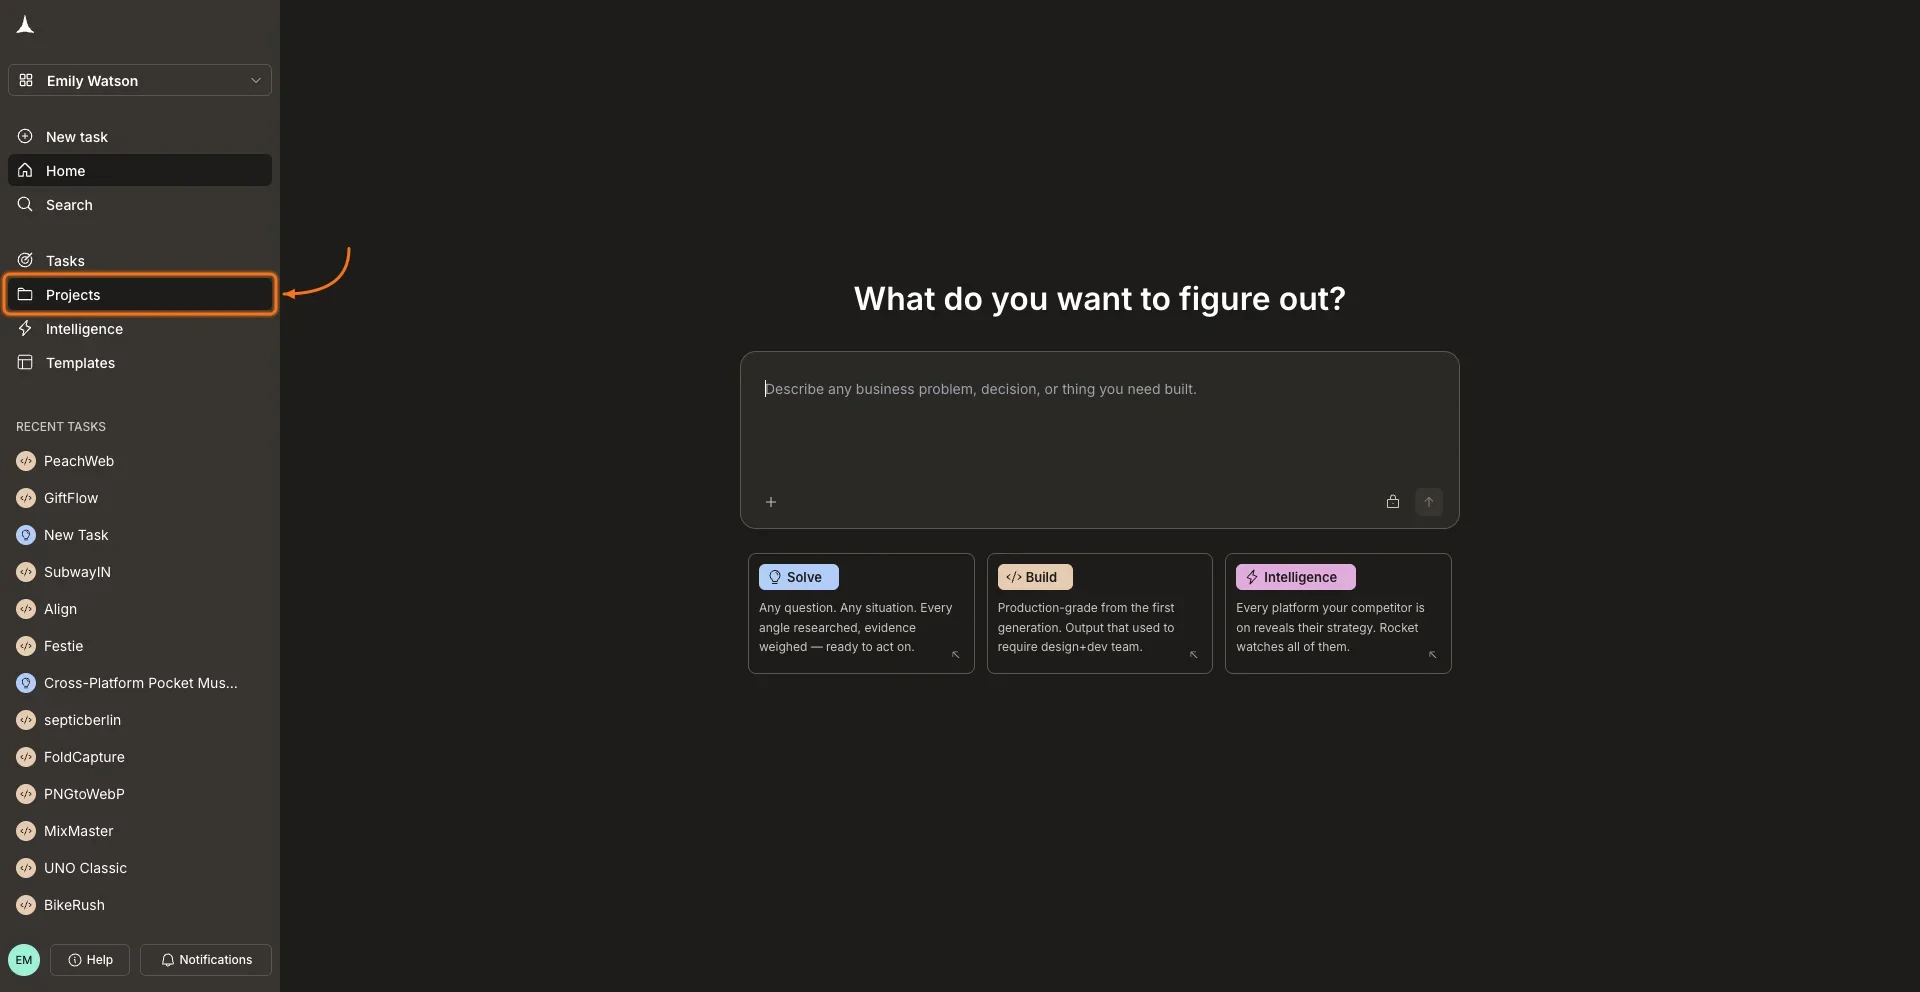
  <Step title="Go to Projects">
    In the sidebar, click **Projects**.

    <Frame caption="Click Projects in the sidebar">
      <img src="https://mintcdn.com/dhiwisepvtltd-5e04e6a4/jIji0v7uMW1wOtfn/images/getting-started/collaboration/project/projects-nav-light.webp?fit=max&auto=format&n=jIji0v7uMW1wOtfn&q=85&s=104165cb043a6b2eb555d5ee14d54588" alt="Sidebar with Projects highlighted." className="theme-image light-image" width="1920" height="992" data-path="images/getting-started/collaboration/project/projects-nav-light.webp" />

      <img src="https://mintcdn.com/dhiwisepvtltd-5e04e6a4/jIji0v7uMW1wOtfn/images/getting-started/collaboration/project/projects-nav-dark.webp?fit=max&auto=format&n=jIji0v7uMW1wOtfn&q=85&s=258bfe6b4e3692ea2f95d9bfc8d1b1e8" alt="Sidebar with Projects highlighted." className="theme-image dark-image" width="1920" height="992" data-path="images/getting-started/collaboration/project/projects-nav-dark.webp" />
    </Frame>
  </Step>

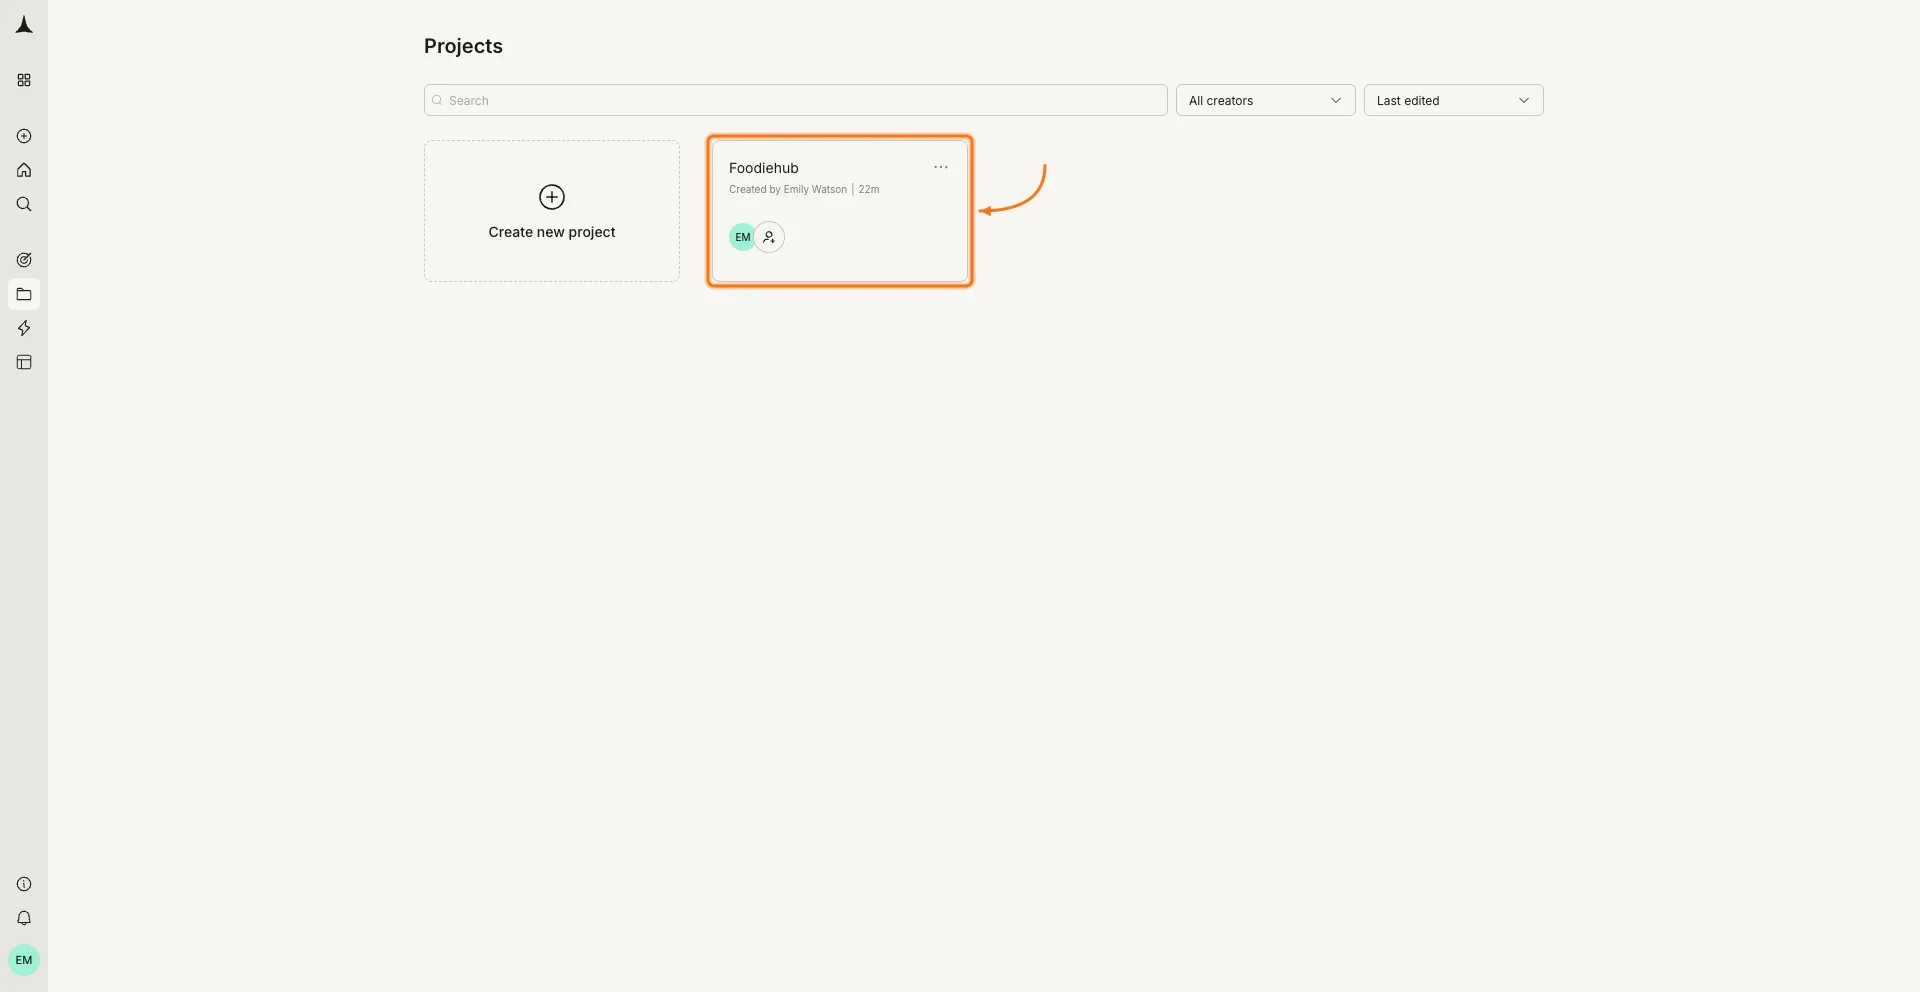
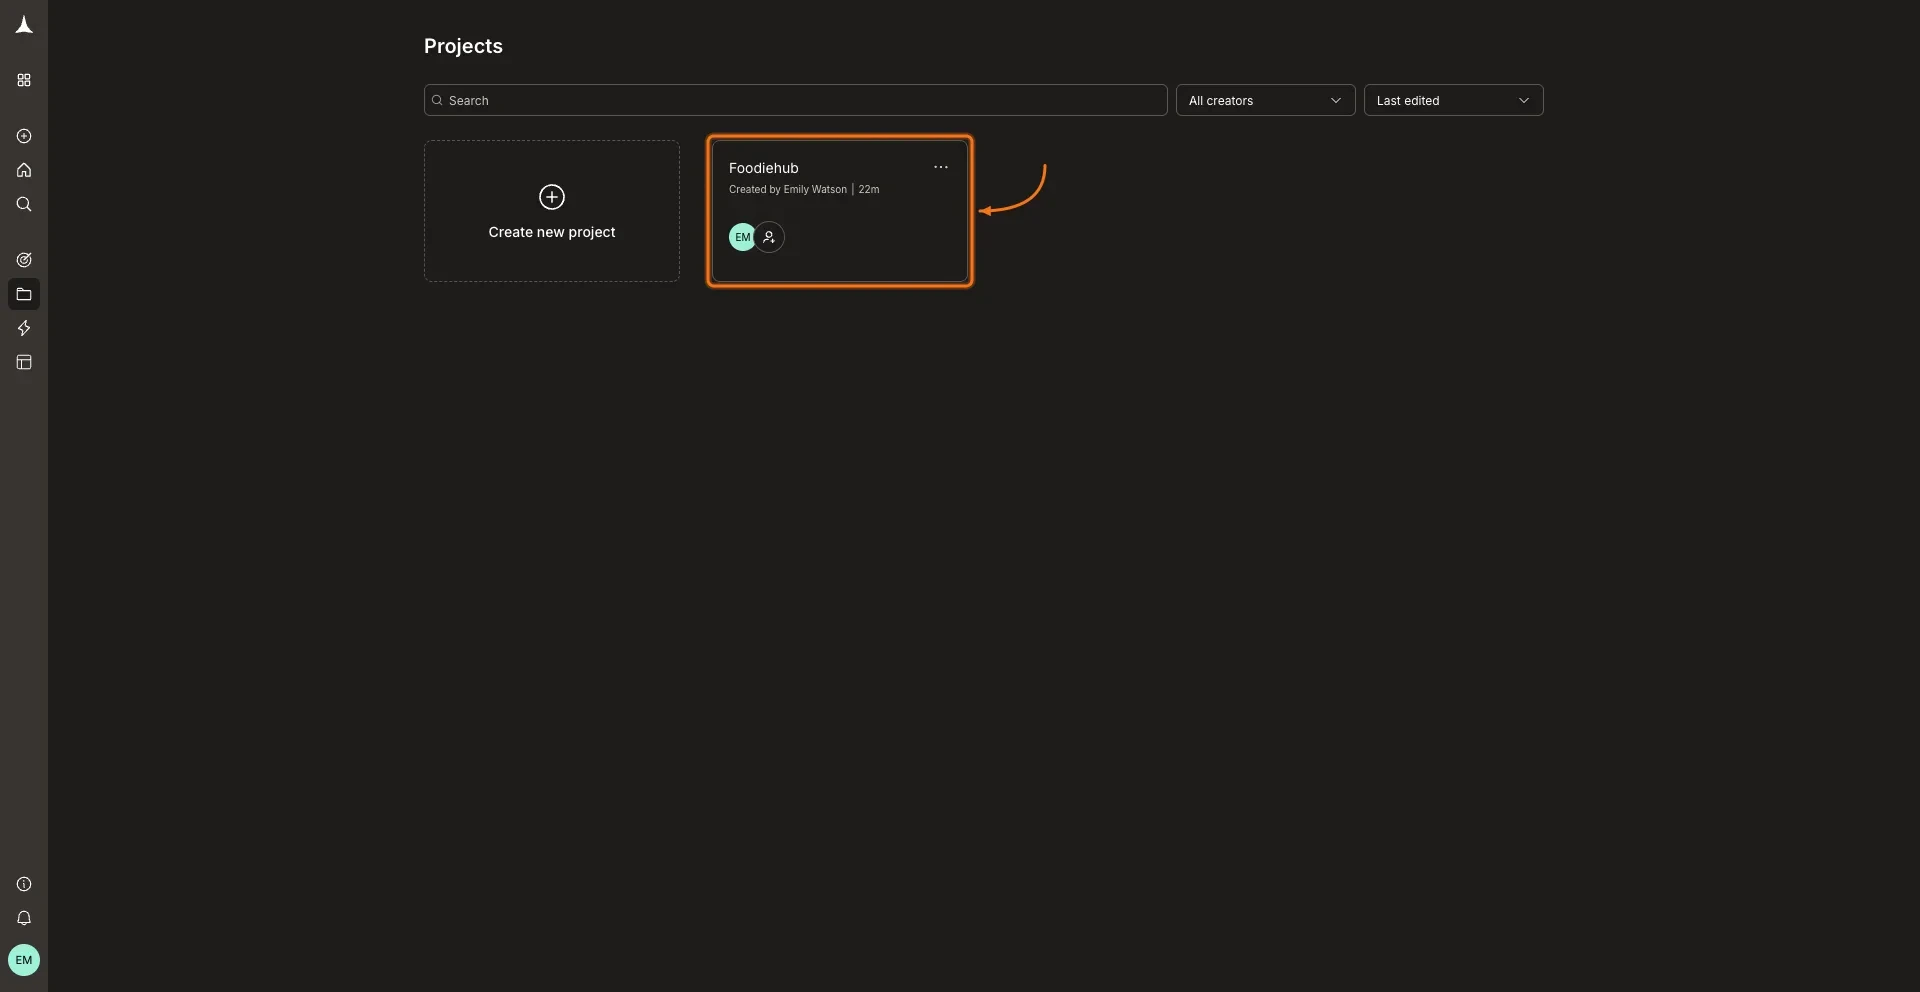
  <Step title="Open your project">
    Click the project you want to share.

    <Frame caption="Select the project">
      <img src="https://mintcdn.com/dhiwisepvtltd-5e04e6a4/jIji0v7uMW1wOtfn/images/getting-started/collaboration/project/project-select-light.webp?fit=max&auto=format&n=jIji0v7uMW1wOtfn&q=85&s=1b48cc482c0e775c07244befcd1c4ee1" alt="Projects list with a project card highlighted." className="theme-image light-image" width="1920" height="992" data-path="images/getting-started/collaboration/project/project-select-light.webp" />

      <img src="https://mintcdn.com/dhiwisepvtltd-5e04e6a4/jIji0v7uMW1wOtfn/images/getting-started/collaboration/project/project-select-dark.webp?fit=max&auto=format&n=jIji0v7uMW1wOtfn&q=85&s=a340484e9022f5de96a67b4e23212988" alt="Projects list with a project card highlighted." className="theme-image dark-image" width="1920" height="992" data-path="images/getting-started/collaboration/project/project-select-dark.webp" />
    </Frame>
  </Step>

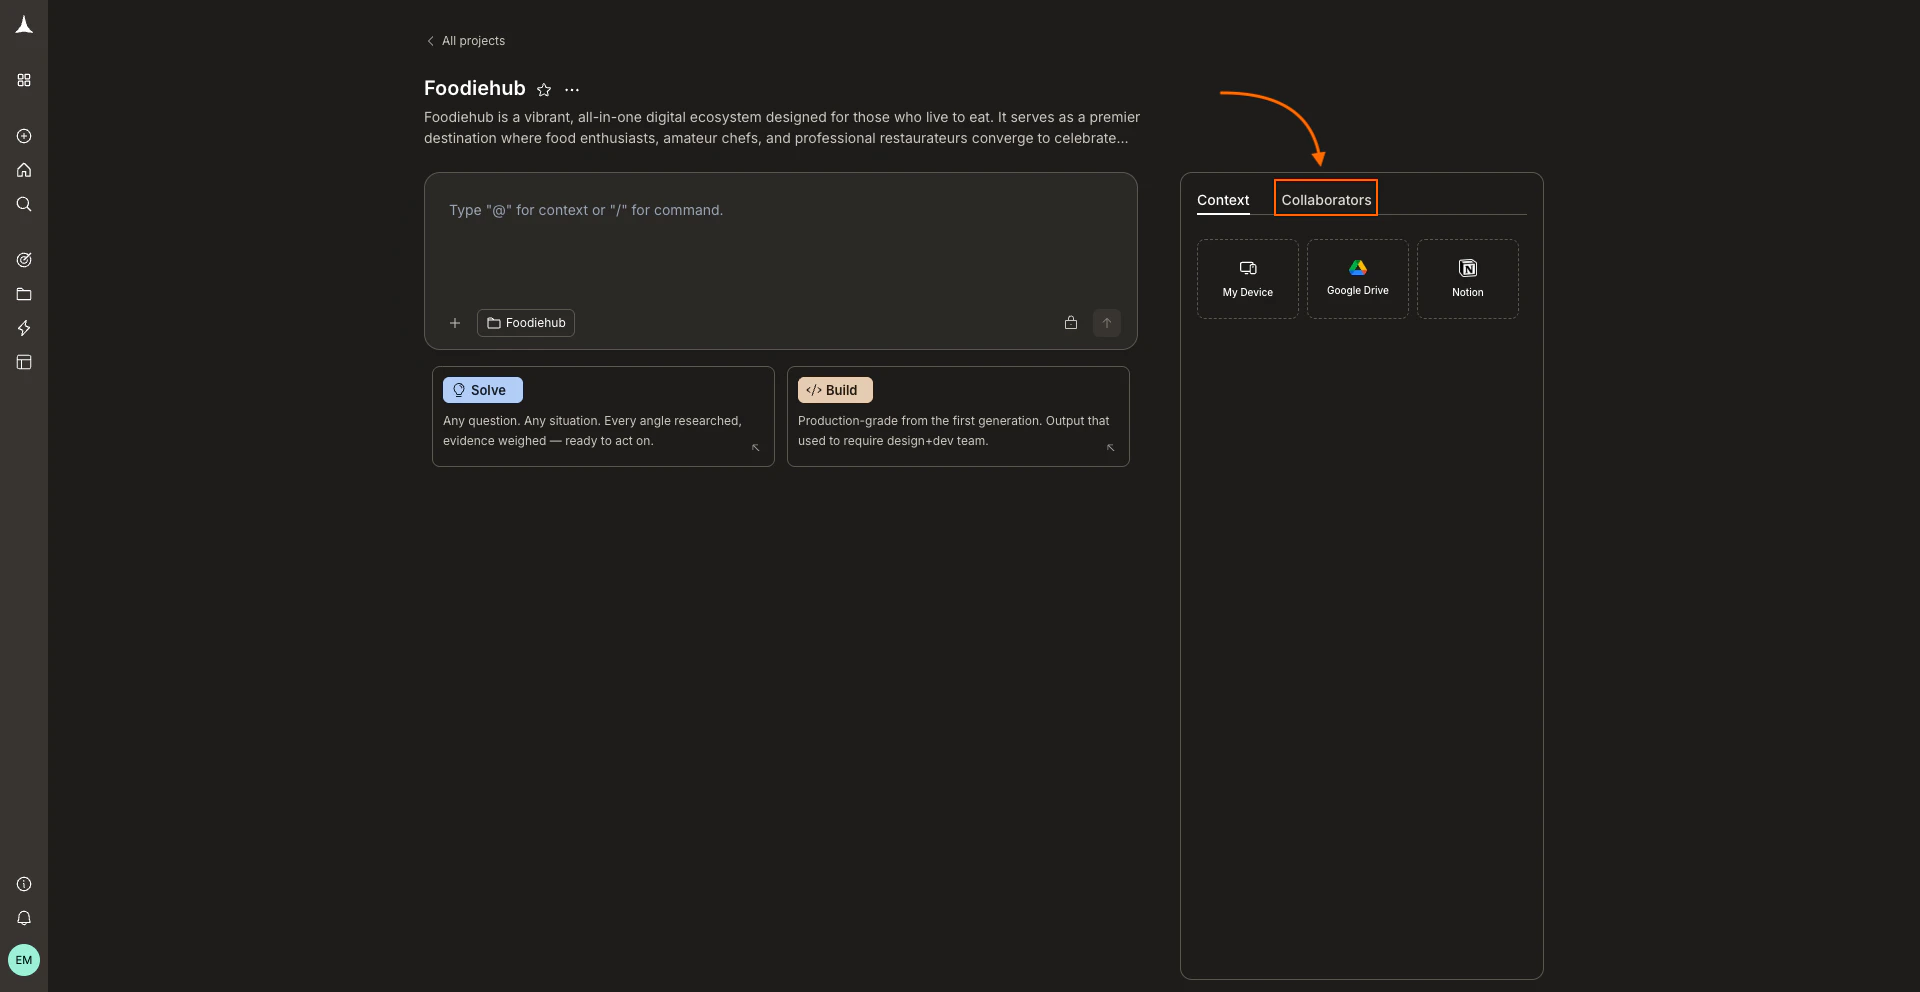
  <Step title="Open the Collaborators tab">
    In the right panel, click the **Collaborators** tab.
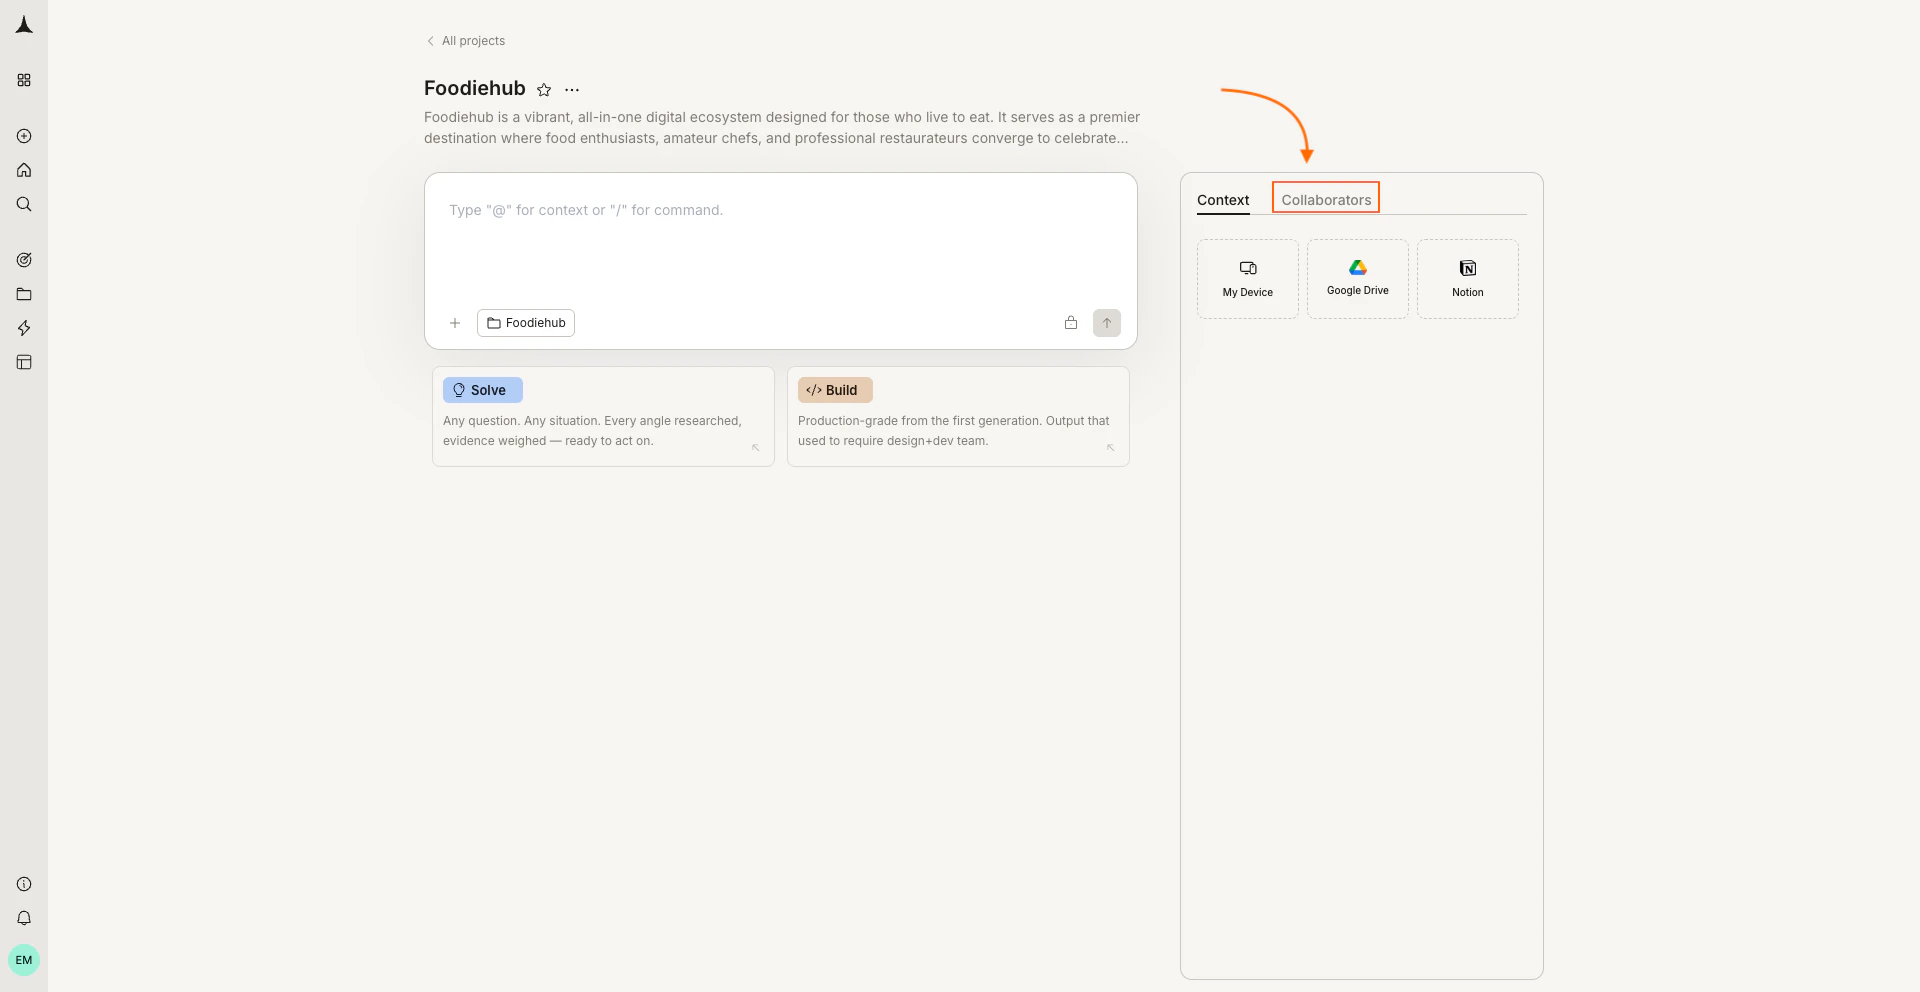
    <Frame caption="Click the Collaborators tab">
      <img src="https://mintcdn.com/dhiwisepvtltd-5e04e6a4/jIji0v7uMW1wOtfn/images/getting-started/collaboration/project/collaborators-tab-light.webp?fit=max&auto=format&n=jIji0v7uMW1wOtfn&q=85&s=b7425979f5a0f8ee3808236f1fe9957d" alt="Project page with the Collaborators tab highlighted." className="theme-image light-image" width="1920" height="992" data-path="images/getting-started/collaboration/project/collaborators-tab-light.webp" />

      <img src="https://mintcdn.com/dhiwisepvtltd-5e04e6a4/jIji0v7uMW1wOtfn/images/getting-started/collaboration/project/collaborators-tab-dark.webp?fit=max&auto=format&n=jIji0v7uMW1wOtfn&q=85&s=eb2d0cff76db720c117fb1647afc9c2a" alt="Project page with the Collaborators tab highlighted." className="theme-image dark-image" width="1920" height="992" data-path="images/getting-started/collaboration/project/collaborators-tab-dark.webp" />
    </Frame>
  </Step>

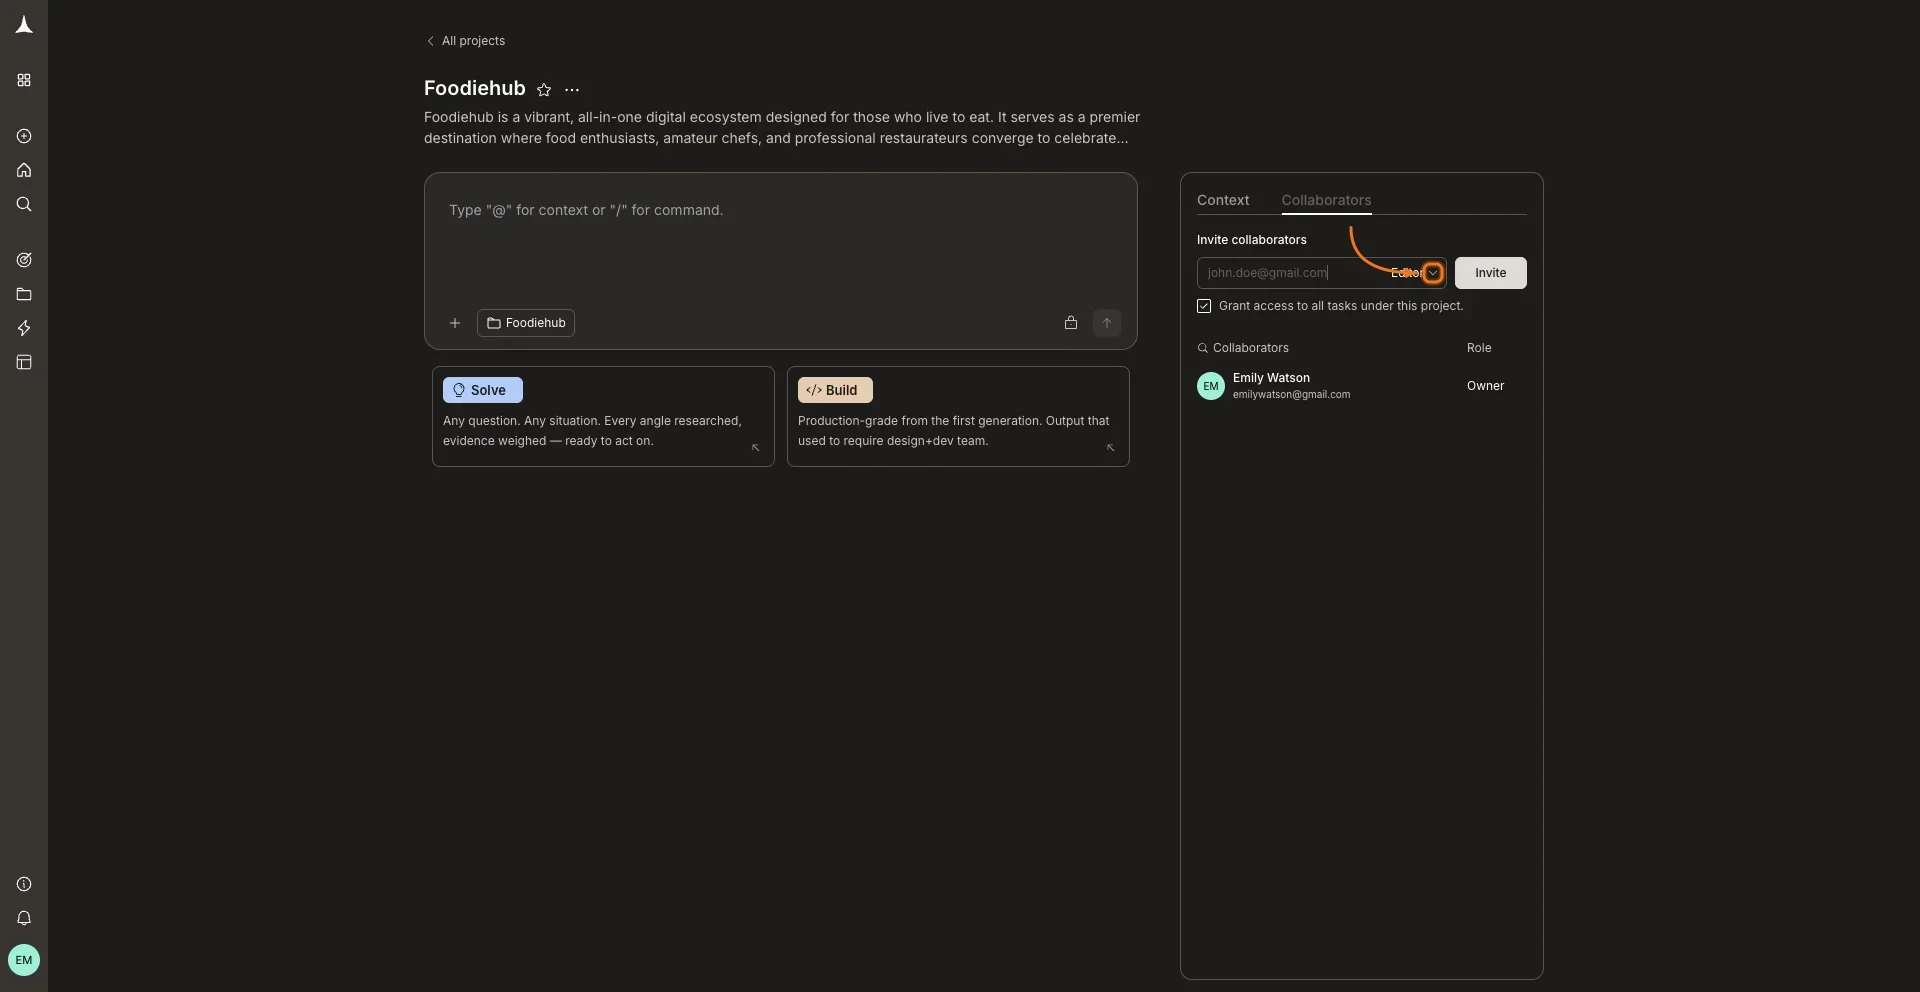
  <Step title="Enter an email and choose a role">
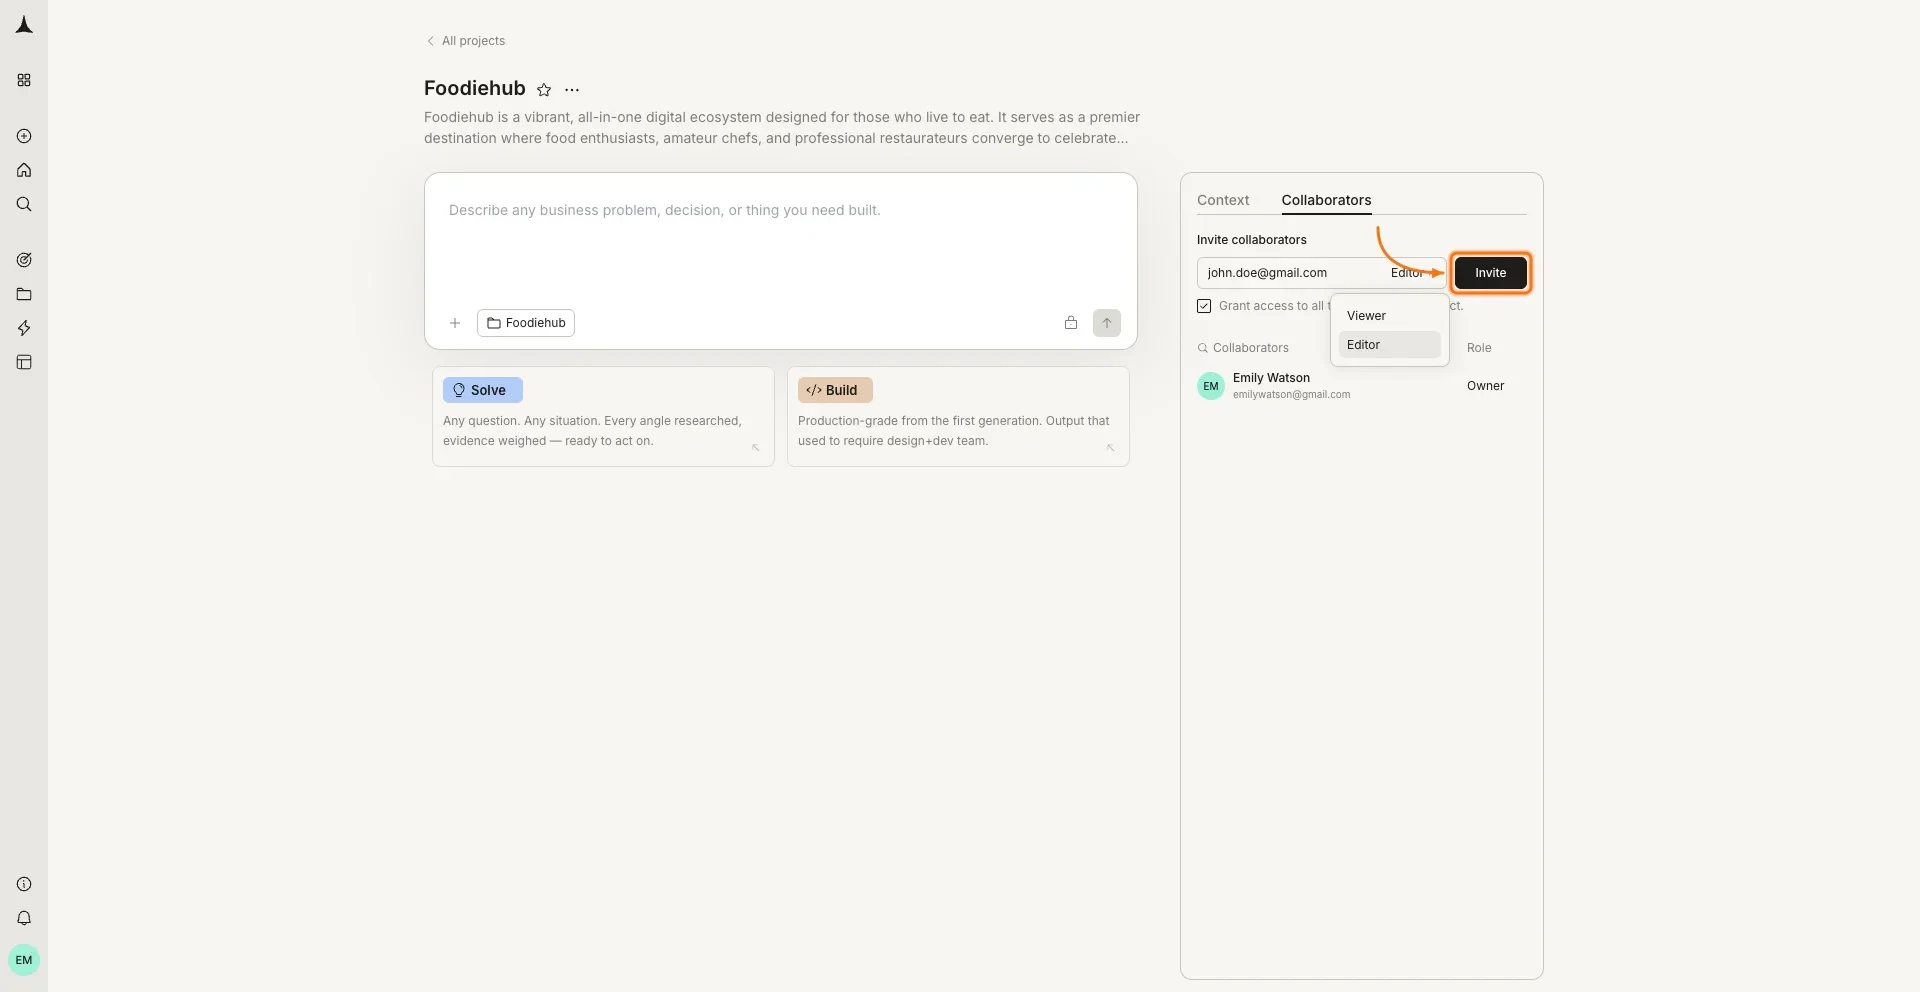
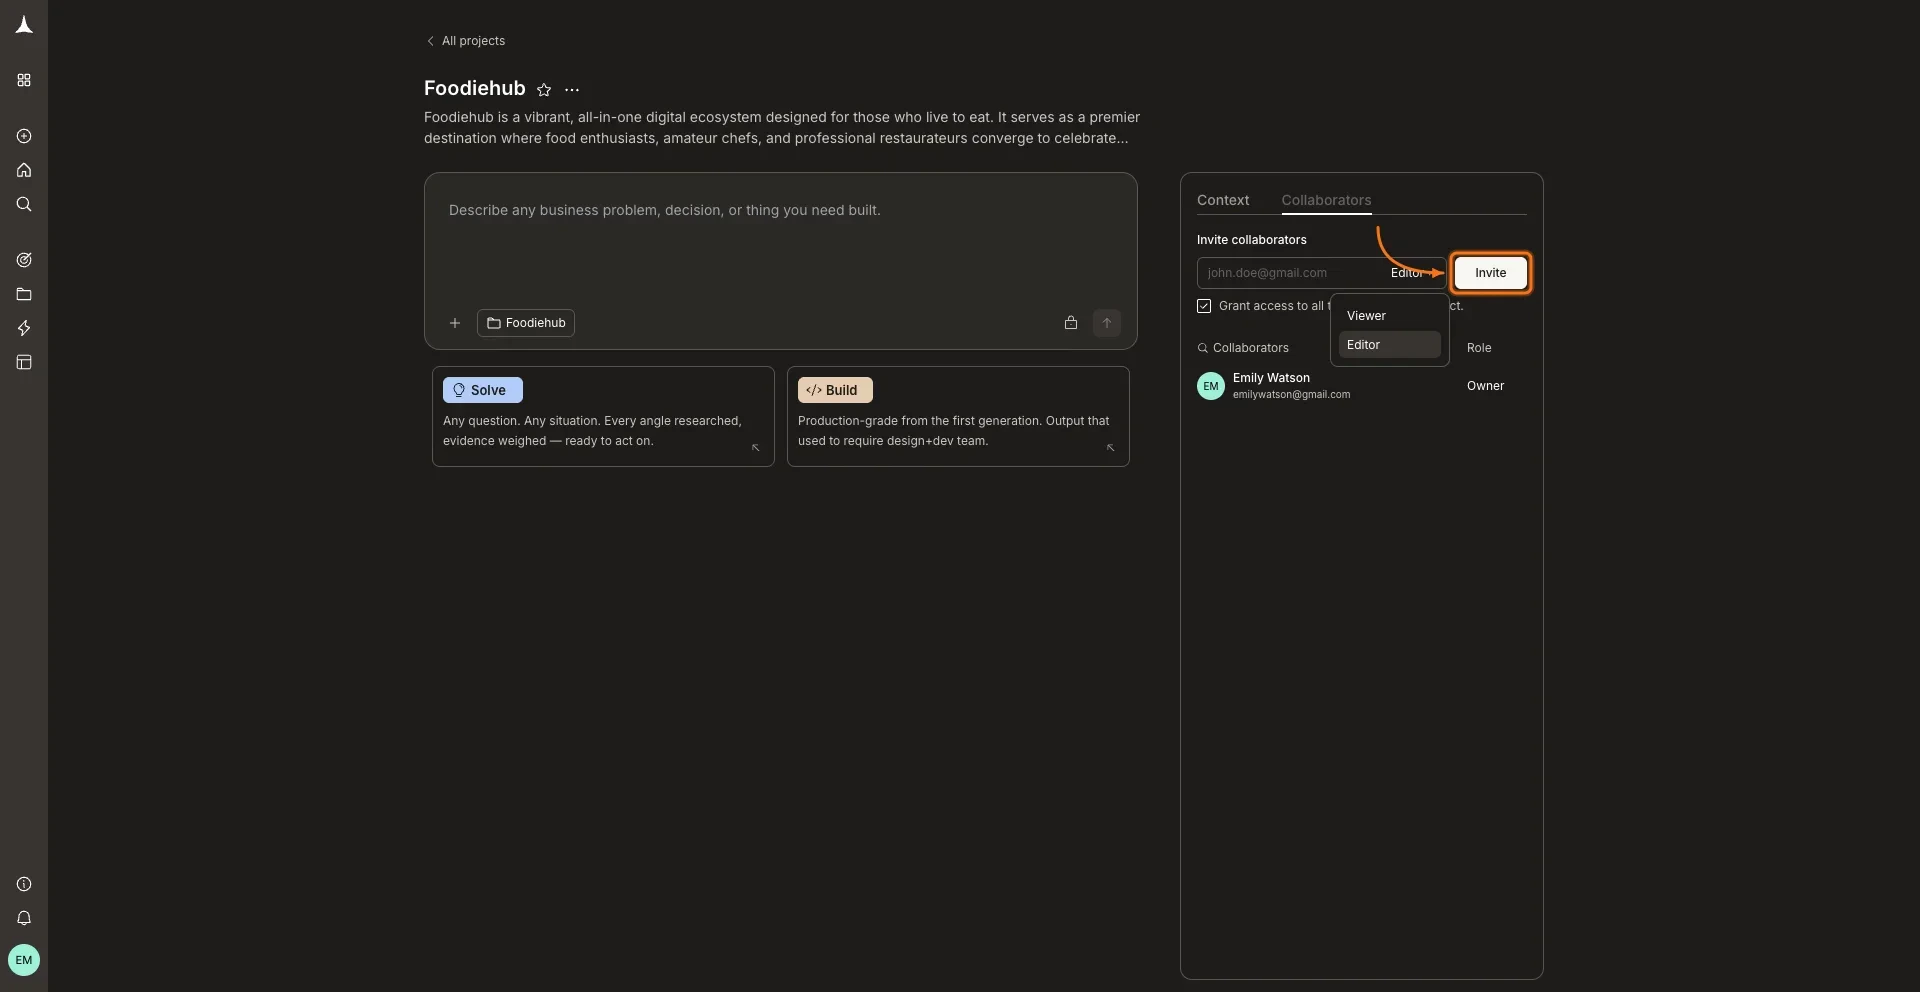
    Type the collaborator's email address and select a role (**Editor** or **Viewer**) from the dropdown. Only the project owner can invite collaborators. Editors who do not own the project can never invite anyone to it.
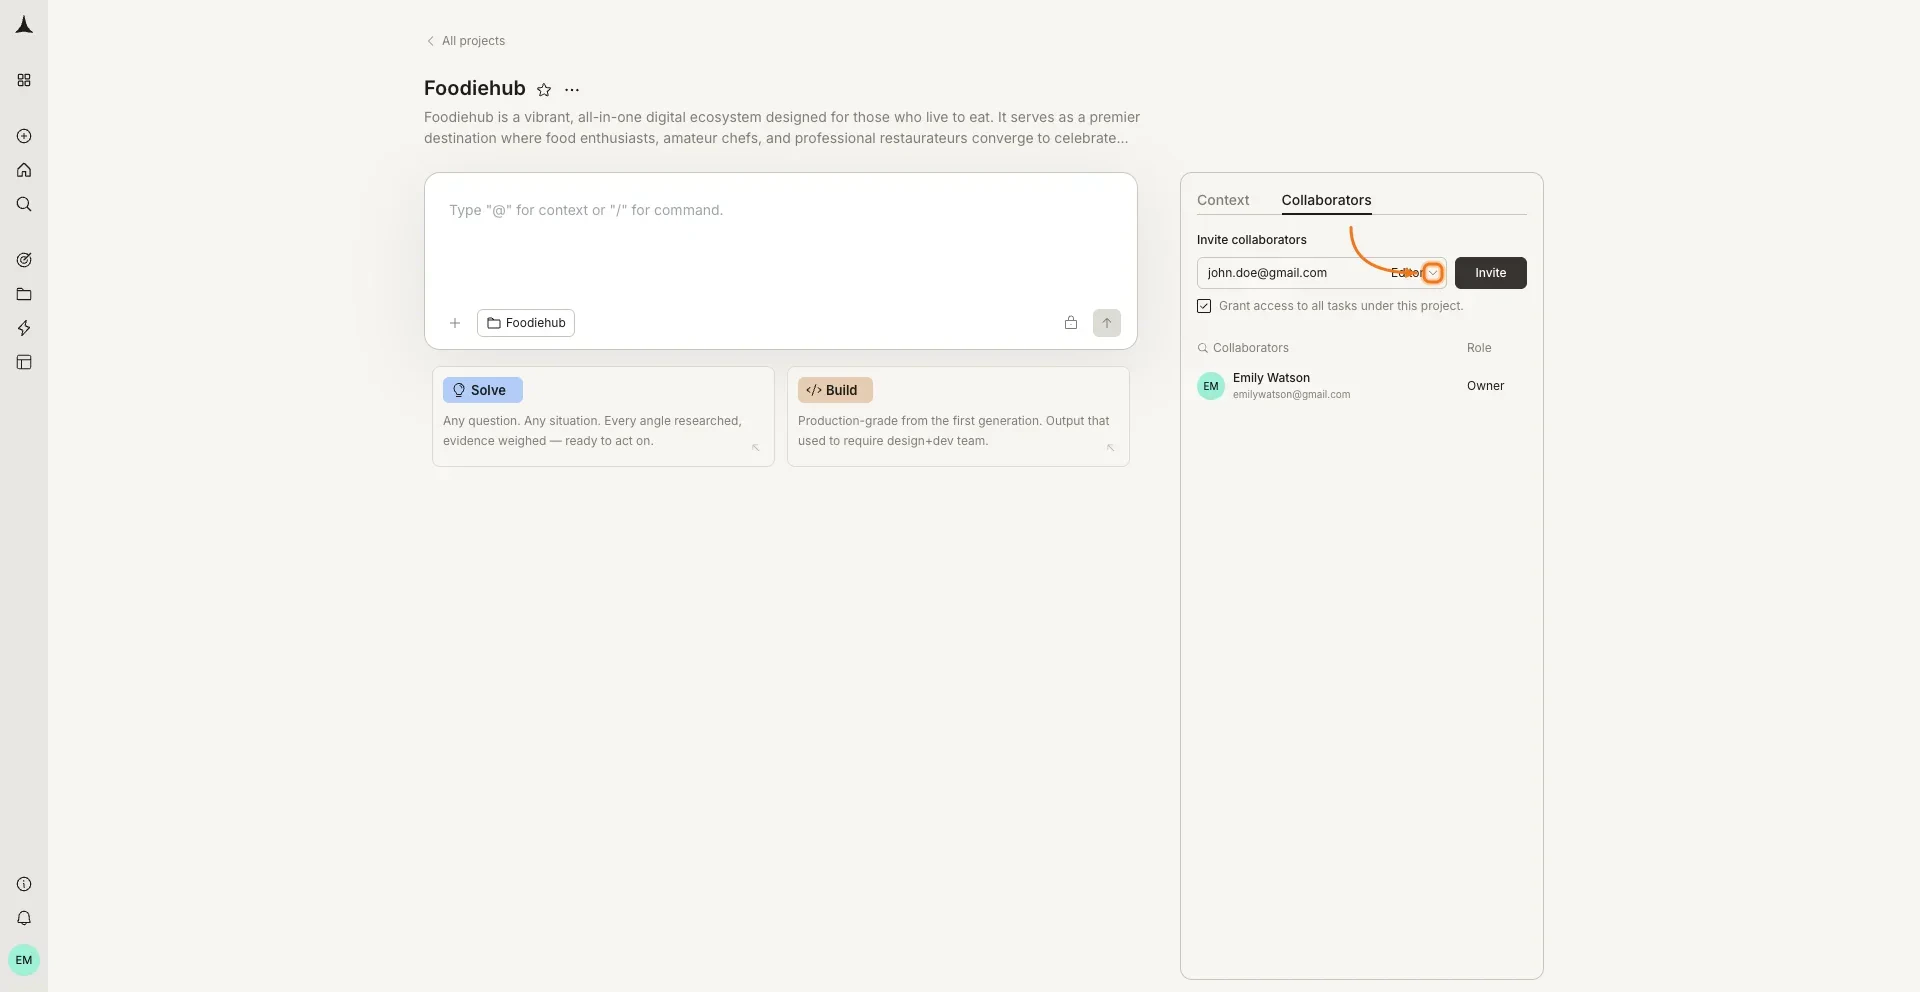
    <Frame caption="Enter email and select a role">
      <img src="https://mintcdn.com/dhiwisepvtltd-5e04e6a4/jIji0v7uMW1wOtfn/images/getting-started/collaboration/project/invite-email-role-light.webp?fit=max&auto=format&n=jIji0v7uMW1wOtfn&q=85&s=9a232ec6e76a73f4efef63292cad3bda" alt="Invite collaborators panel with email field and role dropdown." className="theme-image light-image" width="1920" height="992" data-path="images/getting-started/collaboration/project/invite-email-role-light.webp" />

      <img src="https://mintcdn.com/dhiwisepvtltd-5e04e6a4/jIji0v7uMW1wOtfn/images/getting-started/collaboration/project/invite-email-role-dark.webp?fit=max&auto=format&n=jIji0v7uMW1wOtfn&q=85&s=baa732ee6b5cd20972f1123cc4ab37c7" alt="Invite collaborators panel with email field and role dropdown." className="theme-image dark-image" width="1920" height="992" data-path="images/getting-started/collaboration/project/invite-email-role-dark.webp" />
    </Frame>

    <Frame caption="Role options: Viewer or Editor">
      <img src="https://mintcdn.com/dhiwisepvtltd-5e04e6a4/jIji0v7uMW1wOtfn/images/getting-started/collaboration/project/invite-role-dropdown-light.webp?fit=max&auto=format&n=jIji0v7uMW1wOtfn&q=85&s=1803856bda6f0b8371be85520cee77de" alt="Role dropdown showing Viewer and Editor options." className="theme-image light-image" width="1920" height="992" data-path="images/getting-started/collaboration/project/invite-role-dropdown-light.webp" />

      <img src="https://mintcdn.com/dhiwisepvtltd-5e04e6a4/jIji0v7uMW1wOtfn/images/getting-started/collaboration/project/invite-role-dropdown-dark.webp?fit=max&auto=format&n=jIji0v7uMW1wOtfn&q=85&s=6a6e19e40d2fddc82fa7a30100860067" alt="Role dropdown showing Viewer and Editor options." className="theme-image dark-image" width="1920" height="992" data-path="images/getting-started/collaboration/project/invite-role-dropdown-dark.webp" />
    </Frame>
  </Step>

  <Step title="Grant access to existing tasks (optional)">
    Before clicking **Invite**, use the **Grant access** checkbox to decide whether to share existing tasks:

    * **Ticked:** the collaborator gets access to all tasks that already exist in this project.
    * **Unticked:** the collaborator joins the project but starts with an empty view. You can share tasks with them individually at the [task level](/getting-started/collaboration/task).

    Either way, tasks created after the invitation are not shared automatically. Those always need to be shared separately.

    Click **Invite** when ready.
  </Step>

  <Step title="Invitation sent">
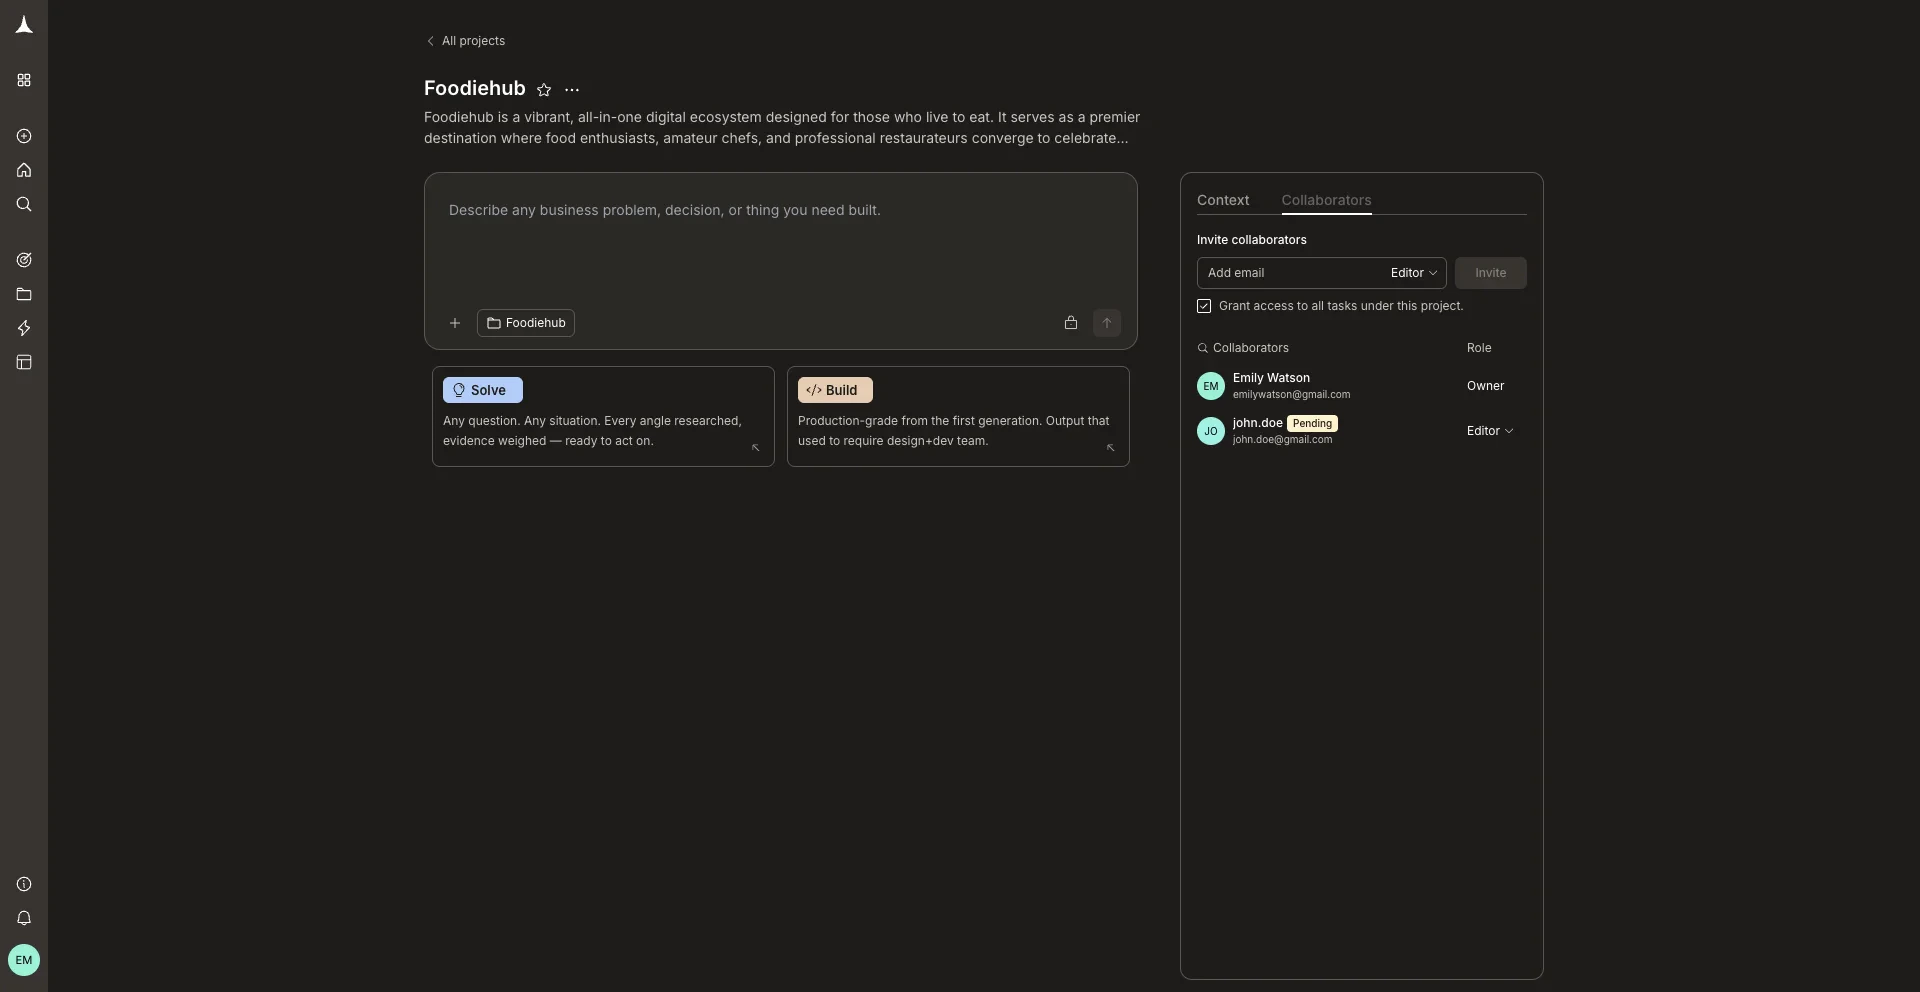
    The collaborator appears in the list with a **Pending** badge until they accept. They will receive an email with a link to join. You can also copy the invite link directly using the copy icon next to their name. Invitation requests can also be accepted or rejected through [notifications](/getting-started/account/notifications), in addition to email and the invitation link.
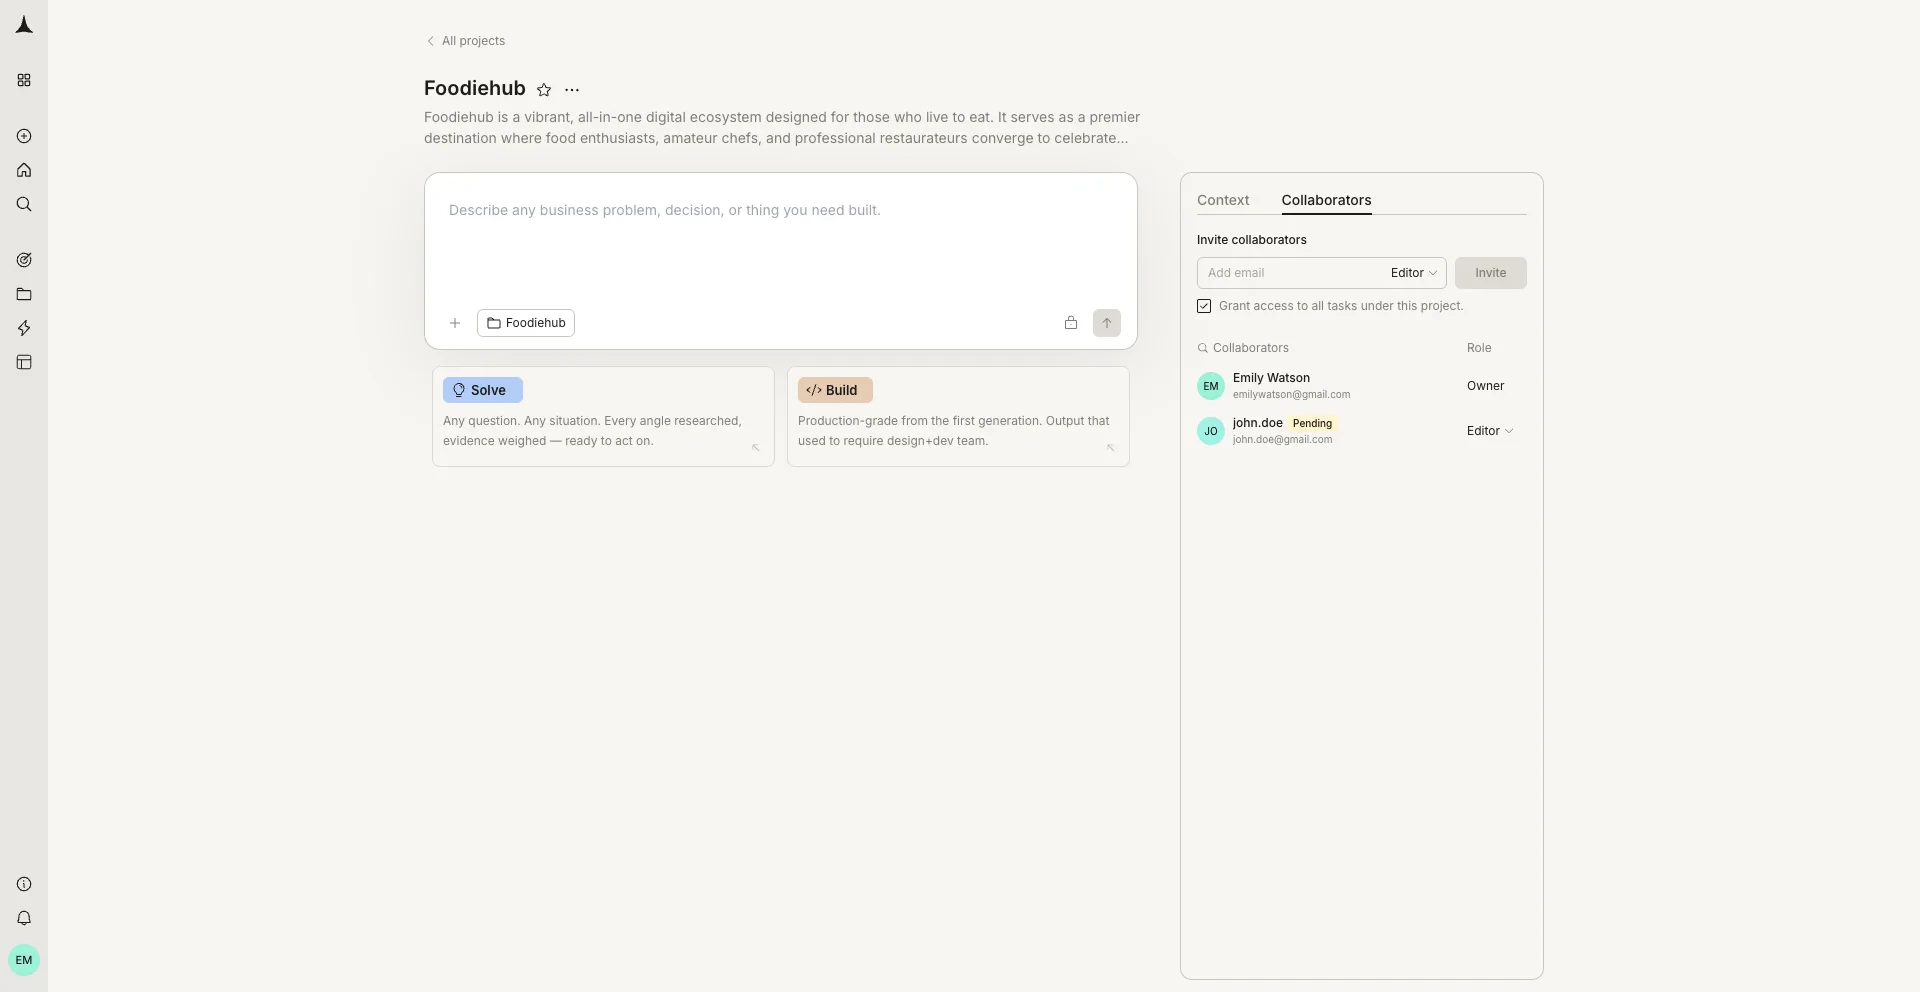
    <Frame caption="Invited collaborator shown as Pending">
      <img src="https://mintcdn.com/dhiwisepvtltd-5e04e6a4/jIji0v7uMW1wOtfn/images/getting-started/collaboration/project/invite-pending-light.webp?fit=max&auto=format&n=jIji0v7uMW1wOtfn&q=85&s=1715a01d0962ff2f31bb4da78b92ce64" alt="Collaborators list showing an invited member with a Pending badge." className="theme-image light-image" width="1920" height="992" data-path="images/getting-started/collaboration/project/invite-pending-light.webp" />

      <img src="https://mintcdn.com/dhiwisepvtltd-5e04e6a4/jIji0v7uMW1wOtfn/images/getting-started/collaboration/project/invite-pending-dark.webp?fit=max&auto=format&n=jIji0v7uMW1wOtfn&q=85&s=510a576c1e088b2ed66e486fa277adfb" alt="Collaborators list showing an invited member with a Pending badge." className="theme-image dark-image" width="1920" height="992" data-path="images/getting-started/collaboration/project/invite-pending-dark.webp" />
    </Frame>
  </Step>
</Steps>

## Revoke a pending invitation

If you need to cancel a project invitation before the recipient accepts it, open the **Collaborators** tab and find the collaborator with the **Pending** badge.

<Steps>
  <Step title="Open the Collaborators tab">
    In the project, click the **Collaborators** tab in the right panel.
  </Step>

  <Step title="Open the role dropdown on the pending row">
    Click the role dropdown (showing **Editor** or **Viewer**) on the pending collaborator's row. This reveals additional actions for that invitation.

    <Frame caption="Find the pending collaborator in the Collaborators list">
      <img src="https://mintcdn.com/dhiwisepvtltd-5e04e6a4/jIji0v7uMW1wOtfn/images/getting-started/collaboration/project/invite-pending-light.webp?fit=max&auto=format&n=jIji0v7uMW1wOtfn&q=85&s=1715a01d0962ff2f31bb4da78b92ce64" alt="Collaborators list showing an invited member with a Pending badge." className="theme-image light-image" width="1920" height="992" data-path="images/getting-started/collaboration/project/invite-pending-light.webp" />

      <img src="https://mintcdn.com/dhiwisepvtltd-5e04e6a4/jIji0v7uMW1wOtfn/images/getting-started/collaboration/project/invite-pending-dark.webp?fit=max&auto=format&n=jIji0v7uMW1wOtfn&q=85&s=510a576c1e088b2ed66e486fa277adfb" alt="Collaborators list showing an invited member with a Pending badge." className="theme-image dark-image" width="1920" height="992" data-path="images/getting-started/collaboration/project/invite-pending-dark.webp" />
    </Frame>
  </Step>

  <Step title="Click Revoke invite">
    Select **Revoke invite** from the dropdown. The pending row is removed immediately and the invitation link in the recipient's email becomes invalid. The recipient can no longer accept the invitation through email, the copied invite link, or [notifications](/getting-started/account/notifications).
  </Step>
</Steps>

## Remove a collaborator

To remove an accepted collaborator's access to the project, open the **Collaborators** tab, find the collaborator's row, and click their role dropdown.

<Steps>
  <Step title="Open the Collaborators tab">
    In the project, click the **Collaborators** tab in the right panel.
  </Step>

  <Step title="Open the role dropdown on the collaborator's row">
    Click the role dropdown (showing **Editor** or **Viewer**) next to the collaborator you want to remove.
  </Step>

  <Step title="Click Remove">
    Select **Remove** from the dropdown. The collaborator loses access to the project immediately. Their access to any tasks in that project is also removed, including individual tasks and tasks that are part of the project.
  </Step>
</Steps>

<Info>
  Revoking or removing someone's access to a project does **not** remove them from the workspace. They remain a workspace member and keep access to any other projects or tasks they were invited to. However, revoking or removing access at the [workspace level](/getting-started/collaboration/workspace) also removes their access from all projects and tasks in the workspace. If you remove an **Editor** who created tasks in this project, the workspace owner automatically becomes the owner of those tasks.
</Info>

## Roles and permissions

Rocket uses two roles at the project level.

| Permission                          | **Editor**                  | **Viewer** |
| :---------------------------------- | :-------------------------- | :--------- |
| **View tasks and outputs**          | Yes                         | Yes        |
| **Create new tasks**                | Yes                         | No         |
| **Edit tasks (chat, iterate)**      | Yes                         | No         |
| **Upload and manage files**         | Yes                         | No         |
| **Connect and disconnect services** | Yes                         | No         |
| **Invite collaborators**            | Yes, if you own the project | No         |

<AccordionGroup>
  <Accordion title="Editor">
    Day to day collaborator. Editors can create tasks, iterate on existing work, upload files, and connect services. Editors who do not own the project can never invite anyone to it. Only the project owner can invite collaborators. When the [invite toggle](/getting-started/workspace/manage#edit-workspace-settings) is enabled, the owner can invite anyone. When it is disabled, the owner can invite only existing workspace members.
  </Accordion>

  <Accordion title="Viewer">
    Read-only access. Viewers can see tasks and outputs they have been granted access to, but cannot create or edit anything. Ideal for stakeholders who need visibility without editing access.
  </Accordion>
</AccordionGroup>

<Info>
  Roles apply at each level independently. A workspace Editor can be given Viewer access only on a specific project.
</Info>

## What's next?

<CardGroup cols={2}>
  <Card title="Task collaboration" icon="bullseye-arrow" href="/getting-started/collaboration/task">
    Share individual Solve or Build tasks by email.
  </Card>

  <Card title="Workspace collaboration" icon="building" href="/getting-started/collaboration/workspace">
    Manage workspace level roles and permissions.
  </Card>

  <Card title="Context flow" icon="arrows-repeat" href="/getting-started/project/context/overview">
    How tasks share context within a project.
  </Card>

  <Card title="Projects overview" icon="folder-open" href="/getting-started/project/overview">
    Create and manage your projects.
  </Card>
</CardGroup>