> ## Documentation Index
> Fetch the complete documentation index at: https://docs.rocket.new/llms.txt
> Use this file to discover all available pages before exploring further.
# Workspace
> Invite members and assign roles at the Rocket.new workspace level.
export const LlmsDirective = () =>
For the complete documentation index, see llms.txt.
For a lightweight markdown version of this page, append .md to the URL.
;
The workspace is the top level of Rocket's [three-level sharing model](/getting-started/collaboration/overview). Use this level for core team members who need broad access across your organization.
Workspace access is not dynamic. When you invite someone, they get access to the projects and tasks that exist at that moment. Any project or task created after the invitation is not automatically shared with them and requires a separate invitation at the [project](/getting-started/collaboration/project) or task level.
## Steps
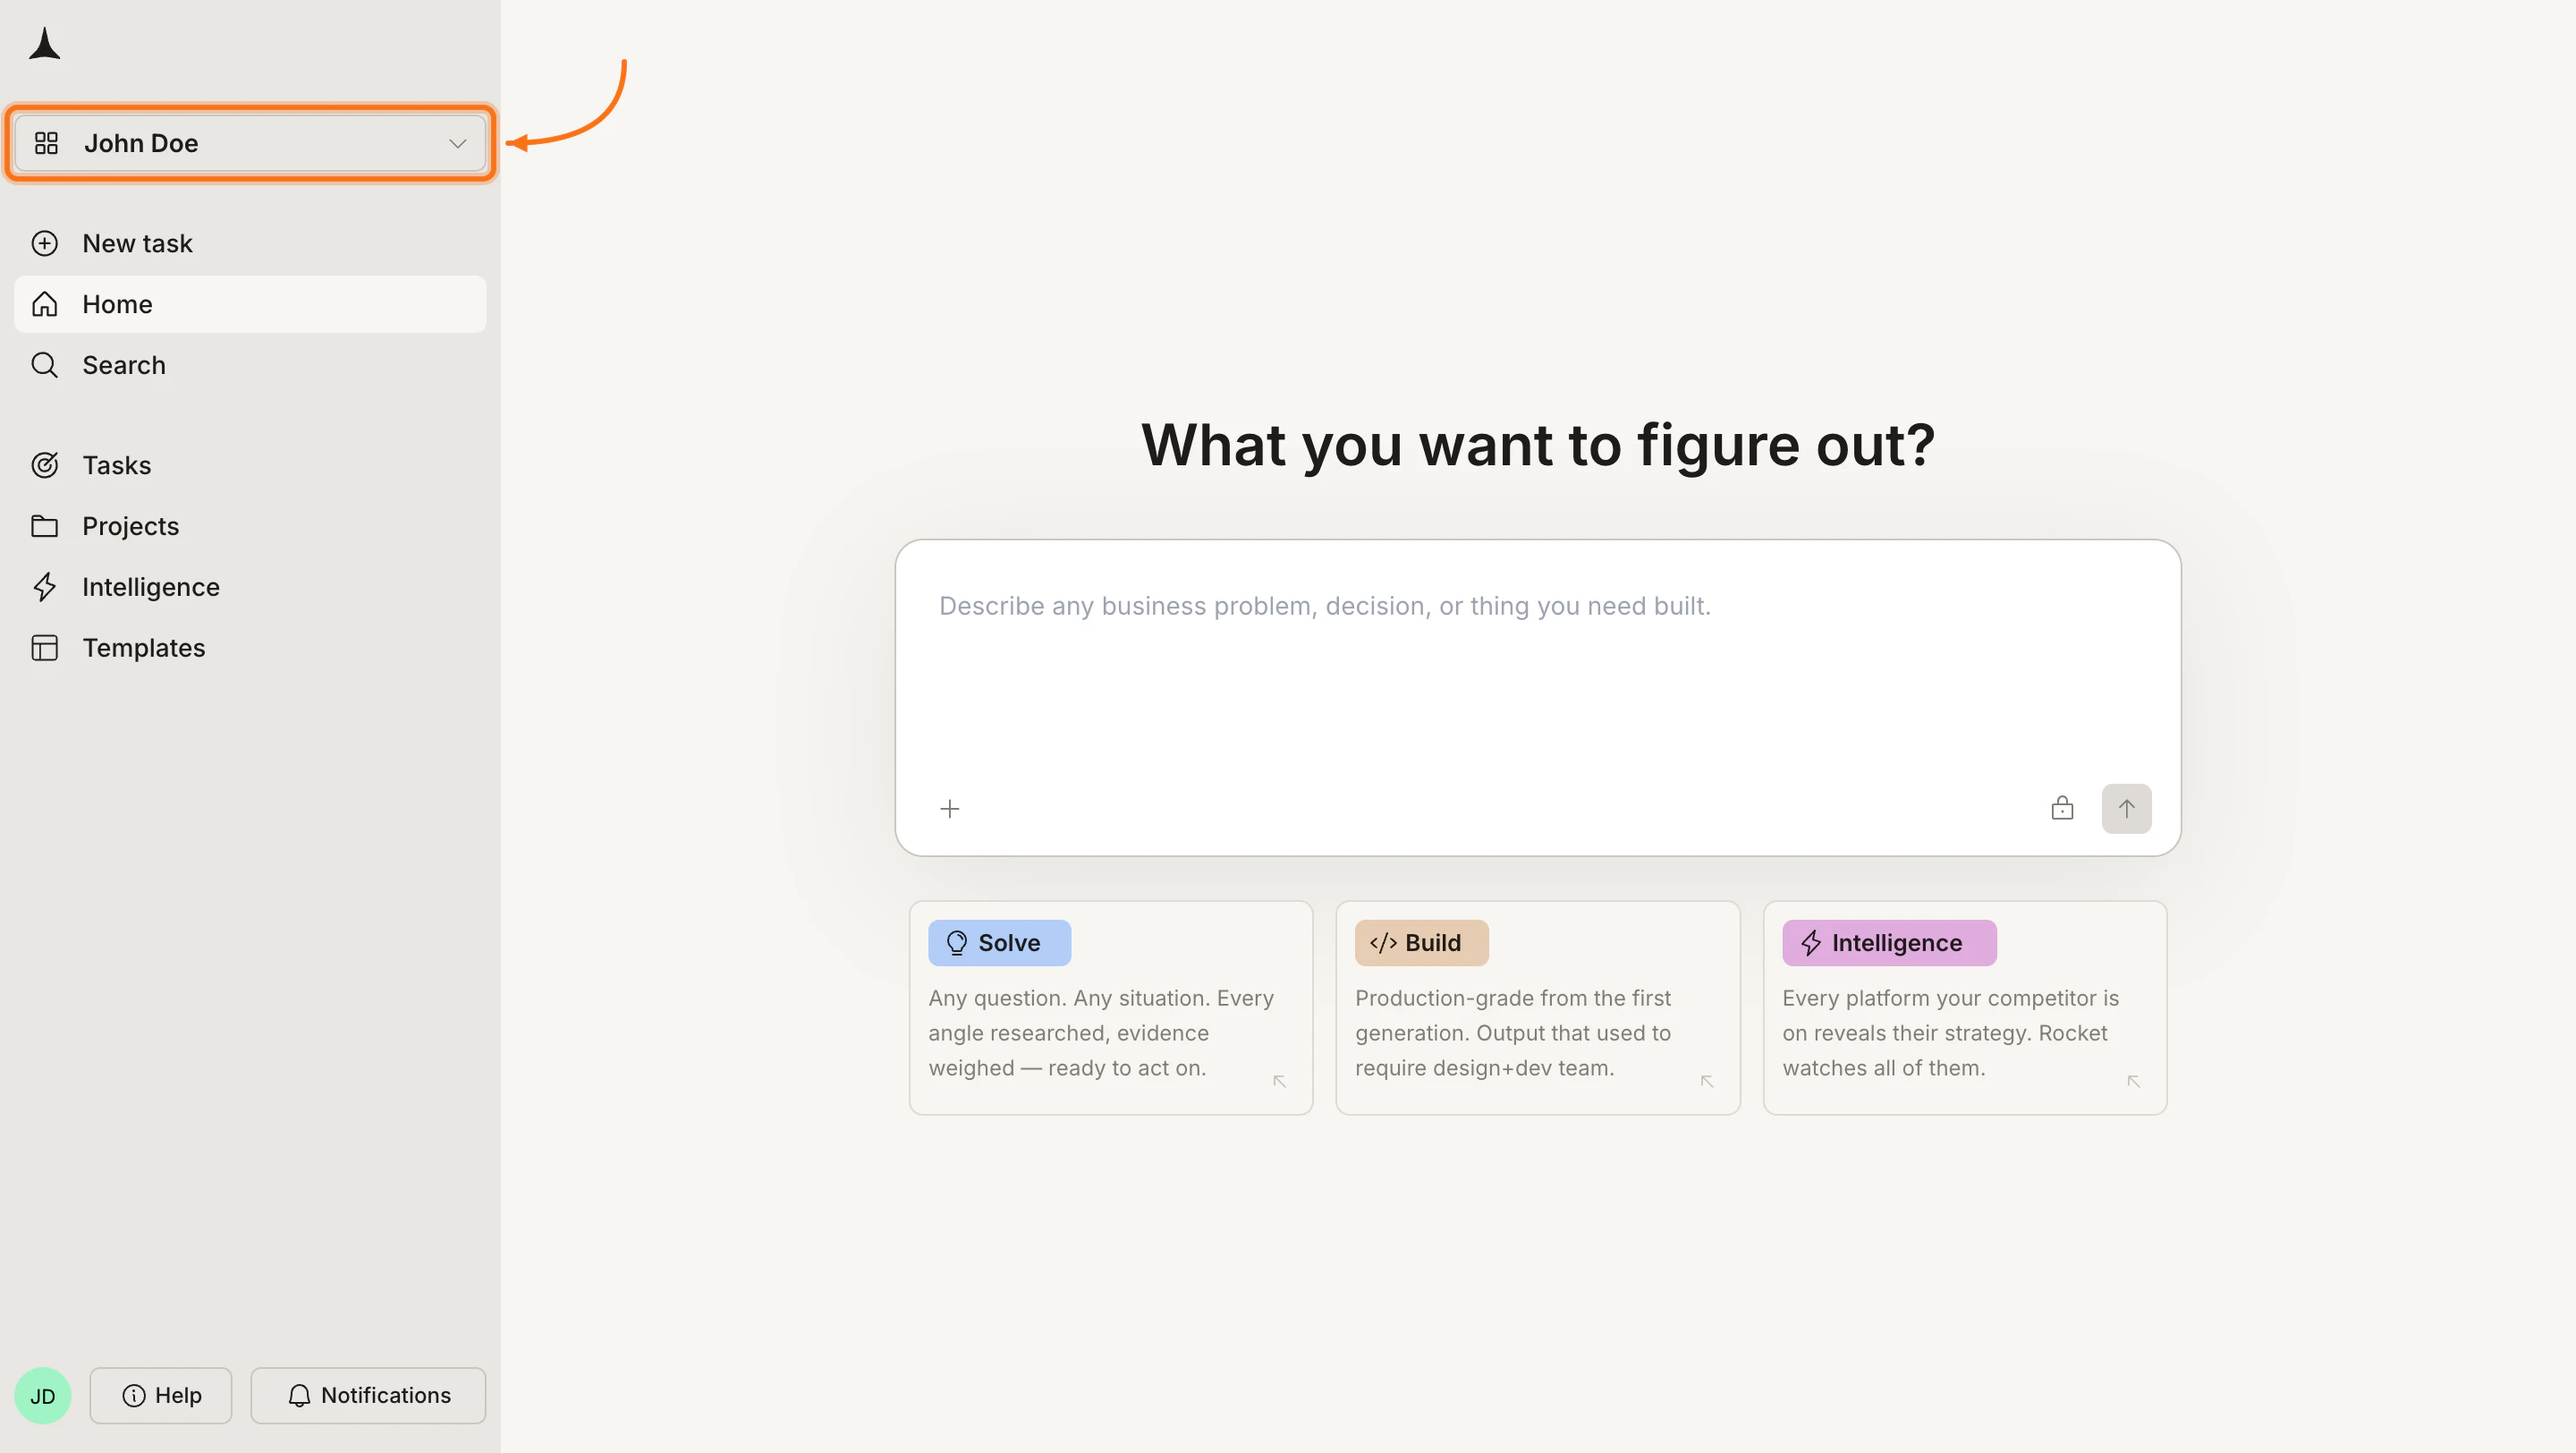
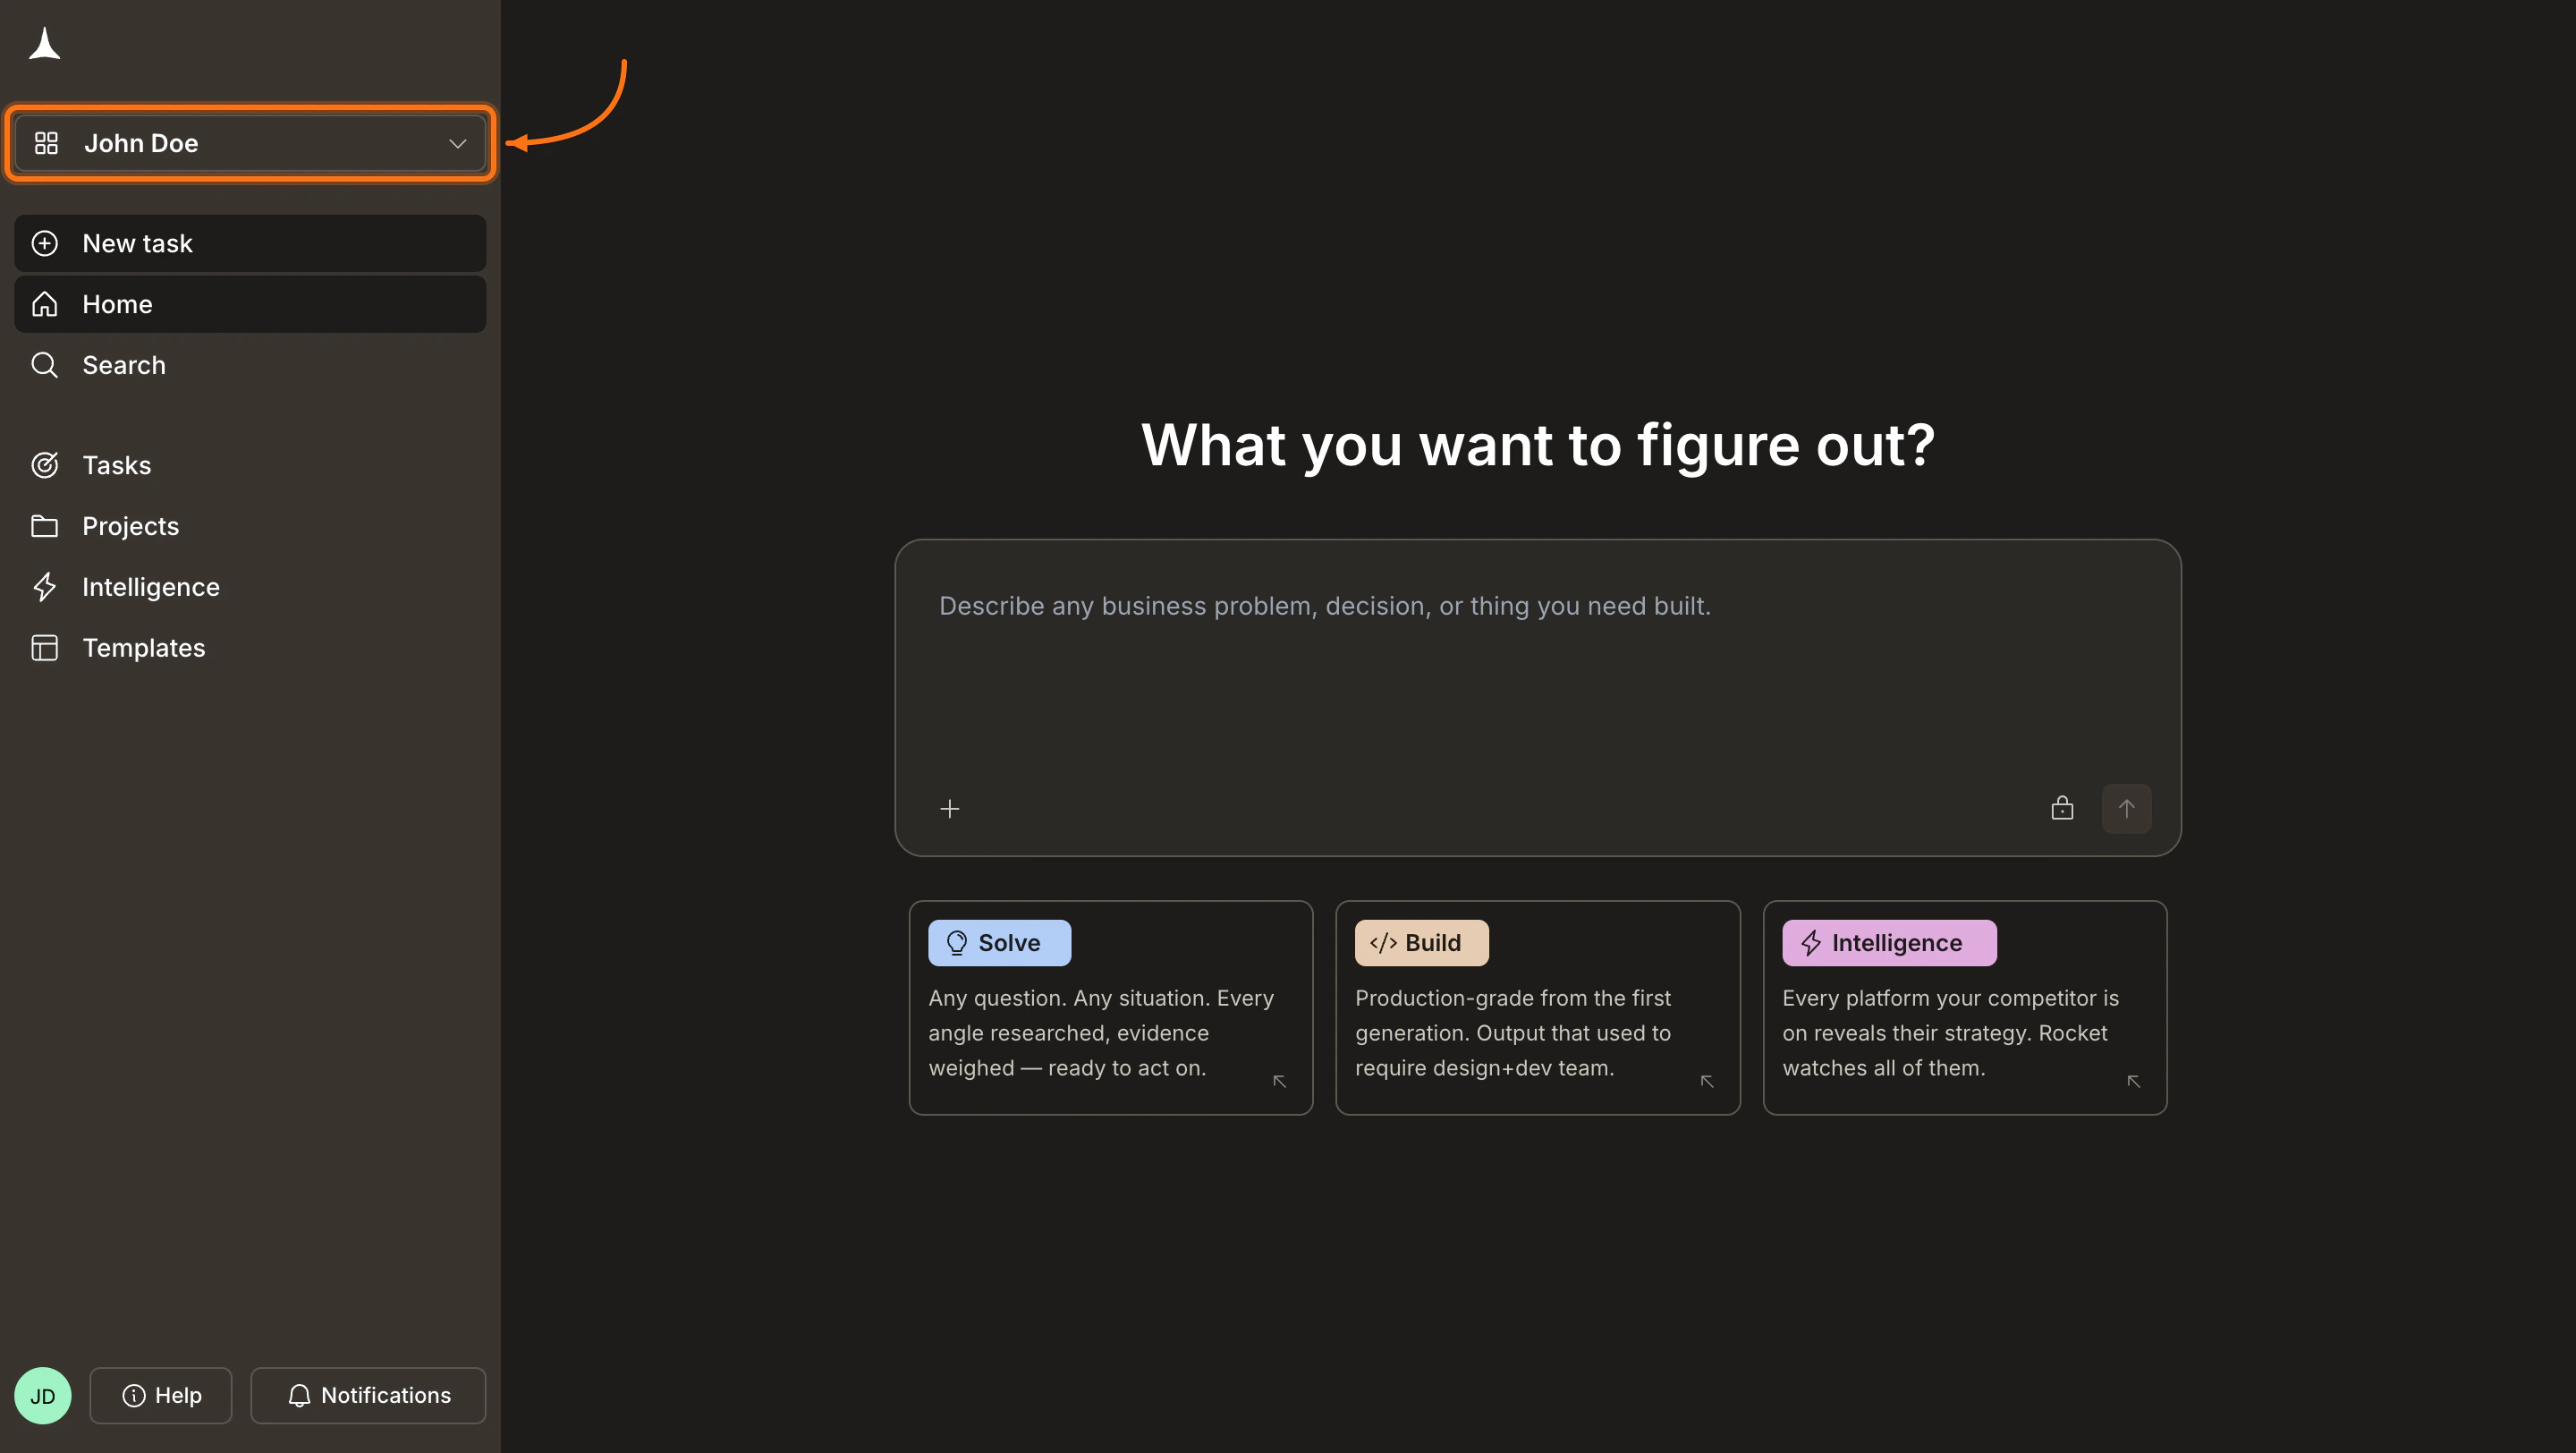
Click your workspace name in the top-left of the sidebar.
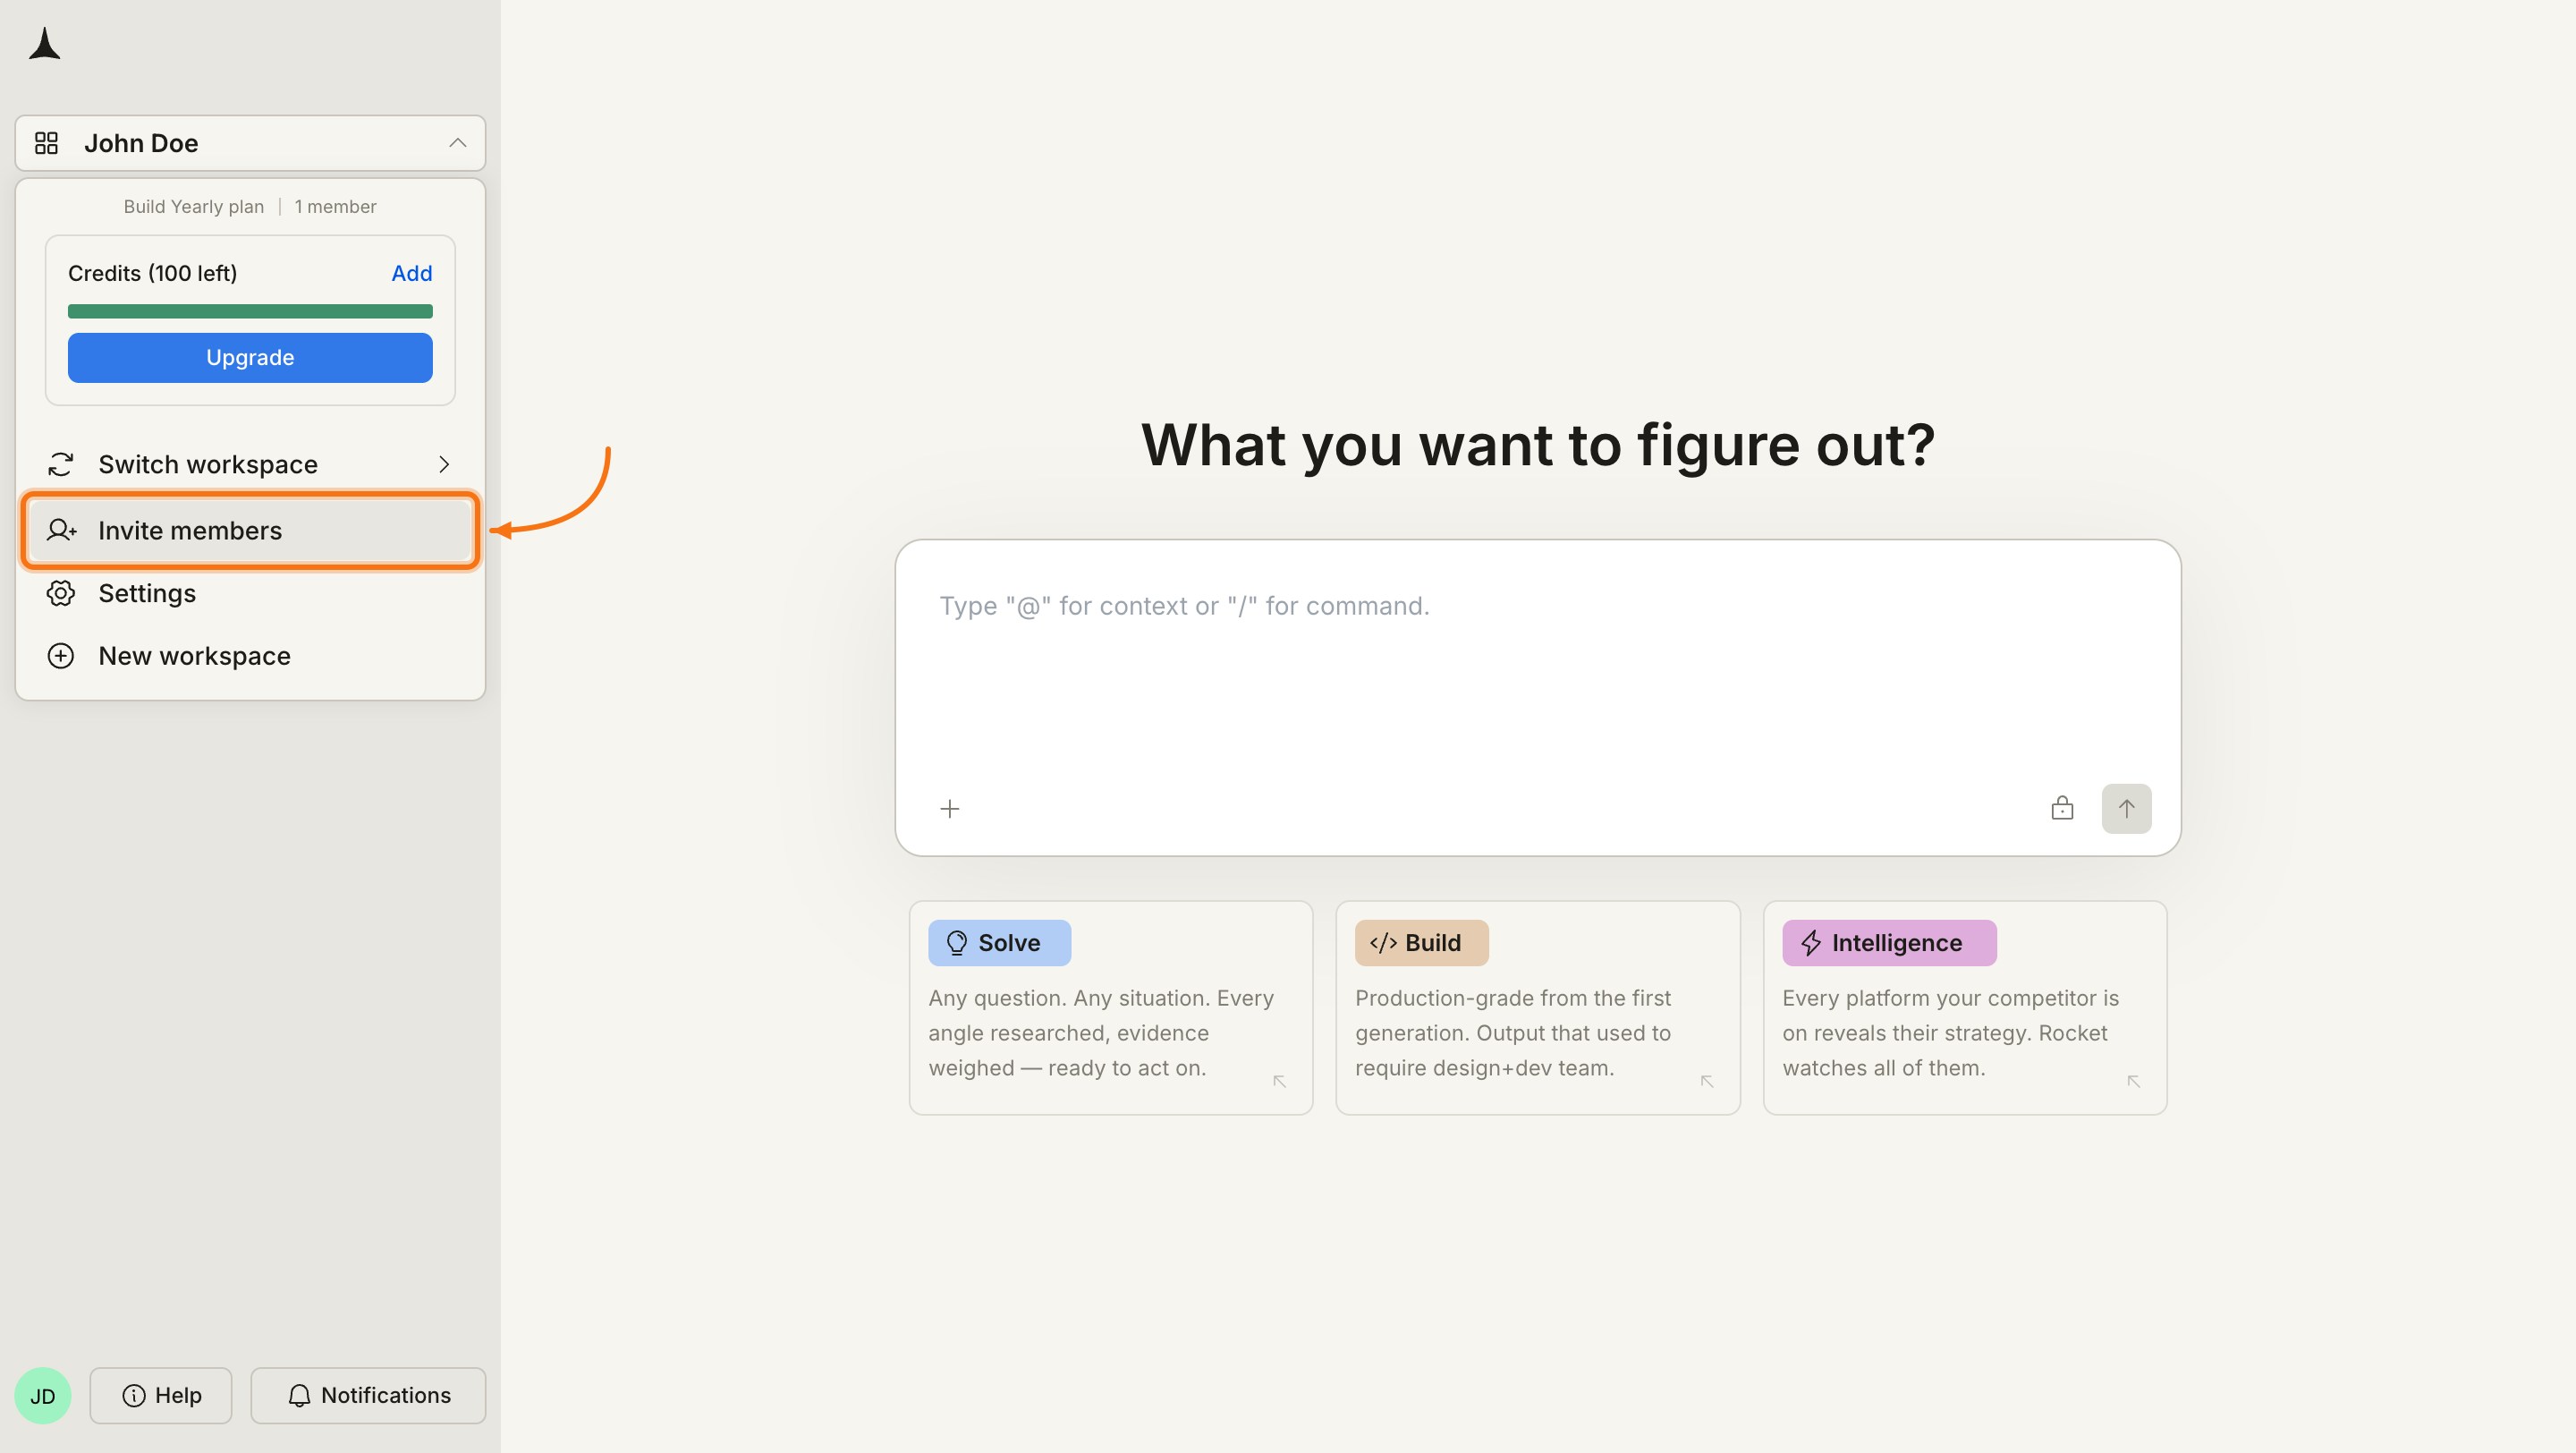
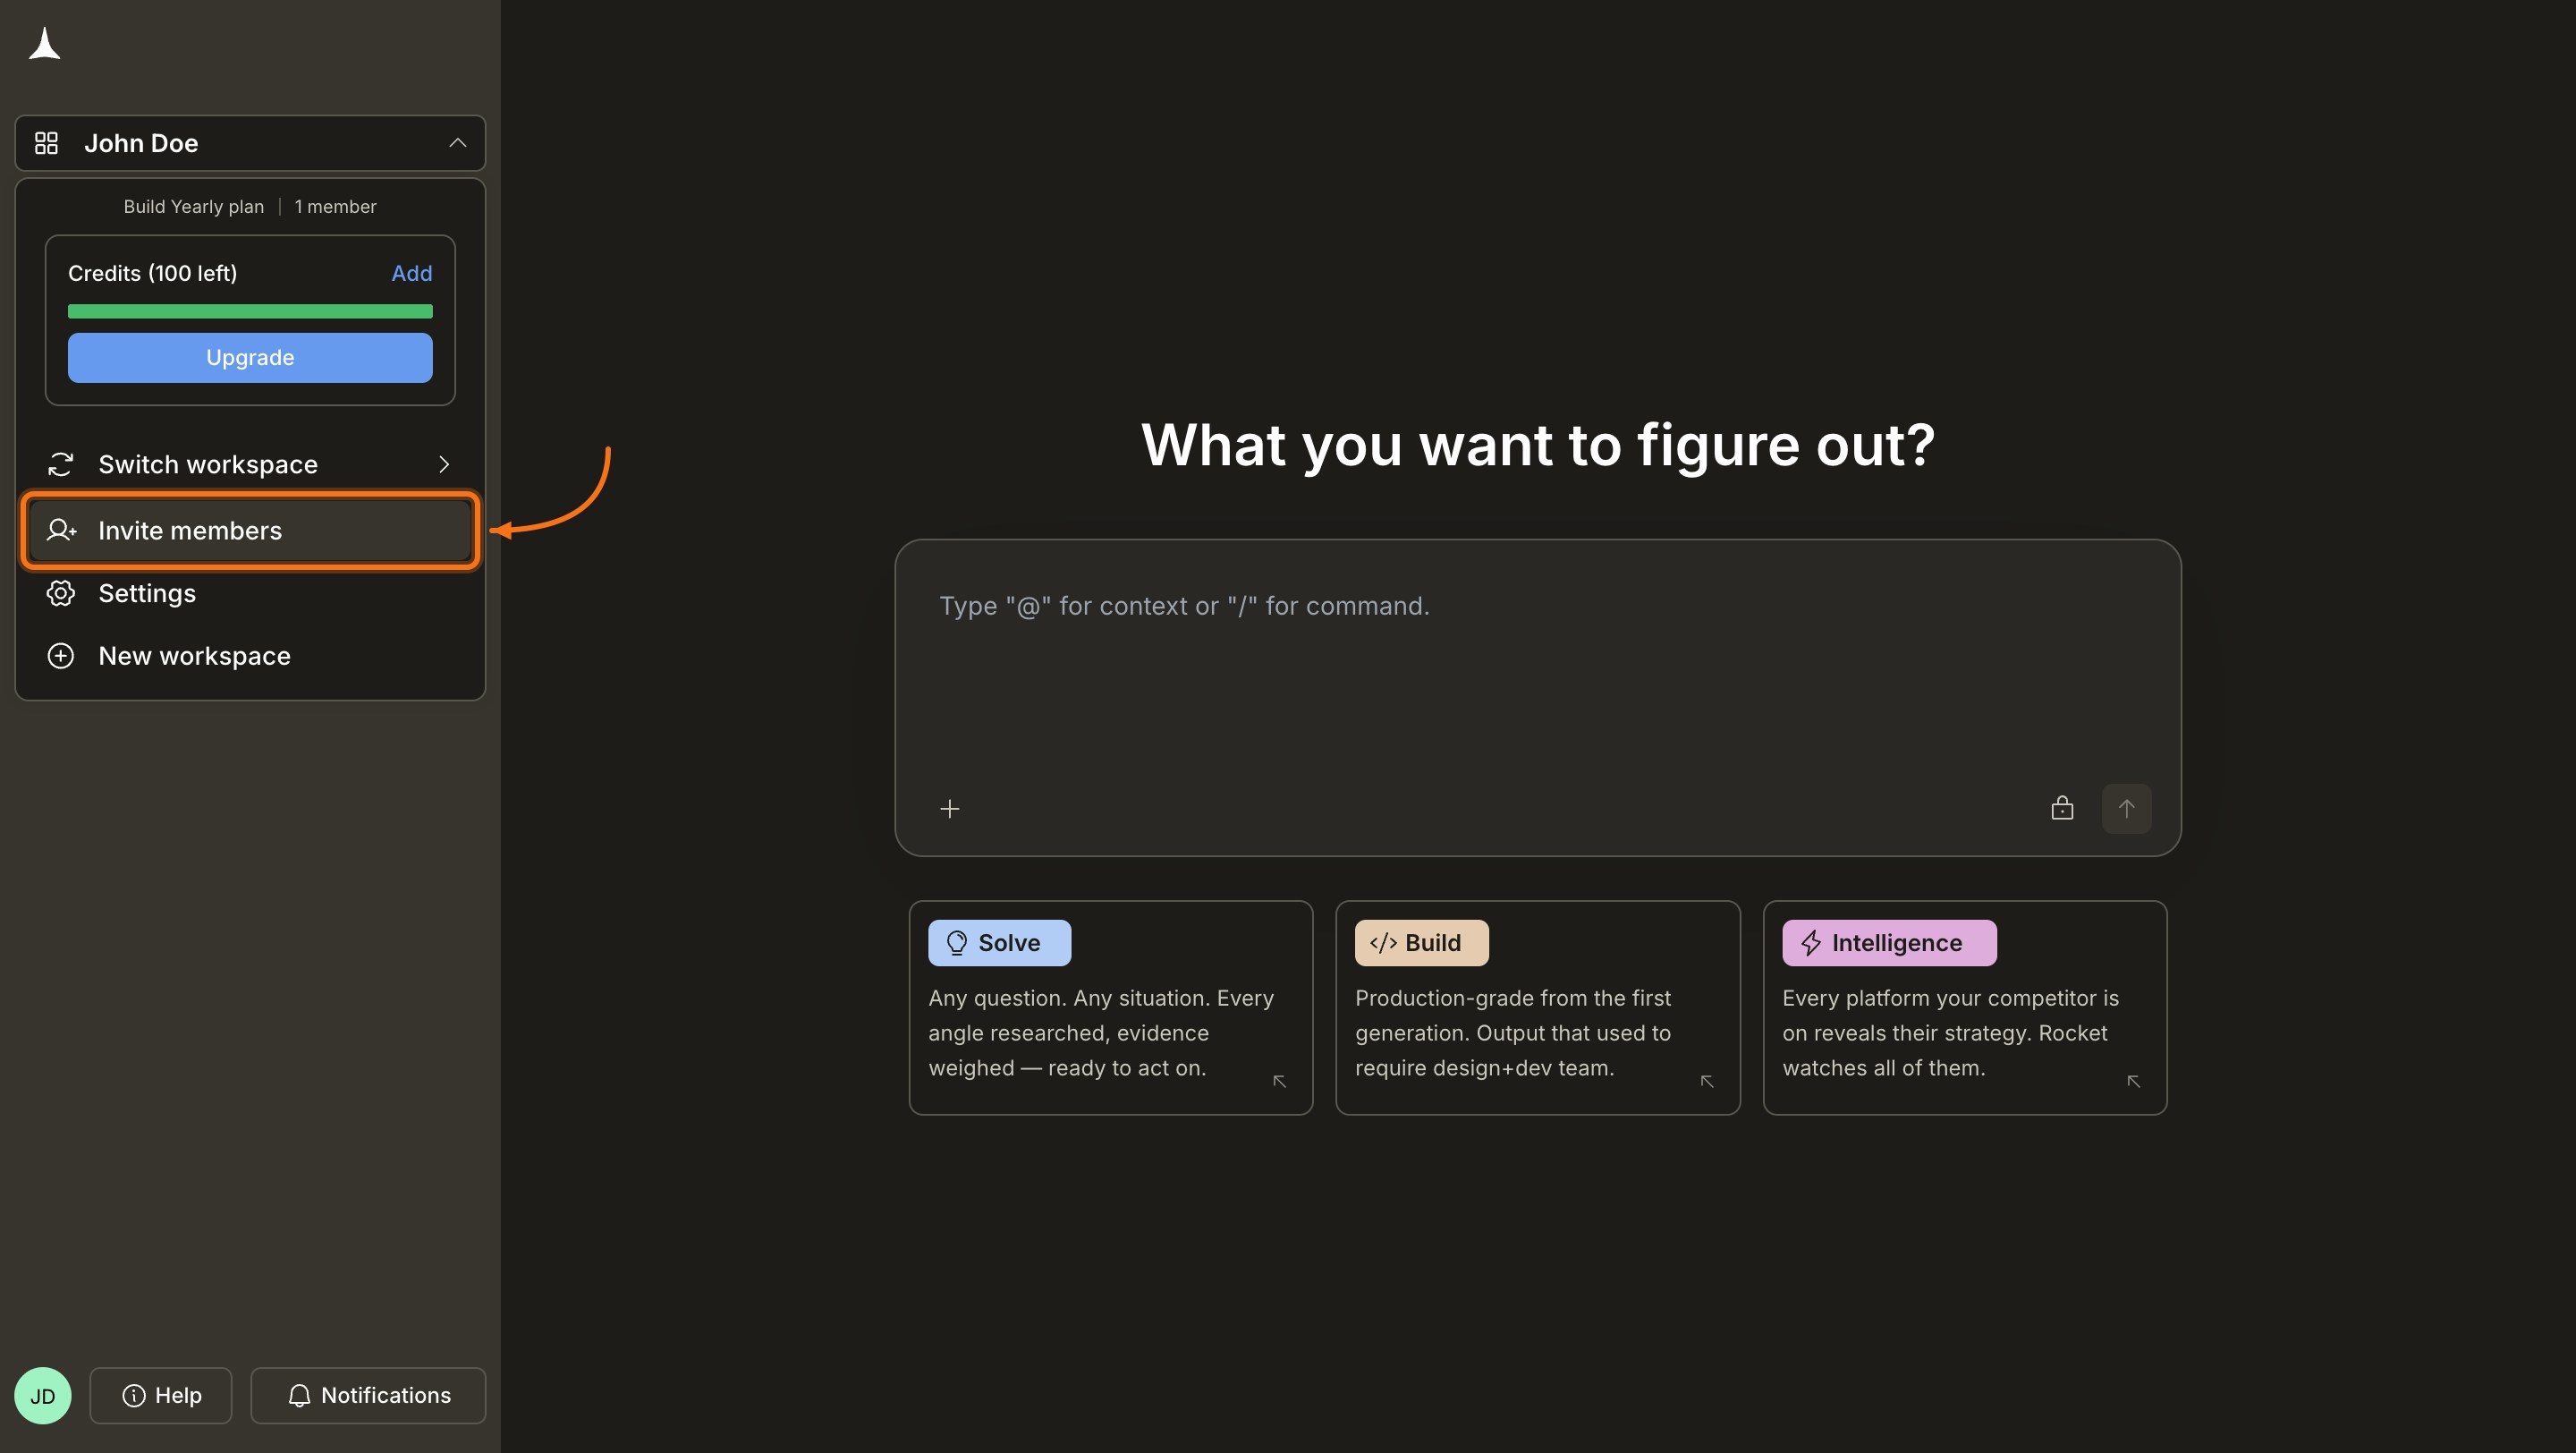
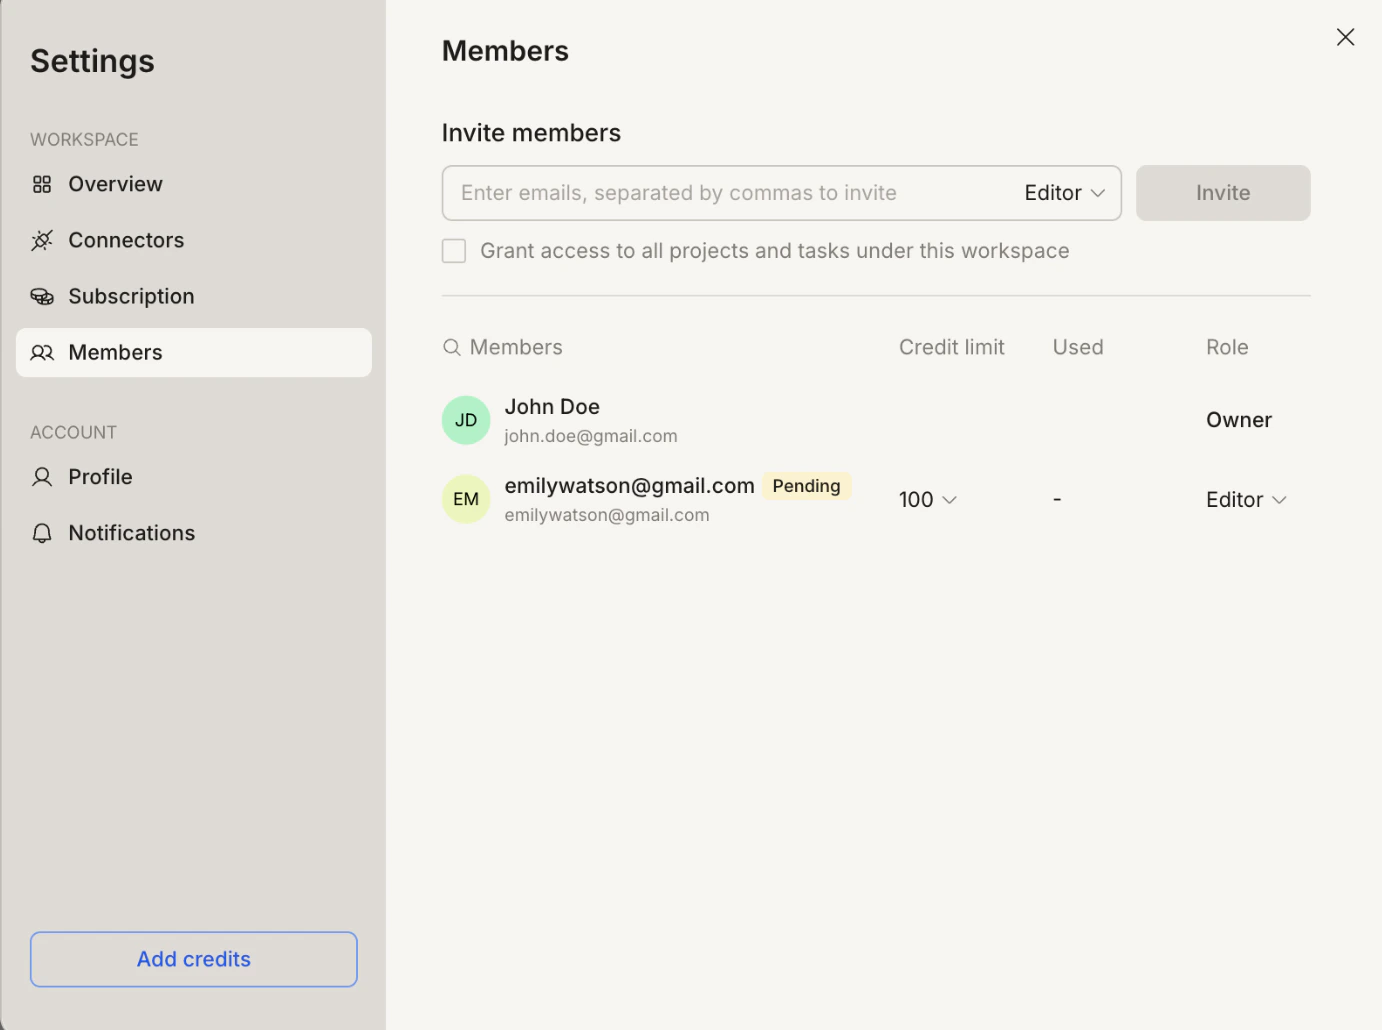
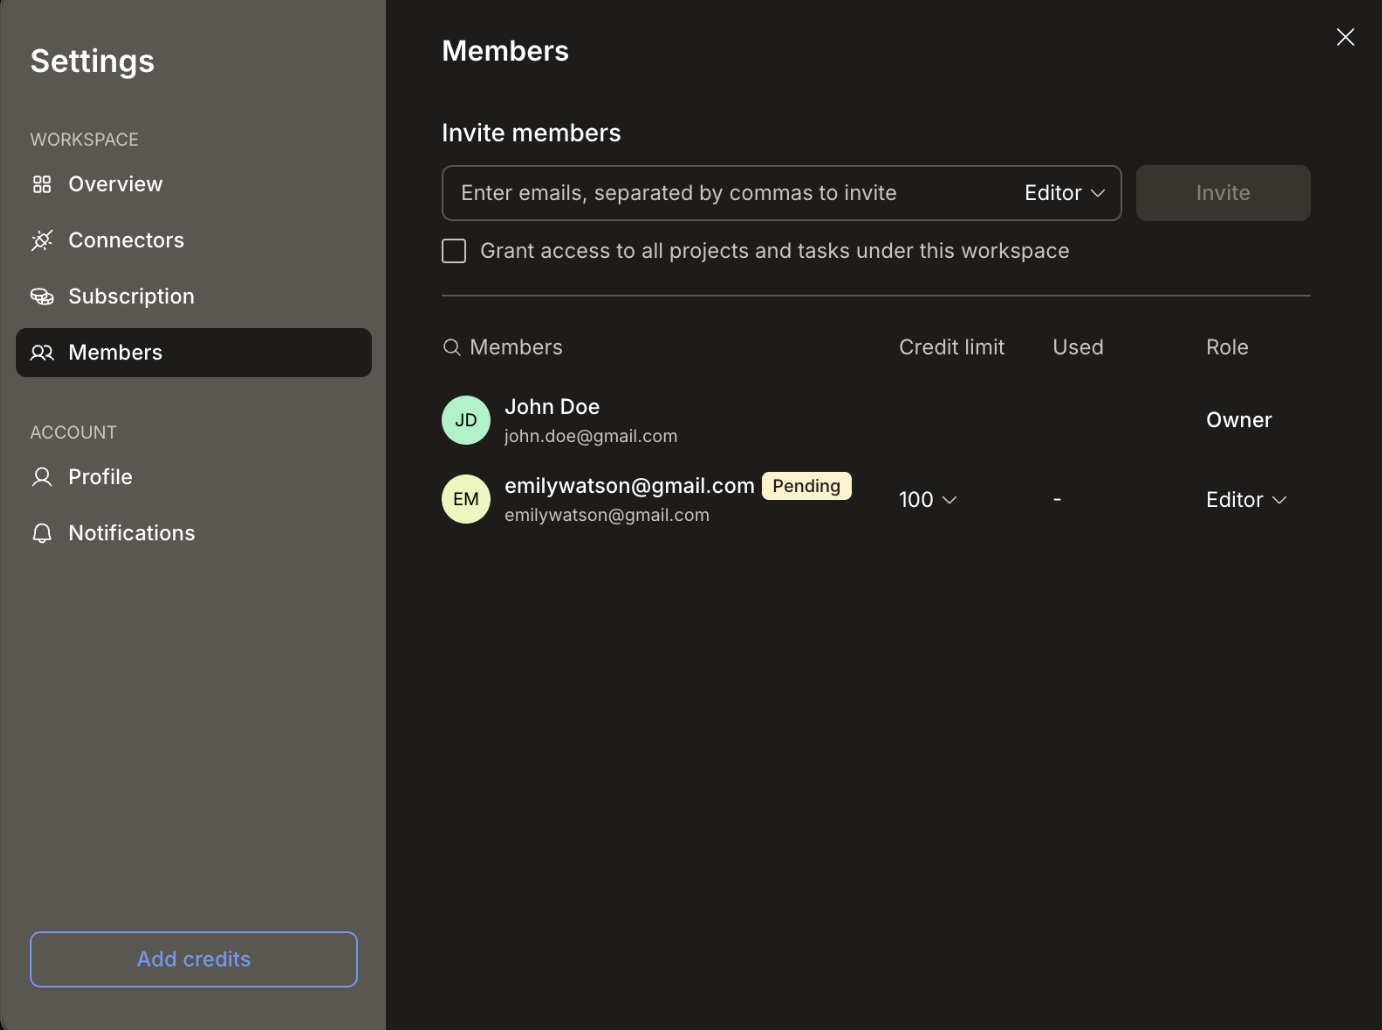
 In the dropdown, click **Invite members**. You can also reach this screen via **Settings → Members**.
 Type one or more email addresses and choose a role for the invitee: **Editor** or **Viewer**. See [Roles and permissions](#roles-and-permissions) for details.
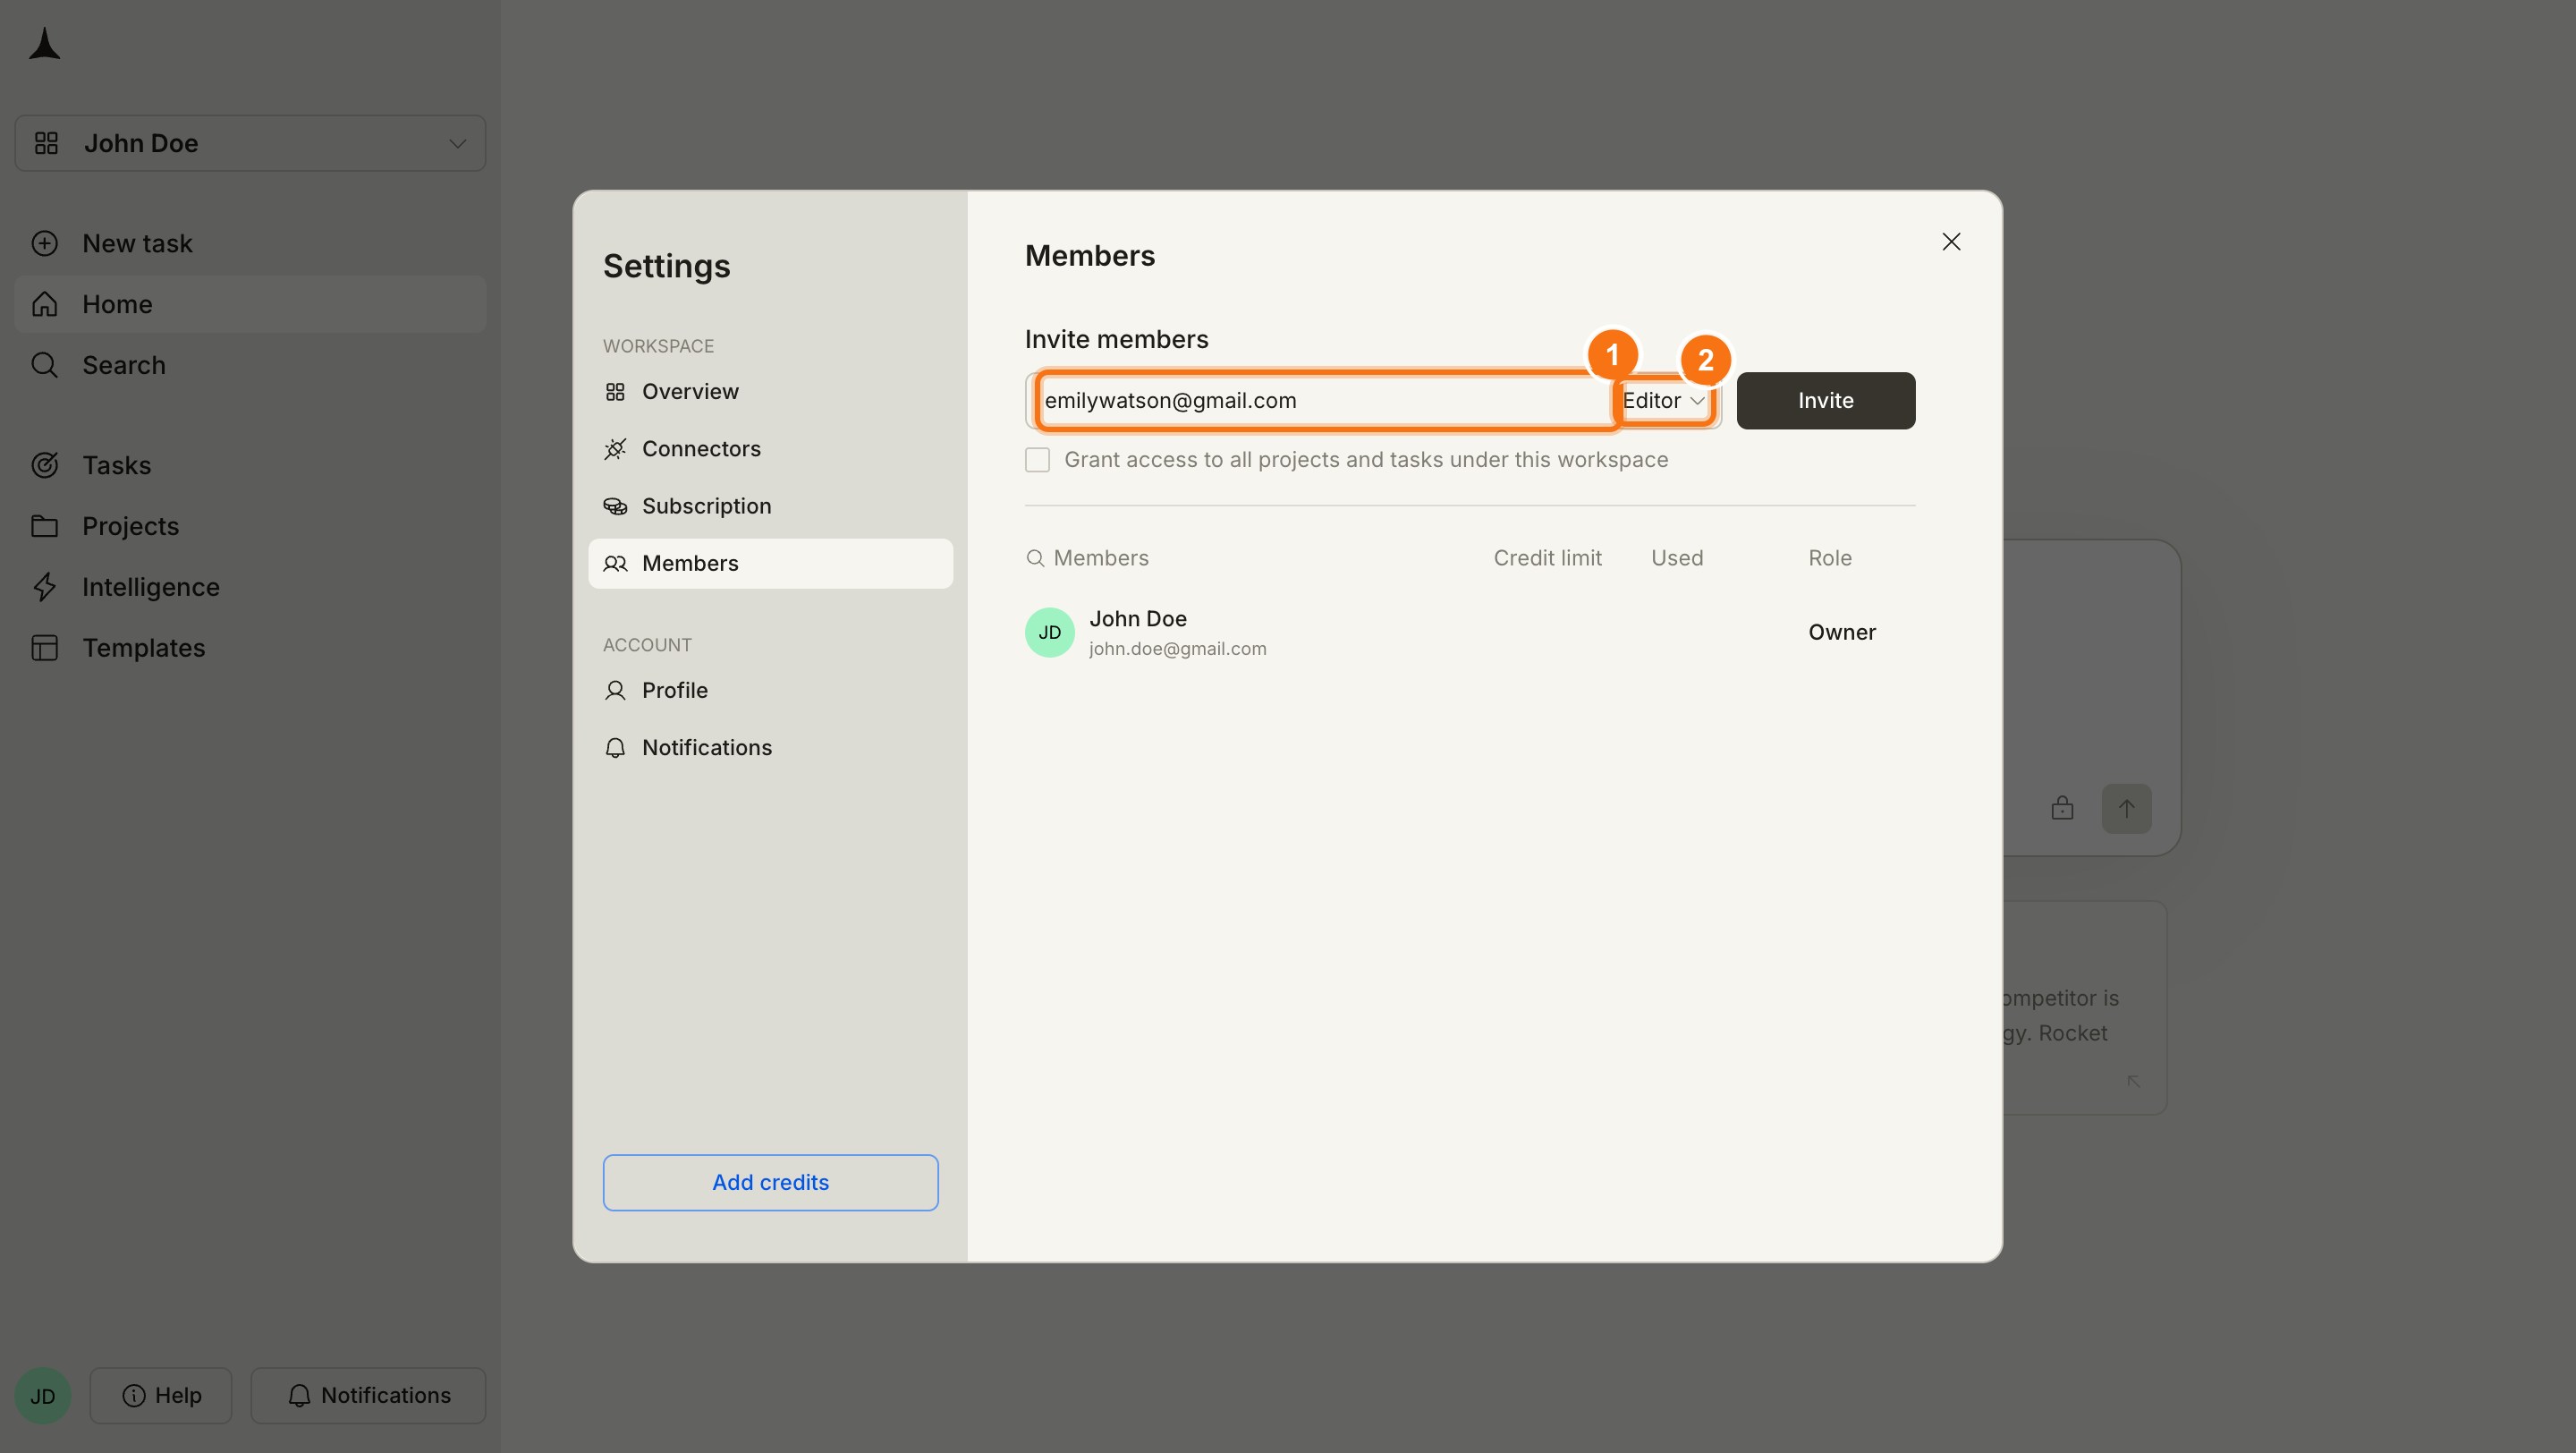
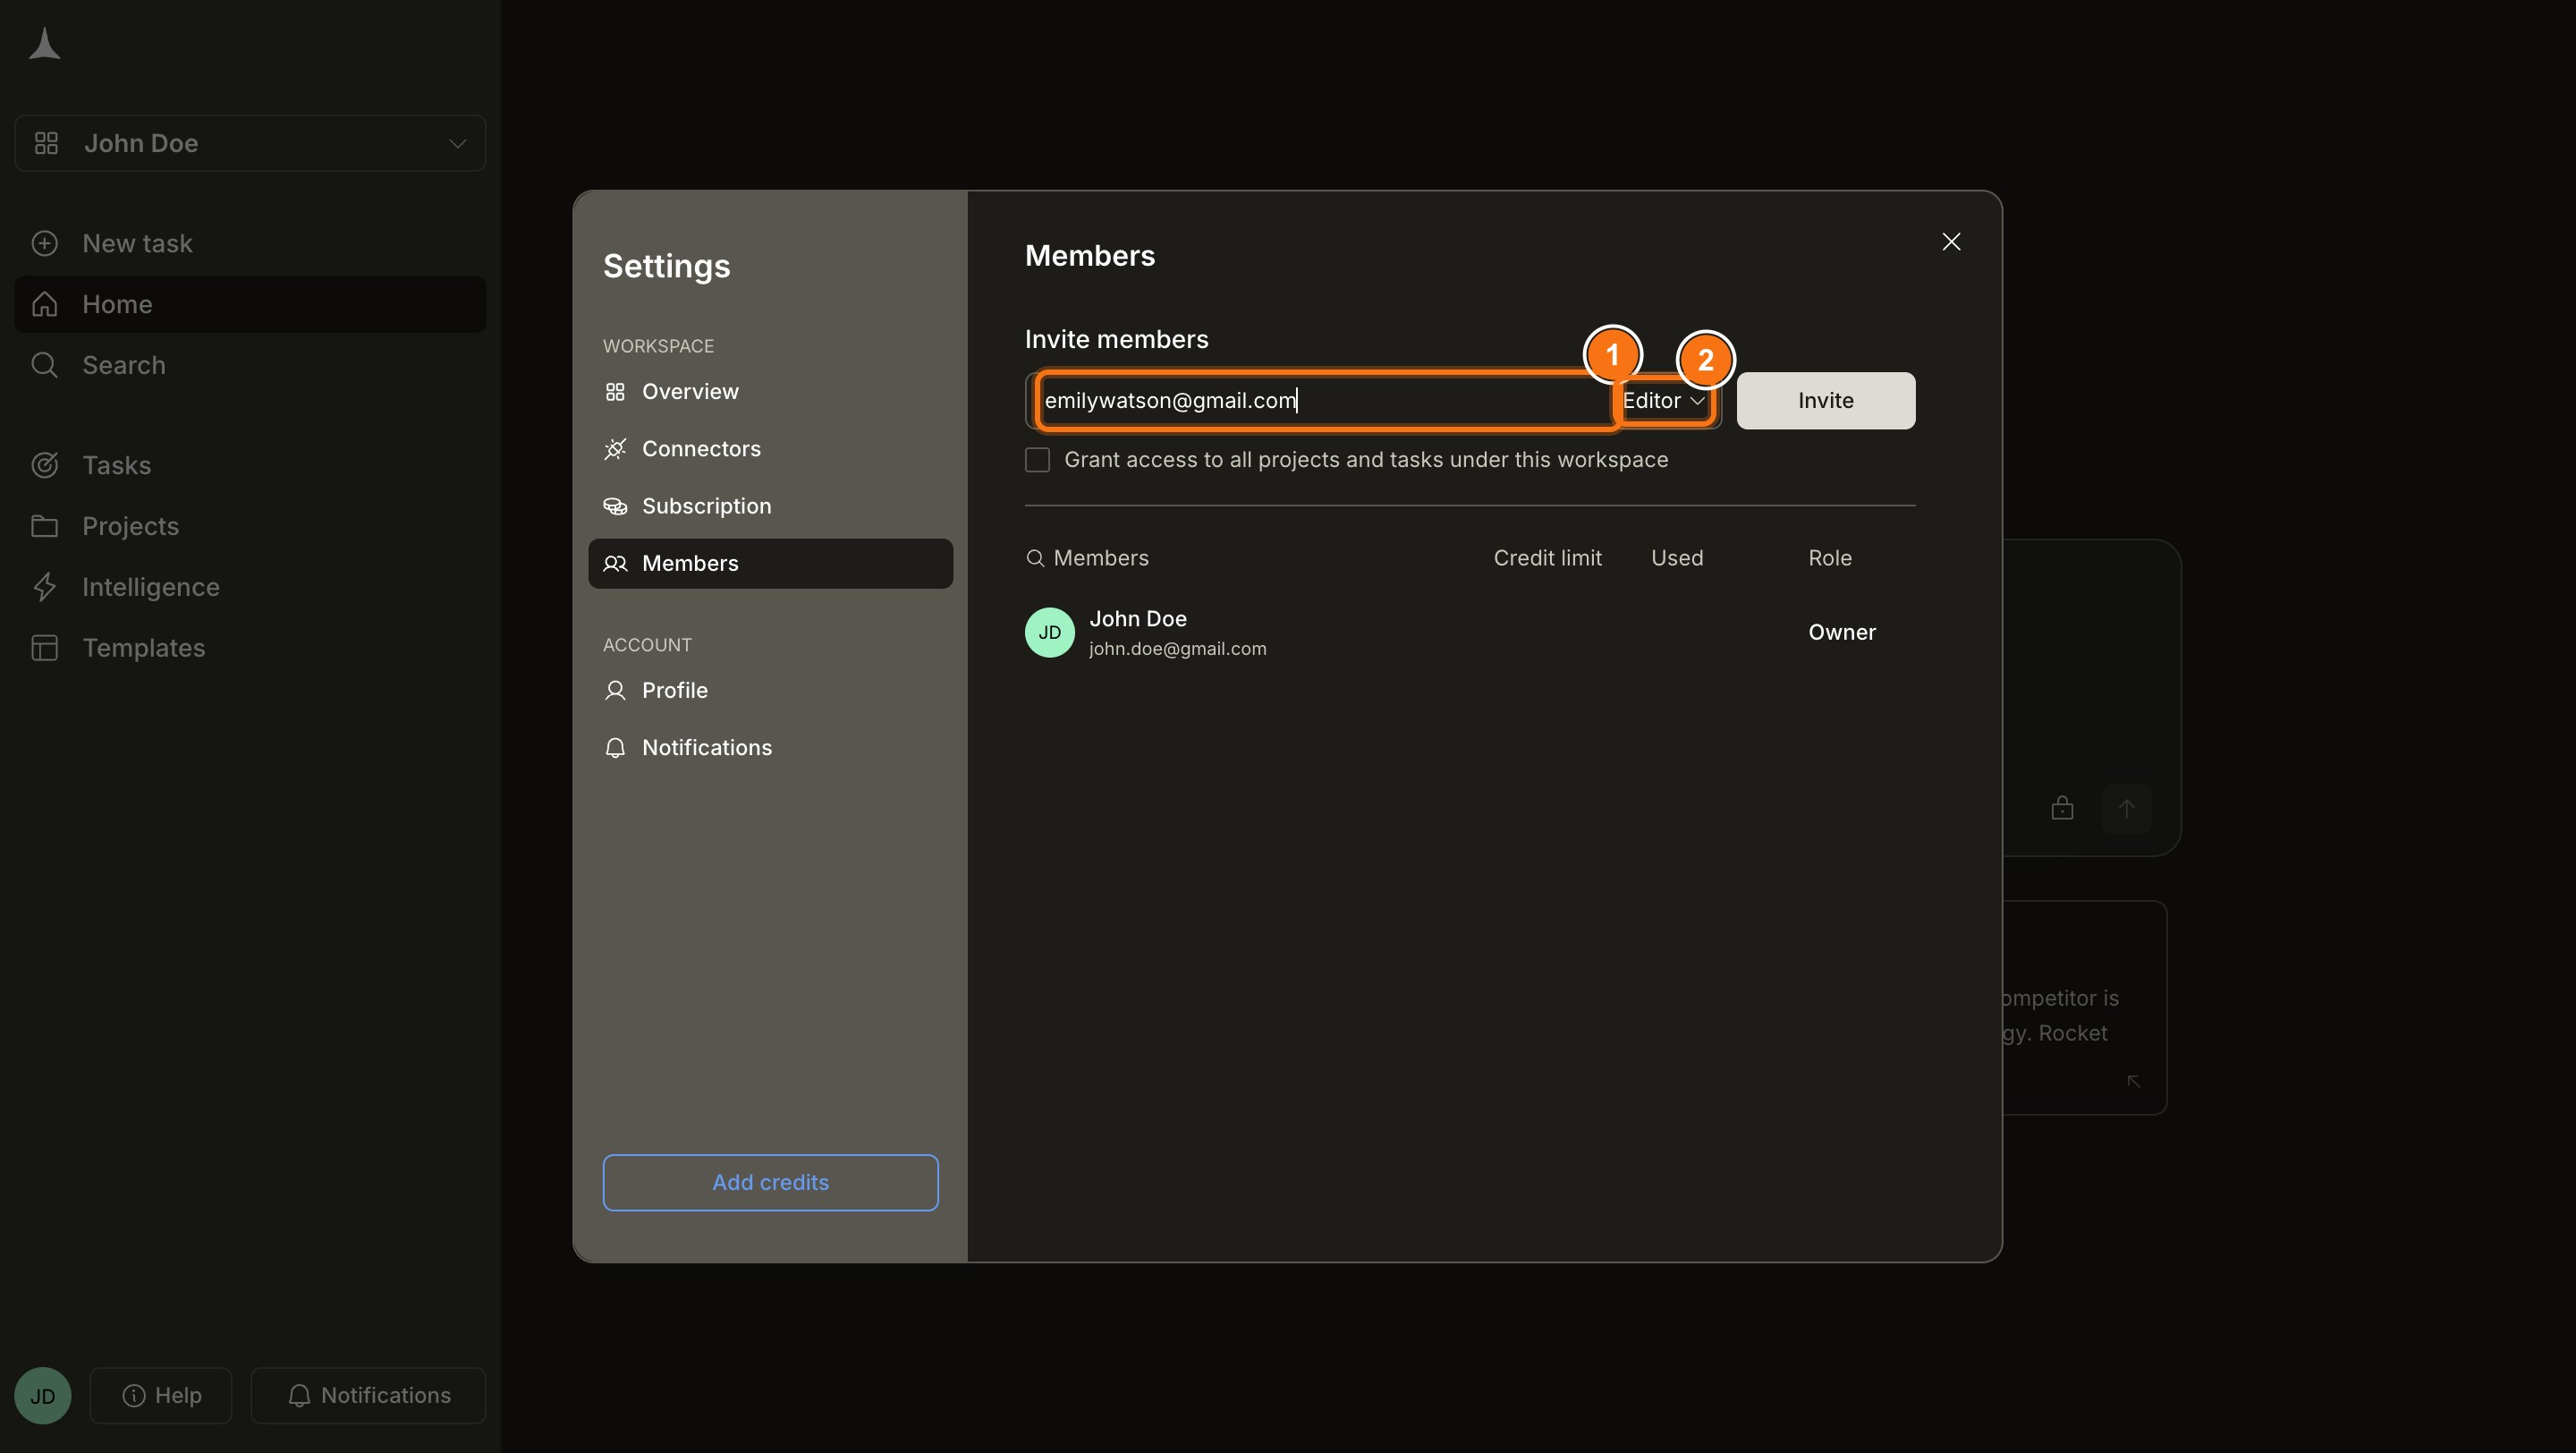 Before sending, decide how much of the workspace to share:
* **Checkbox ticked:** the invitee gets access to all projects and tasks that currently exist in the workspace. Projects or tasks created after the invitation are not included and must be shared separately.
* **Checkbox unticked:** the invitee joins the workspace with an empty view. They can create new projects and tasks but cannot see any existing ones. Existing and future projects must be shared with them at the [project](/getting-started/collaboration/project) or [task](/getting-started/collaboration/task) level.
Before sending, decide how much of the workspace to share:
* **Checkbox ticked:** the invitee gets access to all projects and tasks that currently exist in the workspace. Projects or tasks created after the invitation are not included and must be shared separately.
* **Checkbox unticked:** the invitee joins the workspace with an empty view. They can create new projects and tasks but cannot see any existing ones. Existing and future projects must be shared with them at the [project](/getting-started/collaboration/project) or [task](/getting-started/collaboration/task) level.
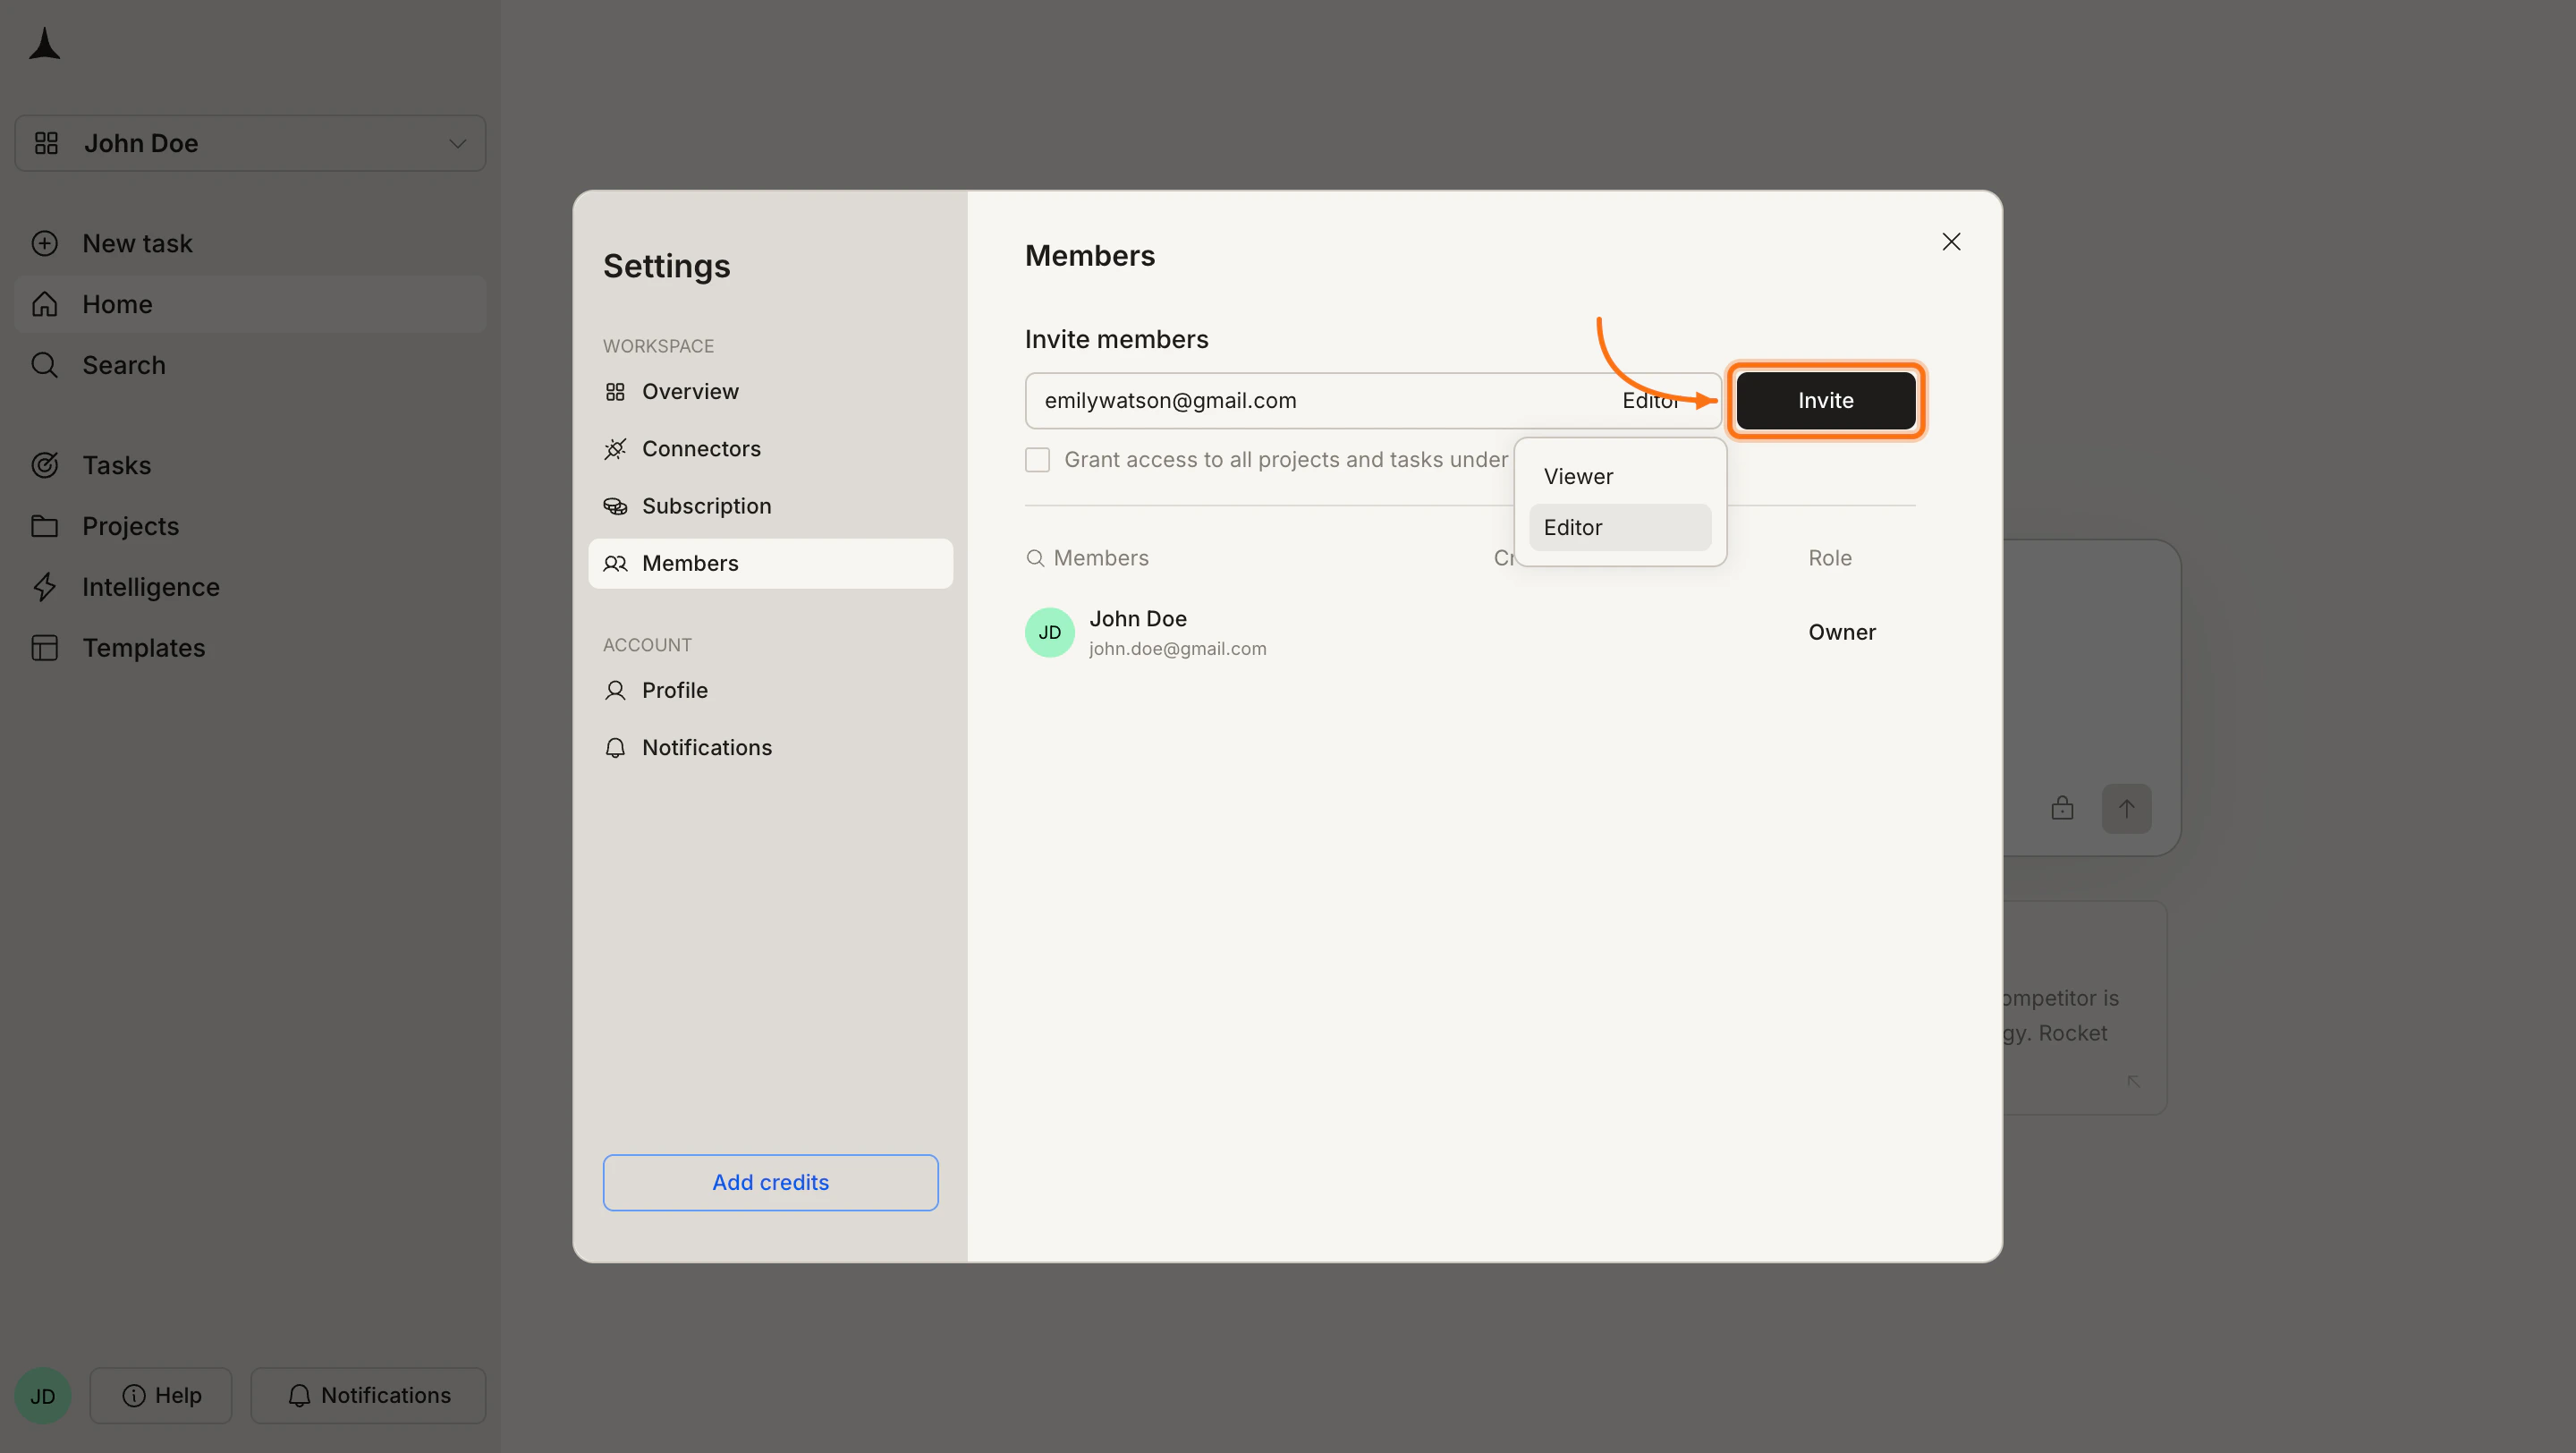
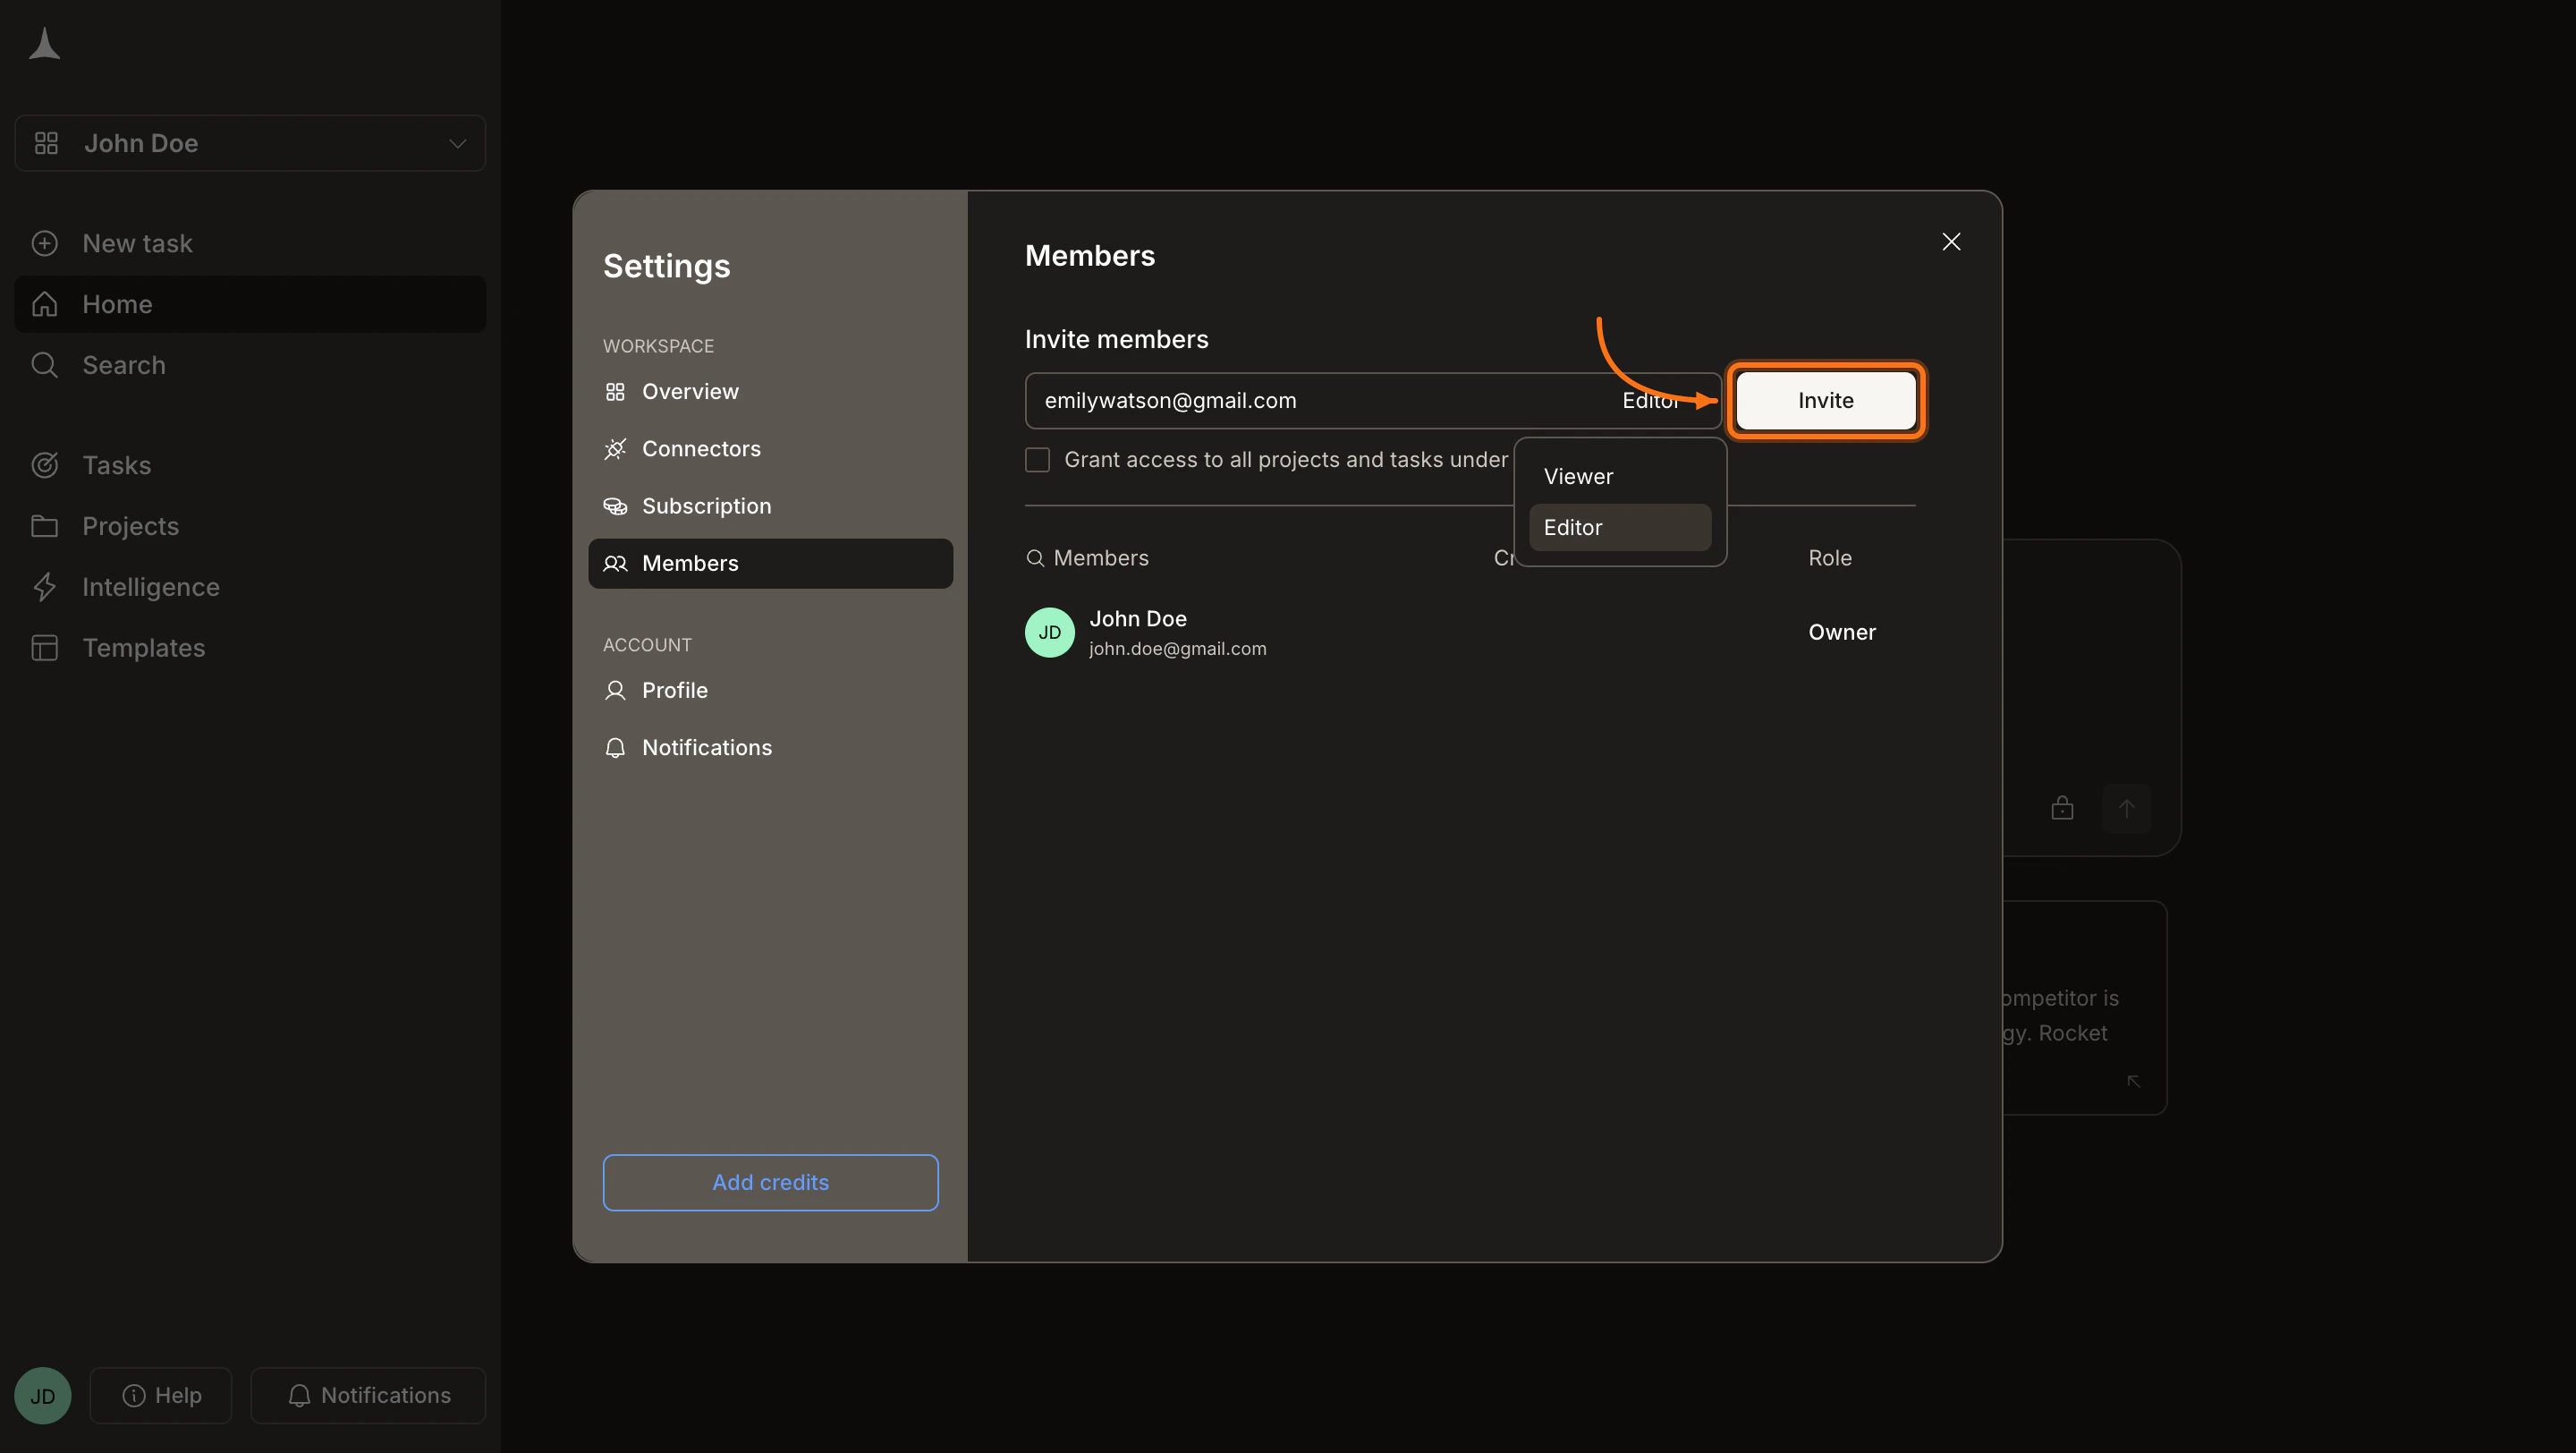 Click **Invite** when ready.
After sending the invitation, the invitee appears in the members list with a **Pending** badge. Every new member is automatically assigned a default credit limit of **100 credits per month**. Use the **Credit limit** dropdown on their row if you want to change this value.
Click **Invite** when ready.
After sending the invitation, the invitee appears in the members list with a **Pending** badge. Every new member is automatically assigned a default credit limit of **100 credits per month**. Use the **Credit limit** dropdown on their row if you want to change this value.
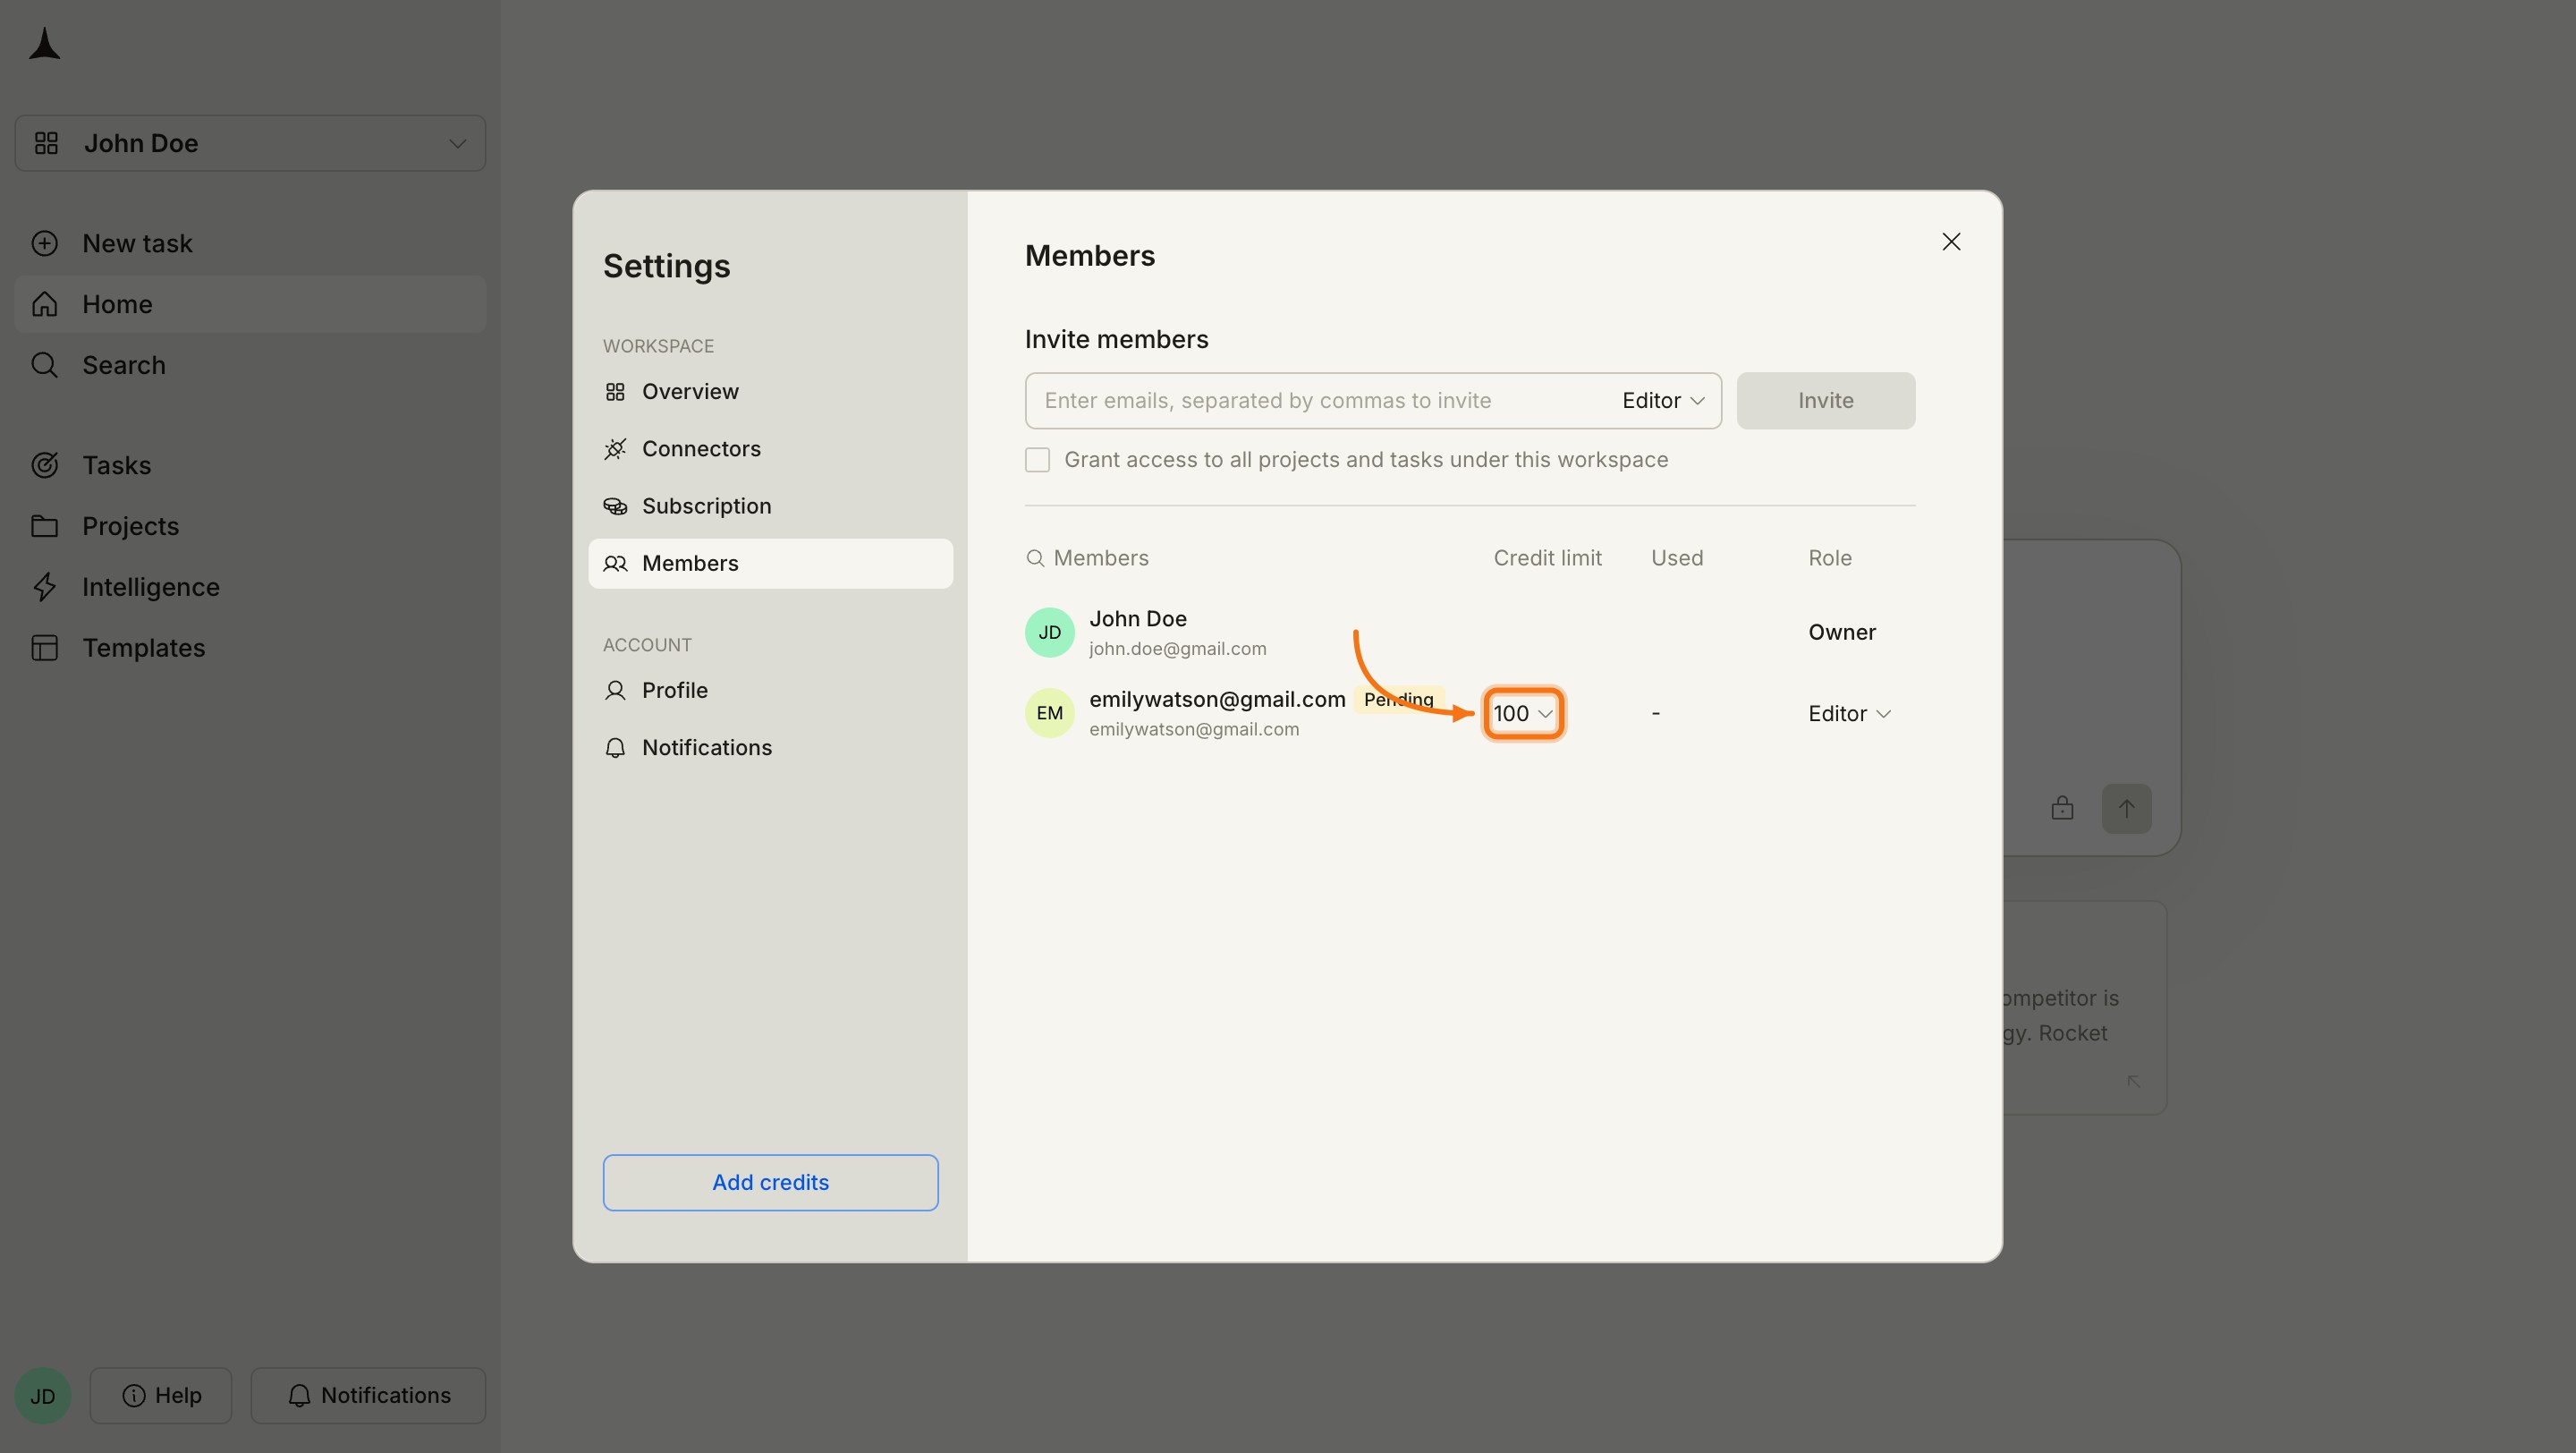
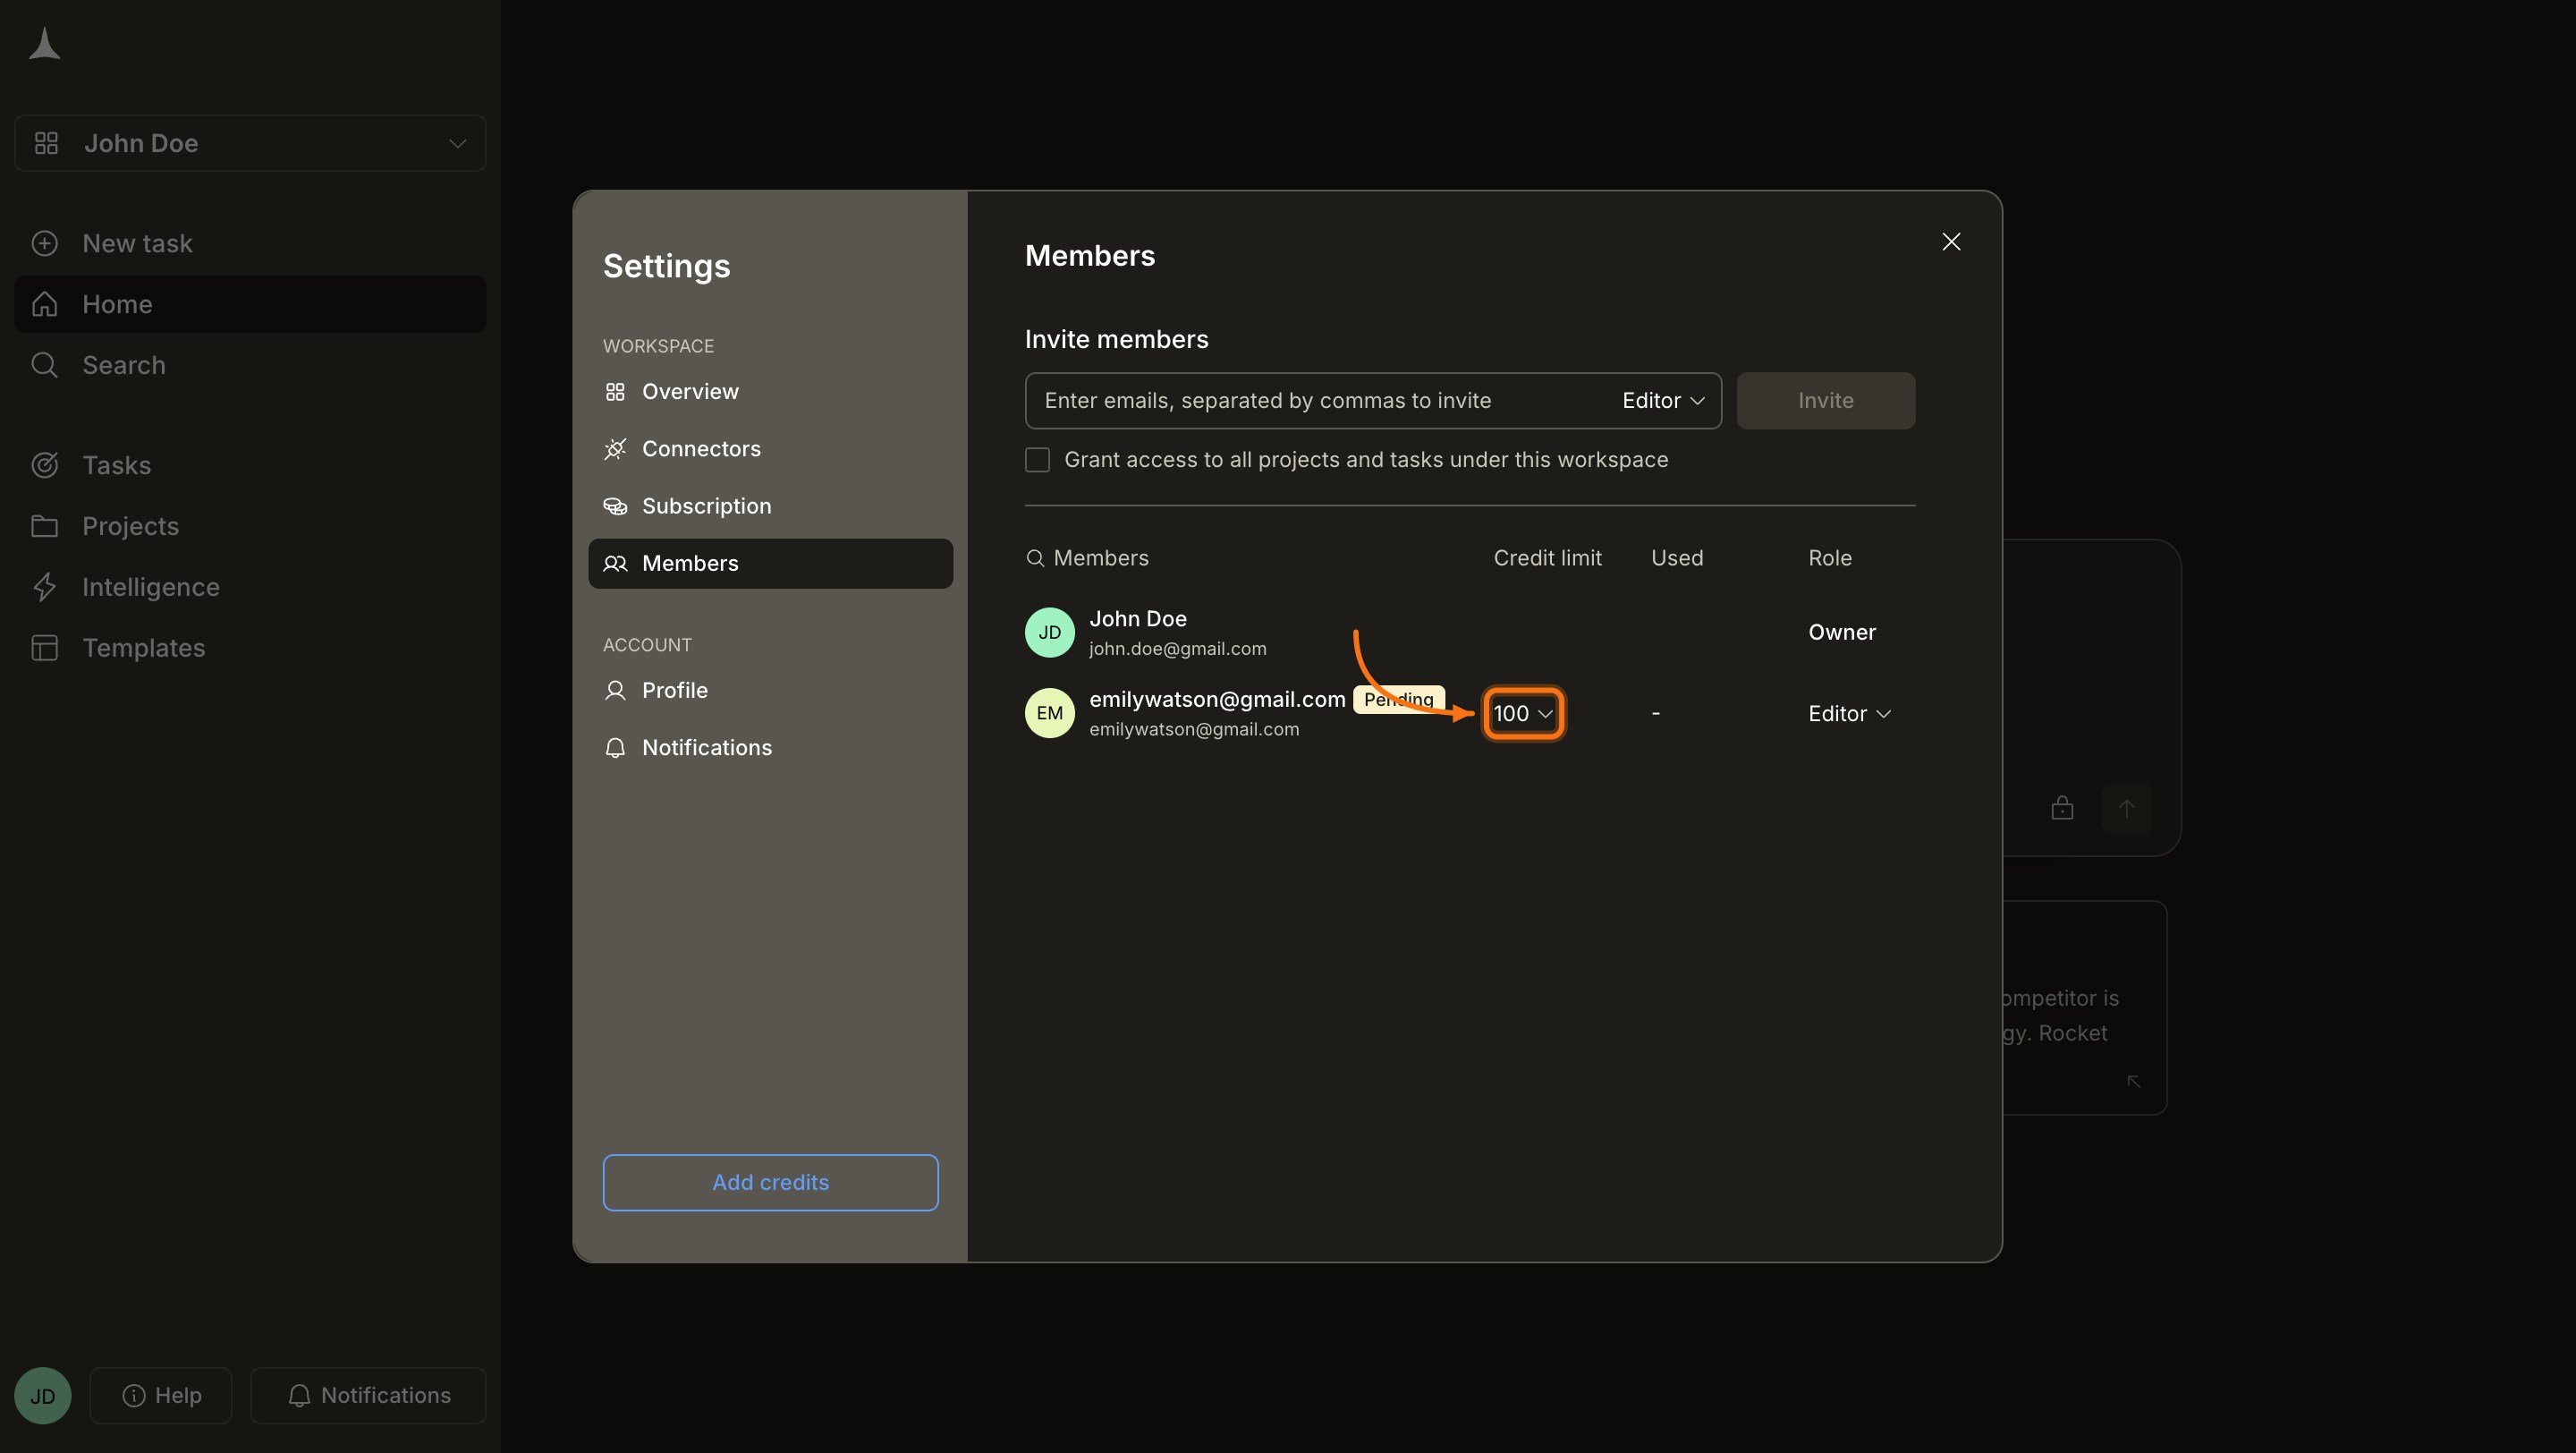 Credit limits apply at all collaboration levels: workspace, project, and task. You can set or update the limit at any time from **Settings → Members**.
If the default of 100 credits per month does not fit your needs, open the **Credit limit** dropdown on the member's row and choose a different value. Available options range from 0 to 700 or more. Setting the limit to **0** prevents the member from generating any output.
Credit limits apply at all collaboration levels: workspace, project, and task. You can set or update the limit at any time from **Settings → Members**.
If the default of 100 credits per month does not fit your needs, open the **Credit limit** dropdown on the member's row and choose a different value. Available options range from 0 to 700 or more. Setting the limit to **0** prevents the member from generating any output.
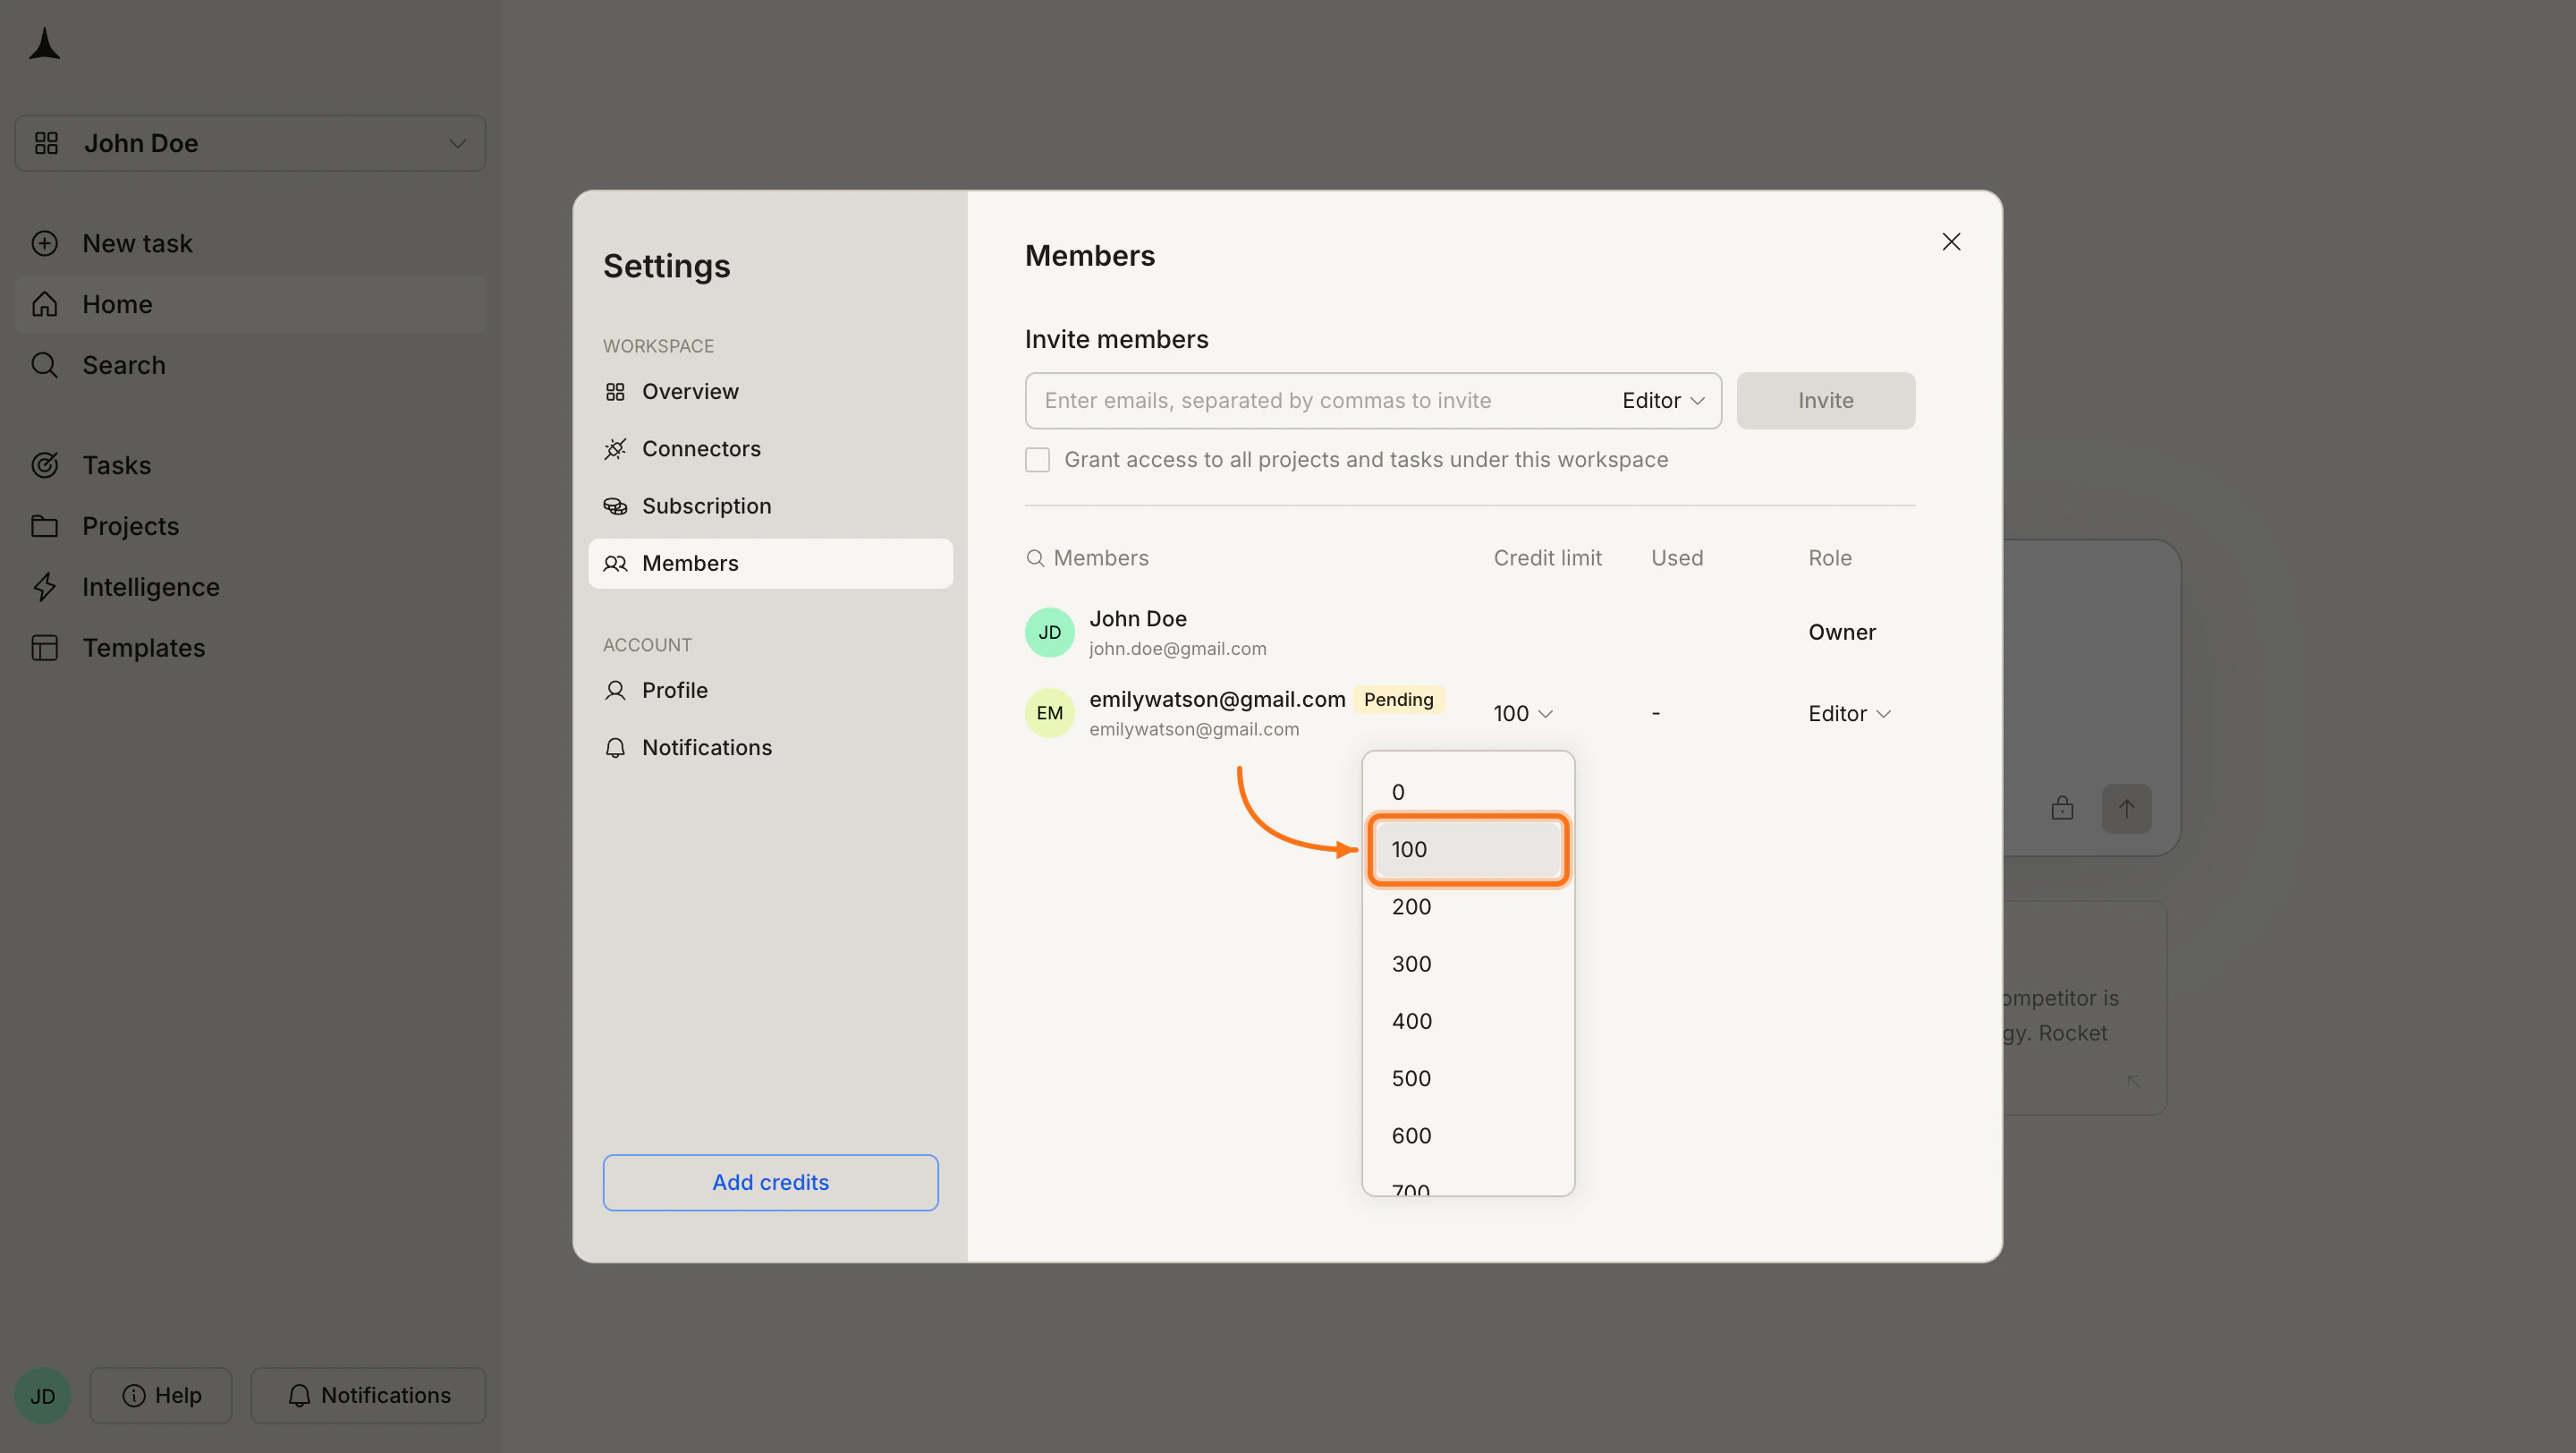
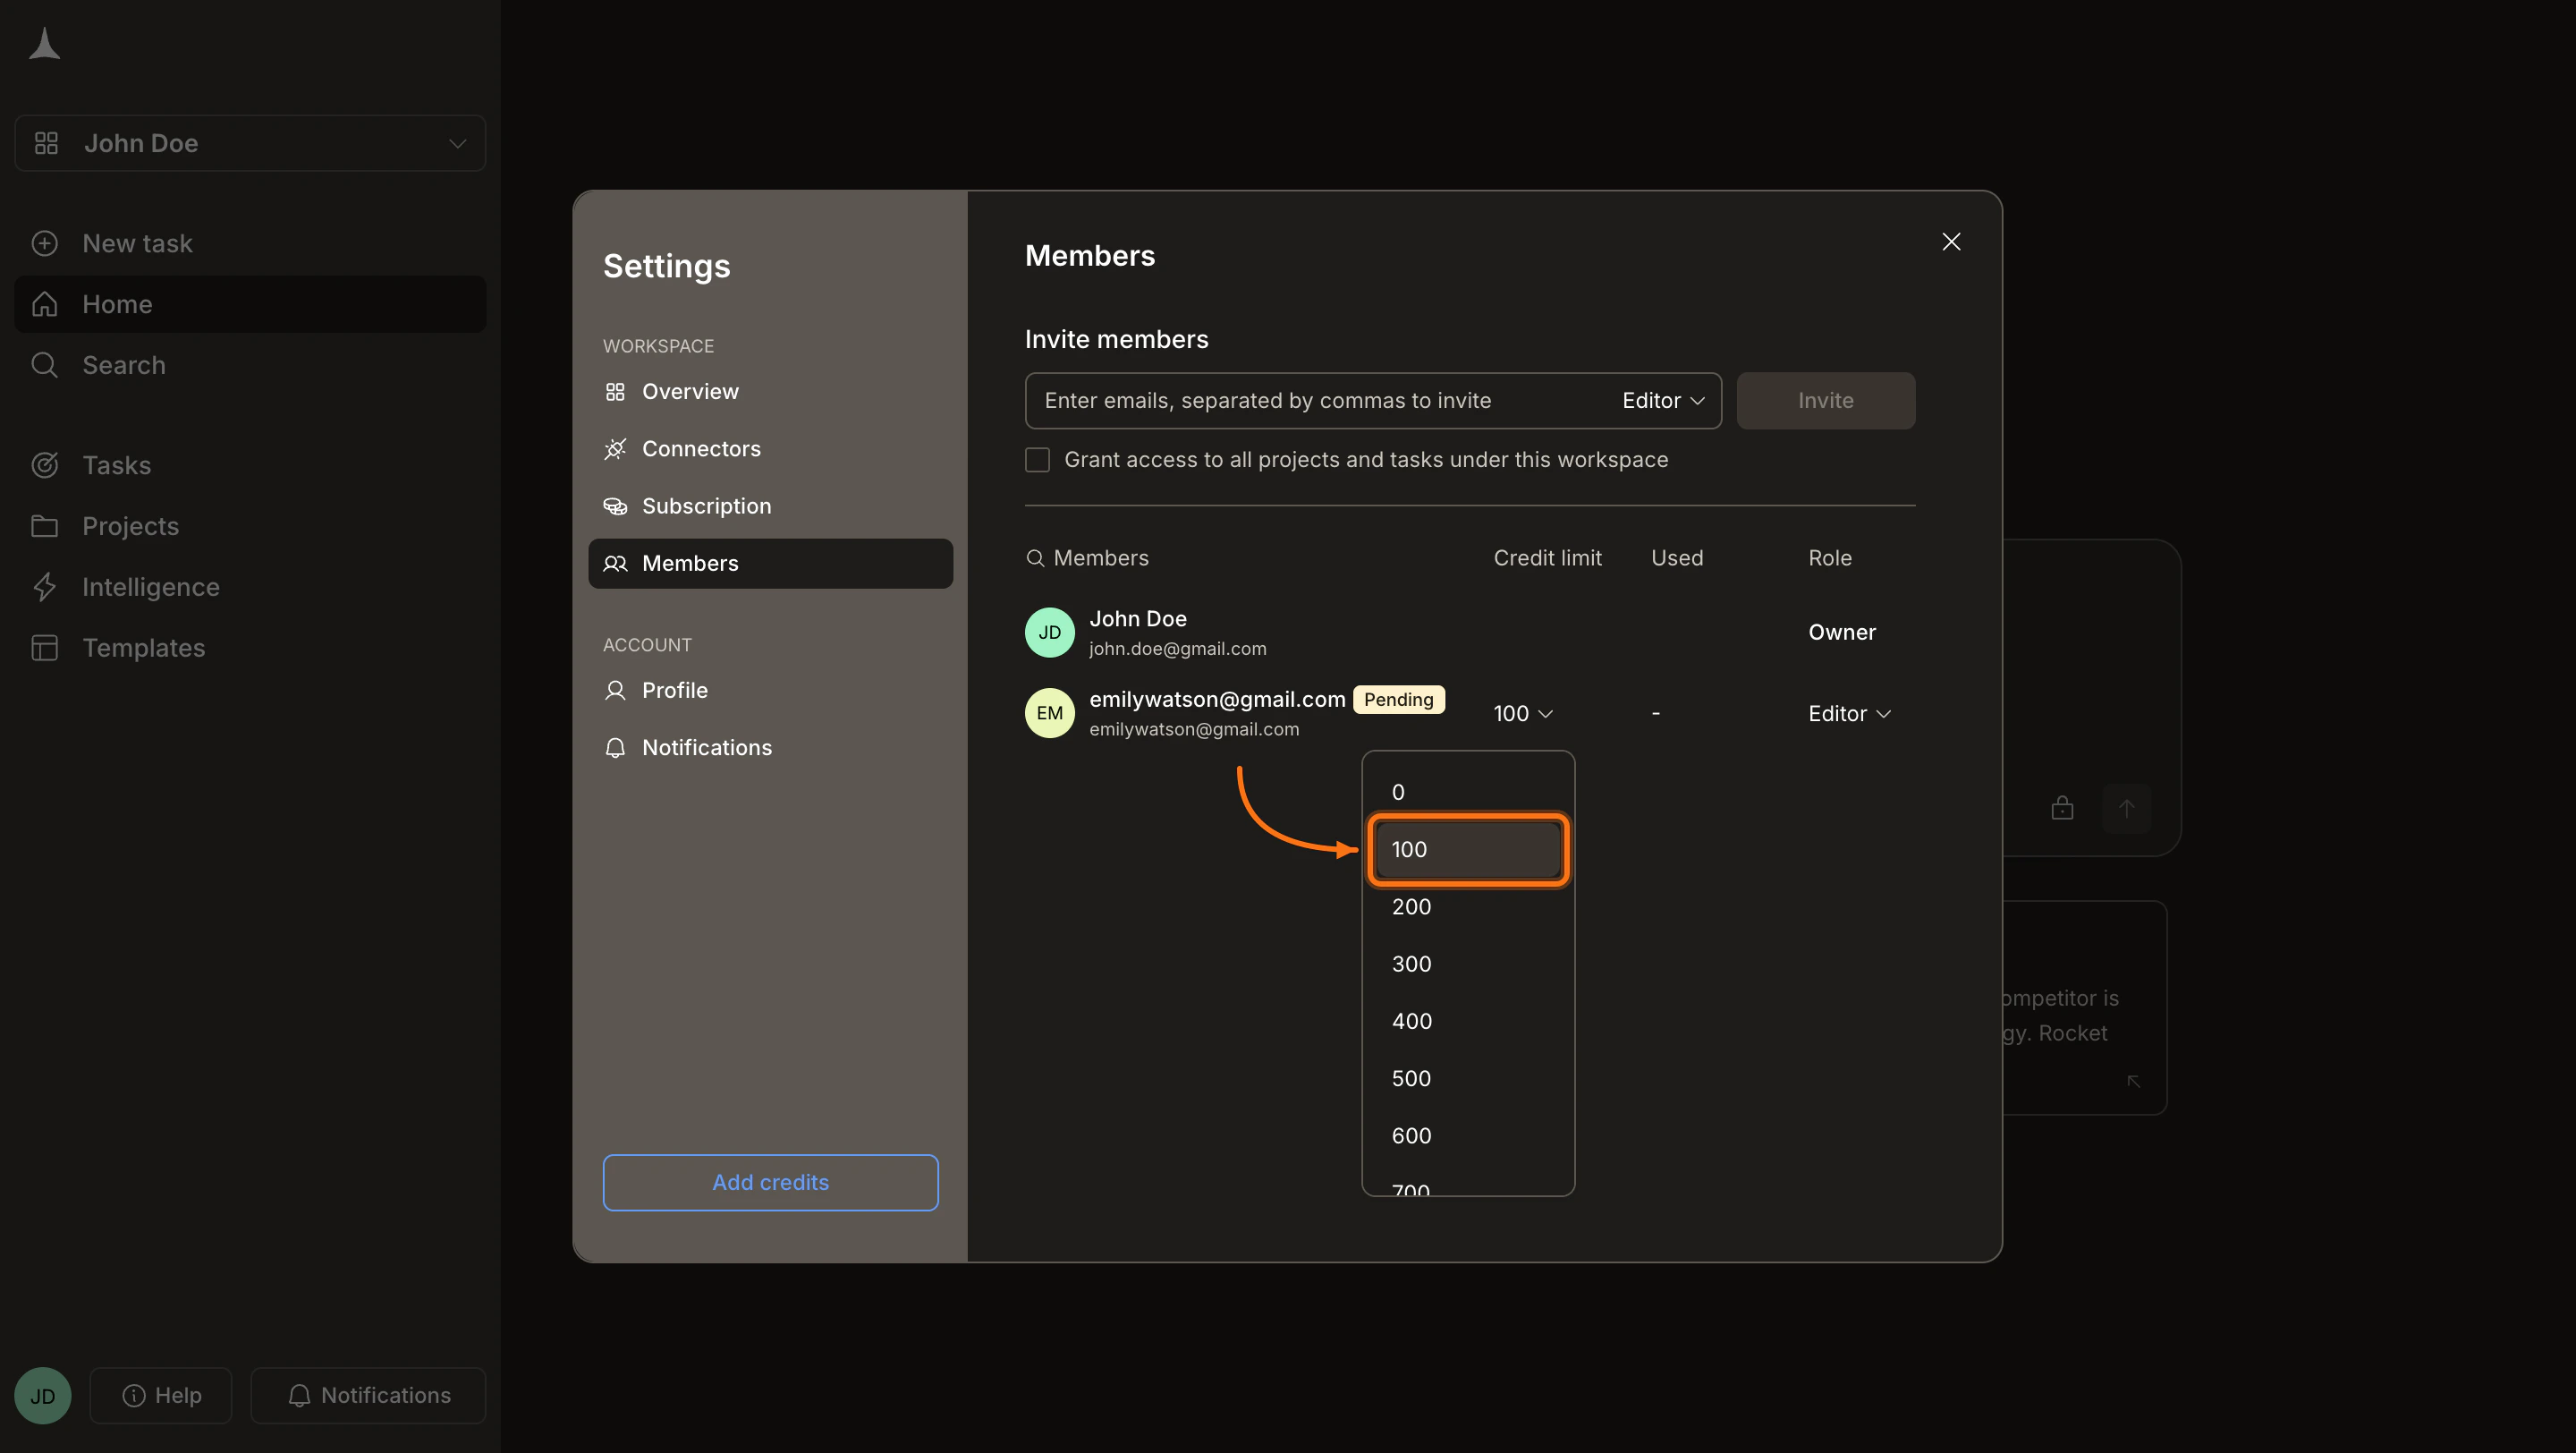 The member appears in the list as **Pending** until they accept. Once accepted, their status updates and they can access the workspace according to the role and scope you configured.
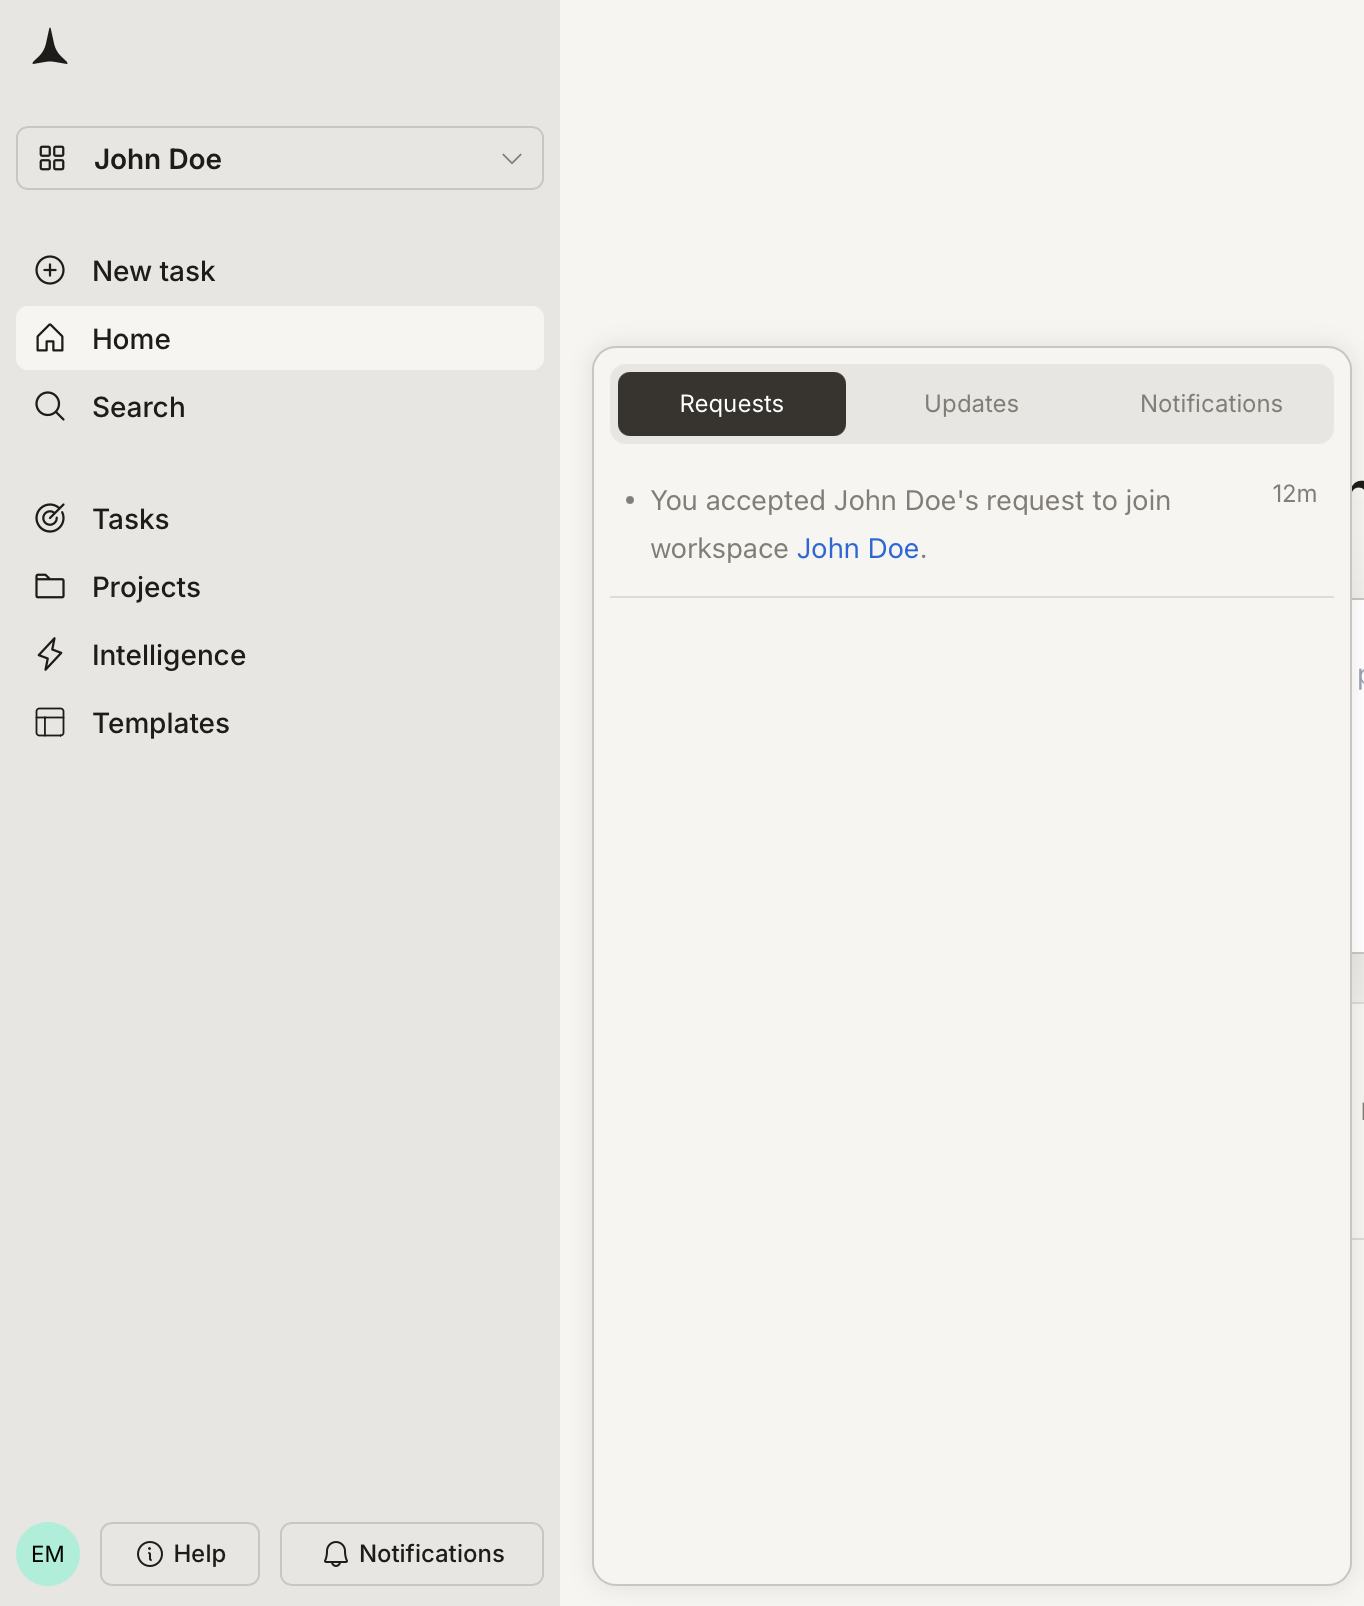
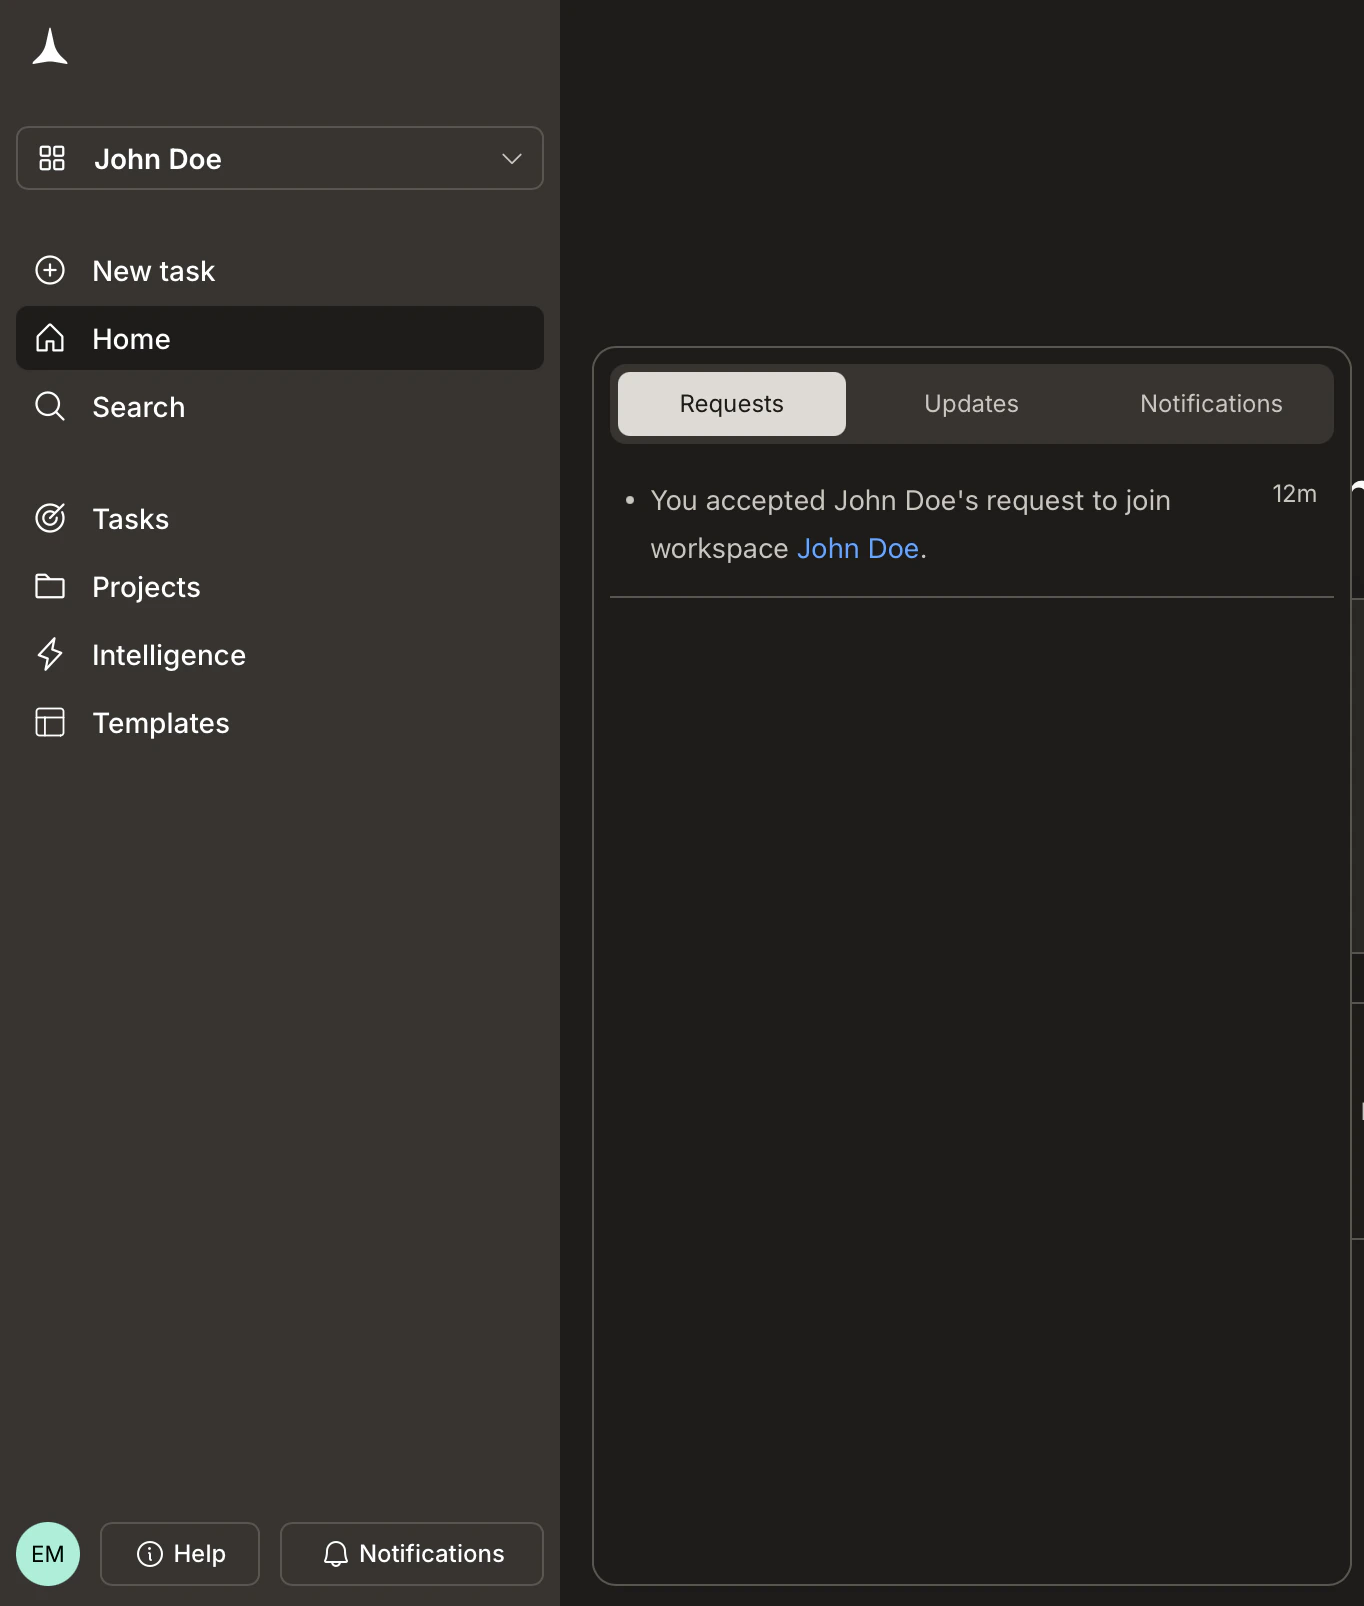
 The invitee receives an email with a link to accept. You can also copy the invite link directly using the copy icon next to their name in the members list. When they accept, you will see a confirmation in the **Requests** tab of the [notification panel](/getting-started/account/notifications).
 ## Roles and permissions
Rocket uses two roles across all levels. The table below shows what each role can do at the workspace level.
| Permission | **Editor** | **Viewer** |
| :---------------------------------- | :----------------------------------------------------------------------------- | :--------- |
| **View tasks and outputs** | Yes | Yes |
| **Create new tasks** | Yes | No |
| **Edit tasks (chat, iterate)** | Yes | No |
| **Upload and manage files** | Yes | No |
| **Connect and disconnect services** | Yes | No |
| **Invite members** | Yes (when [invite toggle](/getting-started/workspace/manage#steps) is enabled) | No |
| **Change member roles** | No | No |
| **Archive or delete projects** | Yes | No |
| **Manage billing** | No | No |
Day-to-day collaborator. Editors can create tasks, iterate on existing work, upload files, connect services, and invite new members.
Read-only access. Viewers can see all tasks and outputs but cannot create or edit anything. Ideal for stakeholders who need visibility without editing access.
Roles apply at each level independently. A workspace Editor can be given Viewer-only access on a specific project.
## Revoke a pending invitation
If you need to cancel an invitation before the recipient accepts it, go to **Settings → Members** and find the member with the **Pending** badge.
Click the role dropdown (showing **Editor** or **Viewer**) on the pending member's row. This reveals additional actions for that invitation.
## Roles and permissions
Rocket uses two roles across all levels. The table below shows what each role can do at the workspace level.
| Permission | **Editor** | **Viewer** |
| :---------------------------------- | :----------------------------------------------------------------------------- | :--------- |
| **View tasks and outputs** | Yes | Yes |
| **Create new tasks** | Yes | No |
| **Edit tasks (chat, iterate)** | Yes | No |
| **Upload and manage files** | Yes | No |
| **Connect and disconnect services** | Yes | No |
| **Invite members** | Yes (when [invite toggle](/getting-started/workspace/manage#steps) is enabled) | No |
| **Change member roles** | No | No |
| **Archive or delete projects** | Yes | No |
| **Manage billing** | No | No |
Day-to-day collaborator. Editors can create tasks, iterate on existing work, upload files, connect services, and invite new members.
Read-only access. Viewers can see all tasks and outputs but cannot create or edit anything. Ideal for stakeholders who need visibility without editing access.
Roles apply at each level independently. A workspace Editor can be given Viewer-only access on a specific project.
## Revoke a pending invitation
If you need to cancel an invitation before the recipient accepts it, go to **Settings → Members** and find the member with the **Pending** badge.
Click the role dropdown (showing **Editor** or **Viewer**) on the pending member's row. This reveals additional actions for that invitation.
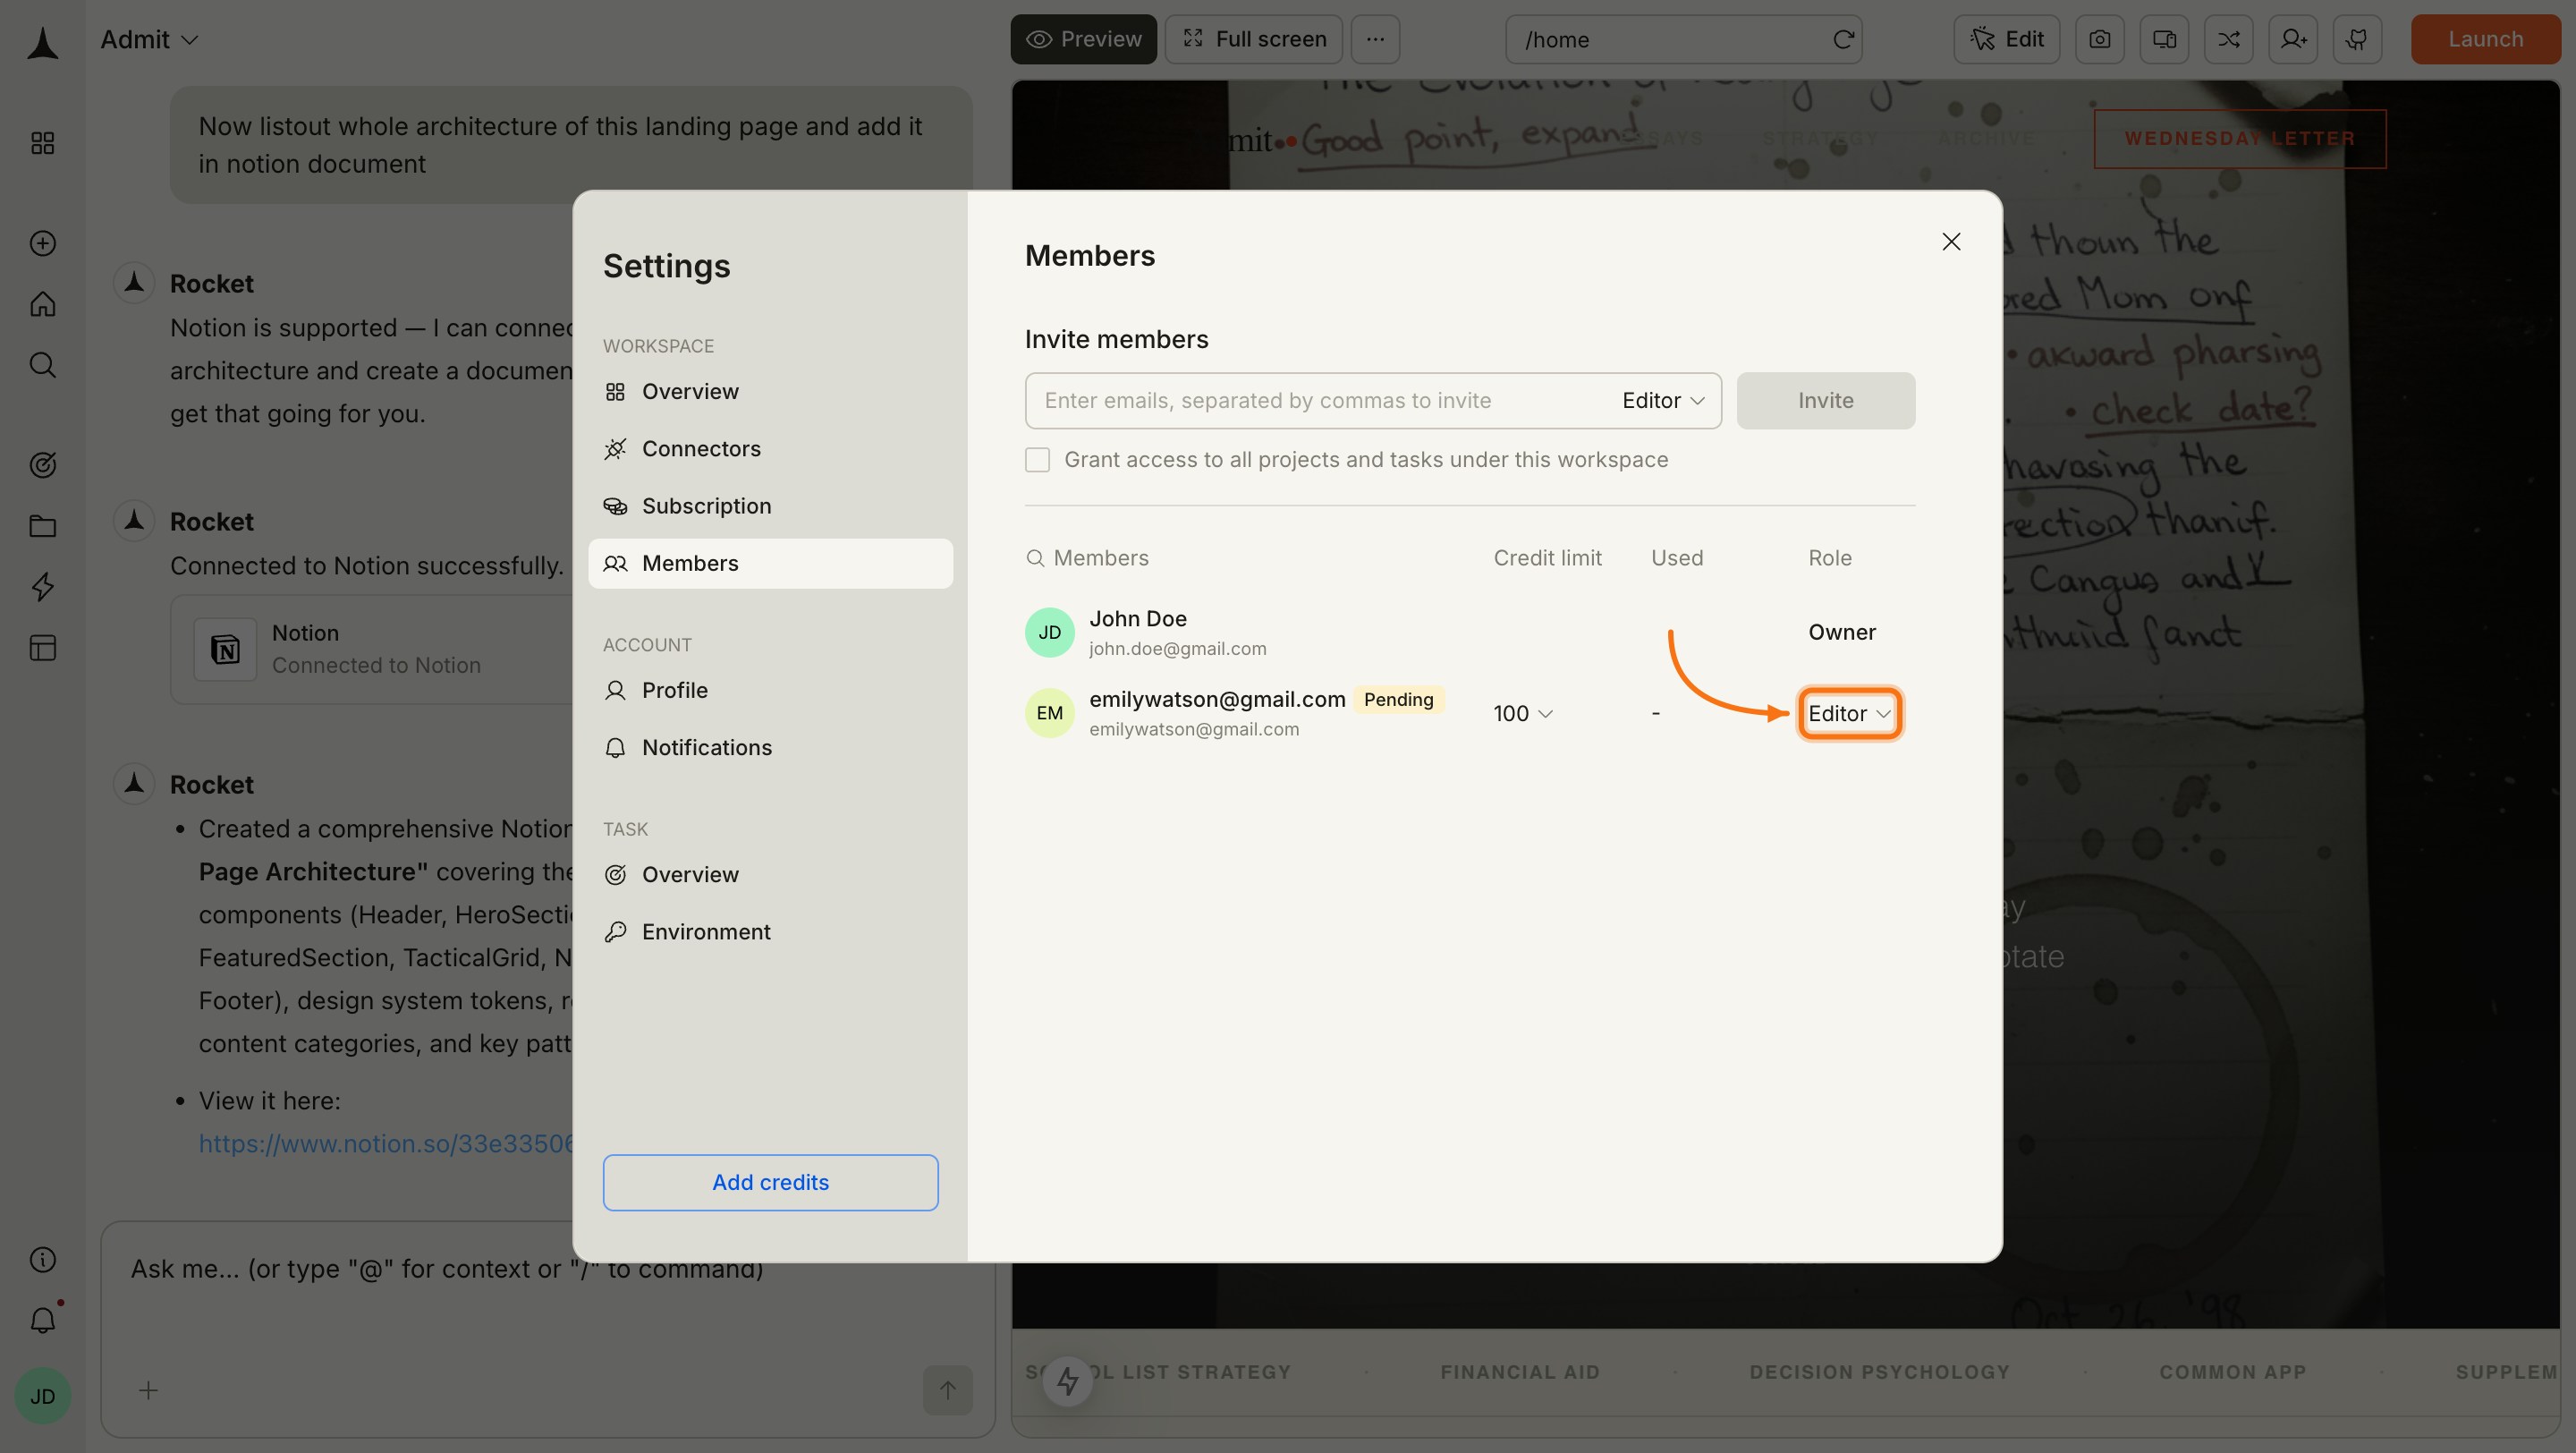
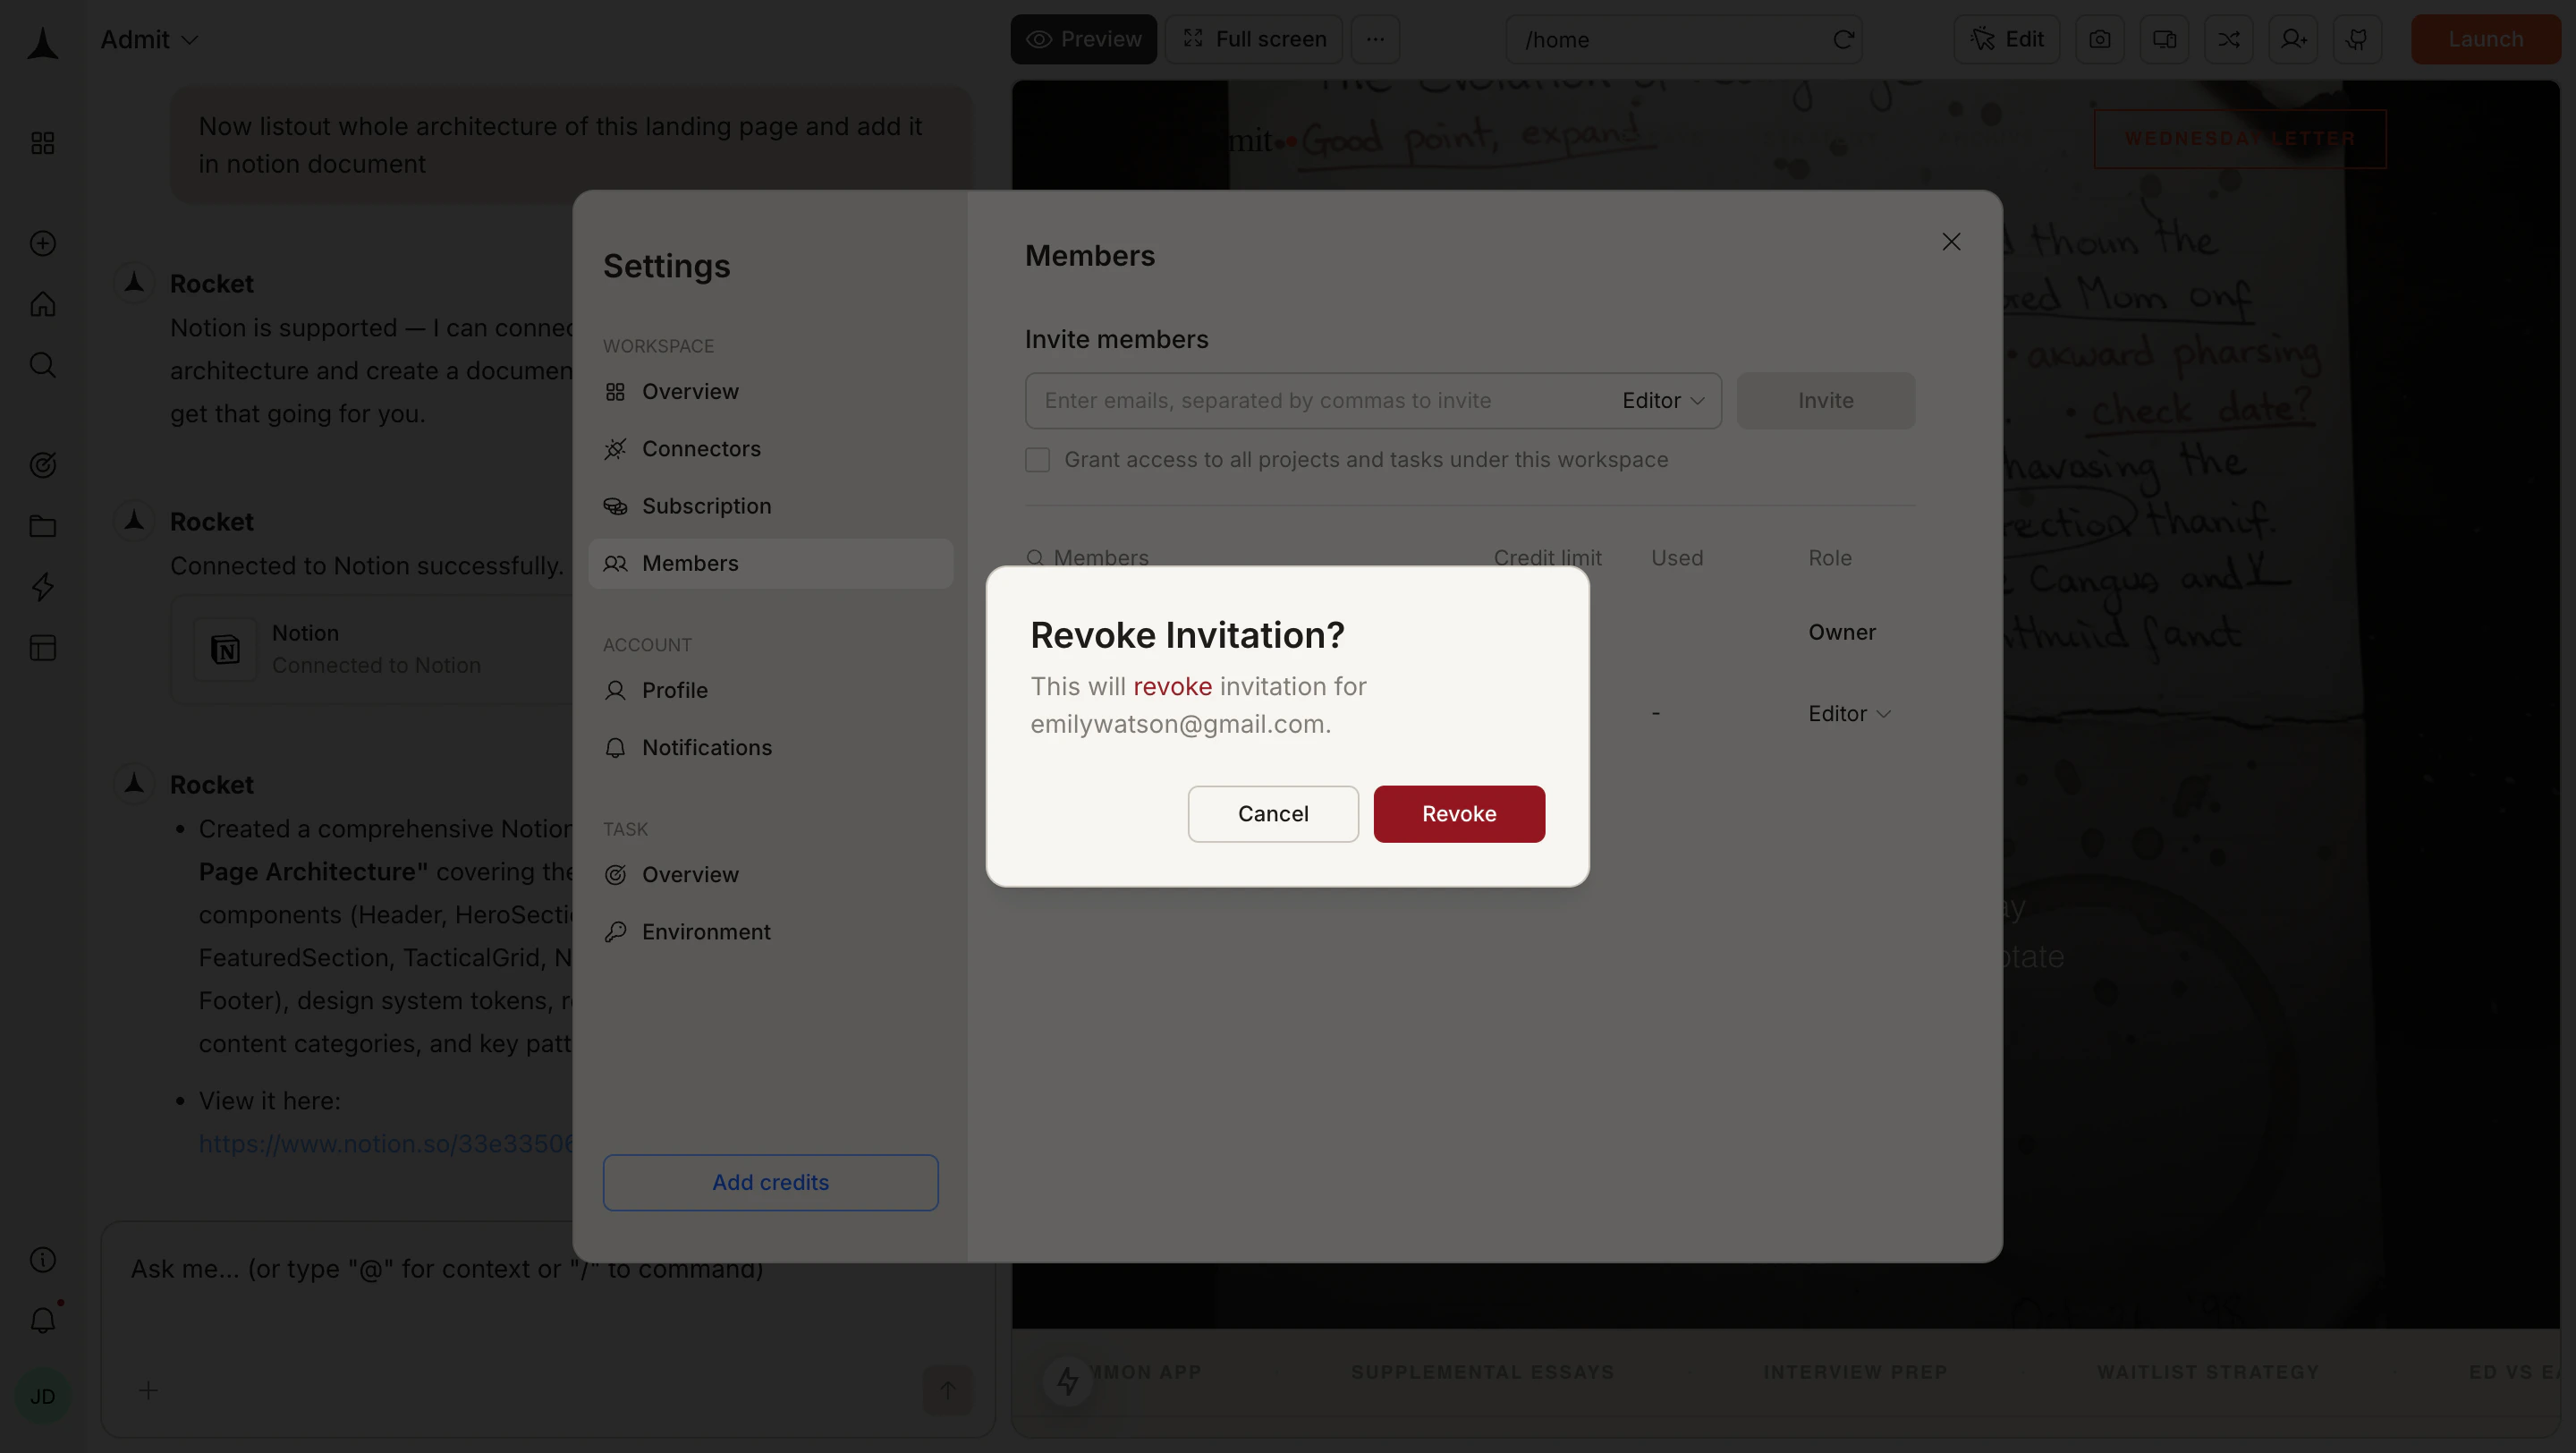
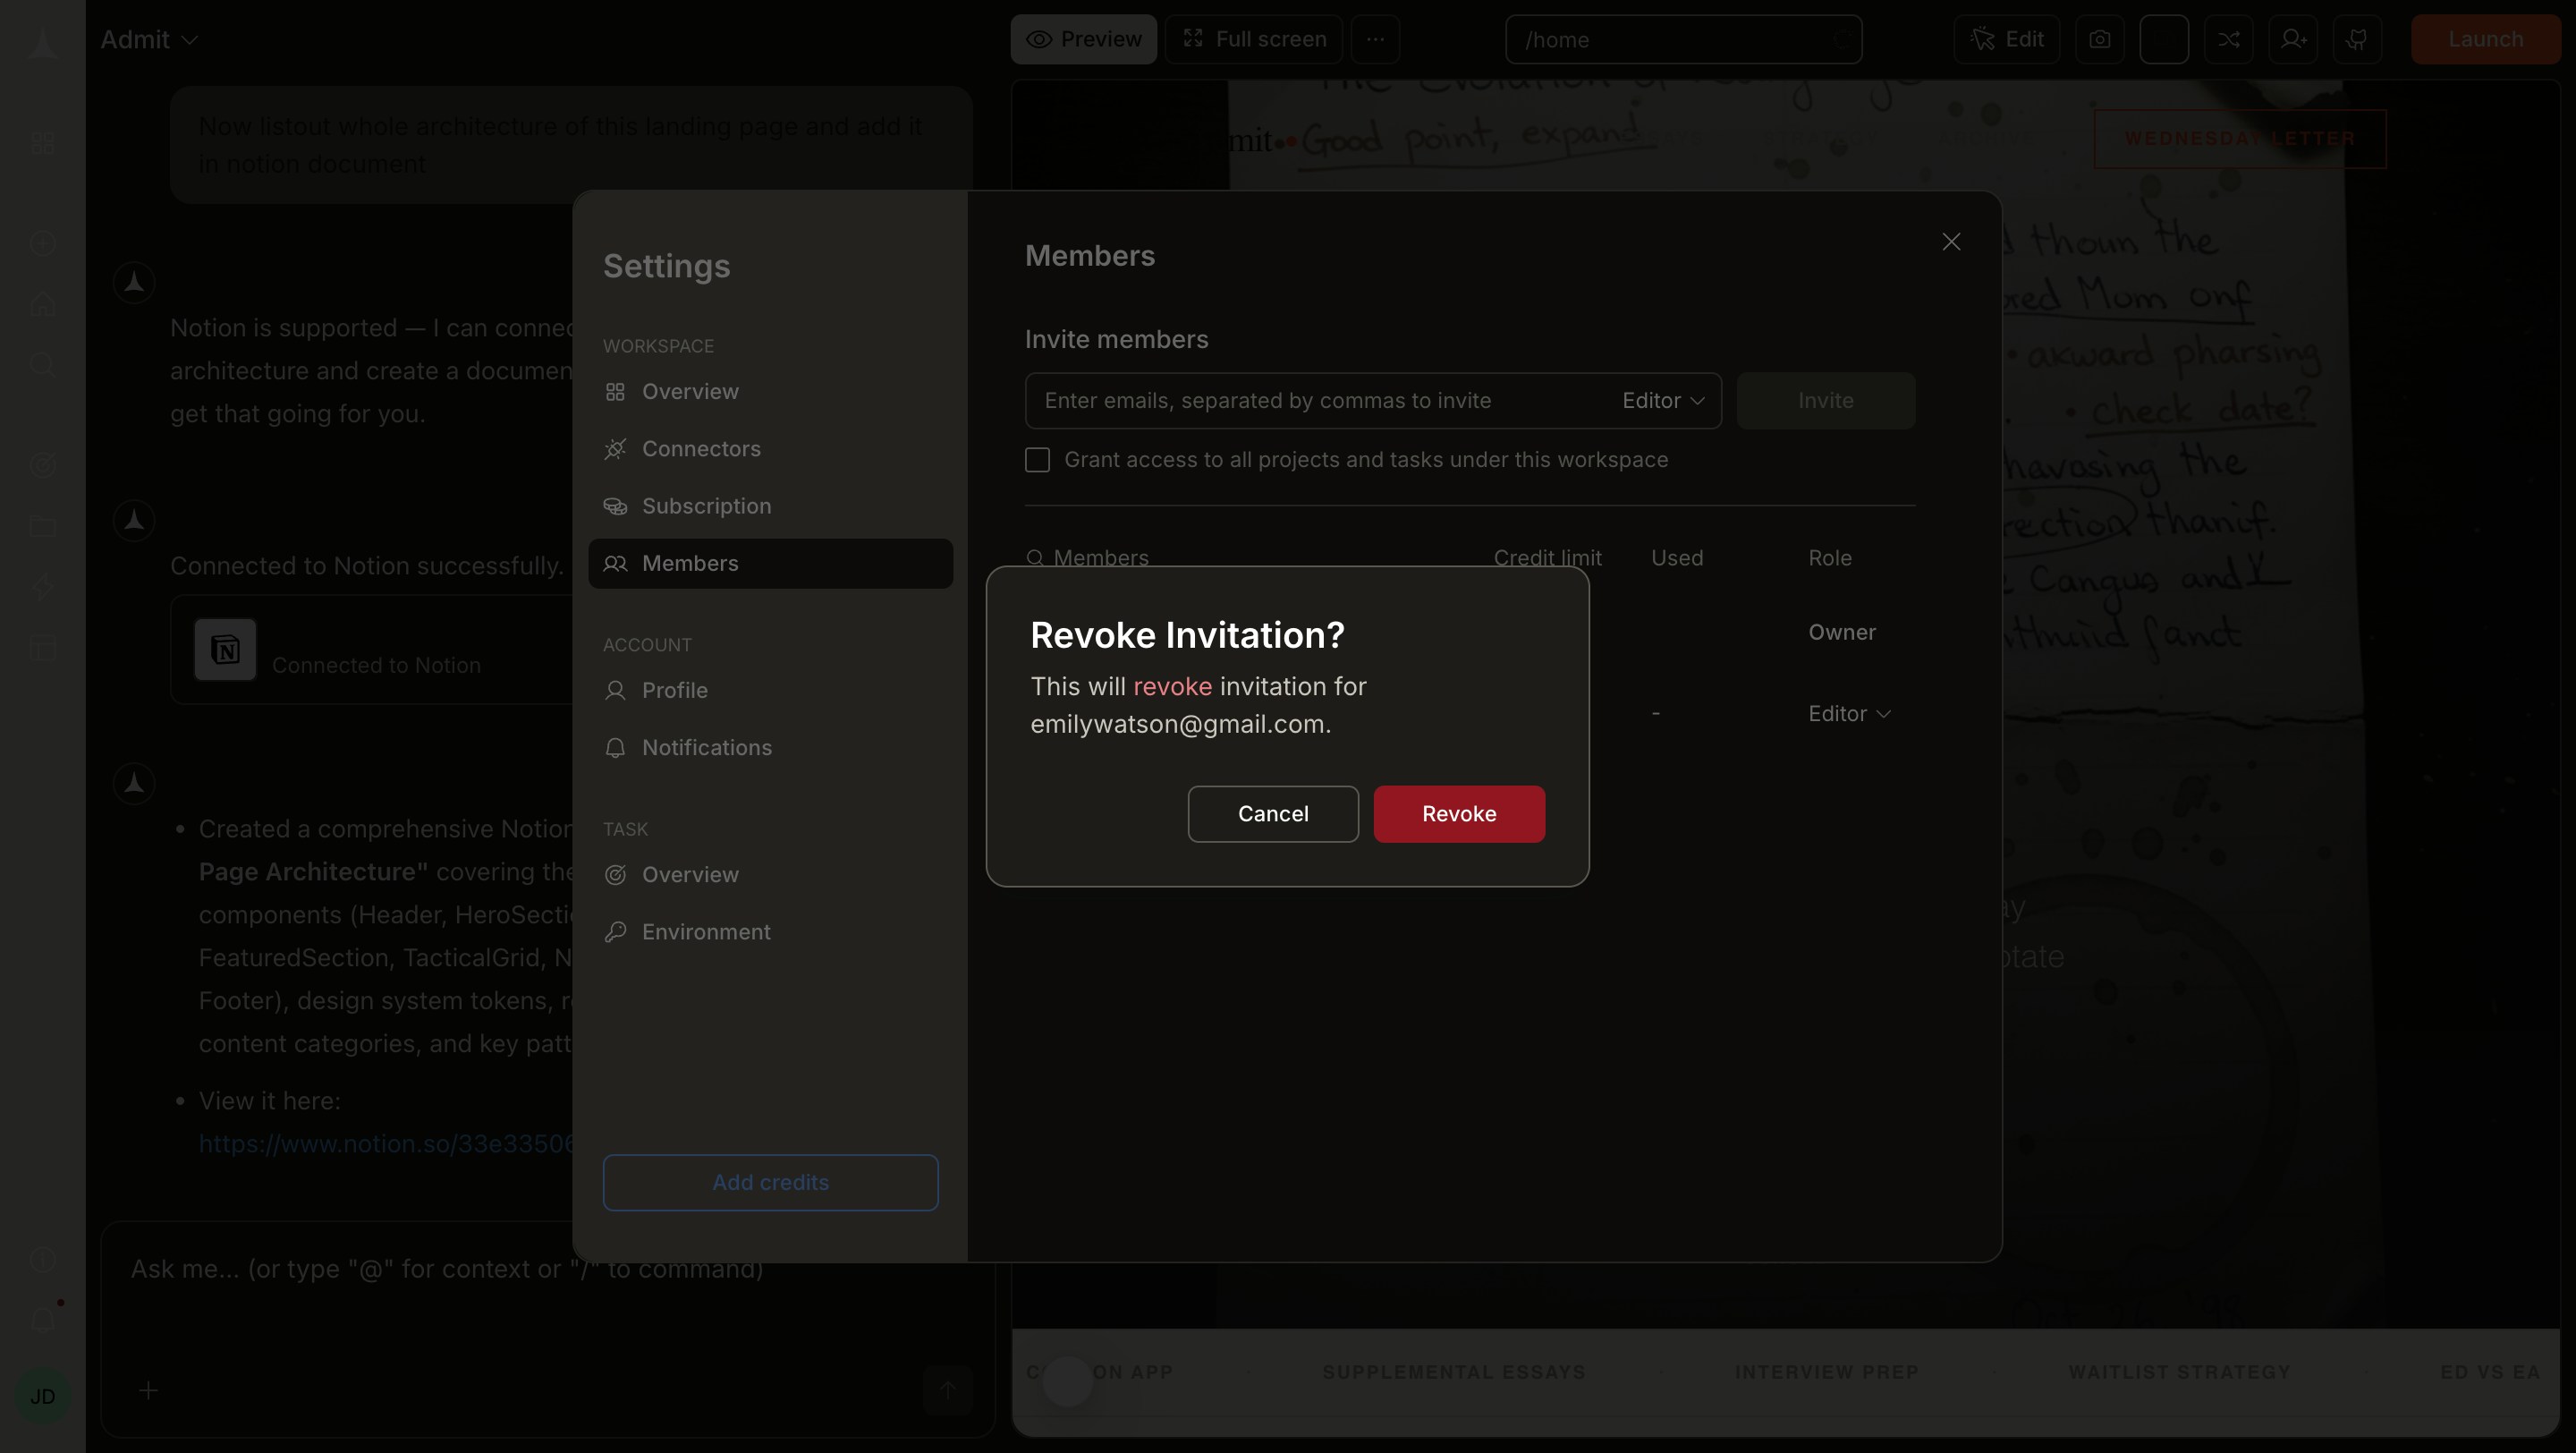
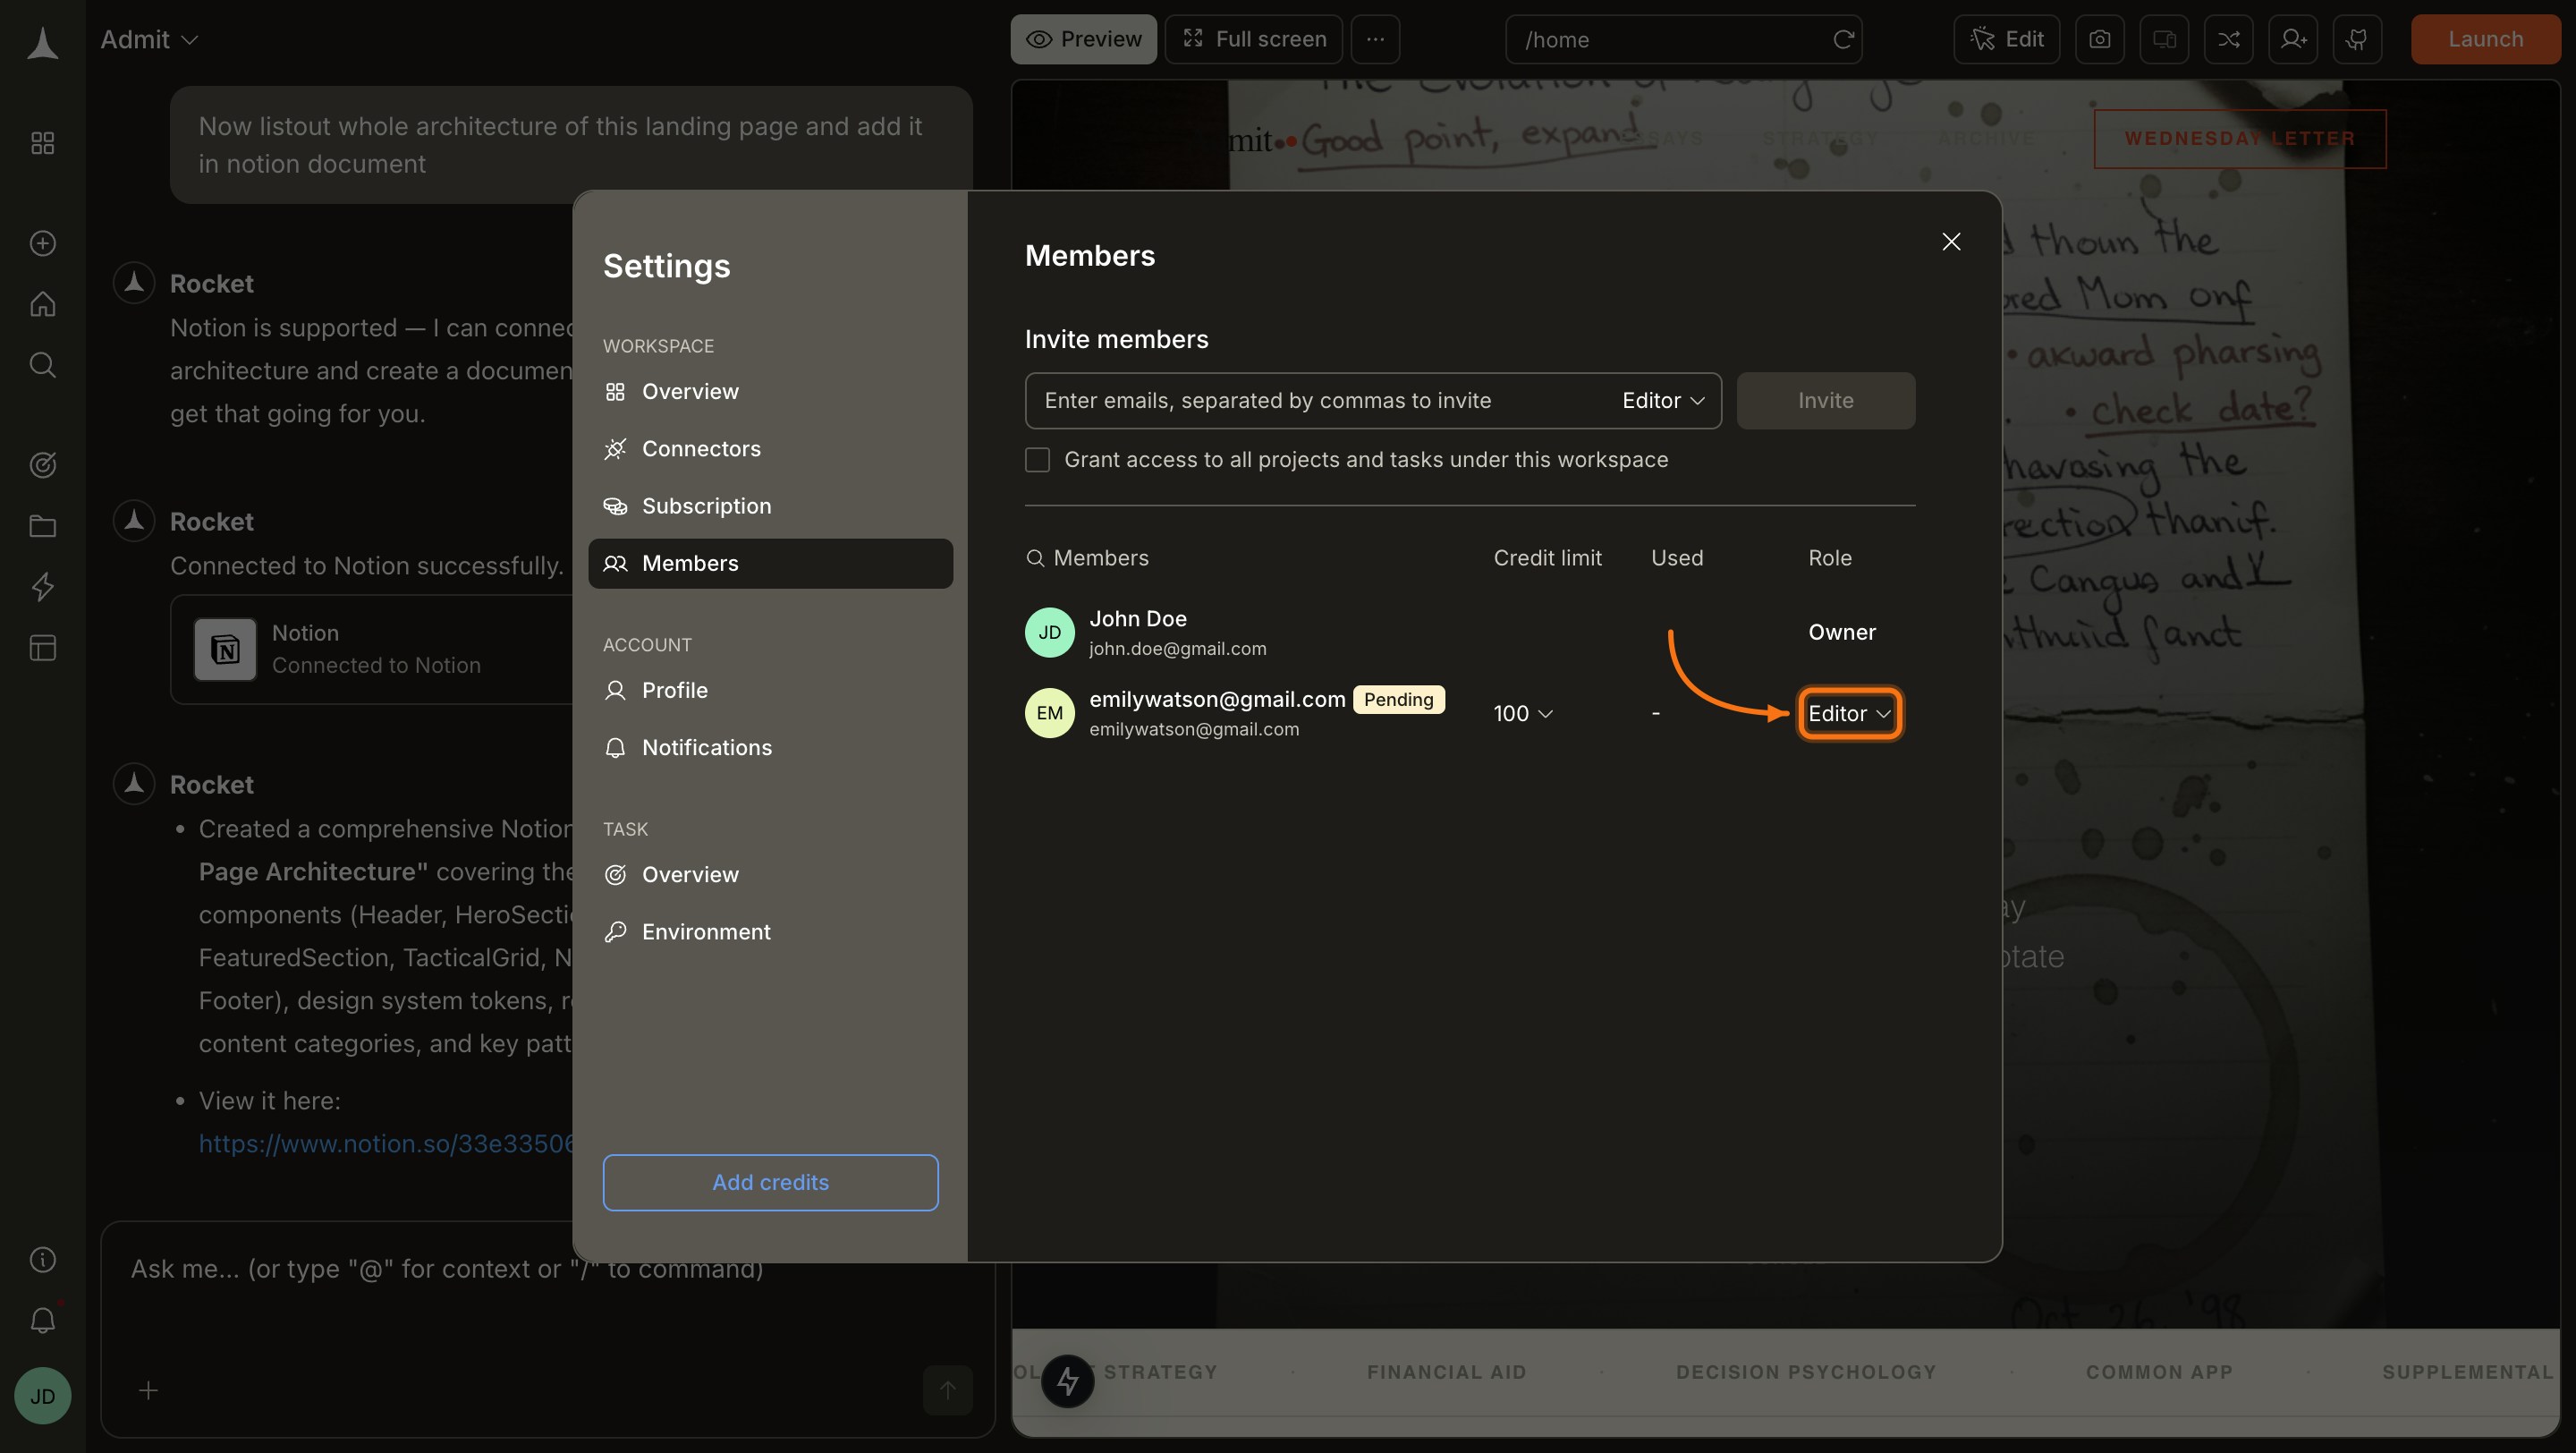 Select **Revoke invite** from the dropdown. The pending row is removed immediately and the invitation link in the recipient's email becomes invalid.
 ## Manage workspace members
To change a member's role, update their credit limit, or remove them, go to **Settings → Members**. Click the role dropdown on the member's row and select **Remove** to revoke their access entirely.
The members panel also shows the credit usage for every member, so you can see at a glance how many credits each person has consumed against their limit. New members are assigned a default limit of **100 credits per month**, which you can adjust at any time from this panel.
## Best practices
Invite core team members to the workspace, add collaborators to specific projects, and share individual tasks with external reviewers. Avoid defaulting to workspace-level invitations for everyone, since this grants broad visibility across all existing projects.
## What's next?
Invite members to specific projects and collaborate on tasks.
Share individual tasks and control visibility.
Manage your workspace settings, billing, and connectors.
Connect external services at the workspace level.
## Manage workspace members
To change a member's role, update their credit limit, or remove them, go to **Settings → Members**. Click the role dropdown on the member's row and select **Remove** to revoke their access entirely.
The members panel also shows the credit usage for every member, so you can see at a glance how many credits each person has consumed against their limit. New members are assigned a default limit of **100 credits per month**, which you can adjust at any time from this panel.
## Best practices
Invite core team members to the workspace, add collaborators to specific projects, and share individual tasks with external reviewers. Avoid defaulting to workspace-level invitations for everyone, since this grants broad visibility across all existing projects.
## What's next?
Invite members to specific projects and collaborate on tasks.
Share individual tasks and control visibility.
Manage your workspace settings, billing, and connectors.
Connect external services at the workspace level.