> ## Documentation Index
> Fetch the complete documentation index at: https://docs.rocket.new/llms.txt
> Use this file to discover all available pages before exploring further.

# Manage

> Create, rename, switch, and delete workspaces in Rocket.new.

export const LlmsDirective = () => <blockquote className="llms-directive">
    For the complete documentation index, see <a href="/llms.txt">llms.txt</a>.
    For a lightweight markdown version of this page, append .md to the URL.
  </blockquote>;

<LlmsDirective />

All workspace actions, creating, renaming, switching, and deleting, are performed from the workspace menu in the top left of the sidebar.

<Note>
  When you create a Rocket account, a default workspace is automatically created using your name with the Free plan.
</Note>

<Divider />

## Create a workspace

<Steps>
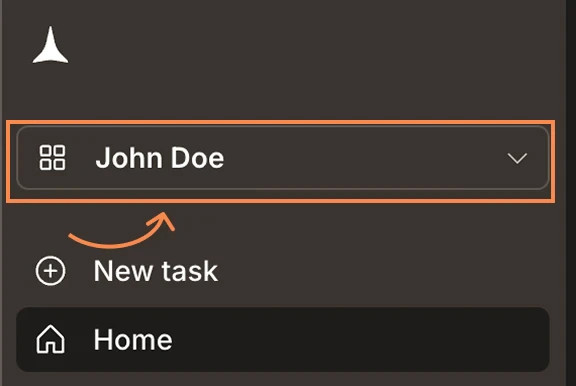
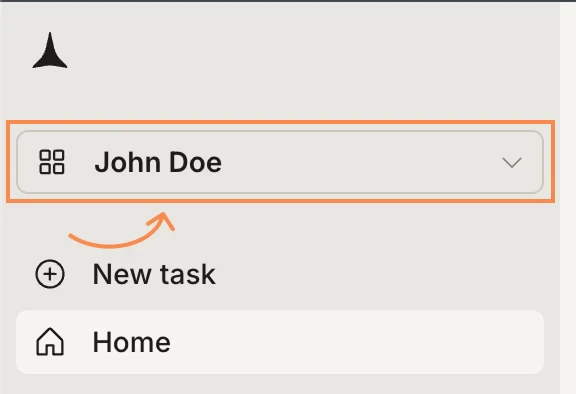
  <Step title="Click your workspace name">
    Click your workspace name in the top left of the sidebar to open the workspace menu.
    <Frame caption="Click your workspace name to open the menu">
      <img src="https://mintcdn.com/dhiwisepvtltd-5e04e6a4/7Nm-xUPzRY4wezqJ/images/getting-started/workspace/manage/create-workspace-open-menu-light.webp?fit=max&auto=format&n=7Nm-xUPzRY4wezqJ&q=85&s=aeec7183e79ab085b3976c7fbbb86e19" alt="Sidebar showing the workspace name button highlighted." className="theme-image light-image" width="576" height="394" data-path="images/getting-started/workspace/manage/create-workspace-open-menu-light.webp" />

      <img src="https://mintcdn.com/dhiwisepvtltd-5e04e6a4/7Nm-xUPzRY4wezqJ/images/getting-started/workspace/manage/create-workspace-open-menu-dark.webp?fit=max&auto=format&n=7Nm-xUPzRY4wezqJ&q=85&s=23a3596d4c0dec67c83a975e72643479" alt="Sidebar showing the workspace name button highlighted." className="theme-image dark-image" width="576" height="386" data-path="images/getting-started/workspace/manage/create-workspace-open-menu-dark.webp" />
    </Frame>
  </Step>

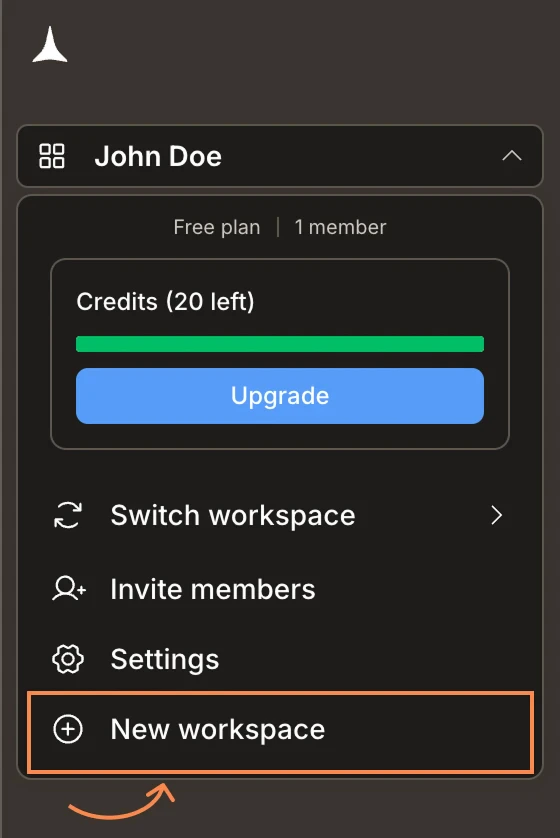
  <Step title="Click New workspace">
    Select **New workspace** at the bottom of the menu.
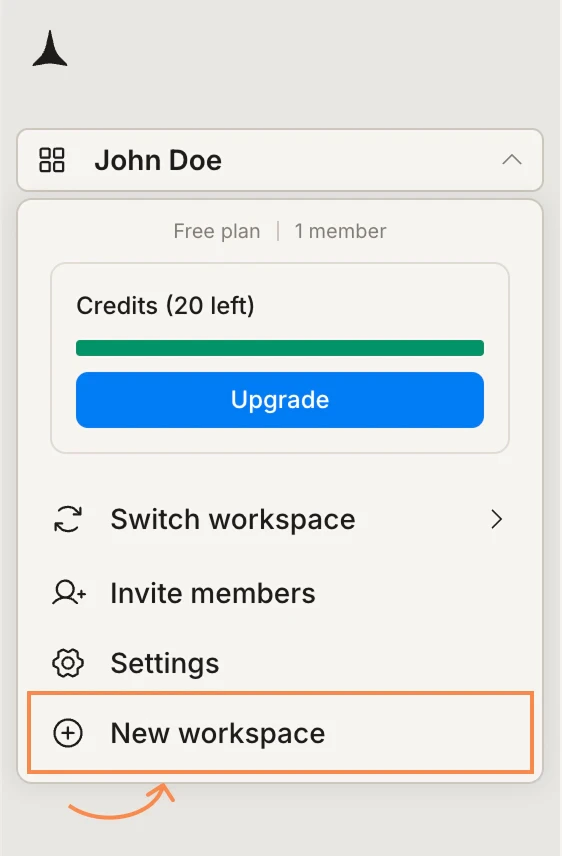
    <Frame caption="Workspace menu with New workspace highlighted">
      <img src="https://mintcdn.com/dhiwisepvtltd-5e04e6a4/7Nm-xUPzRY4wezqJ/images/getting-started/workspace/manage/create-workspace-menu-light.webp?fit=max&auto=format&n=7Nm-xUPzRY4wezqJ&q=85&s=bc64dba3691a6698b6cf614d6b539340" alt="Workspace menu showing Switch workspace, Invite members, Settings, and New workspace options." className="theme-image light-image" width="562" height="856" data-path="images/getting-started/workspace/manage/create-workspace-menu-light.webp" />

      <img src="https://mintcdn.com/dhiwisepvtltd-5e04e6a4/7Nm-xUPzRY4wezqJ/images/getting-started/workspace/manage/create-workspace-menu-dark.webp?fit=max&auto=format&n=7Nm-xUPzRY4wezqJ&q=85&s=77d282189d77dc9eafa49e2d88b7e4b1" alt="Workspace menu showing Switch workspace, Invite members, Settings, and New workspace options." className="theme-image dark-image" width="560" height="838" data-path="images/getting-started/workspace/manage/create-workspace-menu-dark.webp" />
    </Frame>
  </Step>

  <Step title="Fill in the details">
    Enter a **Name** for your workspace. Add an optional **Description** to give context to your team.

    Toggle **Allow workspace members to invite others** if you want editors to be able to invite new members independently.
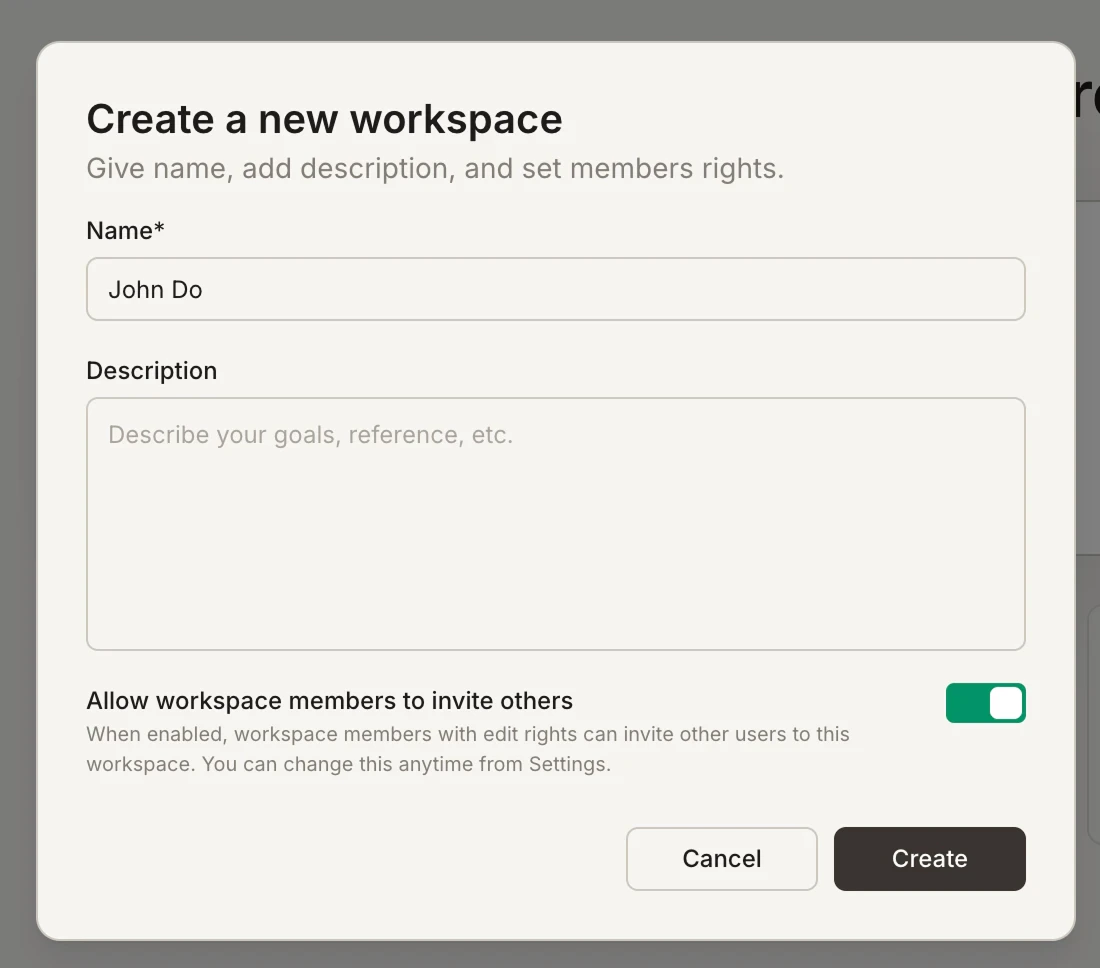
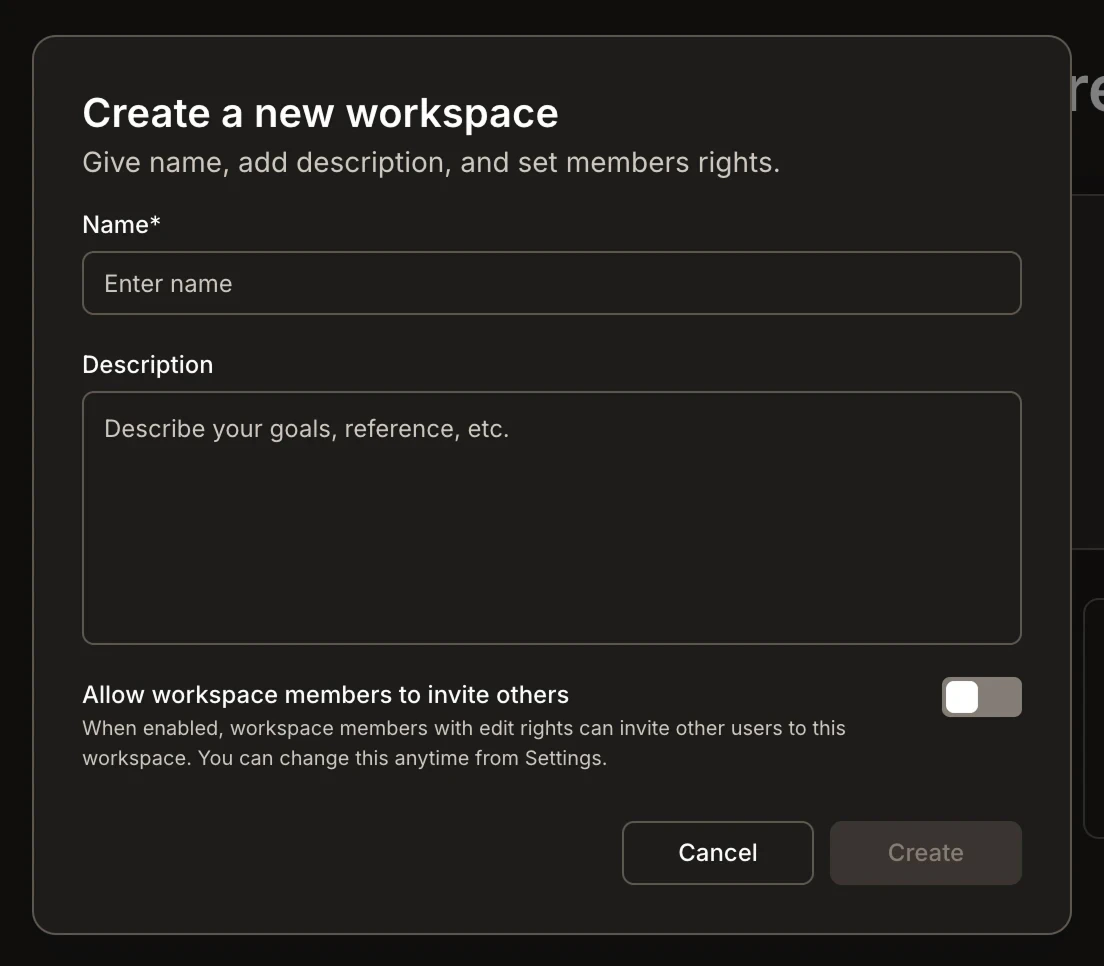
    <Frame caption="Create a new workspace dialog">
      <img src="https://mintcdn.com/dhiwisepvtltd-5e04e6a4/7Nm-xUPzRY4wezqJ/images/getting-started/workspace/manage/create-workspace-dialog-light.webp?fit=max&auto=format&n=7Nm-xUPzRY4wezqJ&q=85&s=ccb6562a627437e4eed88400e7348b1a" alt="Create a new workspace dialog showing Name, Description, and invite toggle fields." className="theme-image light-image" width="1100" height="968" data-path="images/getting-started/workspace/manage/create-workspace-dialog-light.webp" />

      <img src="https://mintcdn.com/dhiwisepvtltd-5e04e6a4/7Nm-xUPzRY4wezqJ/images/getting-started/workspace/manage/create-workspace-dialog-dark.webp?fit=max&auto=format&n=7Nm-xUPzRY4wezqJ&q=85&s=ac8553d589f23b48db4b8037bc74e90a" alt="Create a new workspace dialog showing Name, Description, and invite toggle fields." className="theme-image dark-image" width="1104" height="966" data-path="images/getting-started/workspace/manage/create-workspace-dialog-dark.webp" />
    </Frame>
  </Step>

  <Step title="Click Create">
    Click **Create**. Your new workspace opens immediately and is added to your workspace switcher.
  </Step>
</Steps>

<Divider />

## Edit workspace settings

Open Settings to rename your workspace, update its description, or manage the member invite toggle.

<Steps>
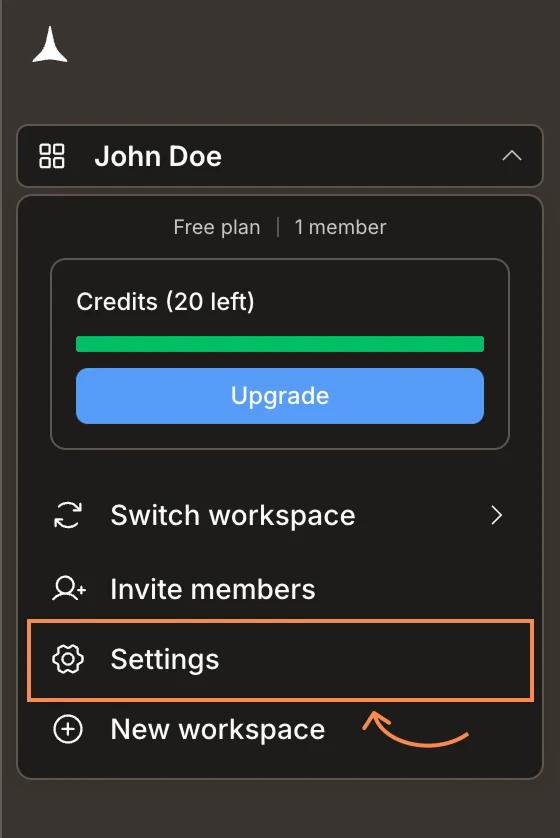
  <Step title="Open the workspace menu and click Settings">
    Click your workspace name in the top left, then select **Settings**.
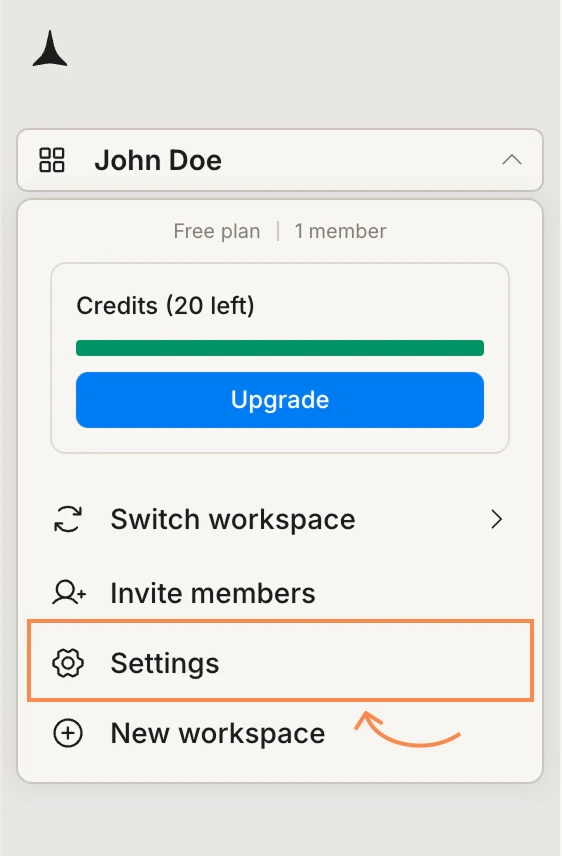
    <Frame caption="Settings option in the workspace menu">
      <img src="https://mintcdn.com/dhiwisepvtltd-5e04e6a4/7Nm-xUPzRY4wezqJ/images/getting-started/workspace/manage/settings-open-light.webp?fit=max&auto=format&n=7Nm-xUPzRY4wezqJ&q=85&s=64fd525de0321b61887d2278c4a582a8" alt="Workspace menu with the Settings option highlighted." className="theme-image light-image" width="562" height="856" data-path="images/getting-started/workspace/manage/settings-open-light.webp" />

      <img src="https://mintcdn.com/dhiwisepvtltd-5e04e6a4/7Nm-xUPzRY4wezqJ/images/getting-started/workspace/manage/settings-open-dark.webp?fit=max&auto=format&n=7Nm-xUPzRY4wezqJ&q=85&s=57d5a93d9a39263e77375588abe7142e" alt="Workspace menu with the Settings option highlighted." className="theme-image dark-image" width="560" height="838" data-path="images/getting-started/workspace/manage/settings-open-dark.webp" />
    </Frame>
  </Step>

  <Step title="Edit in the Overview tab">
    The **Overview** tab is selected by default. Update the workspace **Name** or **Description**, then click **Save changes**.
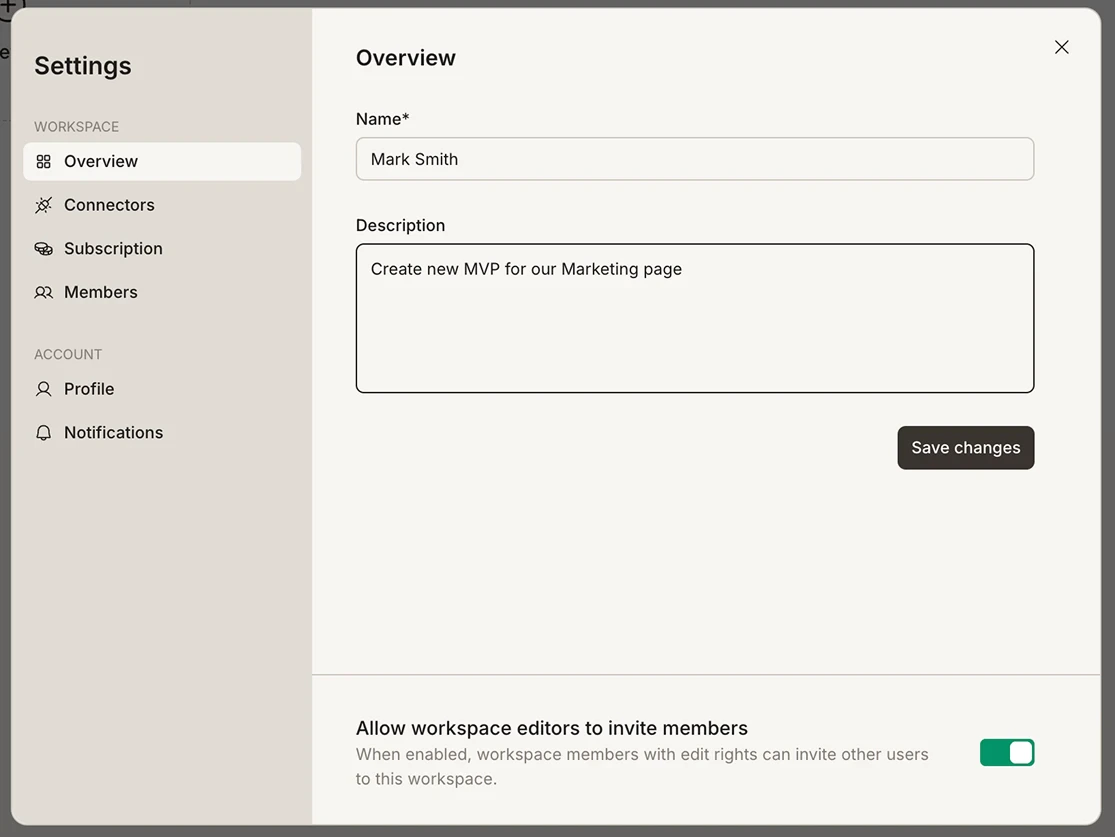
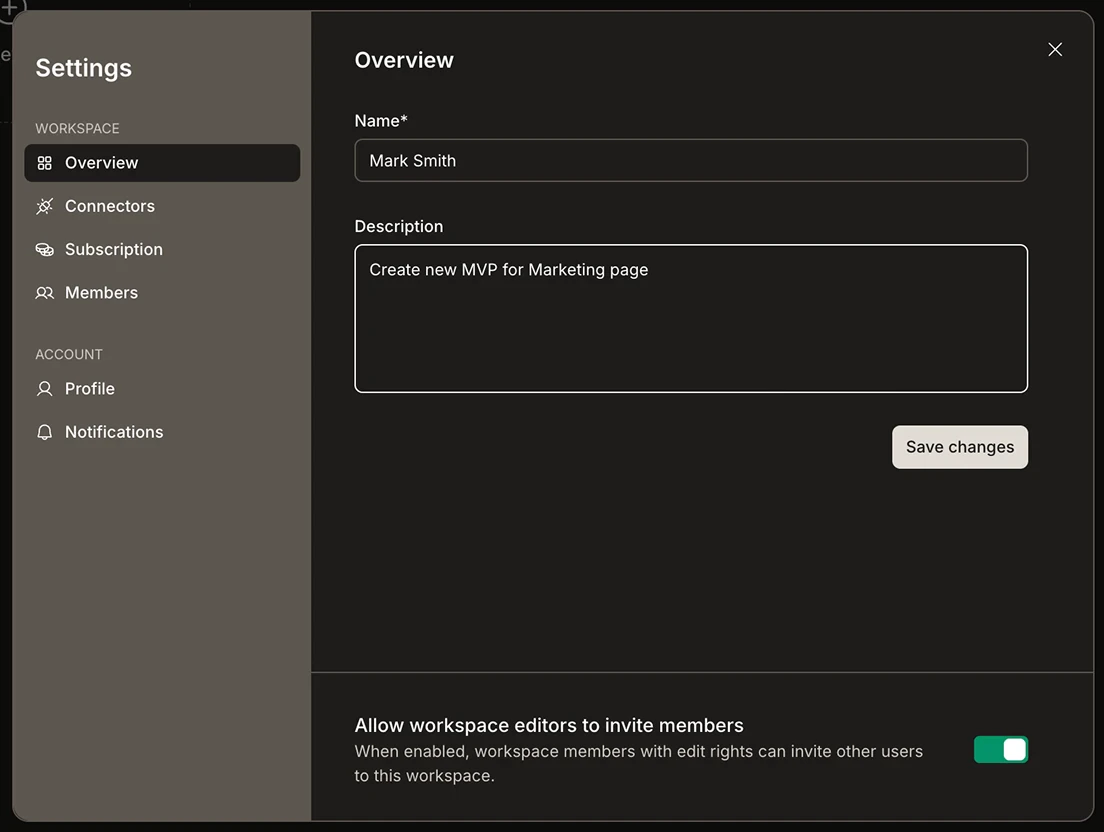
    <Frame caption="Settings - Overview tab">
      <img src="https://mintcdn.com/dhiwisepvtltd-5e04e6a4/7Nm-xUPzRY4wezqJ/images/getting-started/workspace/manage/settings-overview-light.webp?fit=max&auto=format&n=7Nm-xUPzRY4wezqJ&q=85&s=0a682608d462036ee9c69bccc79a112c" alt="Settings panel showing the Overview tab with Name, Description, and Save changes button." className="theme-image light-image" width="1115" height="837" data-path="images/getting-started/workspace/manage/settings-overview-light.webp" />

      <img src="https://mintcdn.com/dhiwisepvtltd-5e04e6a4/7Nm-xUPzRY4wezqJ/images/getting-started/workspace/manage/settings-overview-dark.webp?fit=max&auto=format&n=7Nm-xUPzRY4wezqJ&q=85&s=9ecbe77fa4caff805bf4fb1a9dcfa2fb" alt="Settings panel showing the Overview tab with Name, Description, and Save changes button." className="theme-image dark-image" width="1104" height="832" data-path="images/getting-started/workspace/manage/settings-overview-dark.webp" />
    </Frame>
  </Step>

  <Step title="Manage member invite permissions (optional)">
    Scroll down in the Overview tab to toggle **Allow workspace editors to invite members**. When enabled, workspace members with edit rights can invite other users without needing owner approval. When disabled, no one can add people who are not already members of the workspace — this restriction applies at the workspace, project, and task level.


    <Frame caption="Member invite toggle in Settings">
      <img src="https://mintcdn.com/dhiwisepvtltd-5e04e6a4/7Nm-xUPzRY4wezqJ/images/getting-started/workspace/manage/settings-invite-toggle-light.webp?fit=max&auto=format&n=7Nm-xUPzRY4wezqJ&q=85&s=70759d43688397ba81b5915be81cefc7" alt="Allow workspace editors to invite members toggle switch." className="theme-image light-image" width="1115" height="181" data-path="images/getting-started/workspace/manage/settings-invite-toggle-light.webp" />

      <img src="https://mintcdn.com/dhiwisepvtltd-5e04e6a4/7Nm-xUPzRY4wezqJ/images/getting-started/workspace/manage/settings-invite-toggle-dark.webp?fit=max&auto=format&n=7Nm-xUPzRY4wezqJ&q=85&s=f47d47a365a3b4fb5381657220139ea7" alt="Allow workspace editors to invite members toggle switch." className="theme-image dark-image" width="1104" height="176" data-path="images/getting-started/workspace/manage/settings-invite-toggle-dark.webp" />
    </Frame>
  </Step>
</Steps>

<Divider />

## Switch between workspaces

Click your workspace name in the top left, then click **Switch workspace**. A list of all workspaces you belong to expands inline. Click any workspace to switch to it immediately.
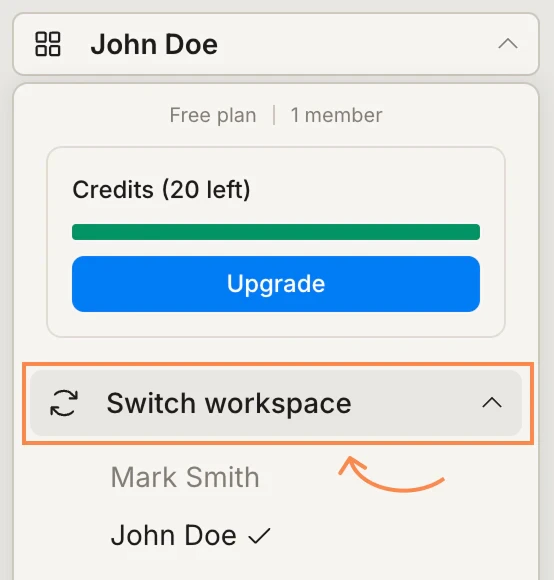
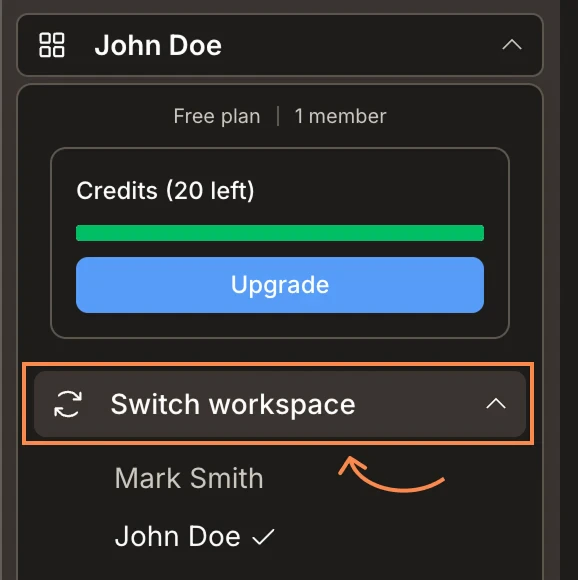
<Frame caption="Switch workspace panel">
  <img src="https://mintcdn.com/dhiwisepvtltd-5e04e6a4/7Nm-xUPzRY4wezqJ/images/getting-started/workspace/manage/switch-workspace-light.webp?fit=max&auto=format&n=7Nm-xUPzRY4wezqJ&q=85&s=5a877eaa17cee73c62739b13c5a32acc" alt="Switch workspace panel showing two workspaces, with John Doe checked as active." className="theme-image light-image" width="554" height="580" data-path="images/getting-started/workspace/manage/switch-workspace-light.webp" />

  <img src="https://mintcdn.com/dhiwisepvtltd-5e04e6a4/7Nm-xUPzRY4wezqJ/images/getting-started/workspace/manage/switch-workspace-dark.webp?fit=max&auto=format&n=7Nm-xUPzRY4wezqJ&q=85&s=98a08cc071ed1bc518806fbcd3f54a84" alt="Switch workspace panel showing two workspaces, with John Doe checked as active." className="theme-image dark-image" width="578" height="580" data-path="images/getting-started/workspace/manage/switch-workspace-dark.webp" />
</Frame>

<Note>
  You can belong to more than one workspace. This is useful when you work with multiple organizations or when your company separates teams into distinct workspaces for billing or access control.
</Note>

<Divider />

## What's next?

<CardGroup cols={2}>
  <Card title="Workspace overview" icon="list" href="/getting-started/workspace/overview">
    Learn about workspace features, settings, and member management.
  </Card>

  <Card title="Subscription" icon="receipt" href="/getting-started/workspace/subscription">
    Manage your plan, credits, and payment methods.
  </Card>
</CardGroup>