In this guide, you’ll learn how to:
Access your Rocket profile settings.
Update your profile photo, display name, and location.
Save and confirm the changes.
Why customize your profile? Make your Rocket account yours. Add a profile photo, set a display name that appears across your projects, and add your location for time zone coordination.
Before you begin You’ll need:
A logged in Rocket account.
Customize your Rocket profile Personalize your Rocket profile instantly.
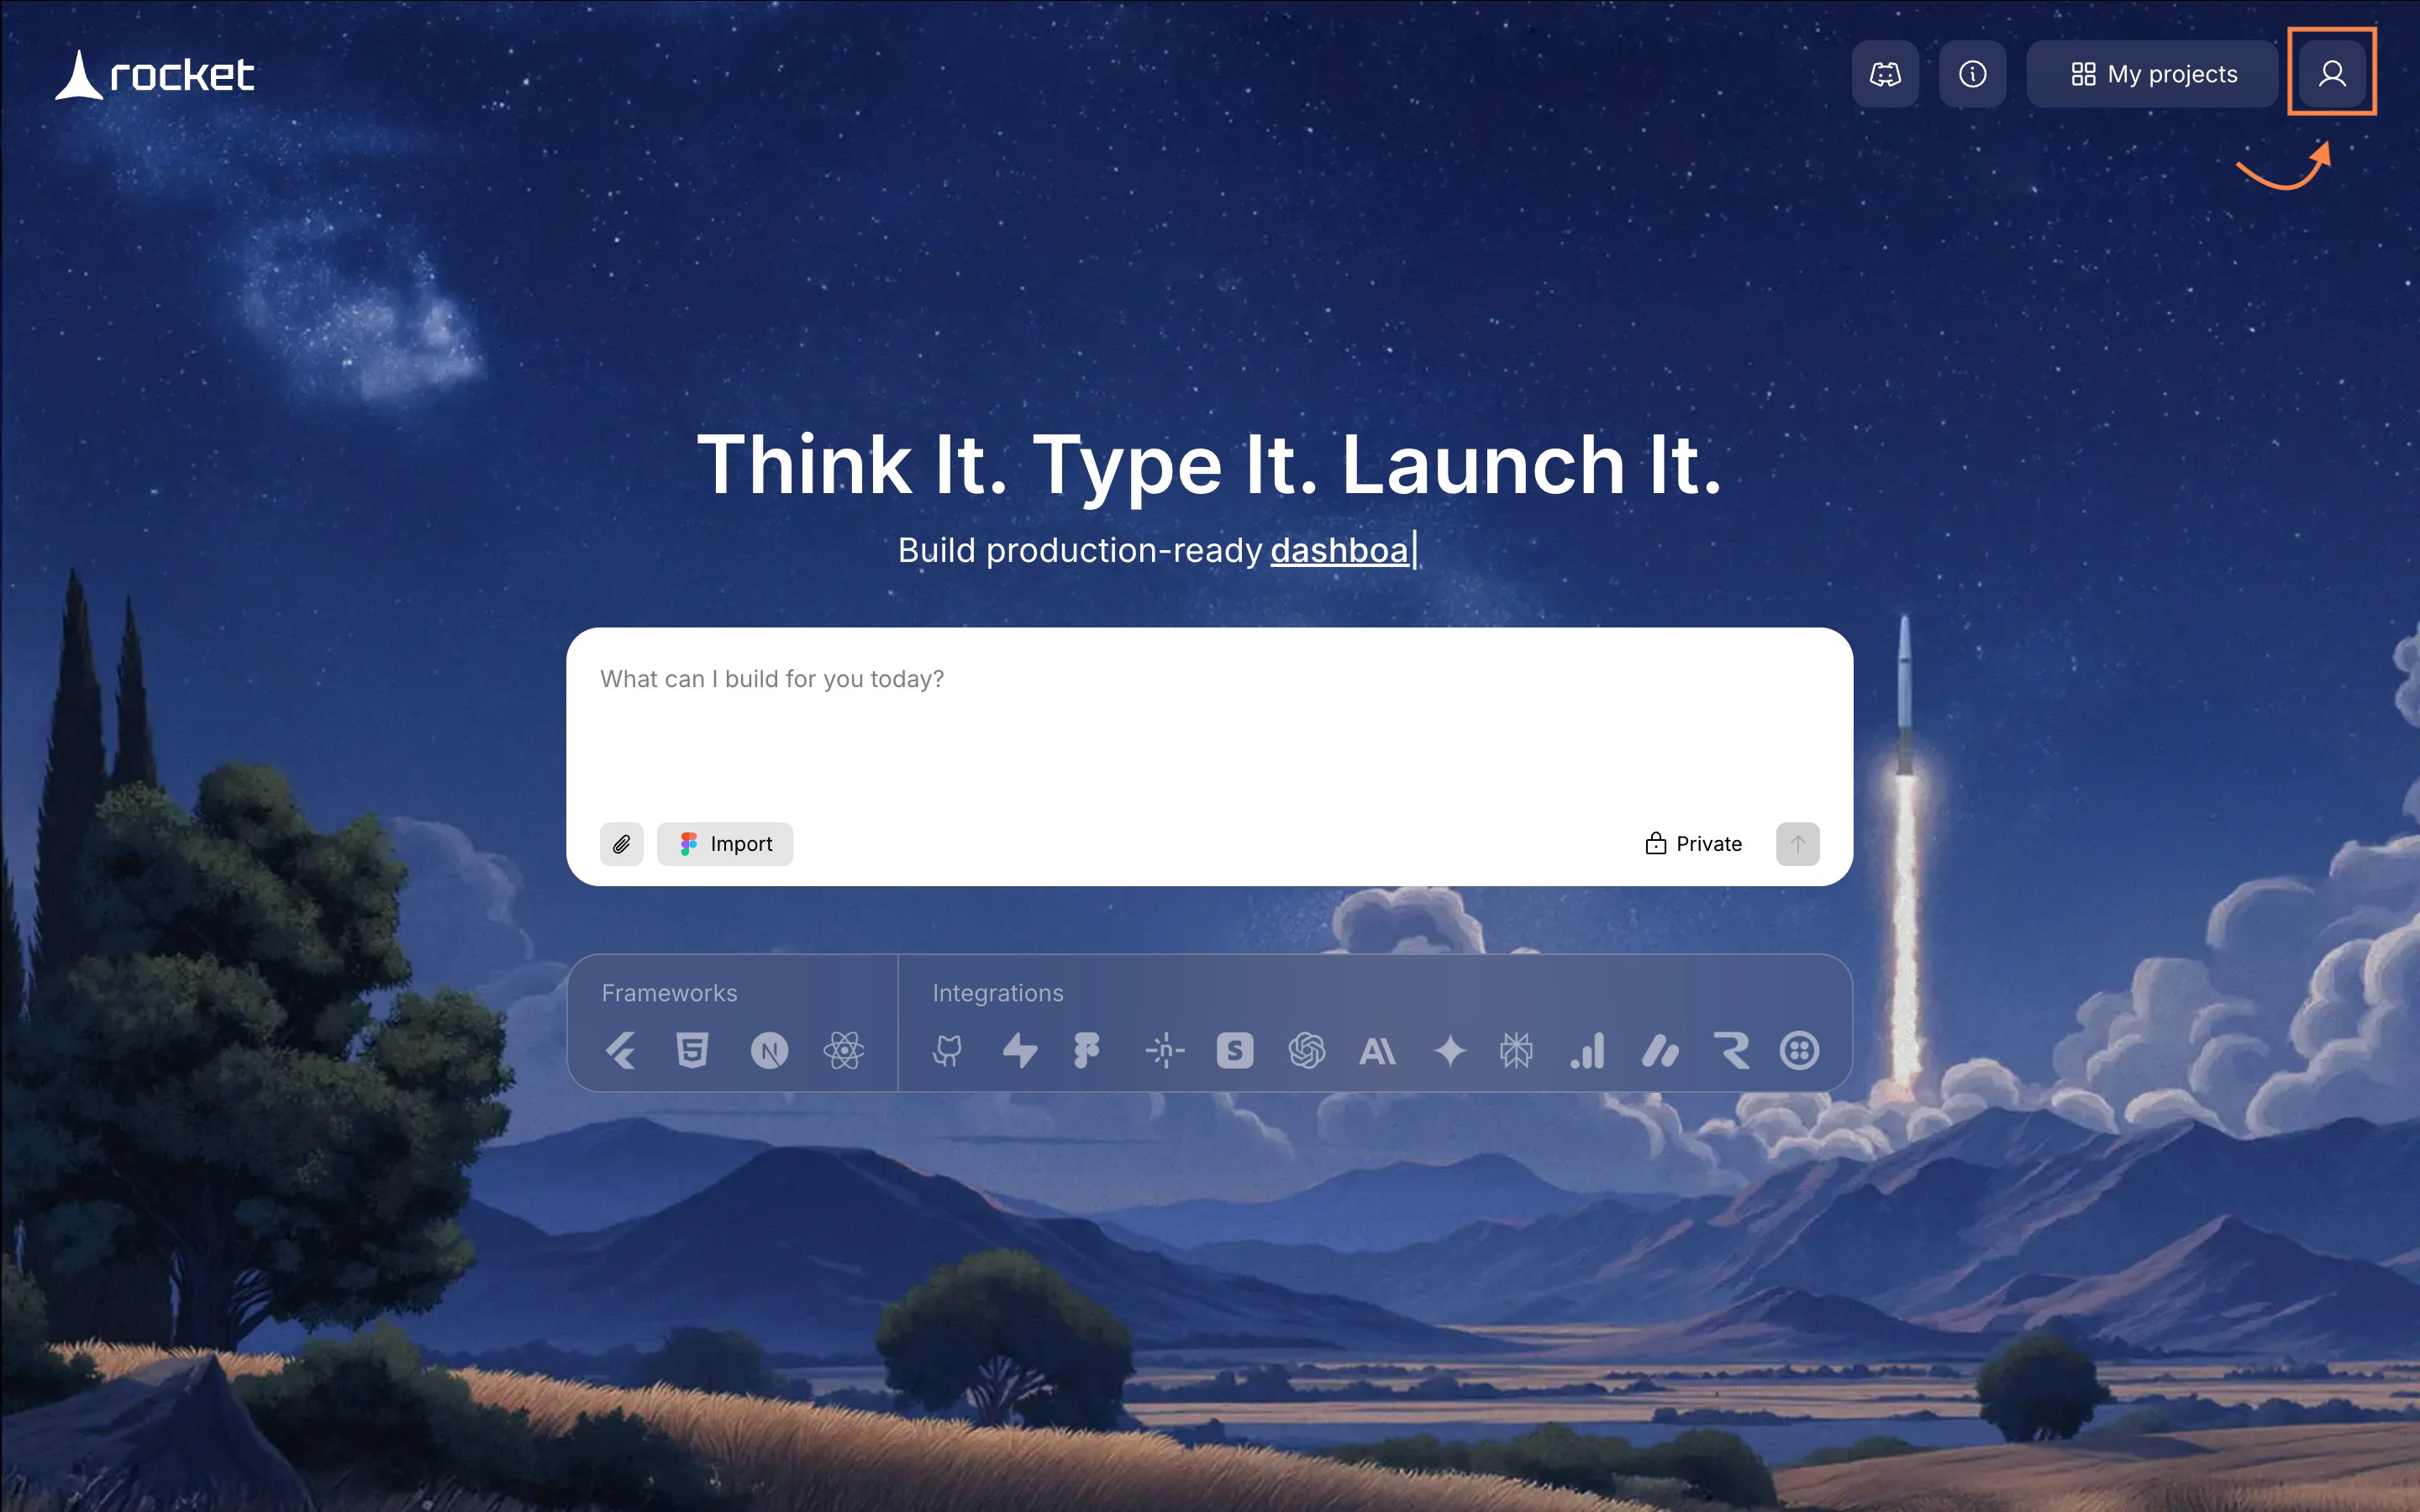
Click the profile icon
Click on the Success check: A dropdown menu appears with Account Settings option.
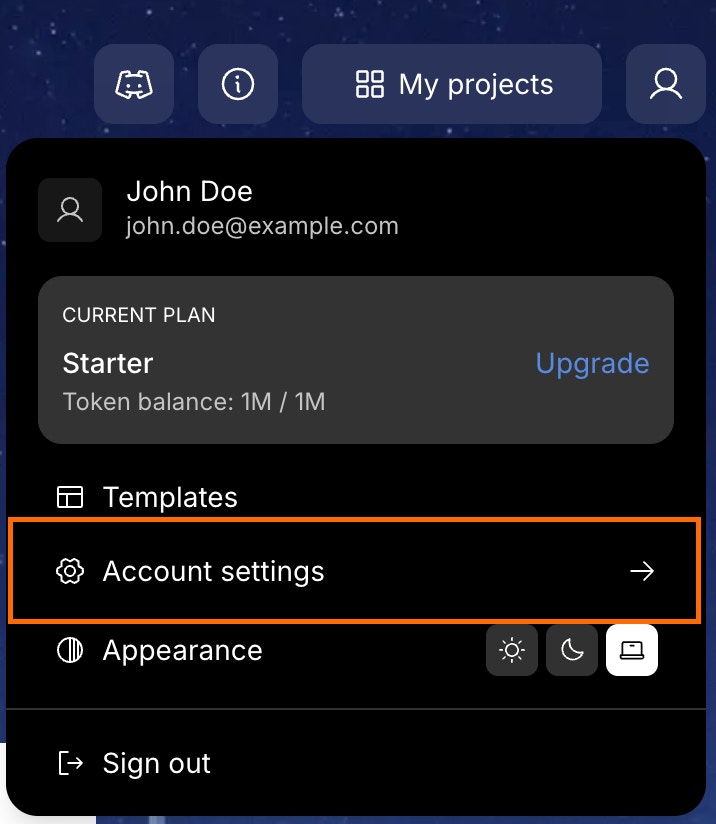
Open Account Settings
Choose Account Settings from the dropdown. Rocket opens your profile form. Success check: The profile settings page opens with your current information displayed.
Update your details
This space belongs to you.
Profile picture: Click the image square and upload a JPG or PNG file.Name: Enter the display name shown across Rocket.Location: Add your city or time zone. Heads up: Email changes are managed by support. Contact support@rocket.new if you need a different login address.Success check: You can see and edit all profile fields, and the image upload area is clickable.
Save your changes
Click Save at the bottom of the form. Rocket confirms once the update is applied. Success check: You see a confirmation message and your updated profile information is saved.
Before you begin You’ll need:
A logged in Rocket account.
The Rocket mobile app installed.
Optional: a square profile photo (PNG or JPG) ready to upload.
Customize your Rocket profile Personalize your Rocket profile instantly from your mobile device.
Tap the profile icon
Tap the Success check: The Profile modal slides up from the bottom of the screen.
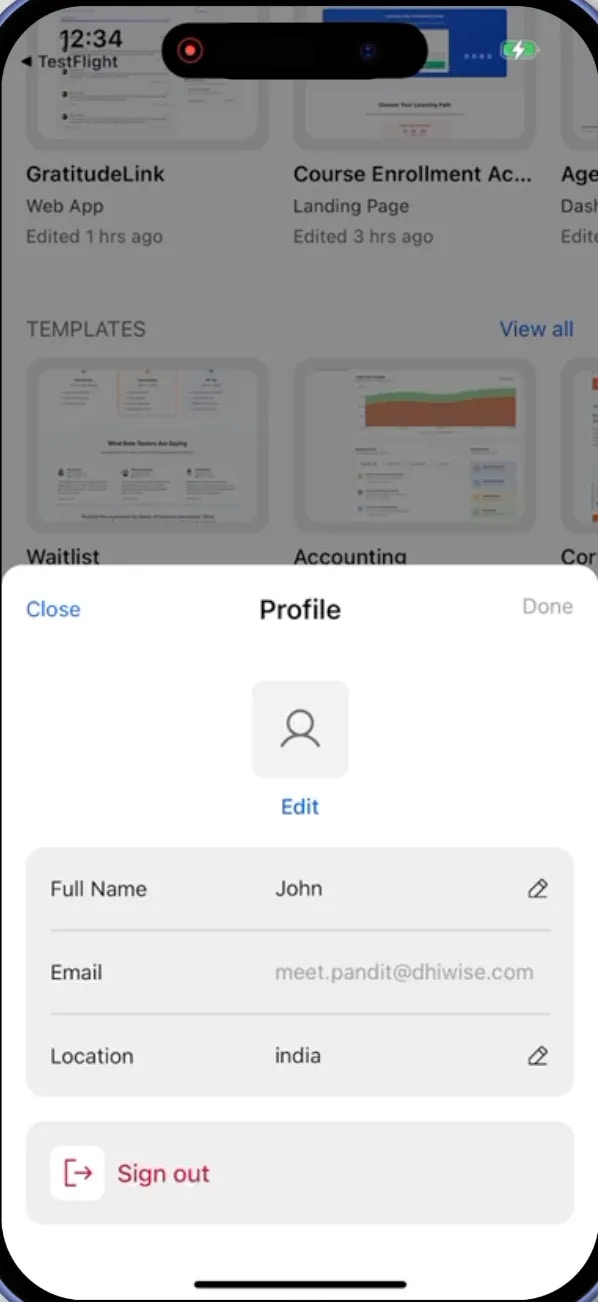
Open the Profile modal
The Profile modal displays your current profile information. You’ll see your profile picture, name, email, and location. Success check: The modal shows Close on the top left, Profile title in the center, and Done button on the top right.
Update your details
Edit any field you want to change:
Profile picture: Tap the profile icon area, then tap Edit below it to upload a new JPG or PNG file.Full Name: Tap the pencil icon next to your name to edit it.Location: Tap the pencil icon next to your location to update it. Heads up: Email changes are managed by support. Contact support@rocket.new if you need a different login address.Success check: Editable fields show pencil icons, and you can tap them to make changes.
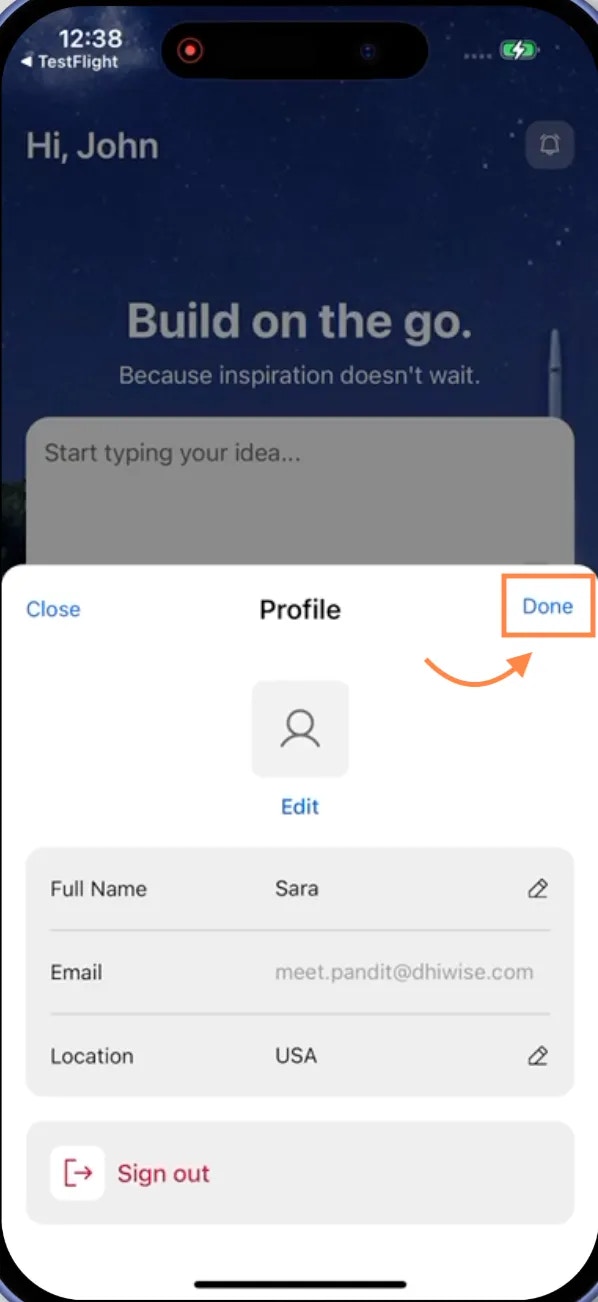
Save your changes
Tap Done in the top-right corner of the Profile modal. Rocket saves your updates and closes the modal. Success check: The modal closes and your changes are saved. Your updated profile information appears the next time you open the Profile modal.
You did it! You’ve just customized your Rocket profile.