The account settings page displays two notification toggles:Push notifications
Receive browser notifications even when Rocket is in the background. Notifications cover build status updates, important process events, and project generation milestones.Audio notifications
Hear a sound alert for build completion, errors, and important tasks needing attention. Useful when working in other tabs or applications.
If prompted for browser notification permissions, click Allow to enable push notifications for Rocket.
You can enable both types for complete coverage, or choose only push (visual) or audio (sound) based on your preference.
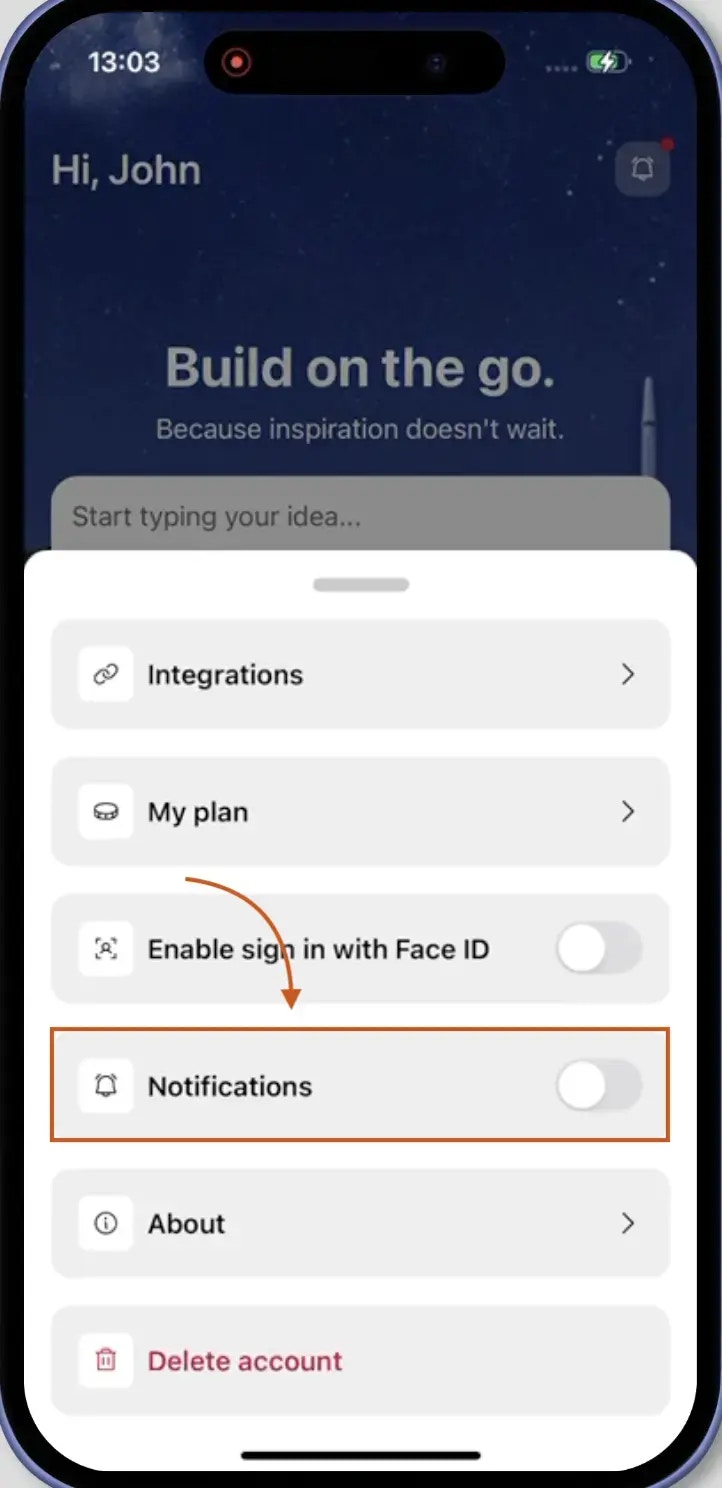
On the home screen, tap the Settings icon in the footer bar at the bottom.
2
Toggle notifications ON
In the settings sheet that slides up, toggle the Notifications switch to ON (green).
When you toggle notifications on for the first time, iOS may prompt you to allow notifications. Tap Allow to grant permission.
If you previously denied notification permissions, go to your device Settings > Rocket > Notifications to enable them, then return to the Rocket app to toggle notifications on.
3
Receive push notifications
Once enabled, you receive mobile push notifications even when the app is in the background or closed. Notifications cover build status updates, important process events, and project generation milestones.