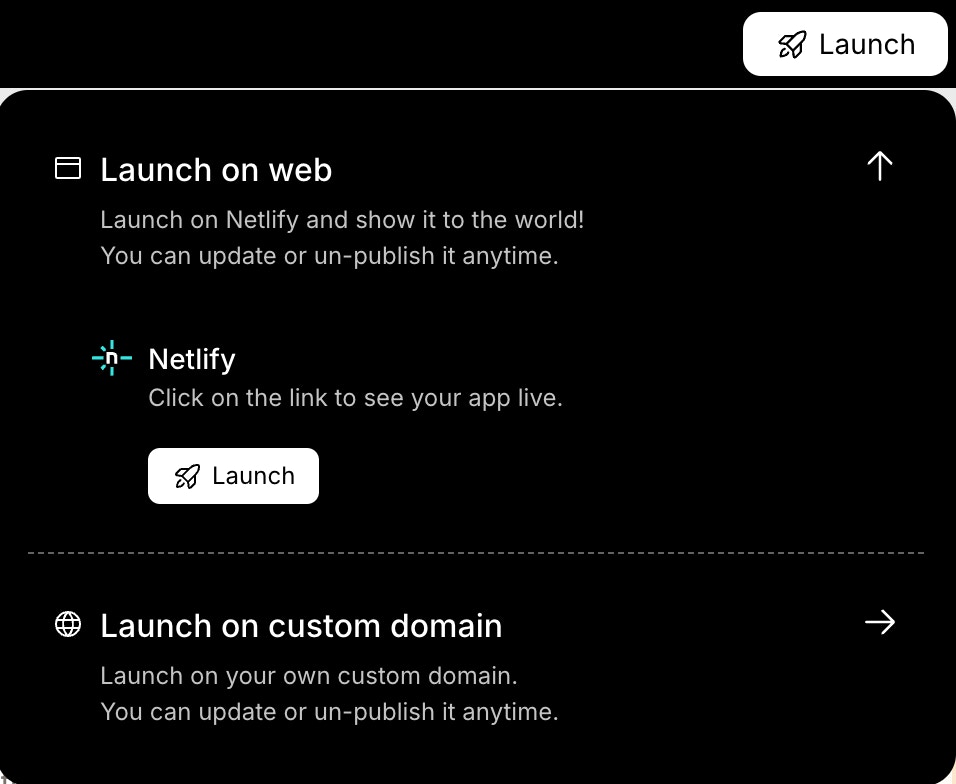
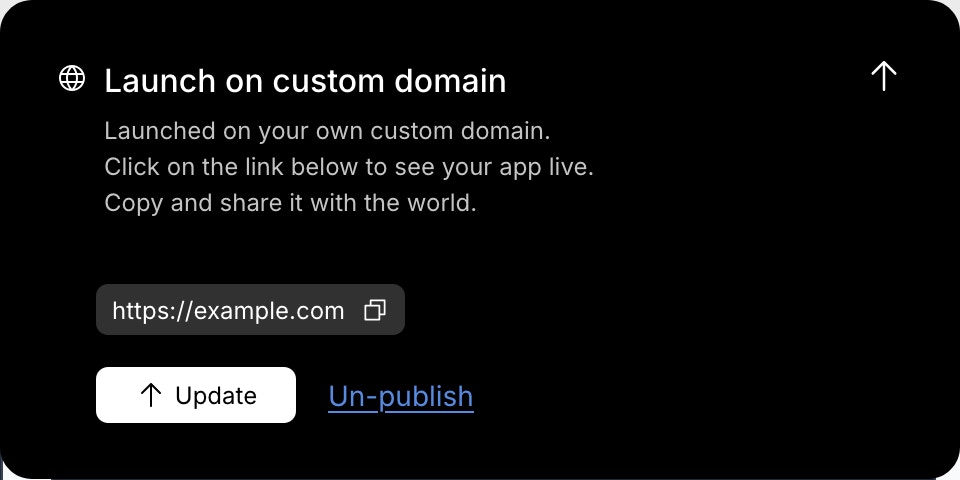
Use your own domain name for your Rocket app. Connect any domain you own, update DNS records once, and Rocket handles the rest.Your app becomes available at your custom address with automatic HTTPS.You will need:
- A Rocket project that has been launched to web
- Access to your domain provider account (for example, GoDaddy, Namecheap, or Squarespace Domains)
- A paid Rocket plan (custom domains are not available on the free tier)
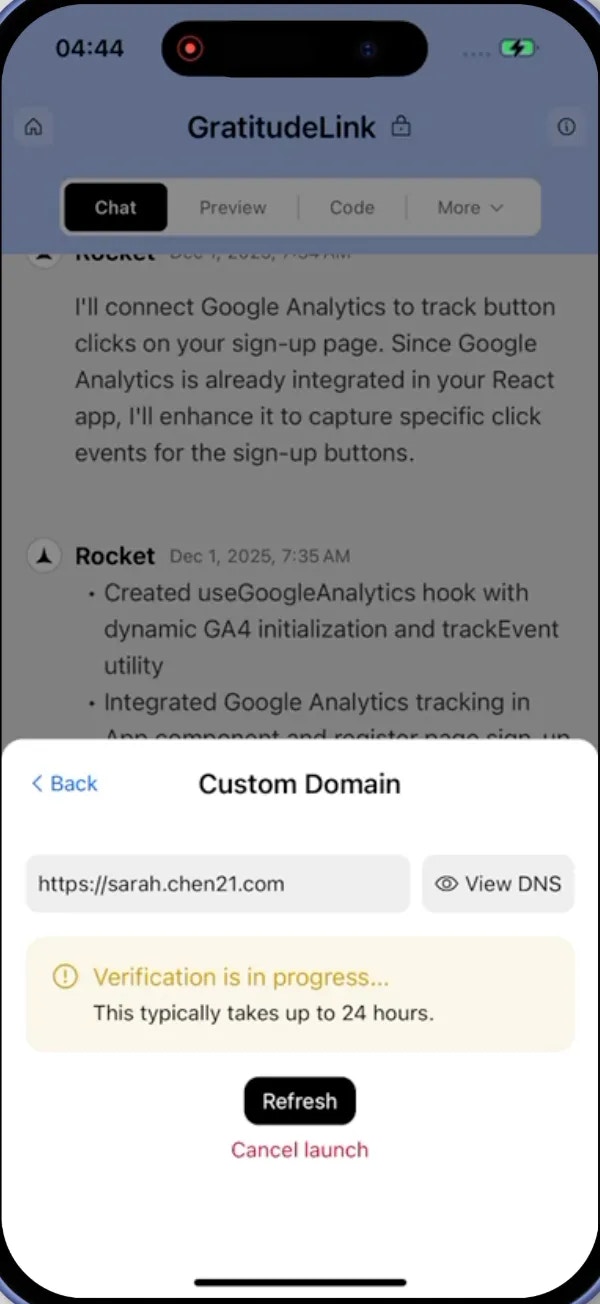
DNS changes can take up to 24 hours to propagate. Your domain may not work immediately after setup.
- Web Browser
- Mobile App
Connect your domain
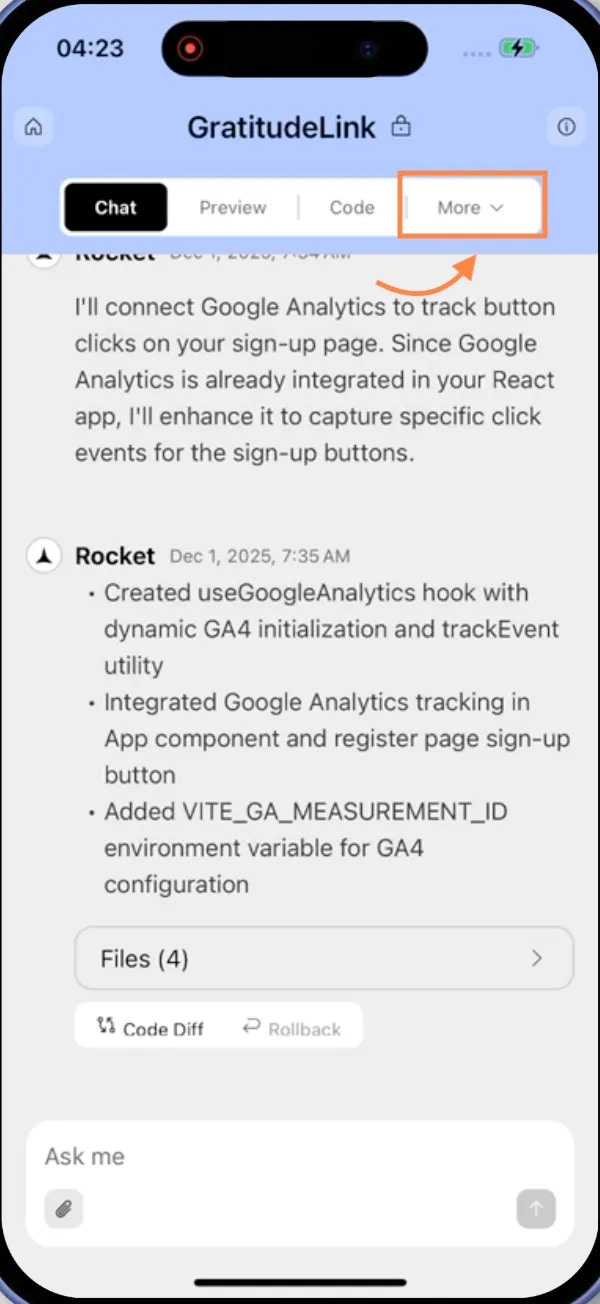
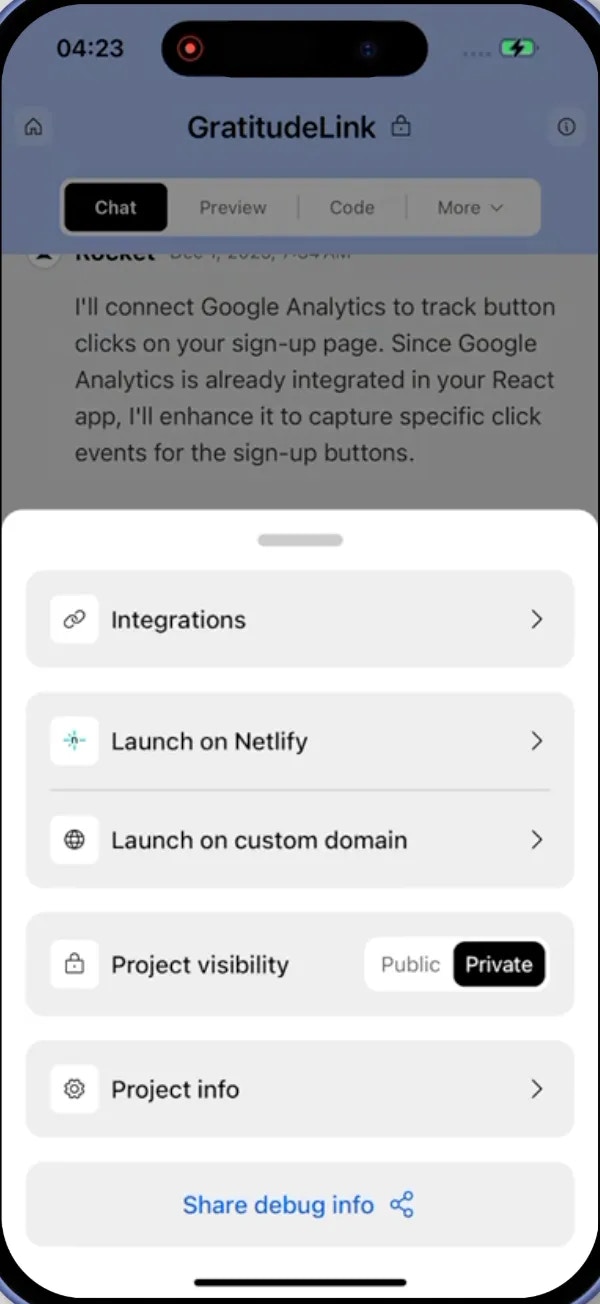
Open the Launch menu
Click the Launch button in the top-right corner of your project.

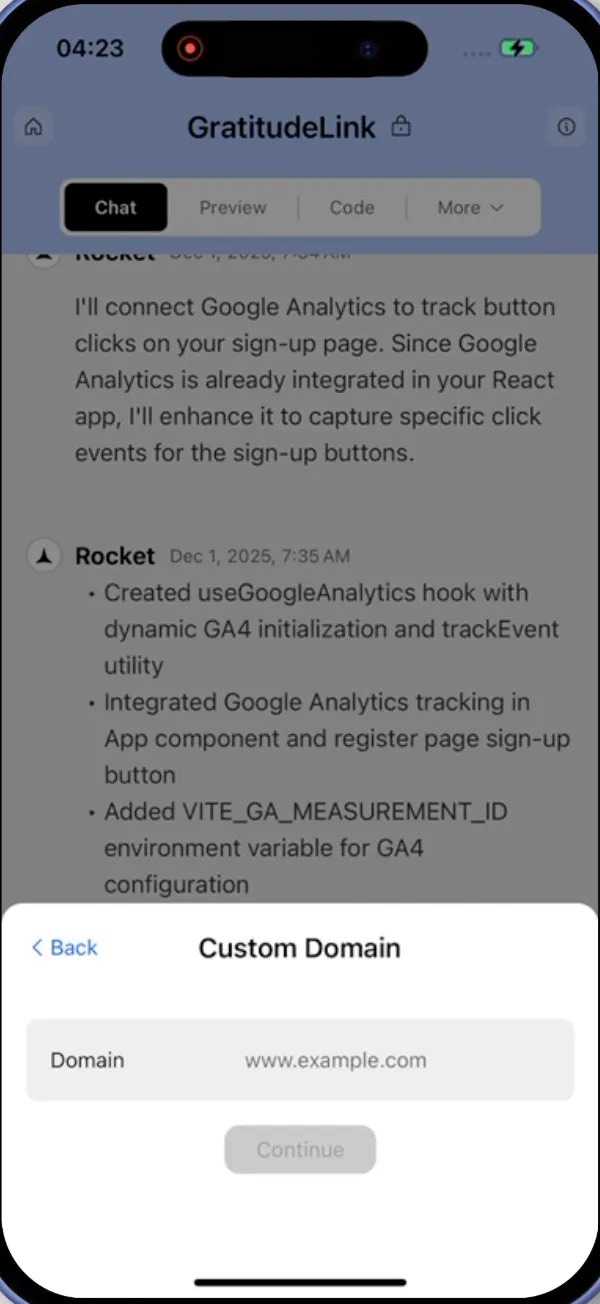
Enter your domain
Type the domain you own (for example, 
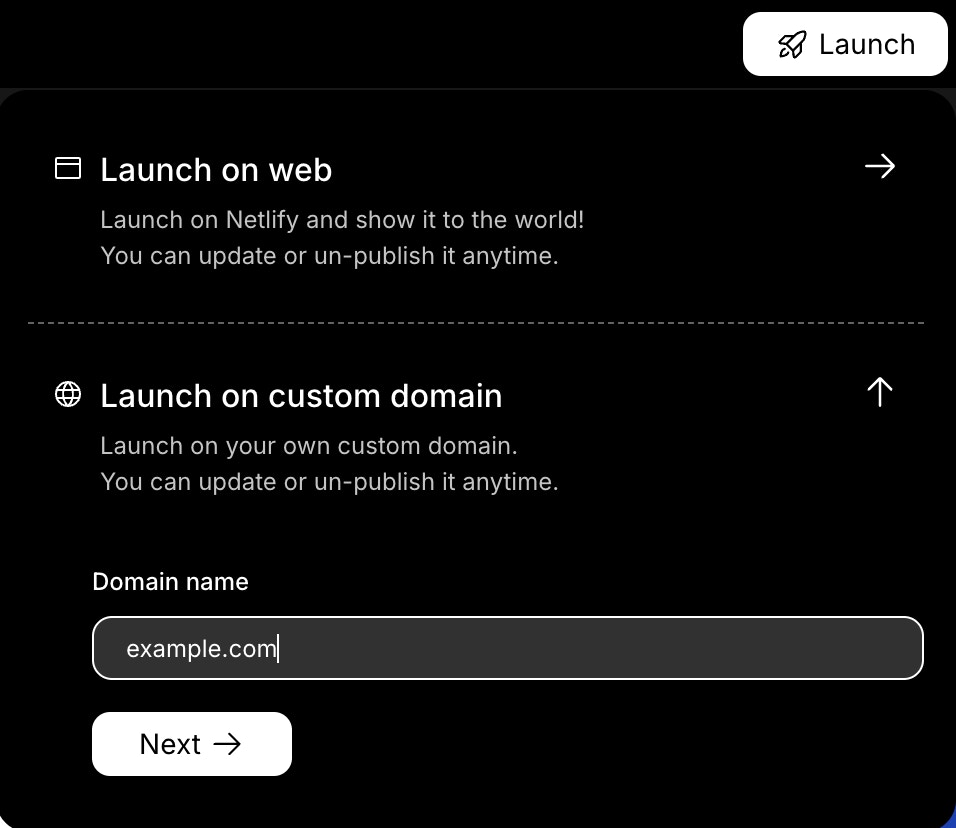
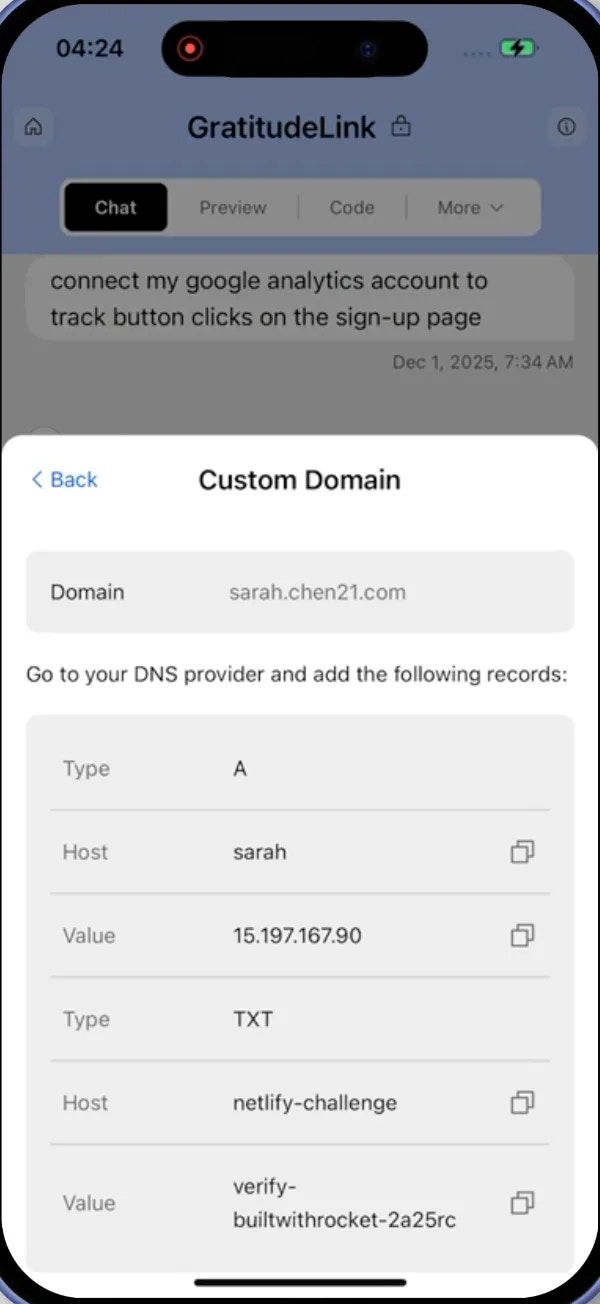
example.com) into the field and click Add Domain.Rocket adds the domain to your project and shows the DNS records you need.Update DNS settings at your domain provider
Copy the DNS records that Rocket shows you. In a new browser tab, open your domain provider’s dashboard and go to the DNS settings for your domain.Add the records exactly as shown (Type, Host, and Value).
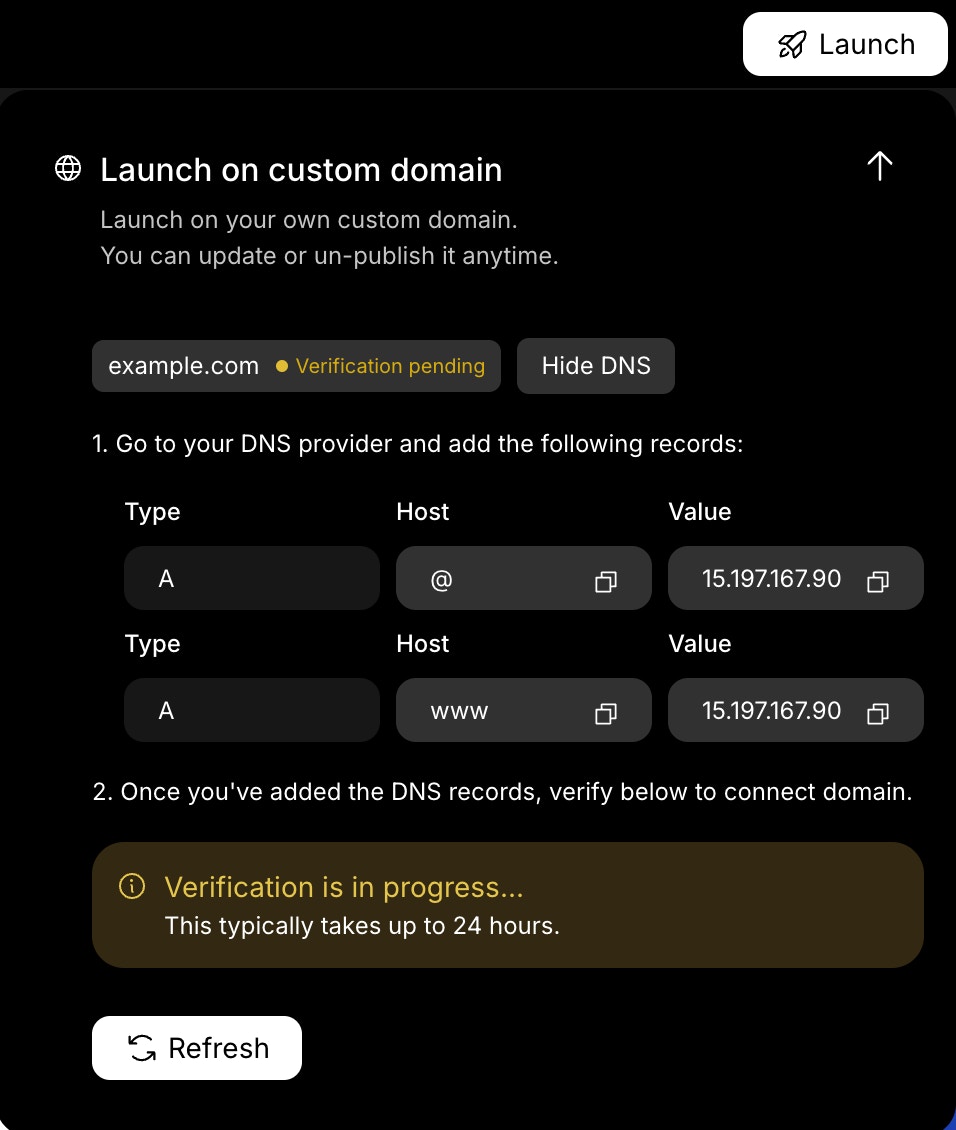
- Root domains (e.g.,
example.com): Add two A records - one with host@(root) and one with hostwww, both pointing to the IP address provided by Rocket. - Subdomains (e.g.,
app.example.com): Add one A record with the subdomain as the host (e.g.,app), pointing to the IP address provided by Rocket.
Verify your domain
Return to Rocket and click Verify next to your domain. The status will show Verification pending at first.


Troubleshooting DNS records
If your domain is not connecting, you may have conflicting DNS records.- Go to dnschecker.org.
- Enter your domain name and select A as the record type.
- If you see multiple different IP addresses, you have conflicting A records.
- Log in to your domain provider’s dashboard, go to DNS settings, and remove any A records that are not pointing to the IP address provided by Rocket.
- Wait up to 24 hours for DNS changes to propagate, then verify again in Rocket.
What’s next?
Improve SEO
Optimize meta tags, structured data, and sitemaps so search engines find your site.
Site analytics
Track visits, pageviews, and traffic sources from your Rocket dashboard.
Site performance
Monitor Core Web Vitals and keep your site fast for every visitor.
Add privacy compliance
Set up cookie consent, GDPR banners, and a privacy policy page.