The Environment settings panel is only available for web build tasks, which use a
.env file. For mobile tasks, variables are stored in env.json - update them directly in that file or inside the connector’s value field.Open Environment settings


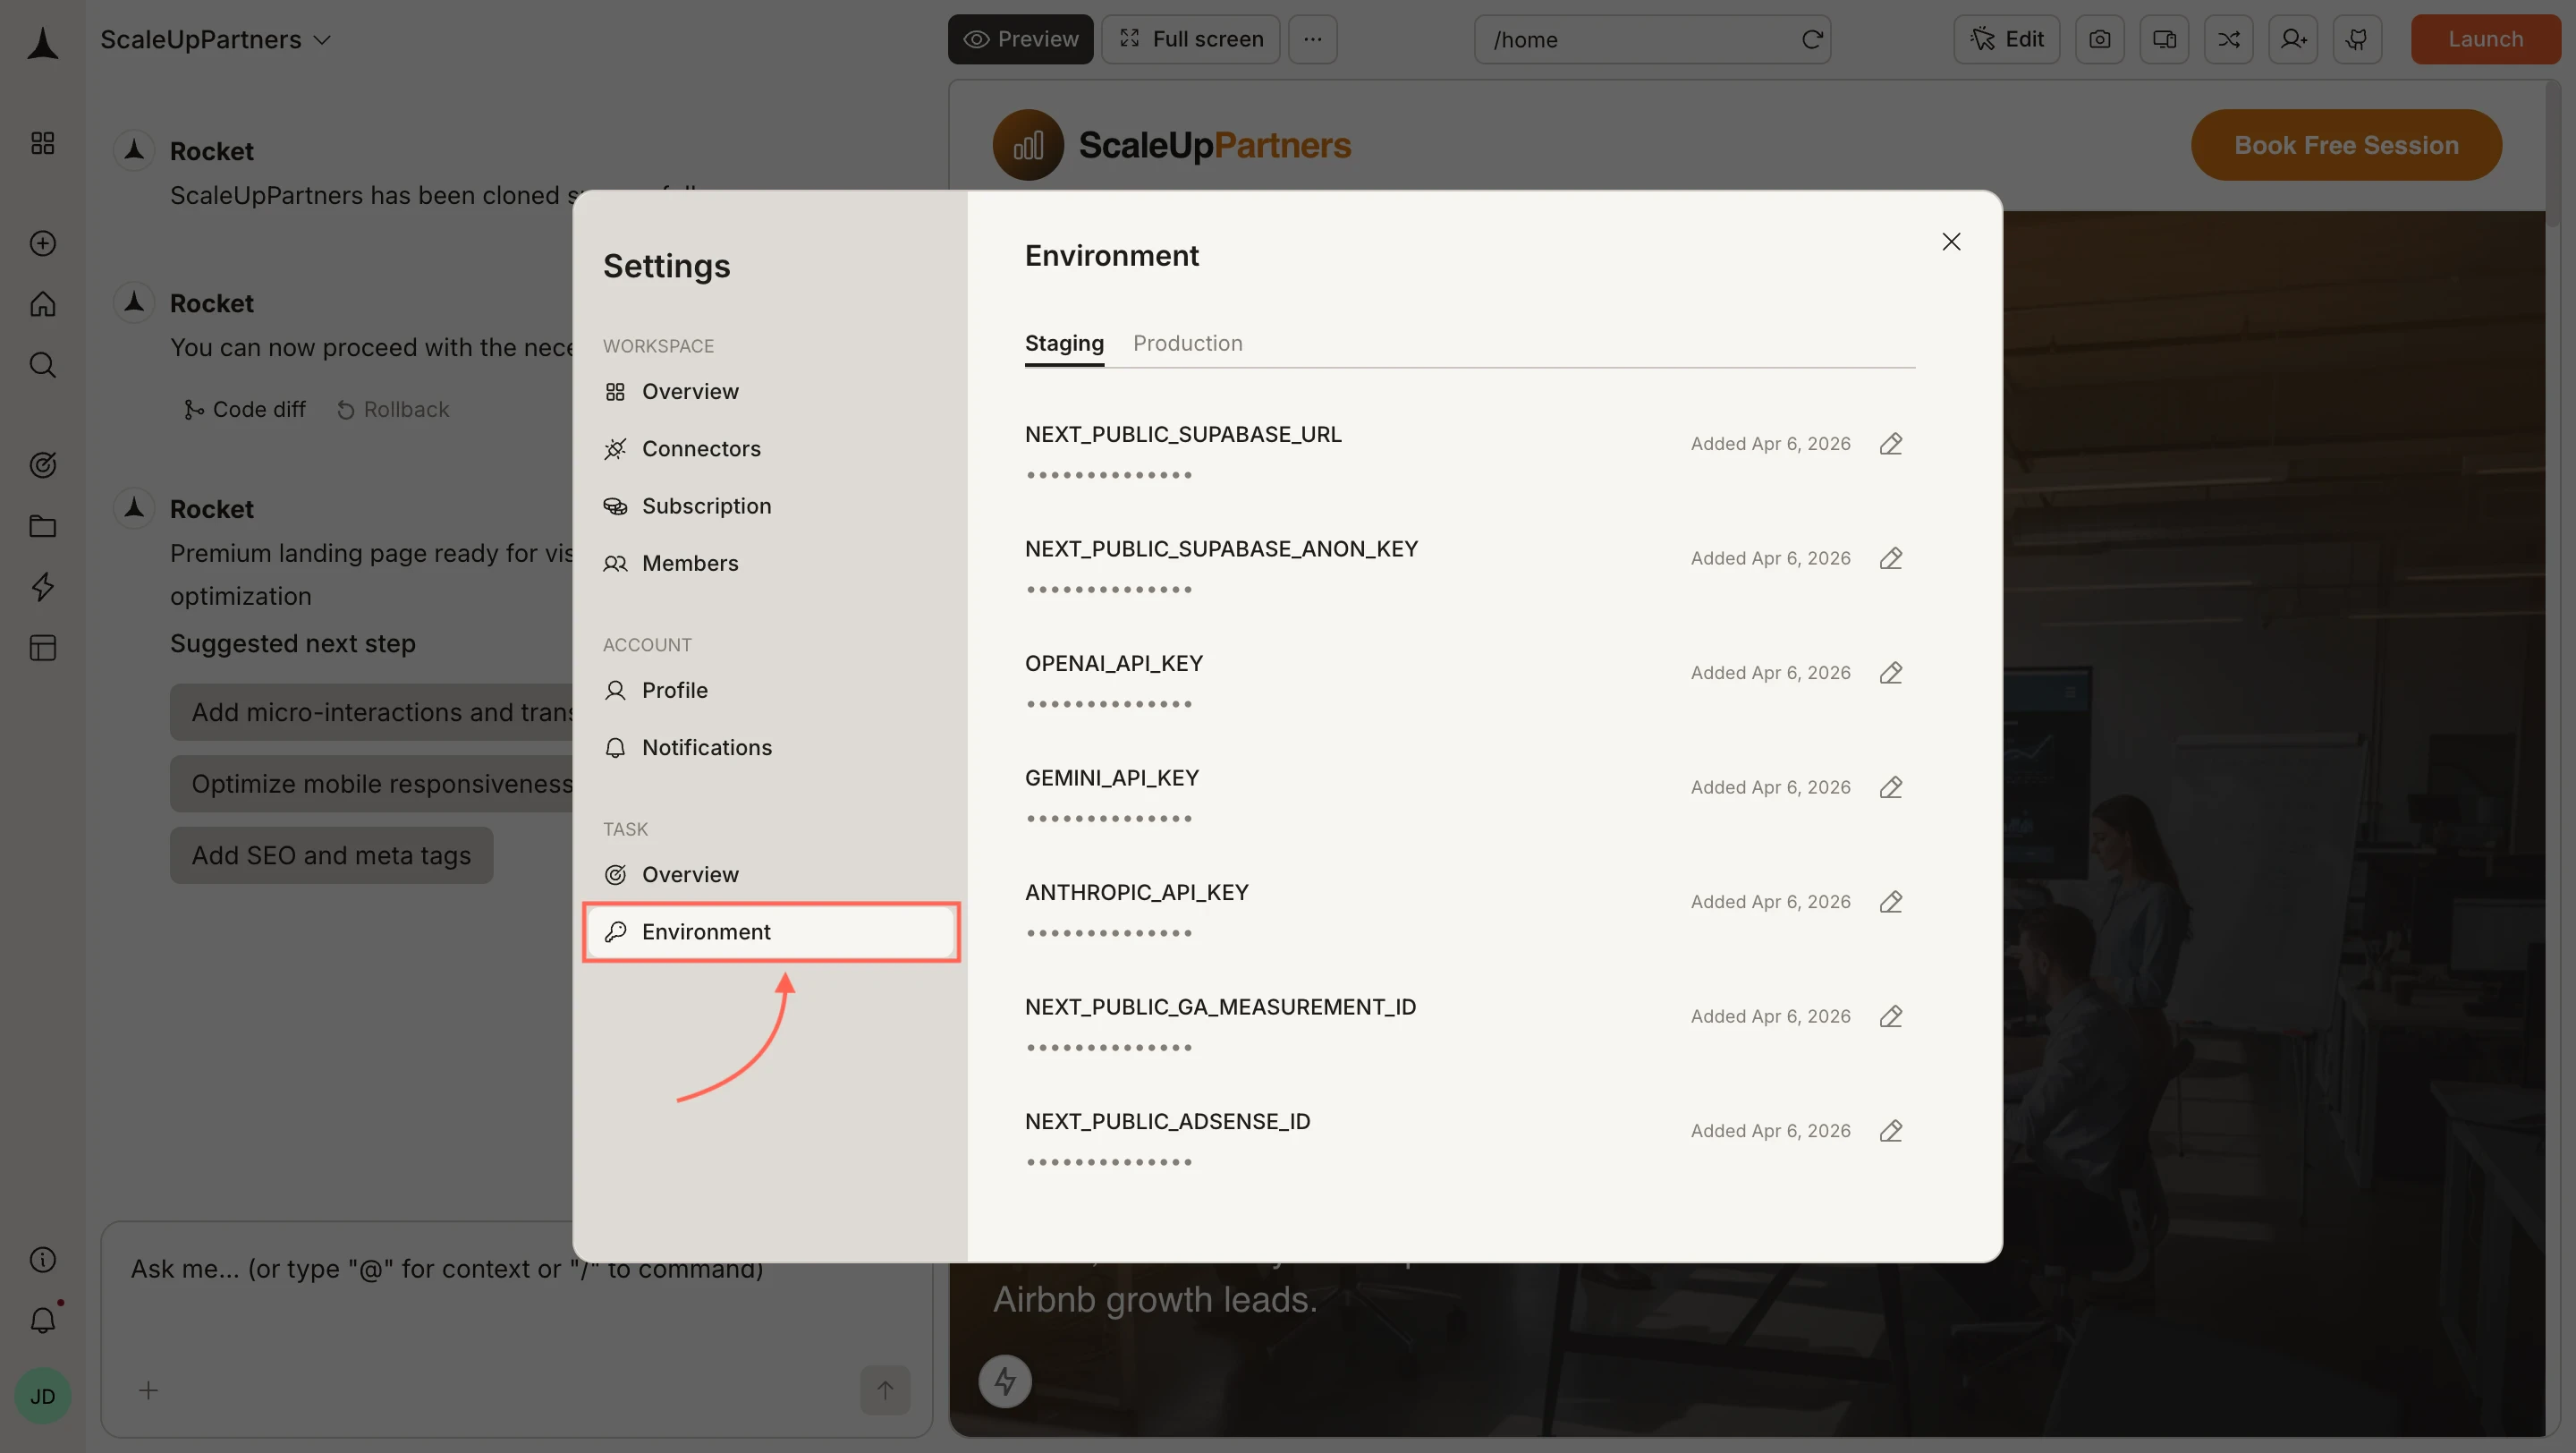
Staging and Production
The Environment panel has two tabs:- Staging - values used while you are building and testing inside Rocket.
- Production - values used when your app is live and publicly launched.
If you set a value directly in your code or in a connector’s value field instead of using this panel, Rocket treats it as a staging value by default.
Add a variable
New environment variables are added through your.env file in code, not through the Settings UI.
For mobile tasks, variables are stored in
env.json instead. Open it in the Code tab and add your key-value pairs there directly.
Edit an existing variable
To update the value of an existing variable, open the Environment panel (Settings > Environment) and click the edit icon on the right side of any variable row. Make your change and save. Changes take effect on the next build or generation in that environment.Use variables in your app
Reference variables in server-side code using standard patterns:Common variables
Variables prefixed with
NEXT_PUBLIC_ are exposed to the browser (client side). All others stay server-side only. Never put secrets in NEXT_PUBLIC_ variables.| Variable | Service |
|---|---|
NEXT_PUBLIC_SUPABASE_URL | Supabase |
NEXT_PUBLIC_SUPABASE_ANON_KEY | Supabase |
STRIPE_SECRET_KEY | Stripe |
OPENAI_API_KEY | OpenAI |
GEMINI_API_KEY | Google Gemini |
ANTHROPIC_API_KEY | Anthropic |
RESEND_API_KEY | Resend |
NEXT_PUBLIC_GA_MEASUREMENT_ID | Google Analytics |
NEXT_PUBLIC_ADSENSE_ID | Google AdSense |
What’s next?
APIs
Import and integrate API endpoints that use your environment variables.
Connectors
Connect services like Supabase, Stripe, and OpenAI with dedicated integrations.
Custom code
Inject scripts and styles that reference your environment configuration.
Chat interface
Ask Rocket to use your variables when building features.