The Theme panel is where you control your site’s visual identity. Update fonts, colors, logo, and images from one place - every change applies site-wide when you save.
Theme is only available for Website and Landing page build types, on the web browser. It is not available for other build types or in the Rocket mobile app.
Theme changes apply site-wide but do not overwrite element-level changes you have made with Visual edit. Both co-exist: Visual edits take precedence on the individual elements you changed, while Theme governs everything else.

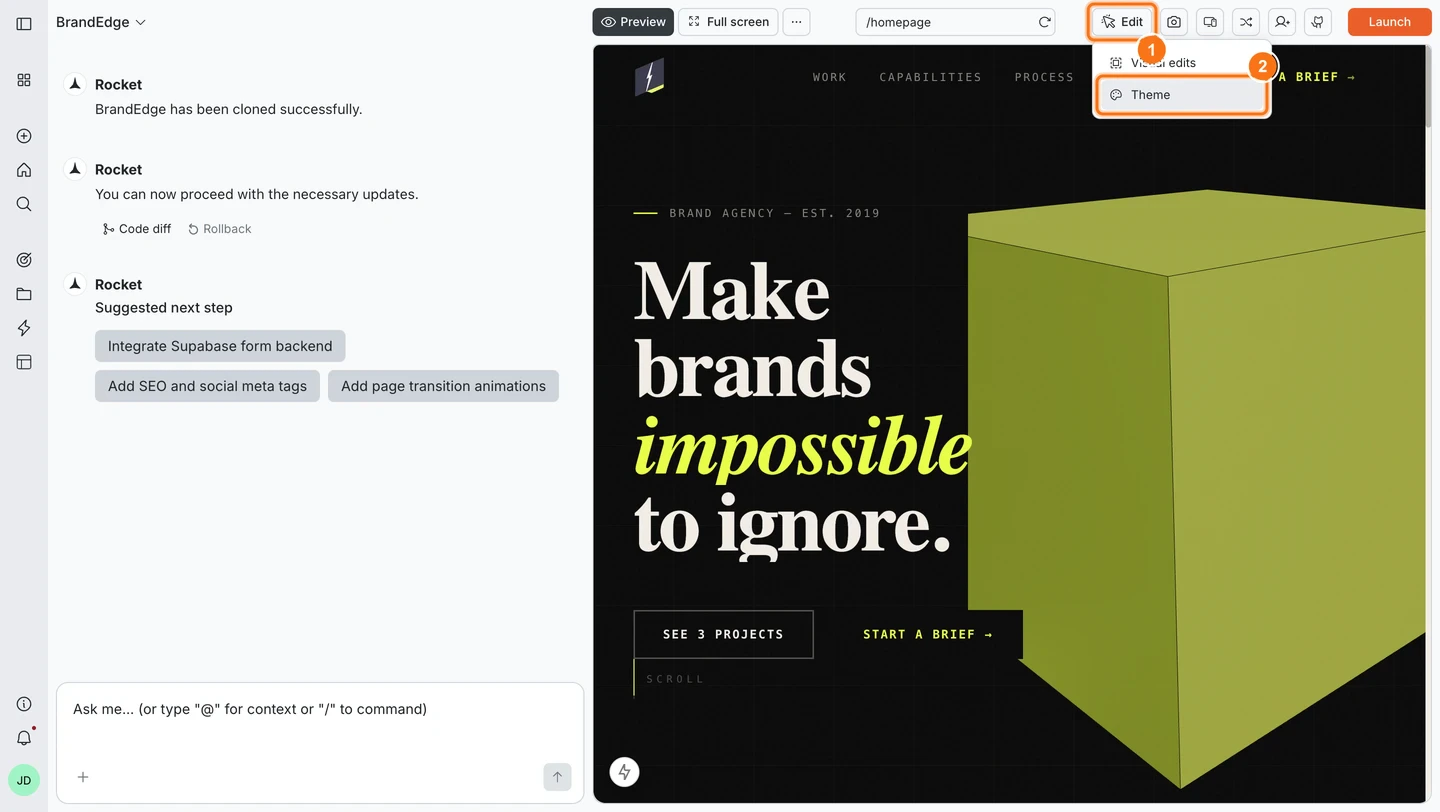
How to open Theme

1

Open the Edit menu

In the preview toolbar, click Edit.
2

Select Theme

Select Theme from the dropdown.
Edit button clicked in the preview toolbar showing a dropdown with Visual edits and Theme options.
The Theme panel opens over the preview. Make changes across any section, then click Save changes at the bottom to apply everything at once.

Fonts

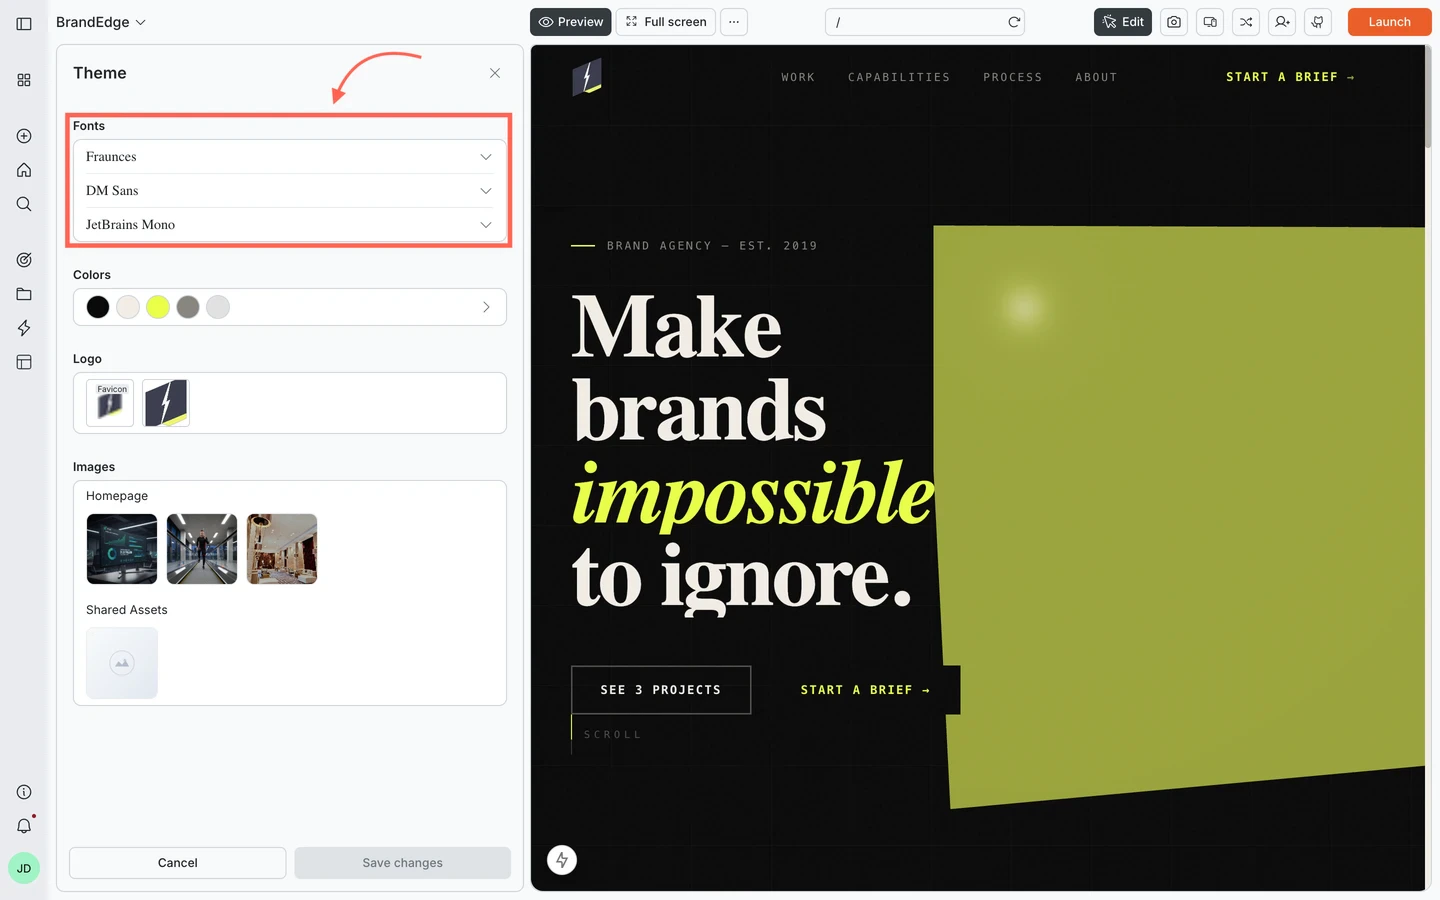
Each typeface role in your site - primary, secondary, and any others - has its own dropdown.
Theme panel with the Fonts section highlighted, showing typeface role dropdowns with font options.
To change a font:
1

Open the role dropdown

Open the dropdown for the role you want to update.
2

Pick a font

Pick a font from the list (Inter, Geist, DM Sans, Plus Jakarta Sans, Manrope, Space Grotesk, Poppins, Montserrat, Roboto, Outfit, and more).
3

Save changes

Click Save changes.
Font changes are not applied to the preview until you save.

Colors

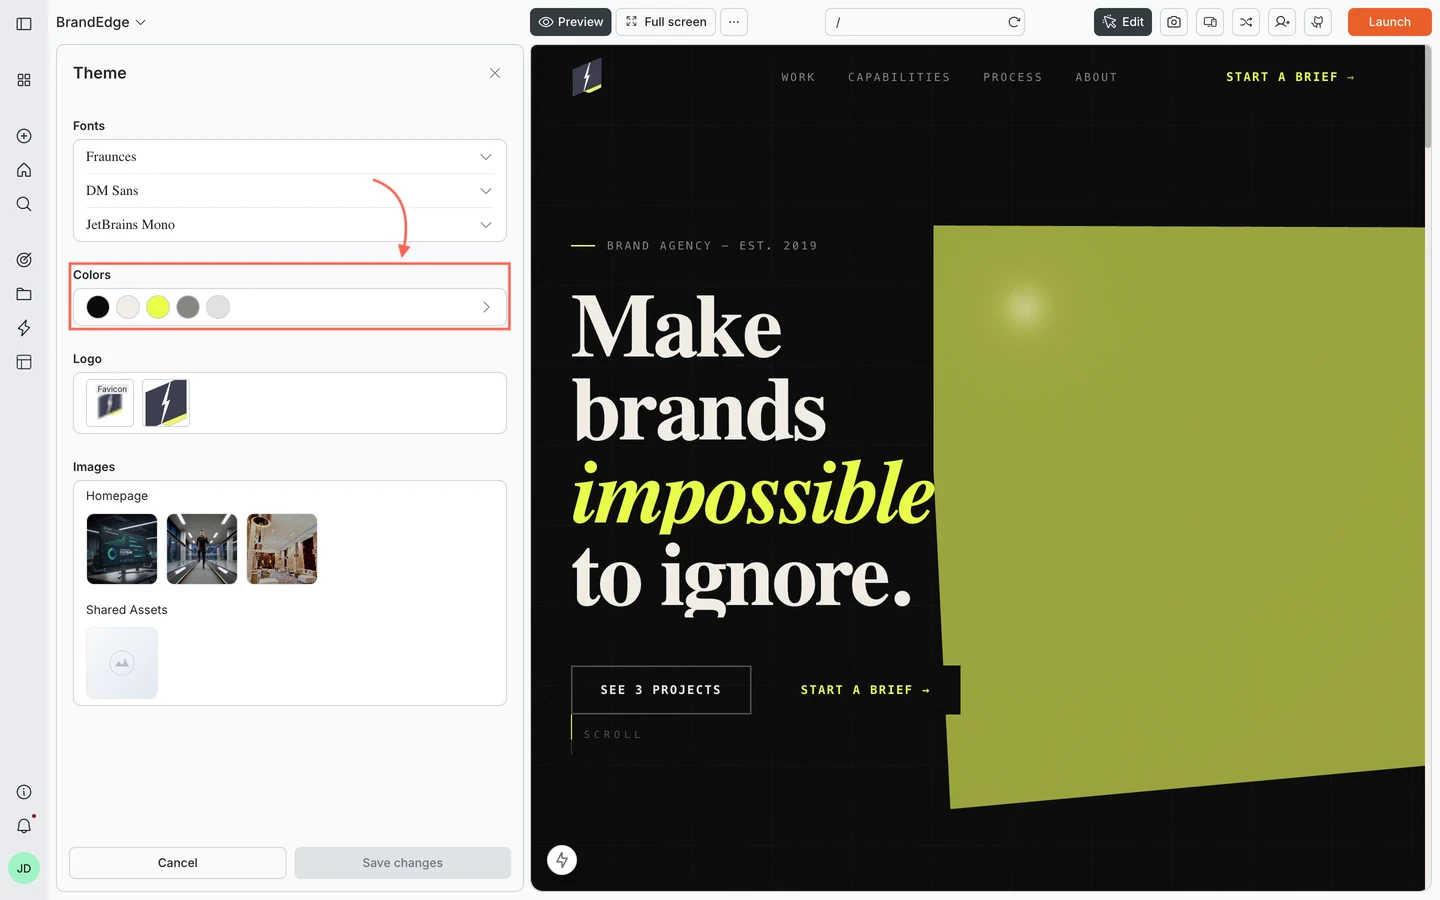
The Colors section shows your palette as a row of swatches.
Theme panel with the Colors section highlighted, showing a row of color swatches for the site's palette.
To edit a color:
1

Open the color editor

Click the swatches row or the arrow to open the color editor.
2

Find the role

Find the role you want to change - Background, Foreground, Primary, Secondary, Accent, Muted, Card, Border, Input, Focus Ring, and others are all listed individually.
3

Set the color

Click the role and set it to any color.
4

Save changes

Click Save changes.
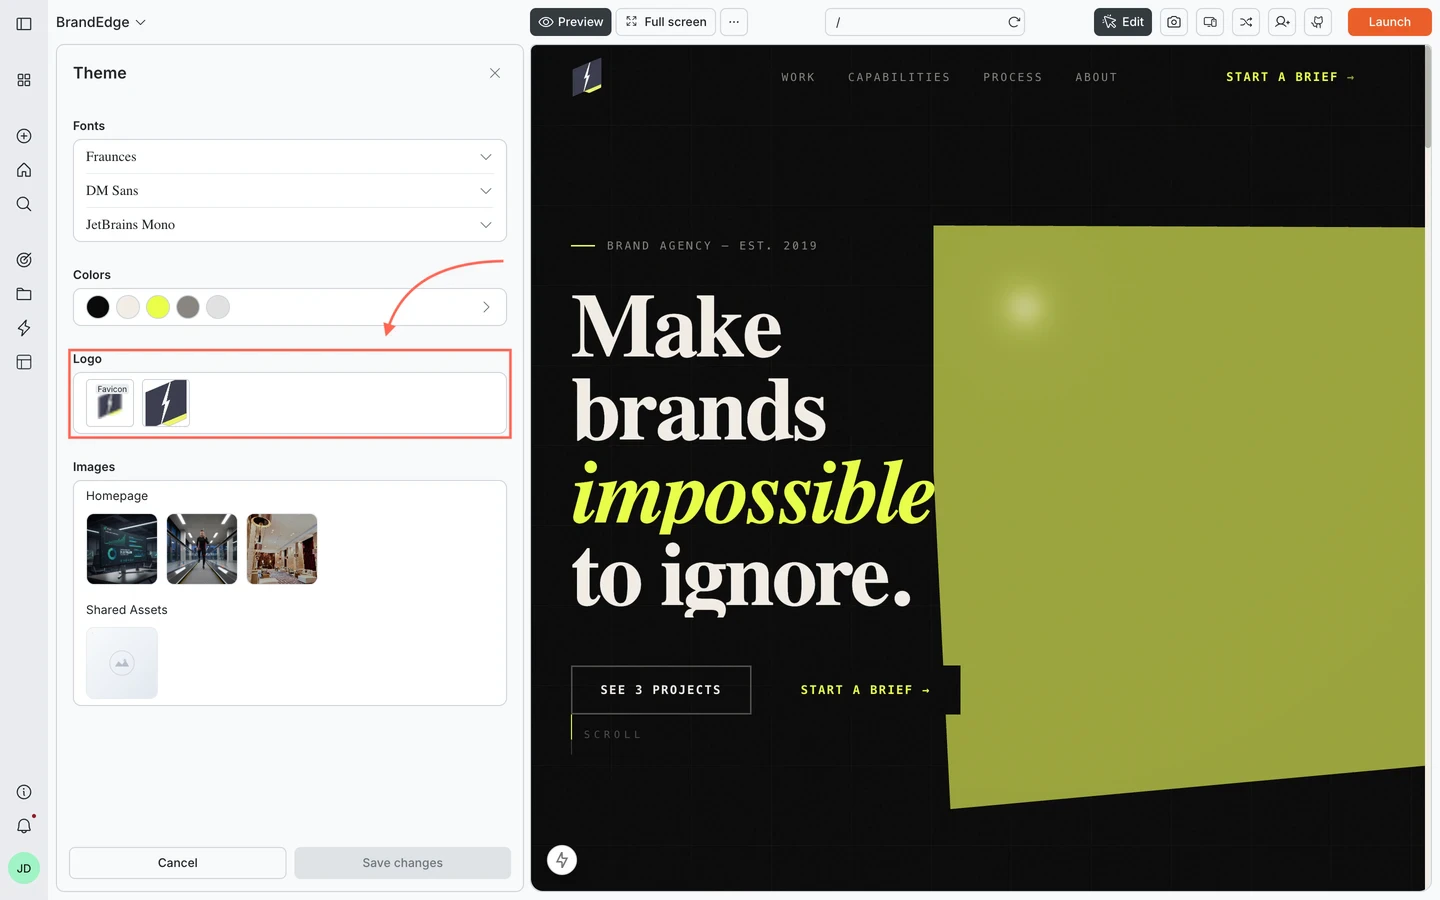
Color changes update every page and component that uses those roles. The Logo section has upload slots for your site’s brand marks.

Theme panel with the Logo section highlighted, showing logo upload slots.
SlotWhat it is
FaviconThe small icon shown in browser tabs and bookmarks
App logoYour primary logo, used in the navbar and other brand placements
To upload:
1

Click the slot

Click the slot you want to fill.
2

Select a file

Select a file from your device.
3

Save changes

Click Save changes.
Transparent PNGs work best for logos. For the favicon, use a square image - ICO and PNG formats are both supported.

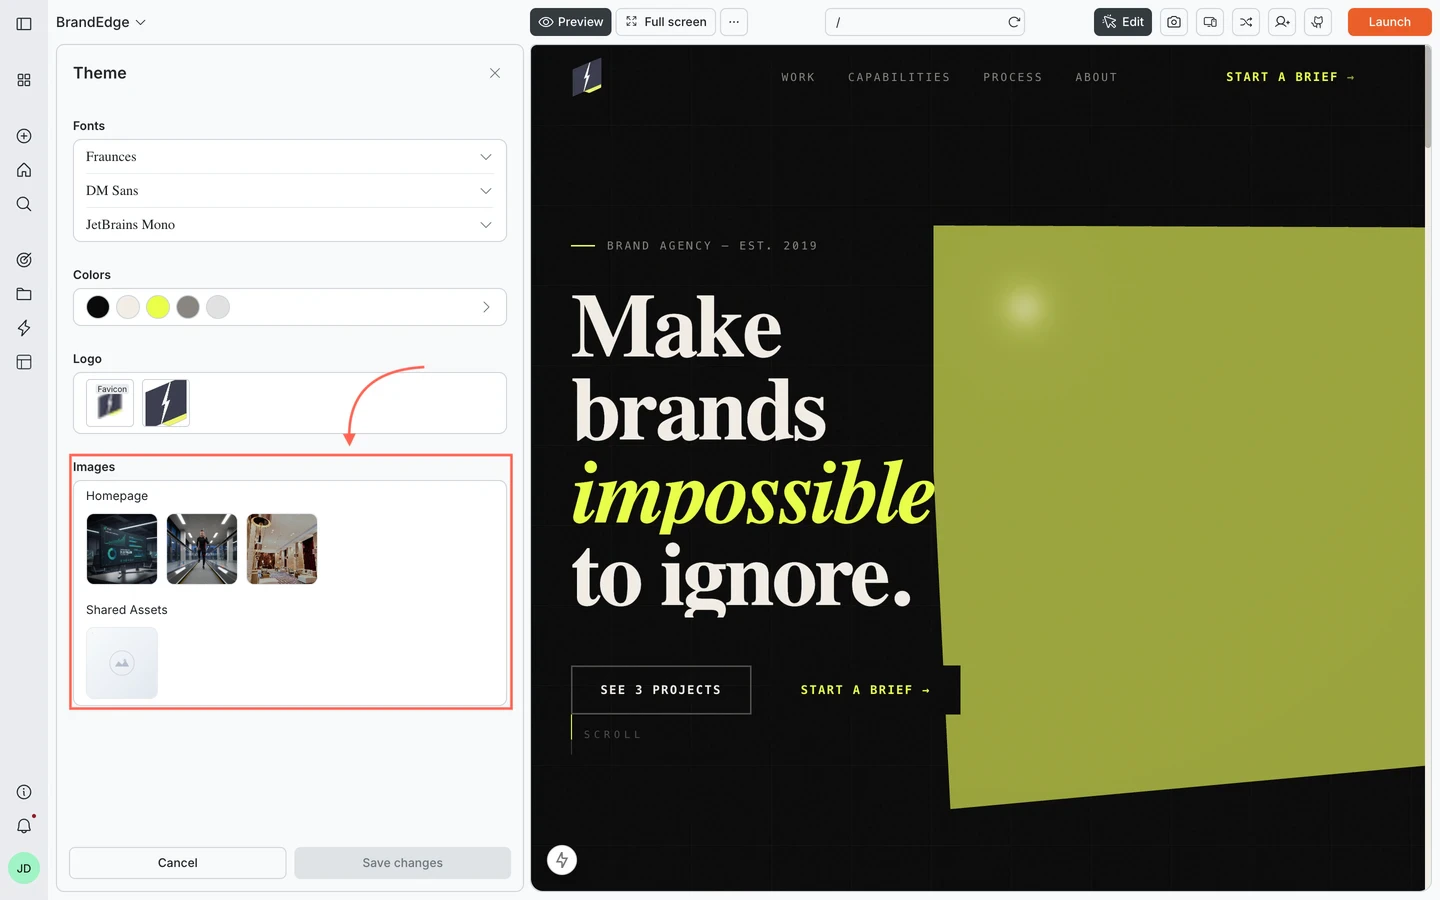
Images

The Images section shows every image in your site, organized by page.
Theme panel with the Images section highlighted, showing image thumbnails organized by page and a Shared Assets group.
  • Page groups - images listed under a page name only appear on that page
  • Shared Assets - images used across multiple pages; replacing one here updates it everywhere
Click any thumbnail to replace it with a new file.

What’s next?

Visual edit

Click any element to change its text, style, or spacing directly in the preview.

Commands

Use slash commands like /Change App Theme and /Update App Logo for AI-driven brand changes.

Chat with Rocket

Describe broader design changes in chat and Rocket applies them across your site.

Code tab

Browse and edit your task source files directly.