Subscription management is only available on the web browser. You need a logged-in Rocket account to manage your plan.
Buy a plan
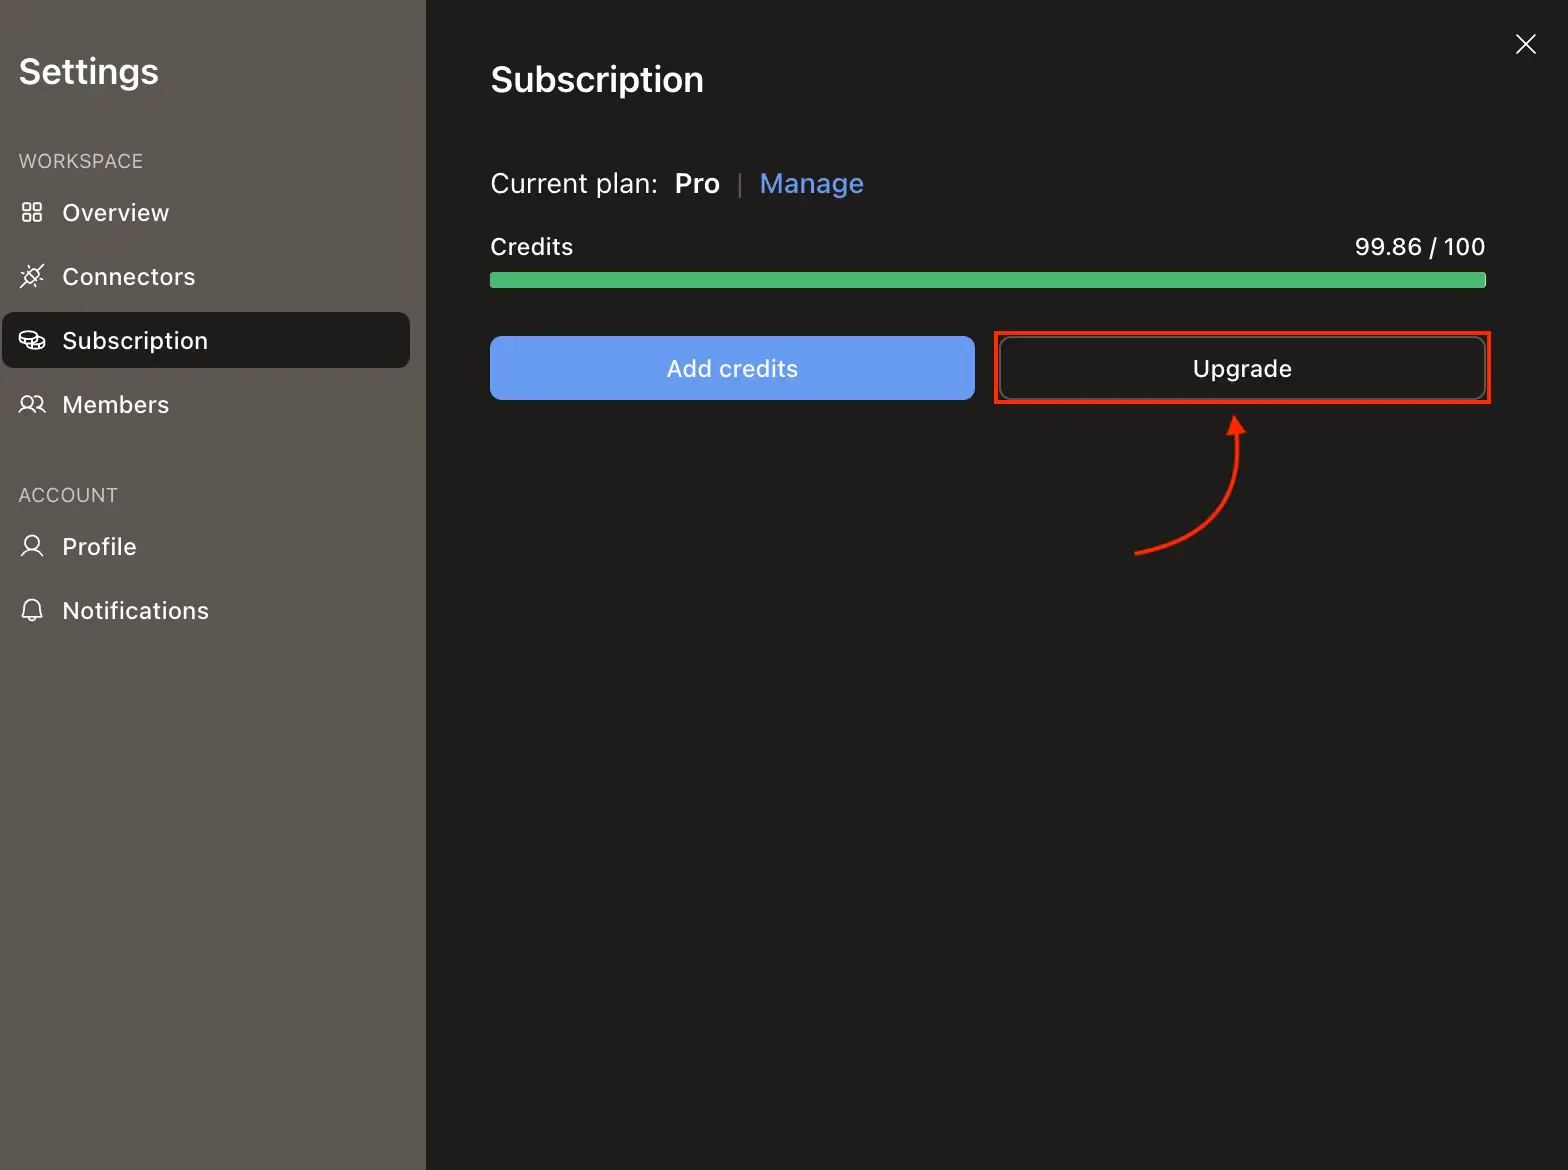
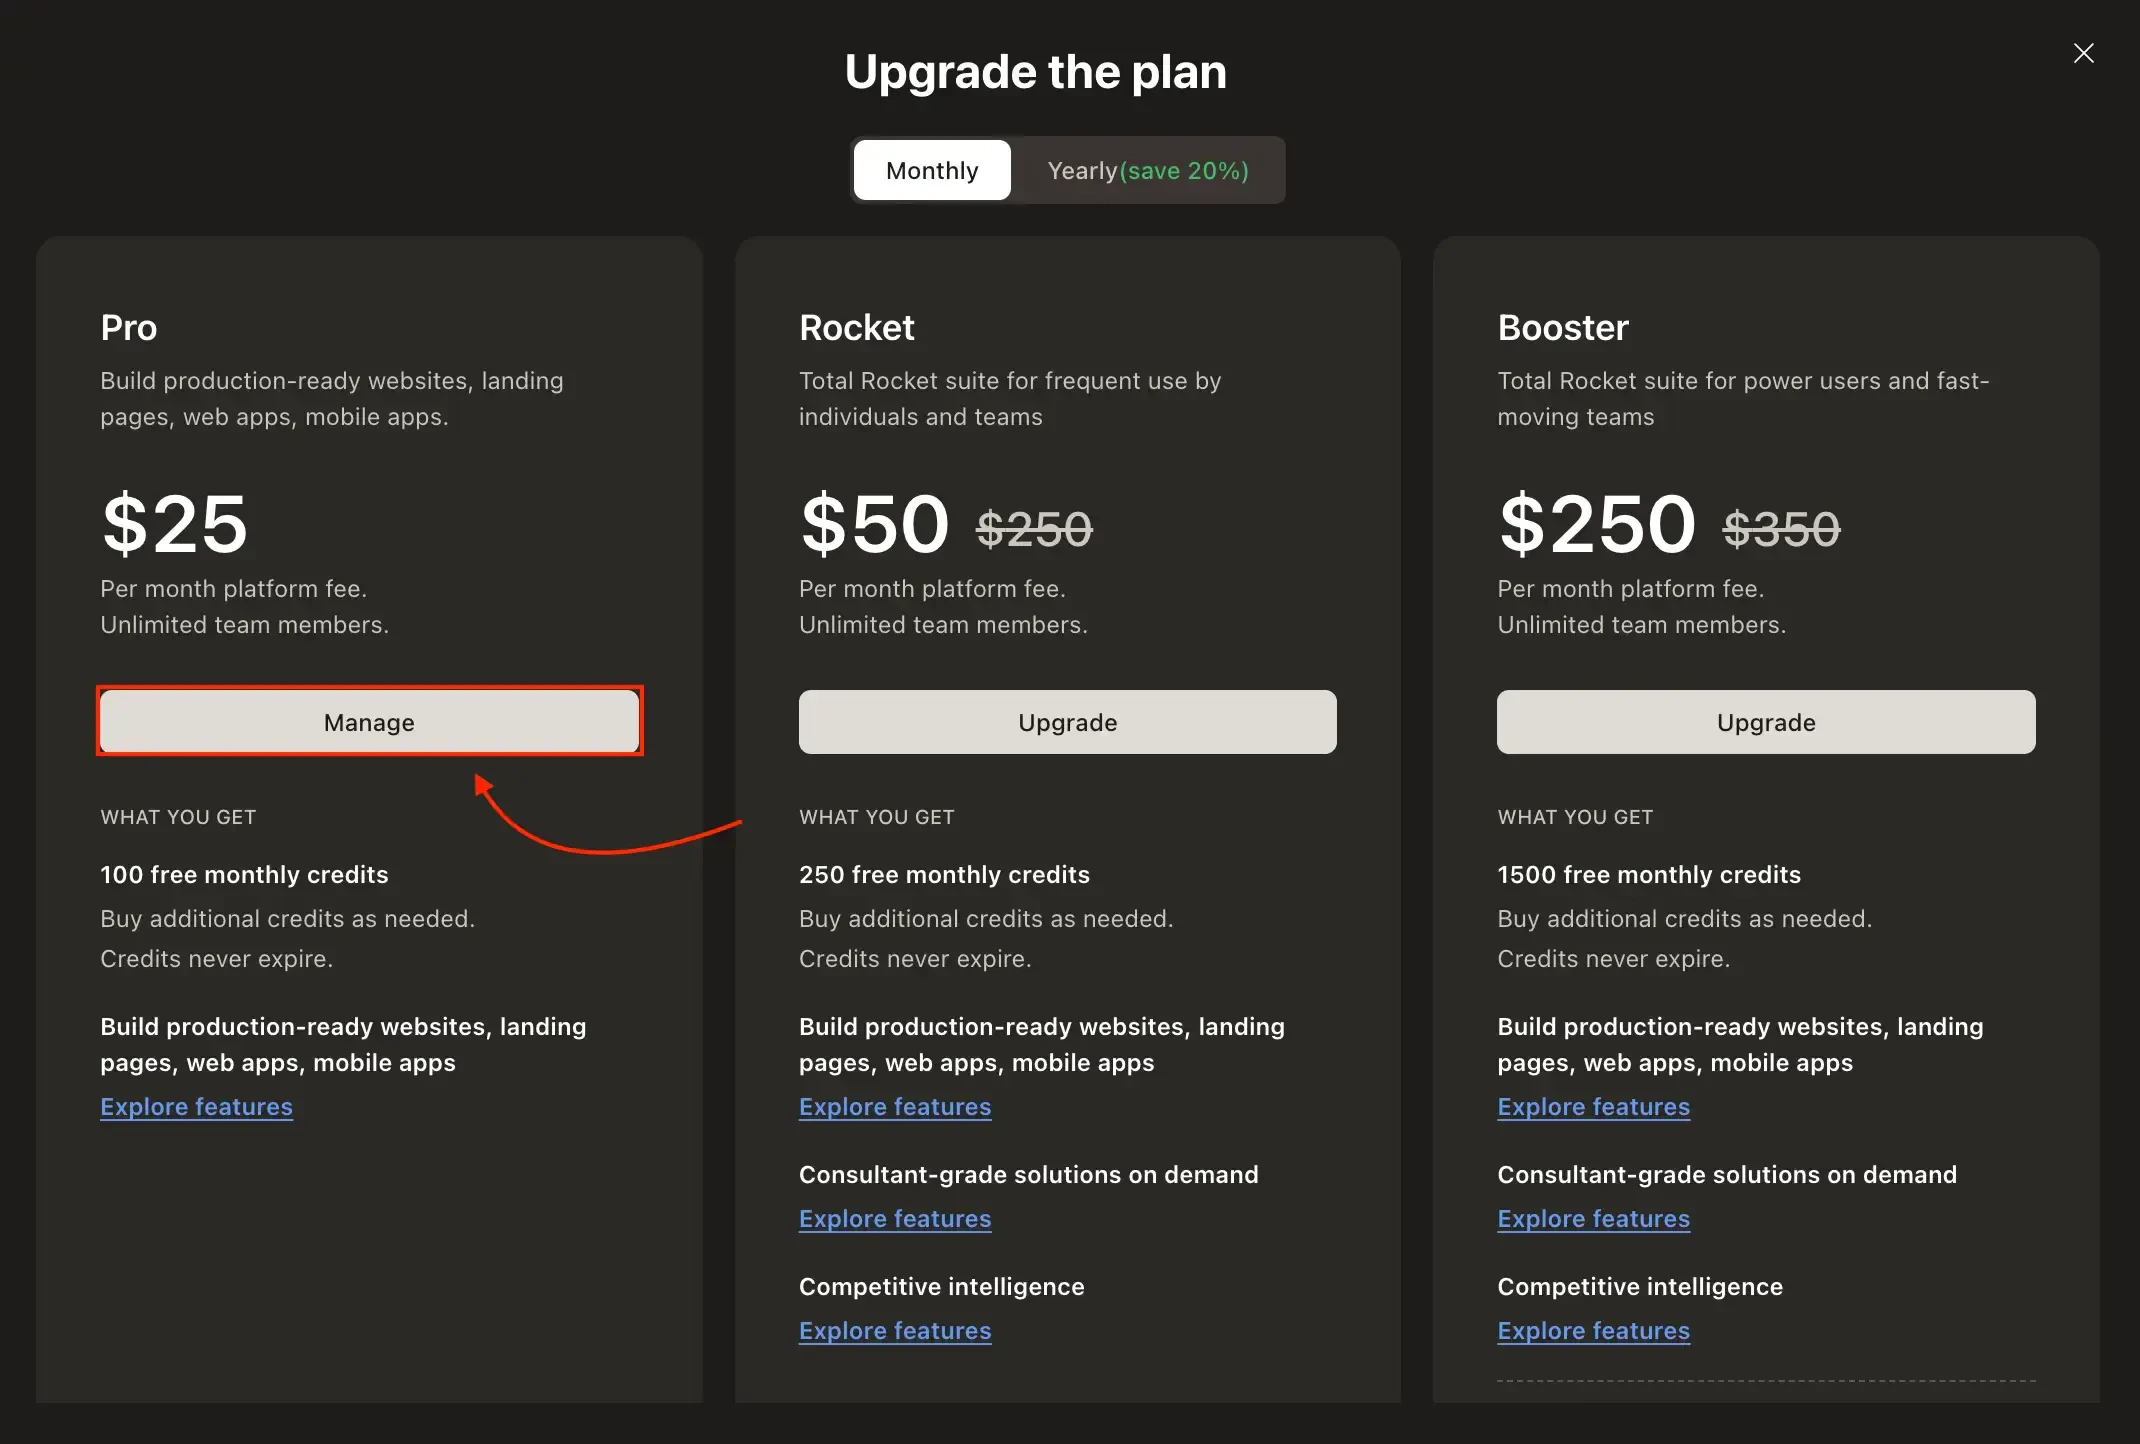
Open Settings and click Upgrade
Go to Settings → Subscription. Click the Upgrade button. The Upgrade modal opens showing available plans (Pro, Rocket, Booster). Toggle Yearly (save 20%) to see annual pricing.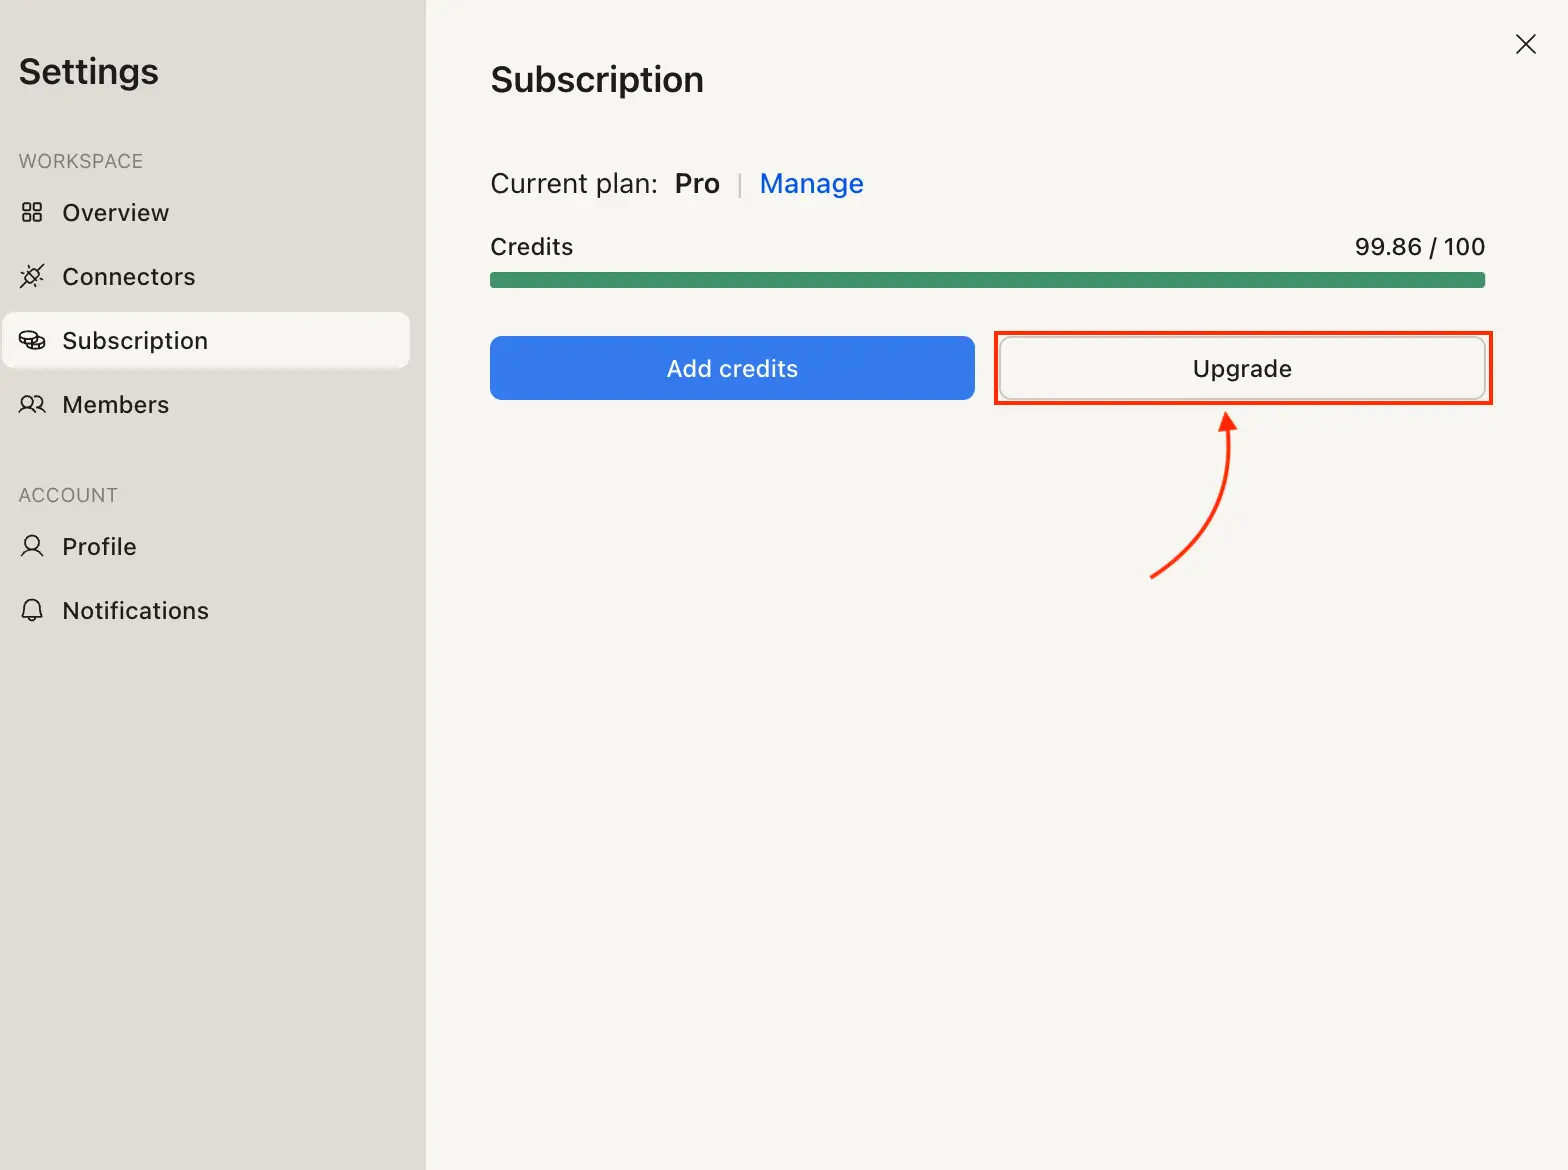
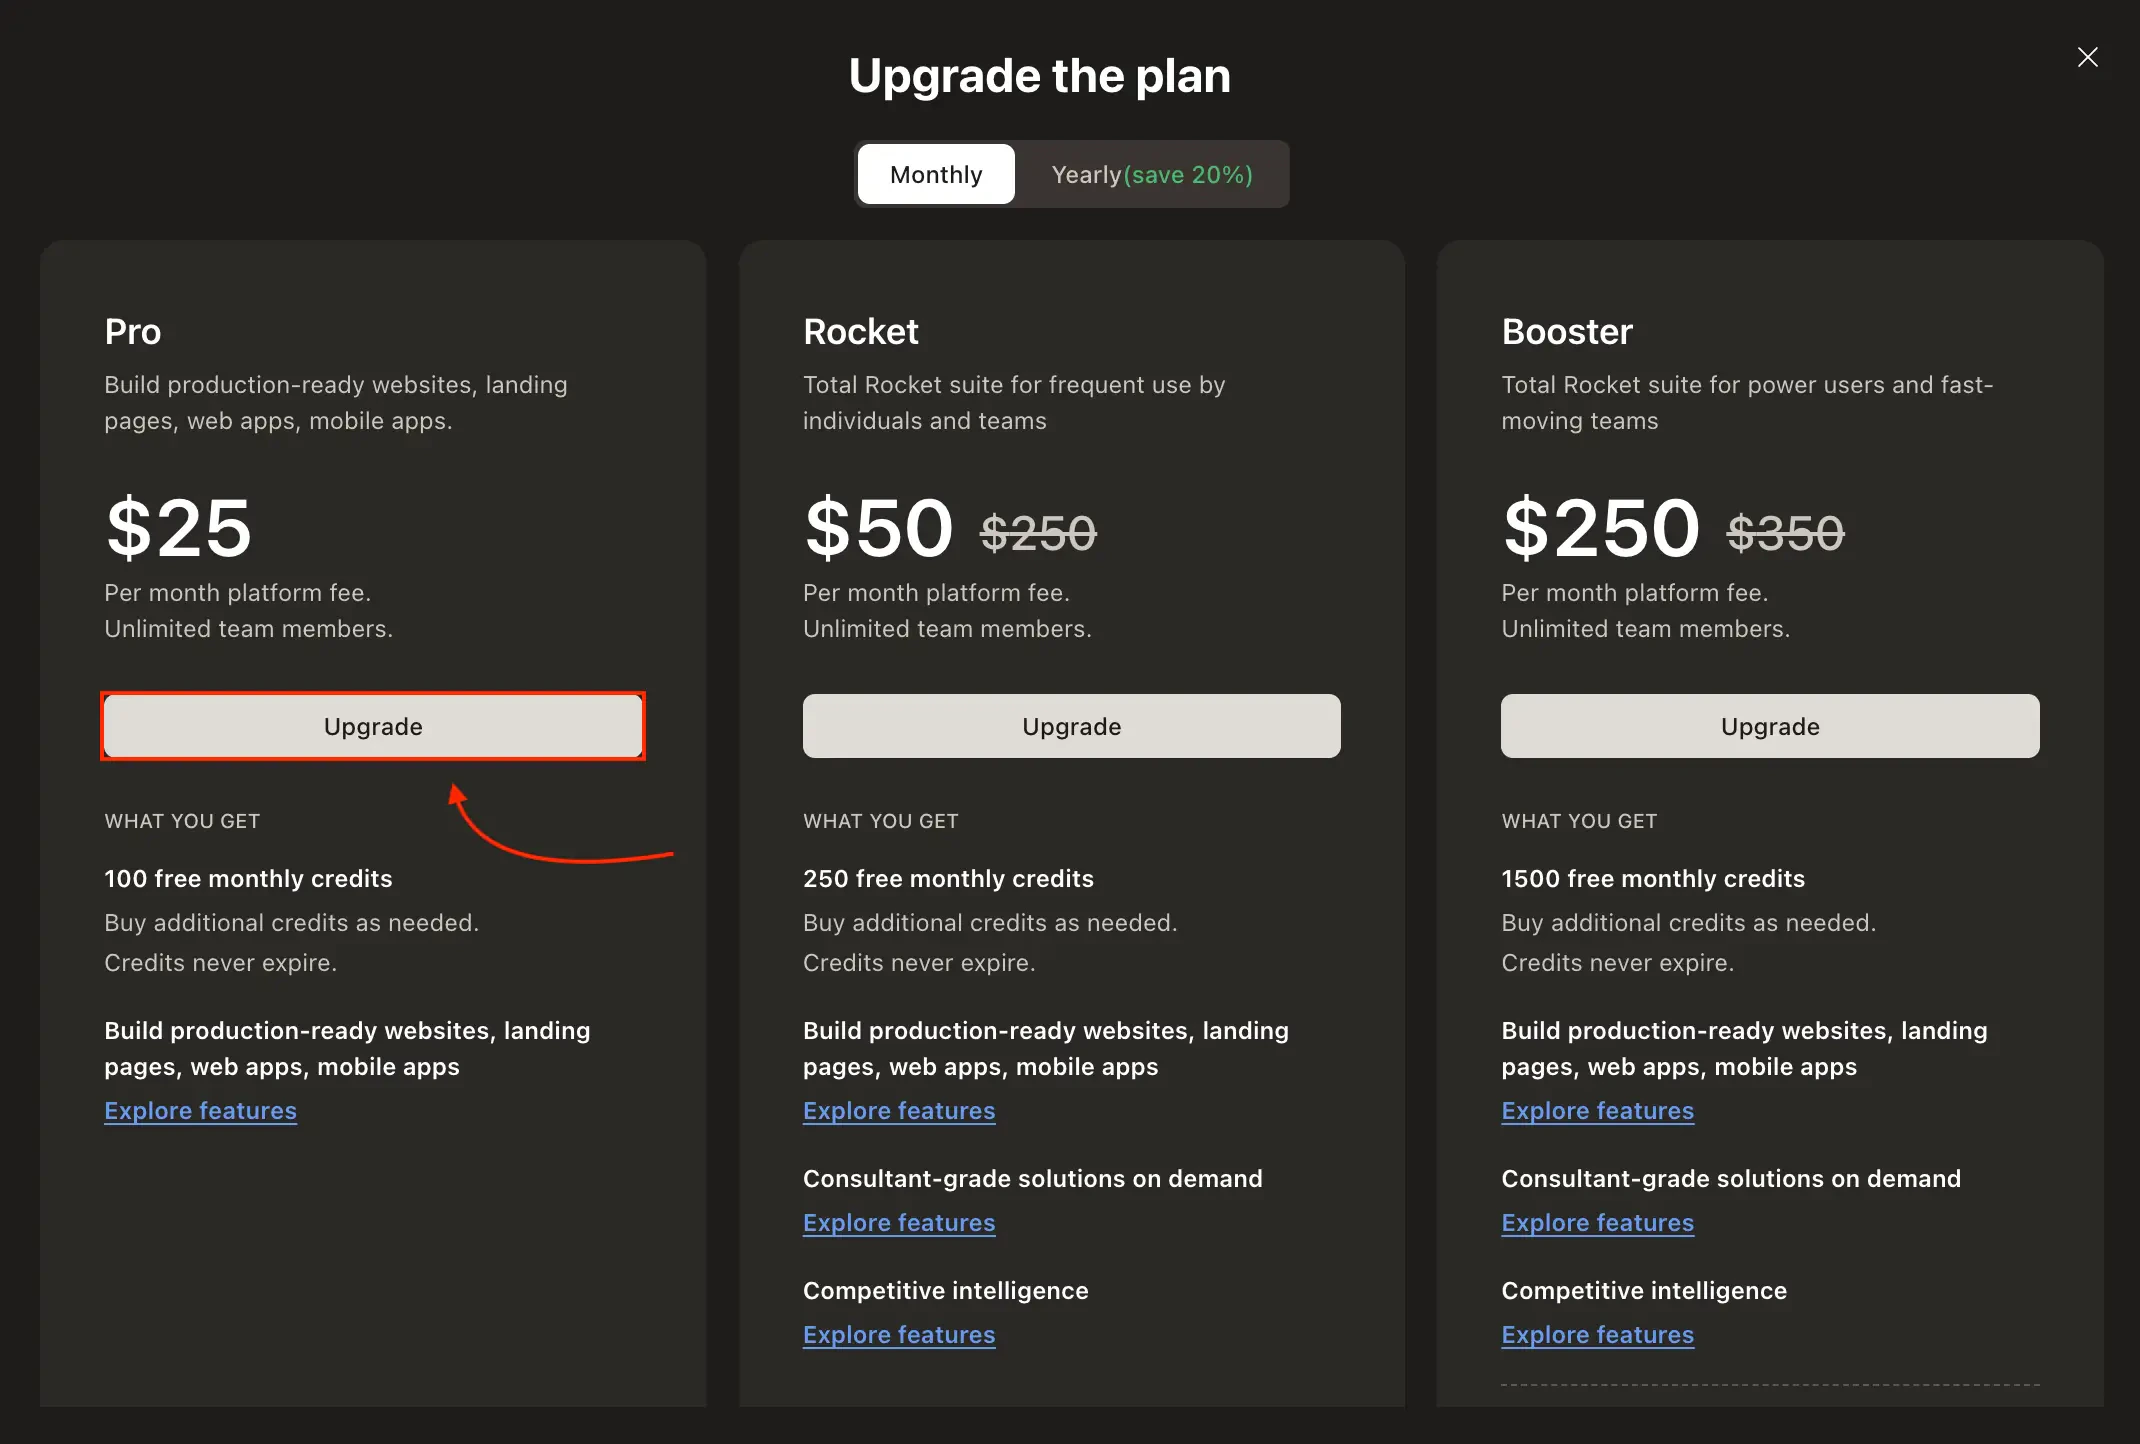
Click Upgrade on the plan you want
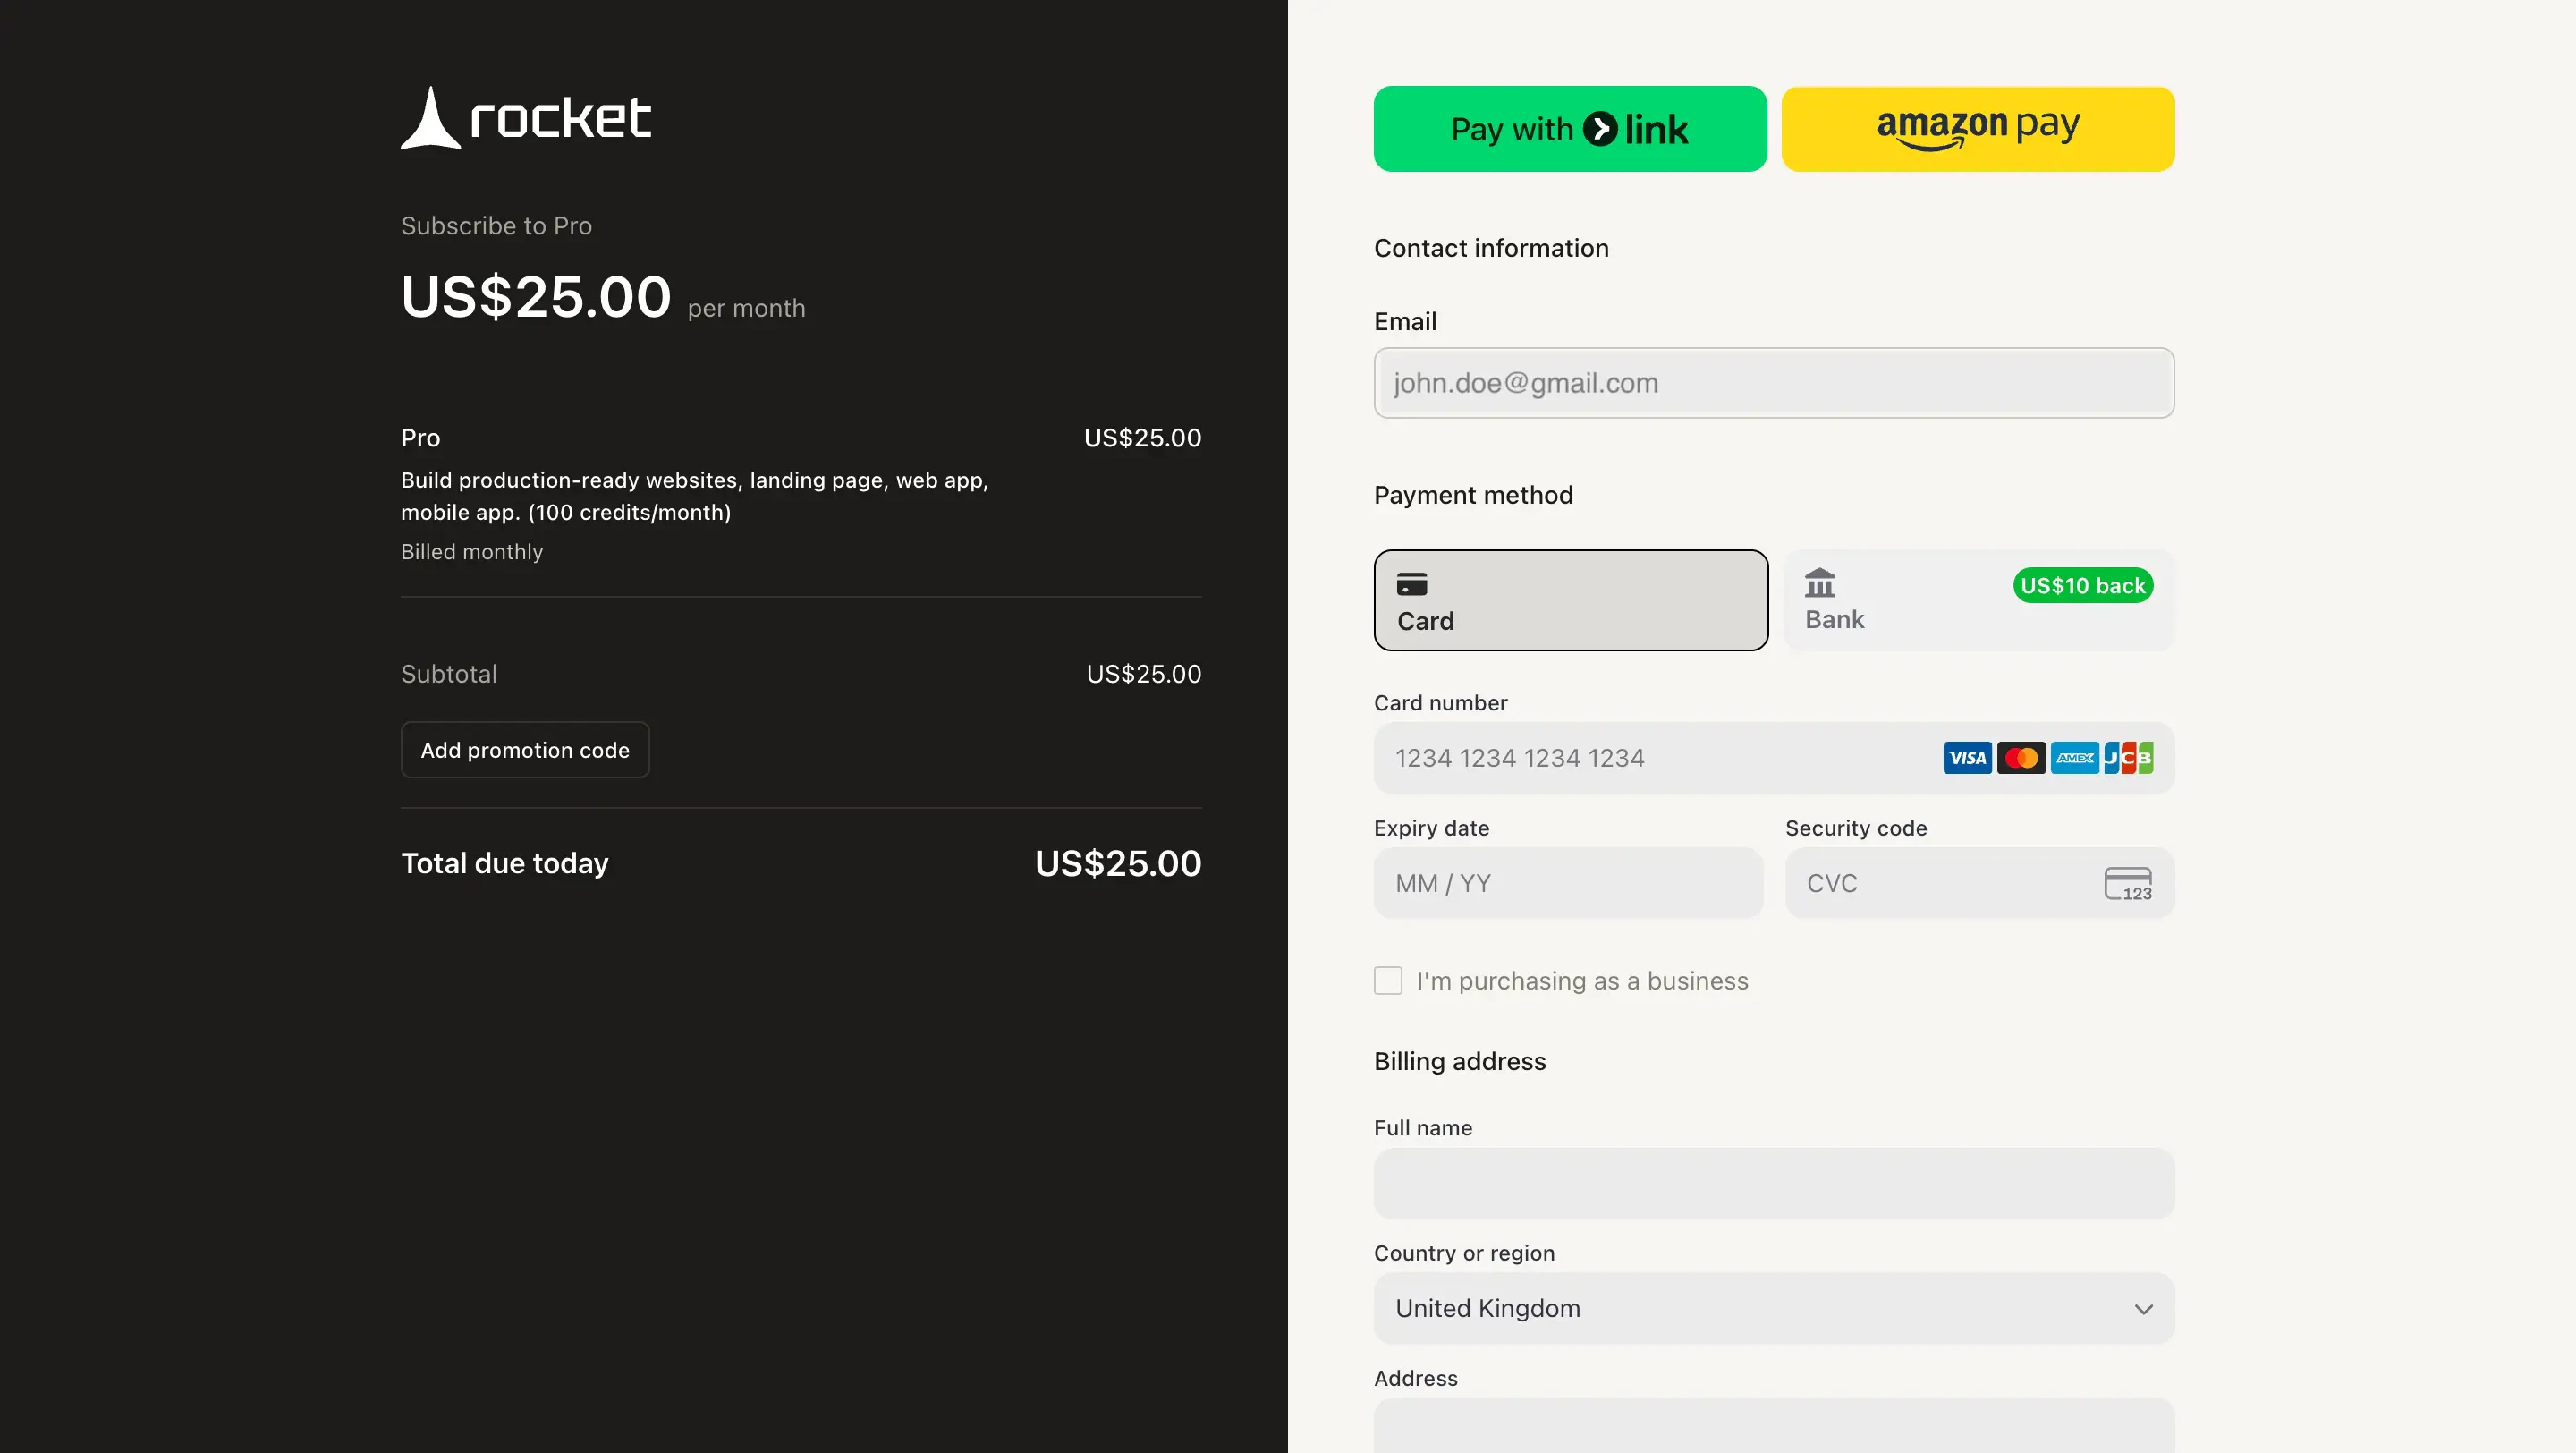
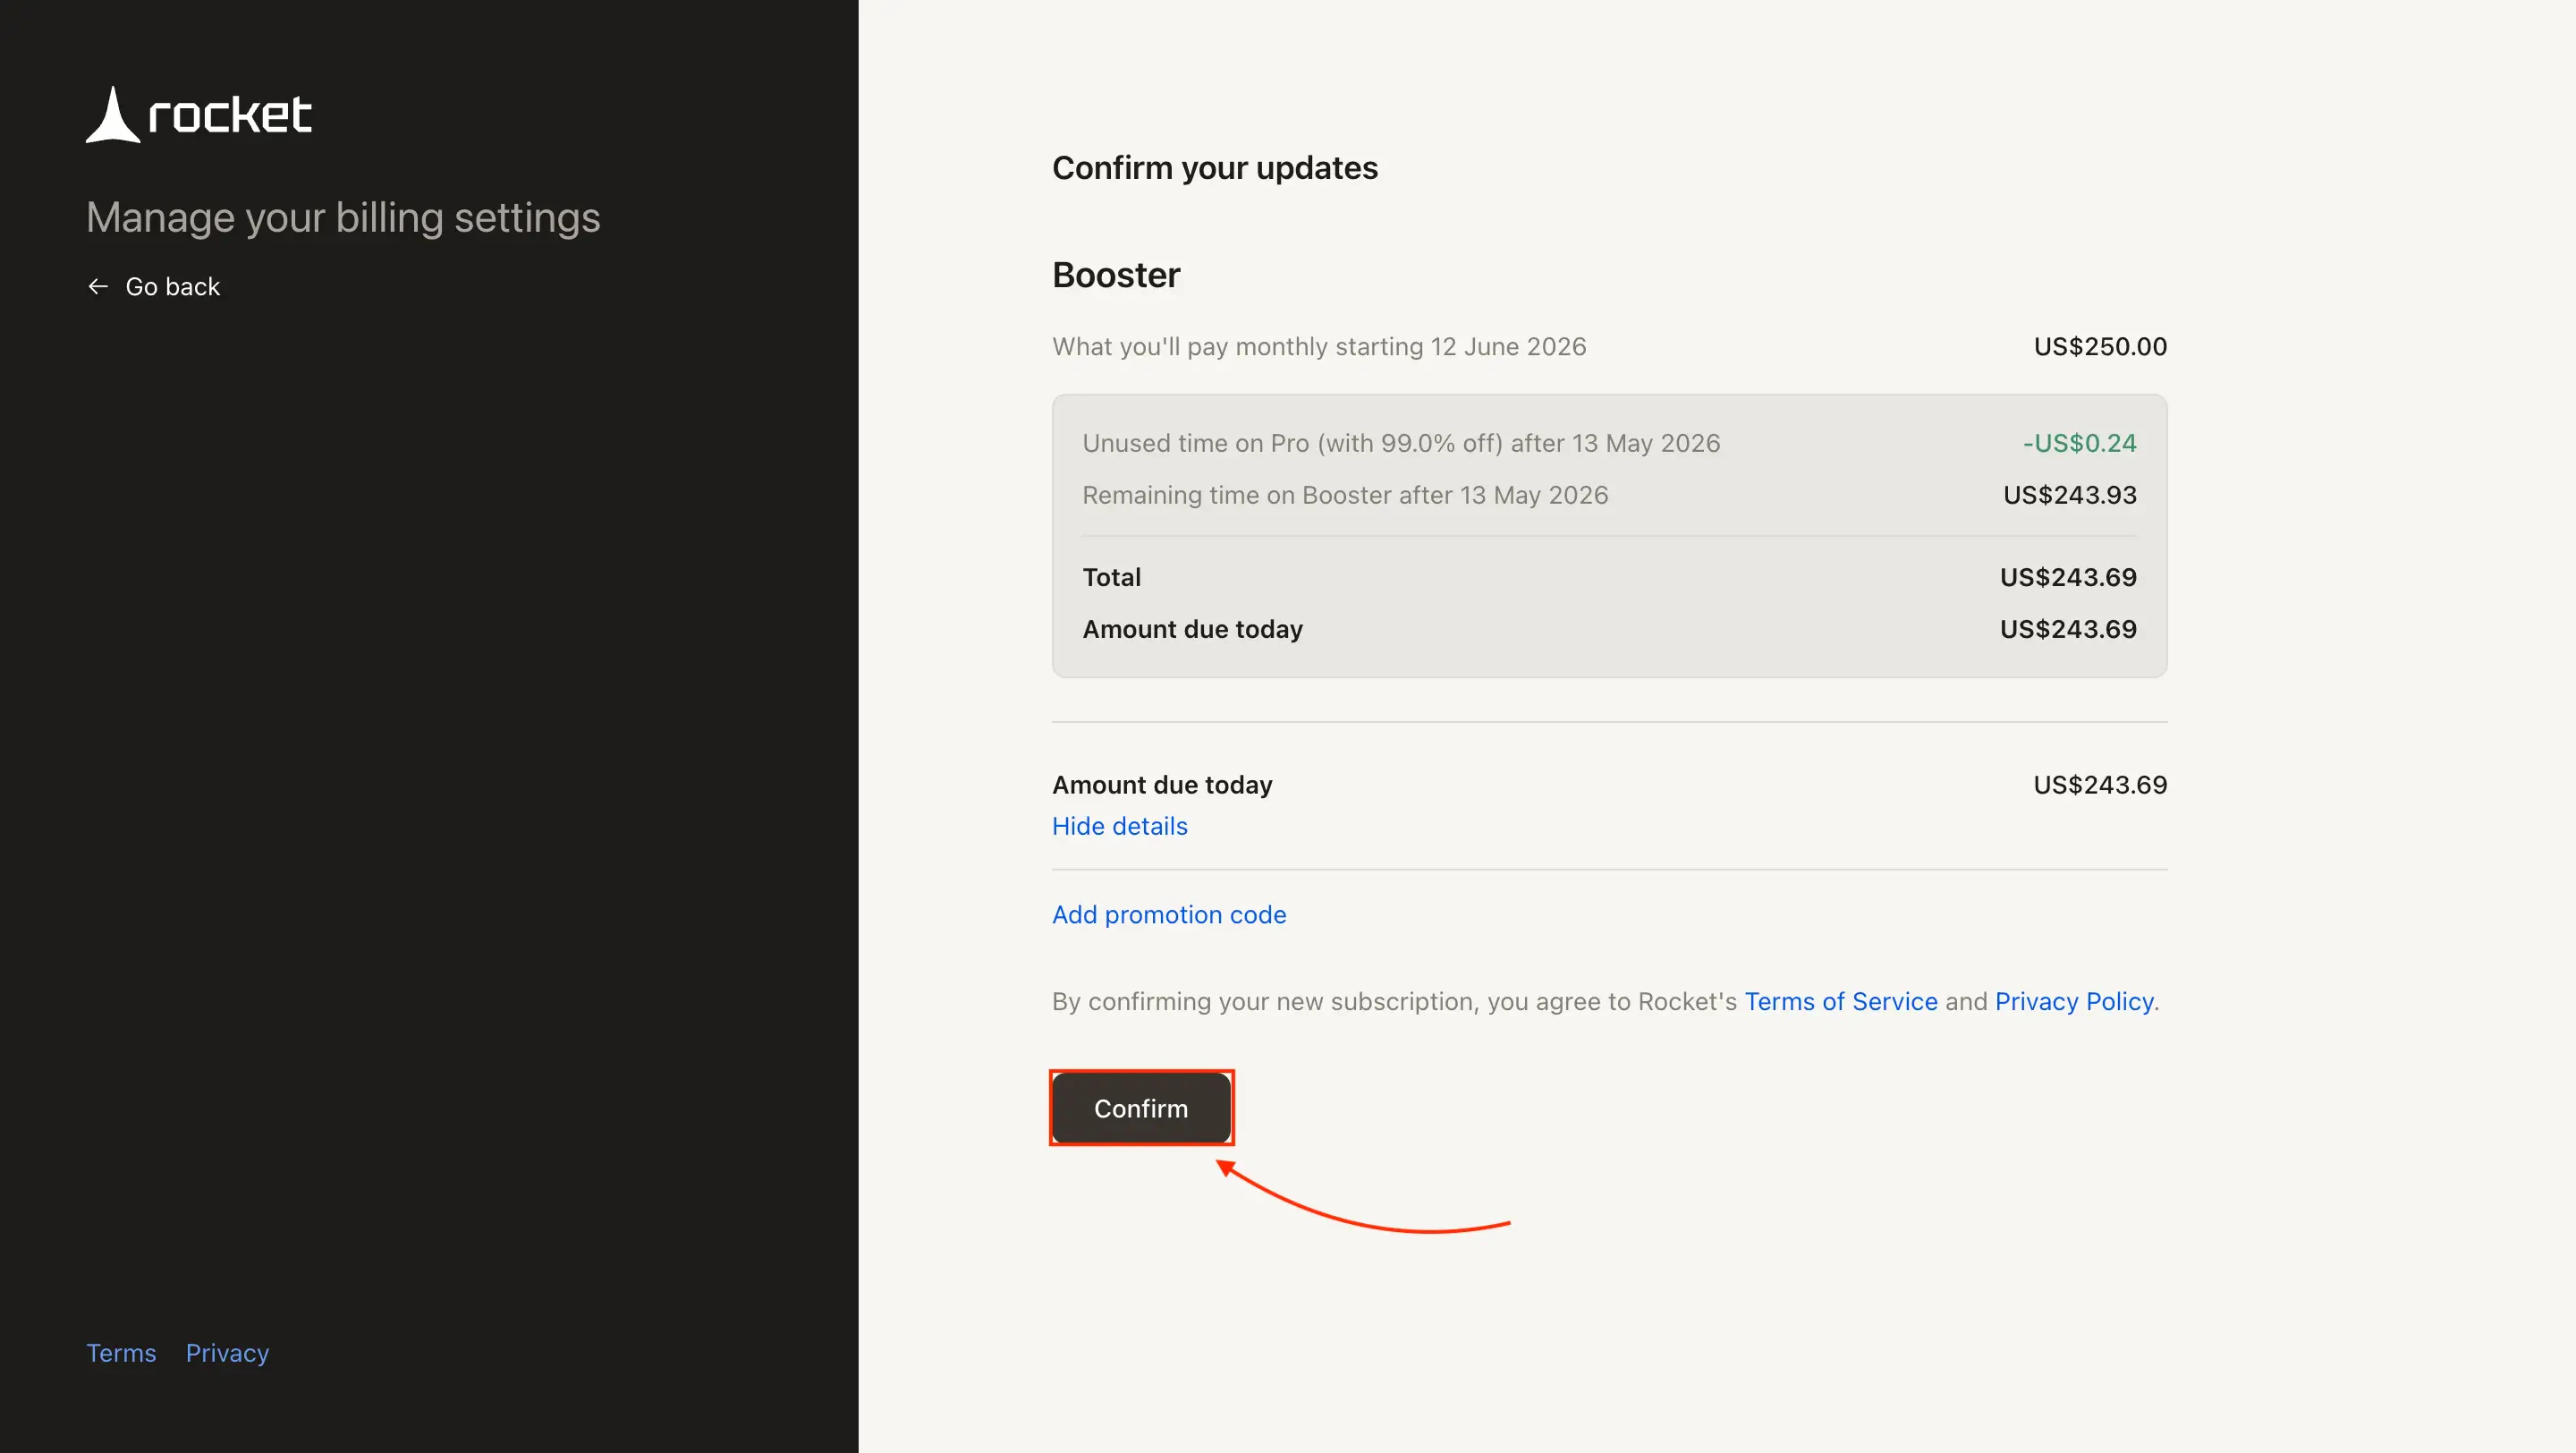
Click Upgrade on the plan that fits your workload. You are redirected to Stripe checkout.
Already on a paid plan? See Upgrade to another plan.
Upgrade paths by plan
The Subscription tab shows different options based on your current plan. See how to buy a plan or upgrade to another plan.| Current plan | Available upgrades |
|---|---|
| Free | Pro, Rocket, Booster |
| Pro | Rocket, Booster |
| Rocket | Booster |
| Booster | No upgrades available (highest tier) |
Upgrade to another plan
Open the Subscription tab
Go to Settings → Subscription. Your current plan is shown at the top. Click the Upgrade button.
Choose the higher plan
The Upgrade modal shows all available plans. Click Upgrade on the plan you want to move to.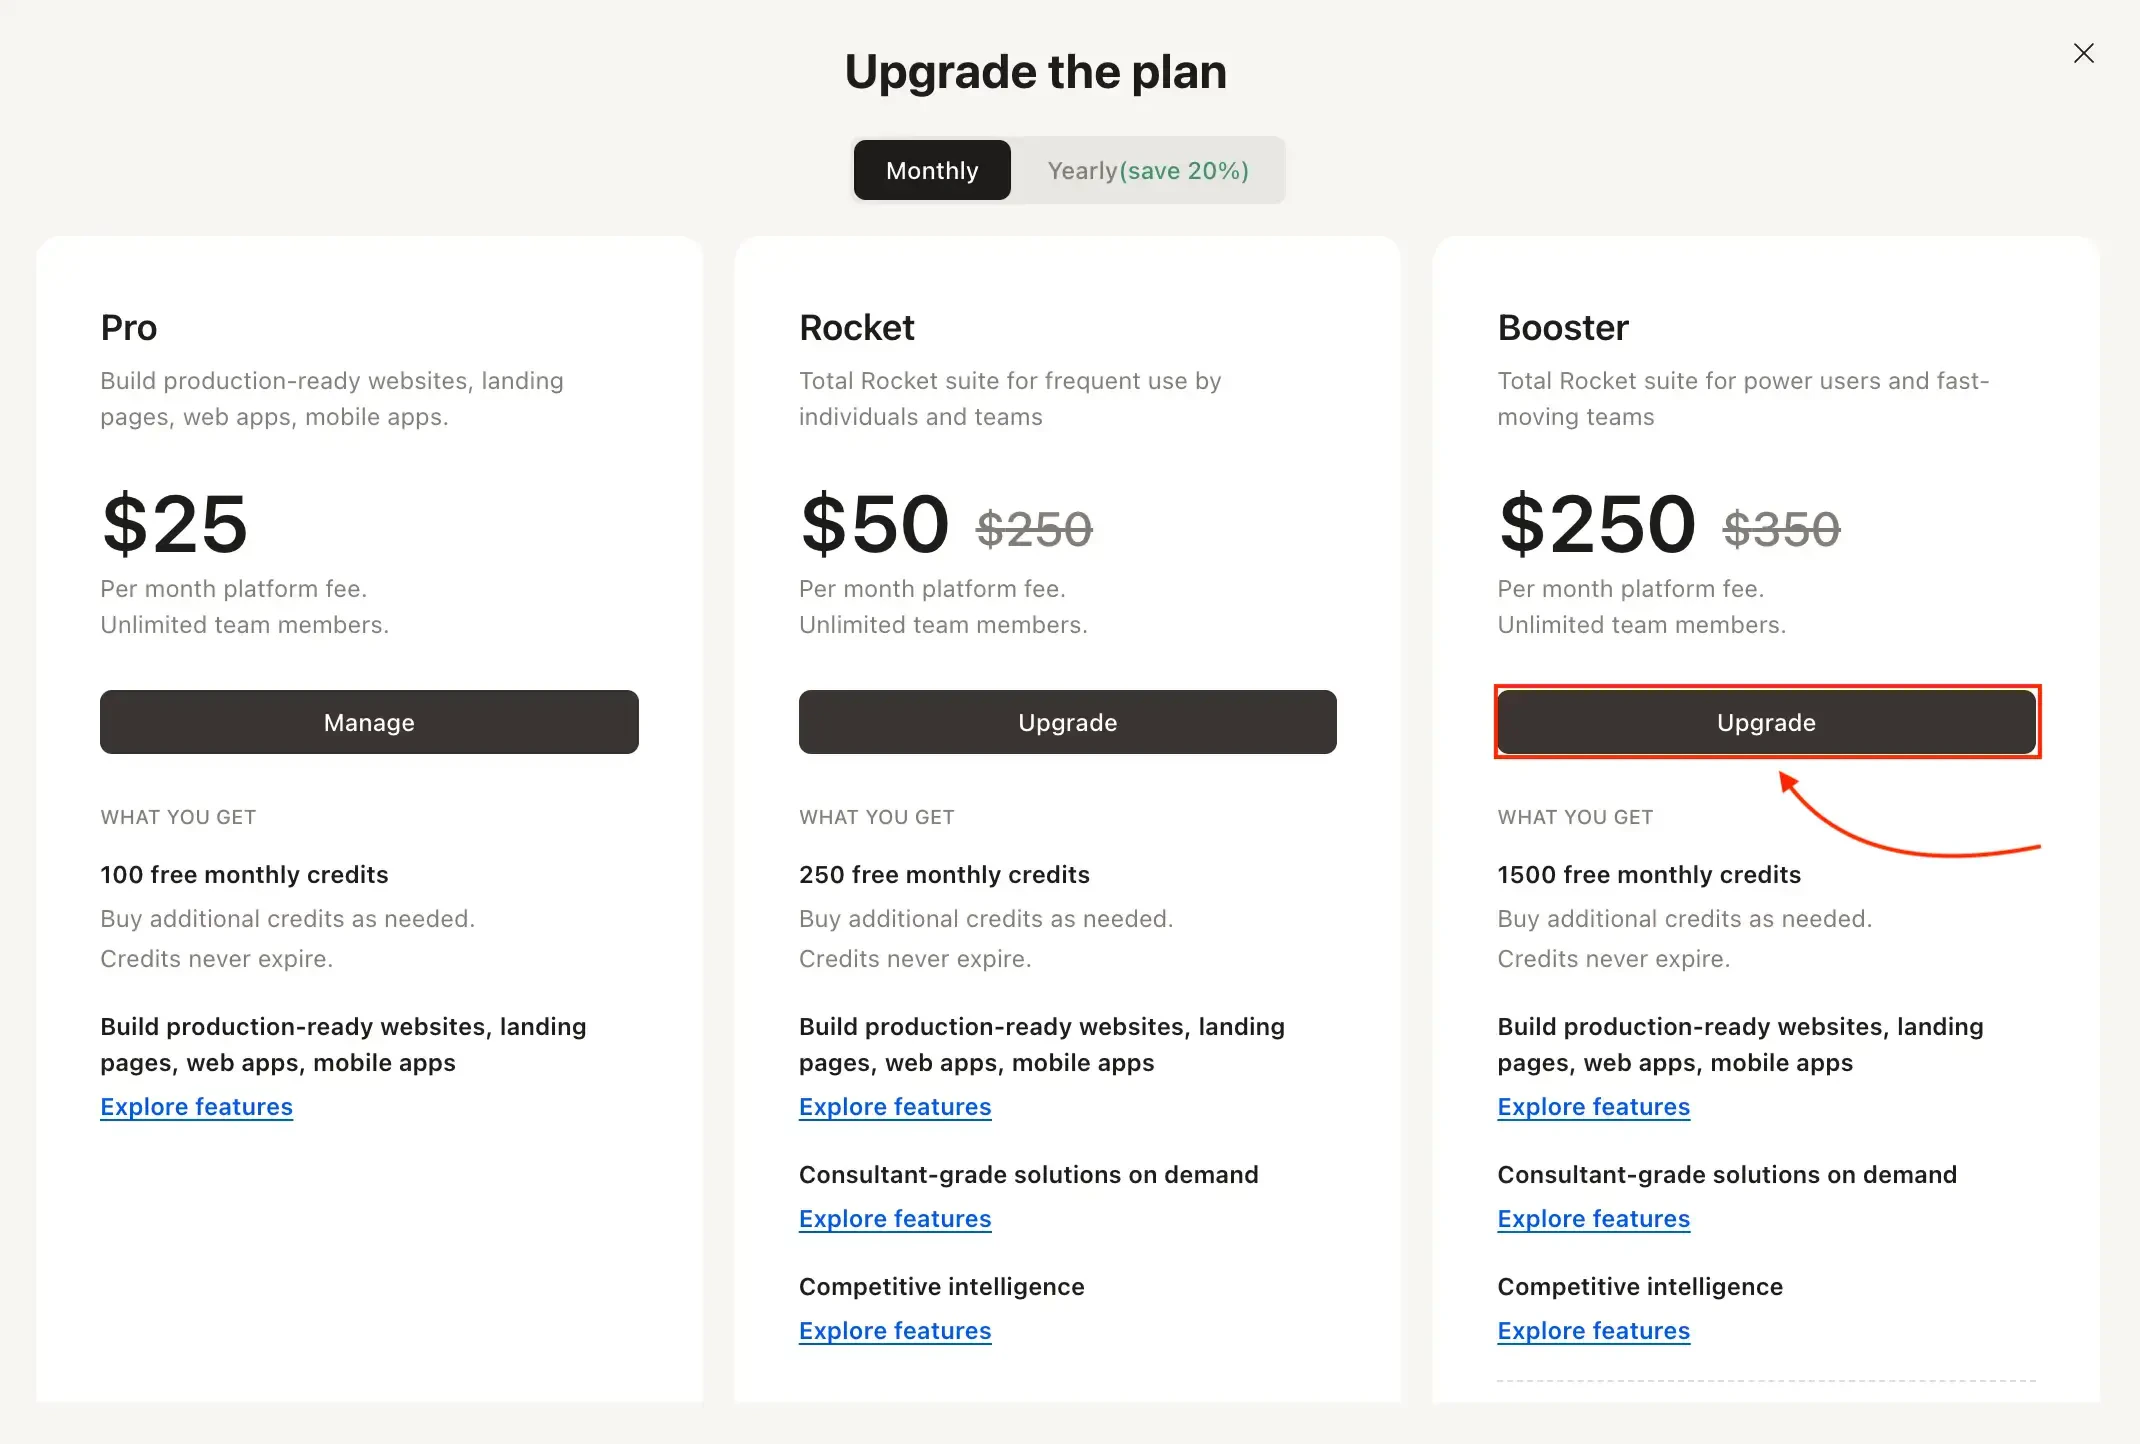
Add credits
The Add credits button is visible in Settings → Subscription for paid users. Clicking it takes you directly to Stripe checkout where you choose how many credits to buy. If you find yourself adding credits regularly, consider upgrading to a higher plan for better value.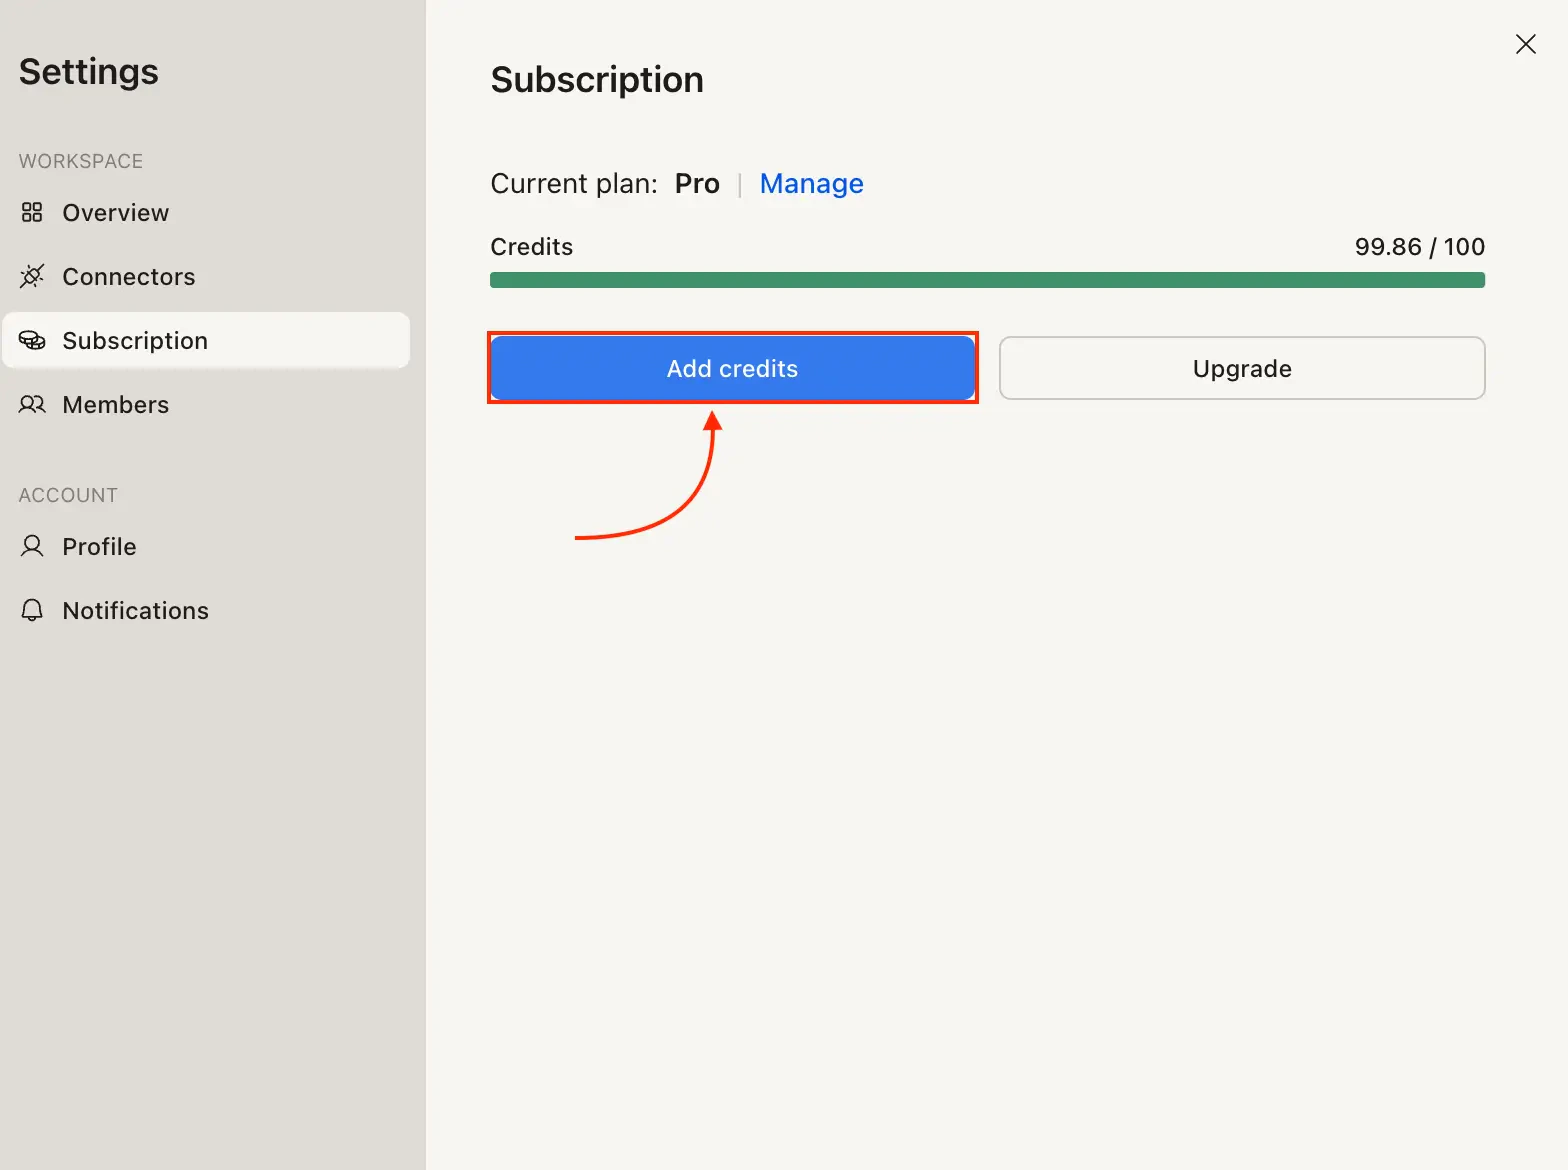
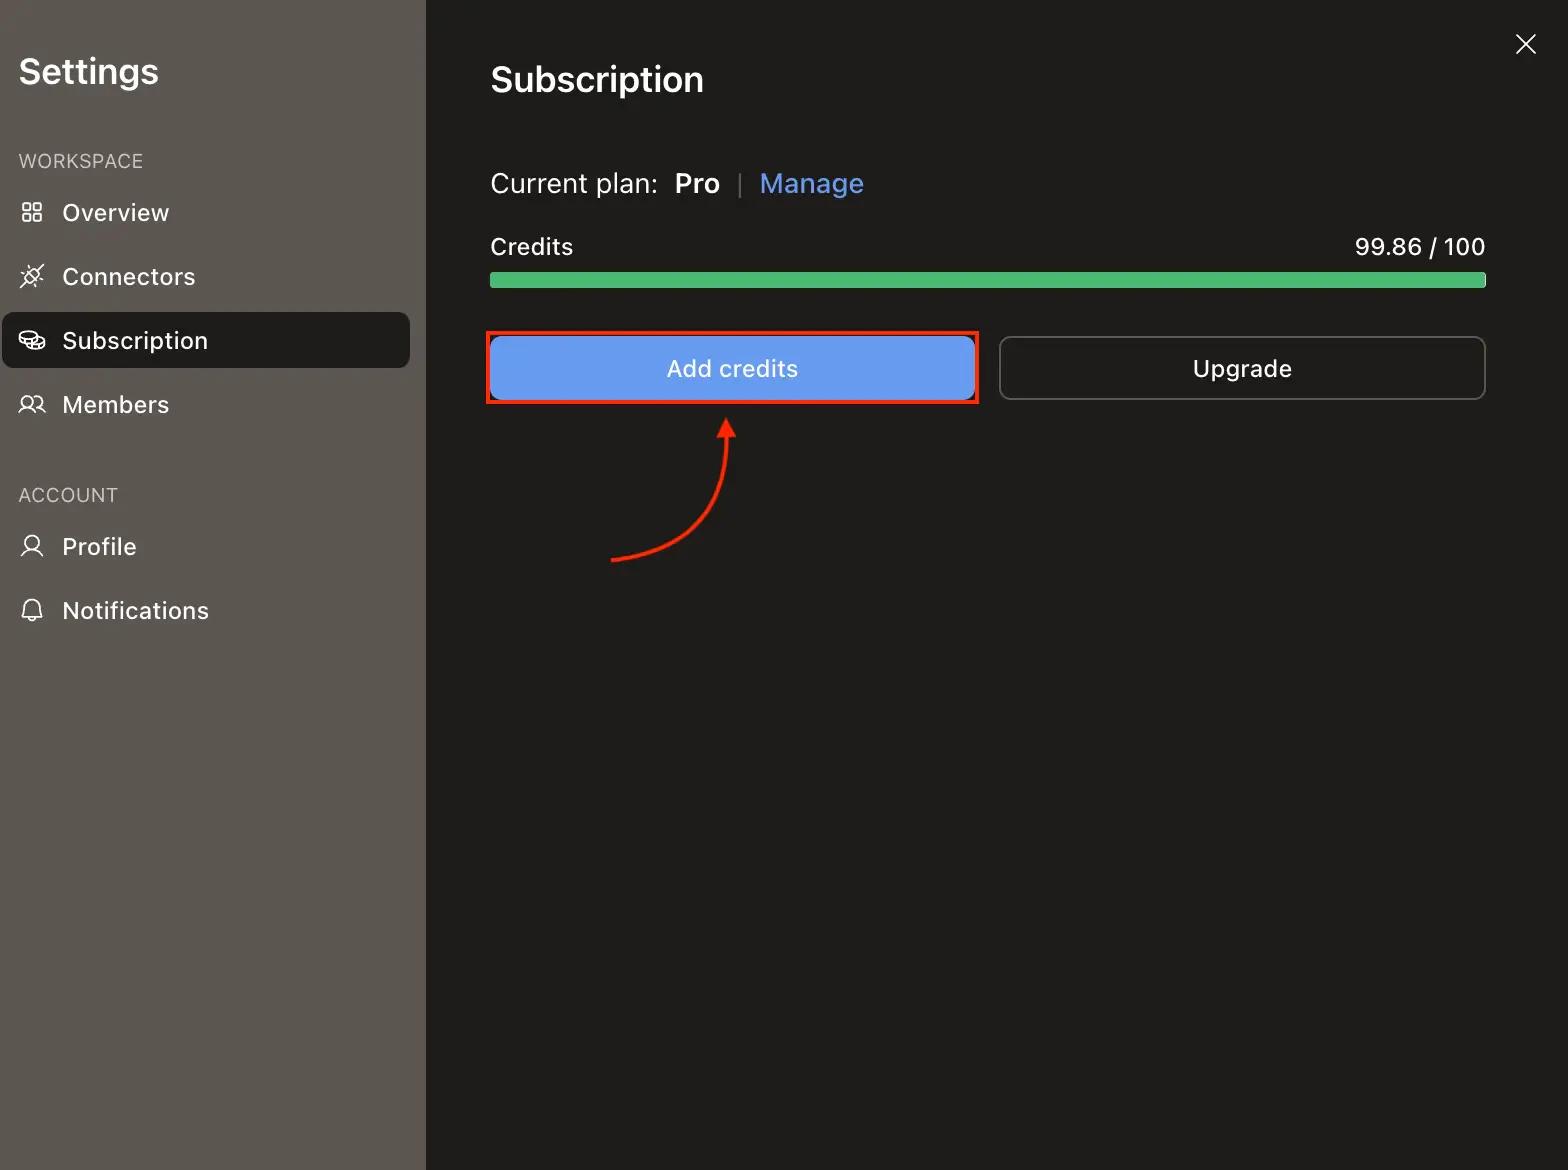

Free plan users do not see the Add credits button. Upgrade to a paid plan first.
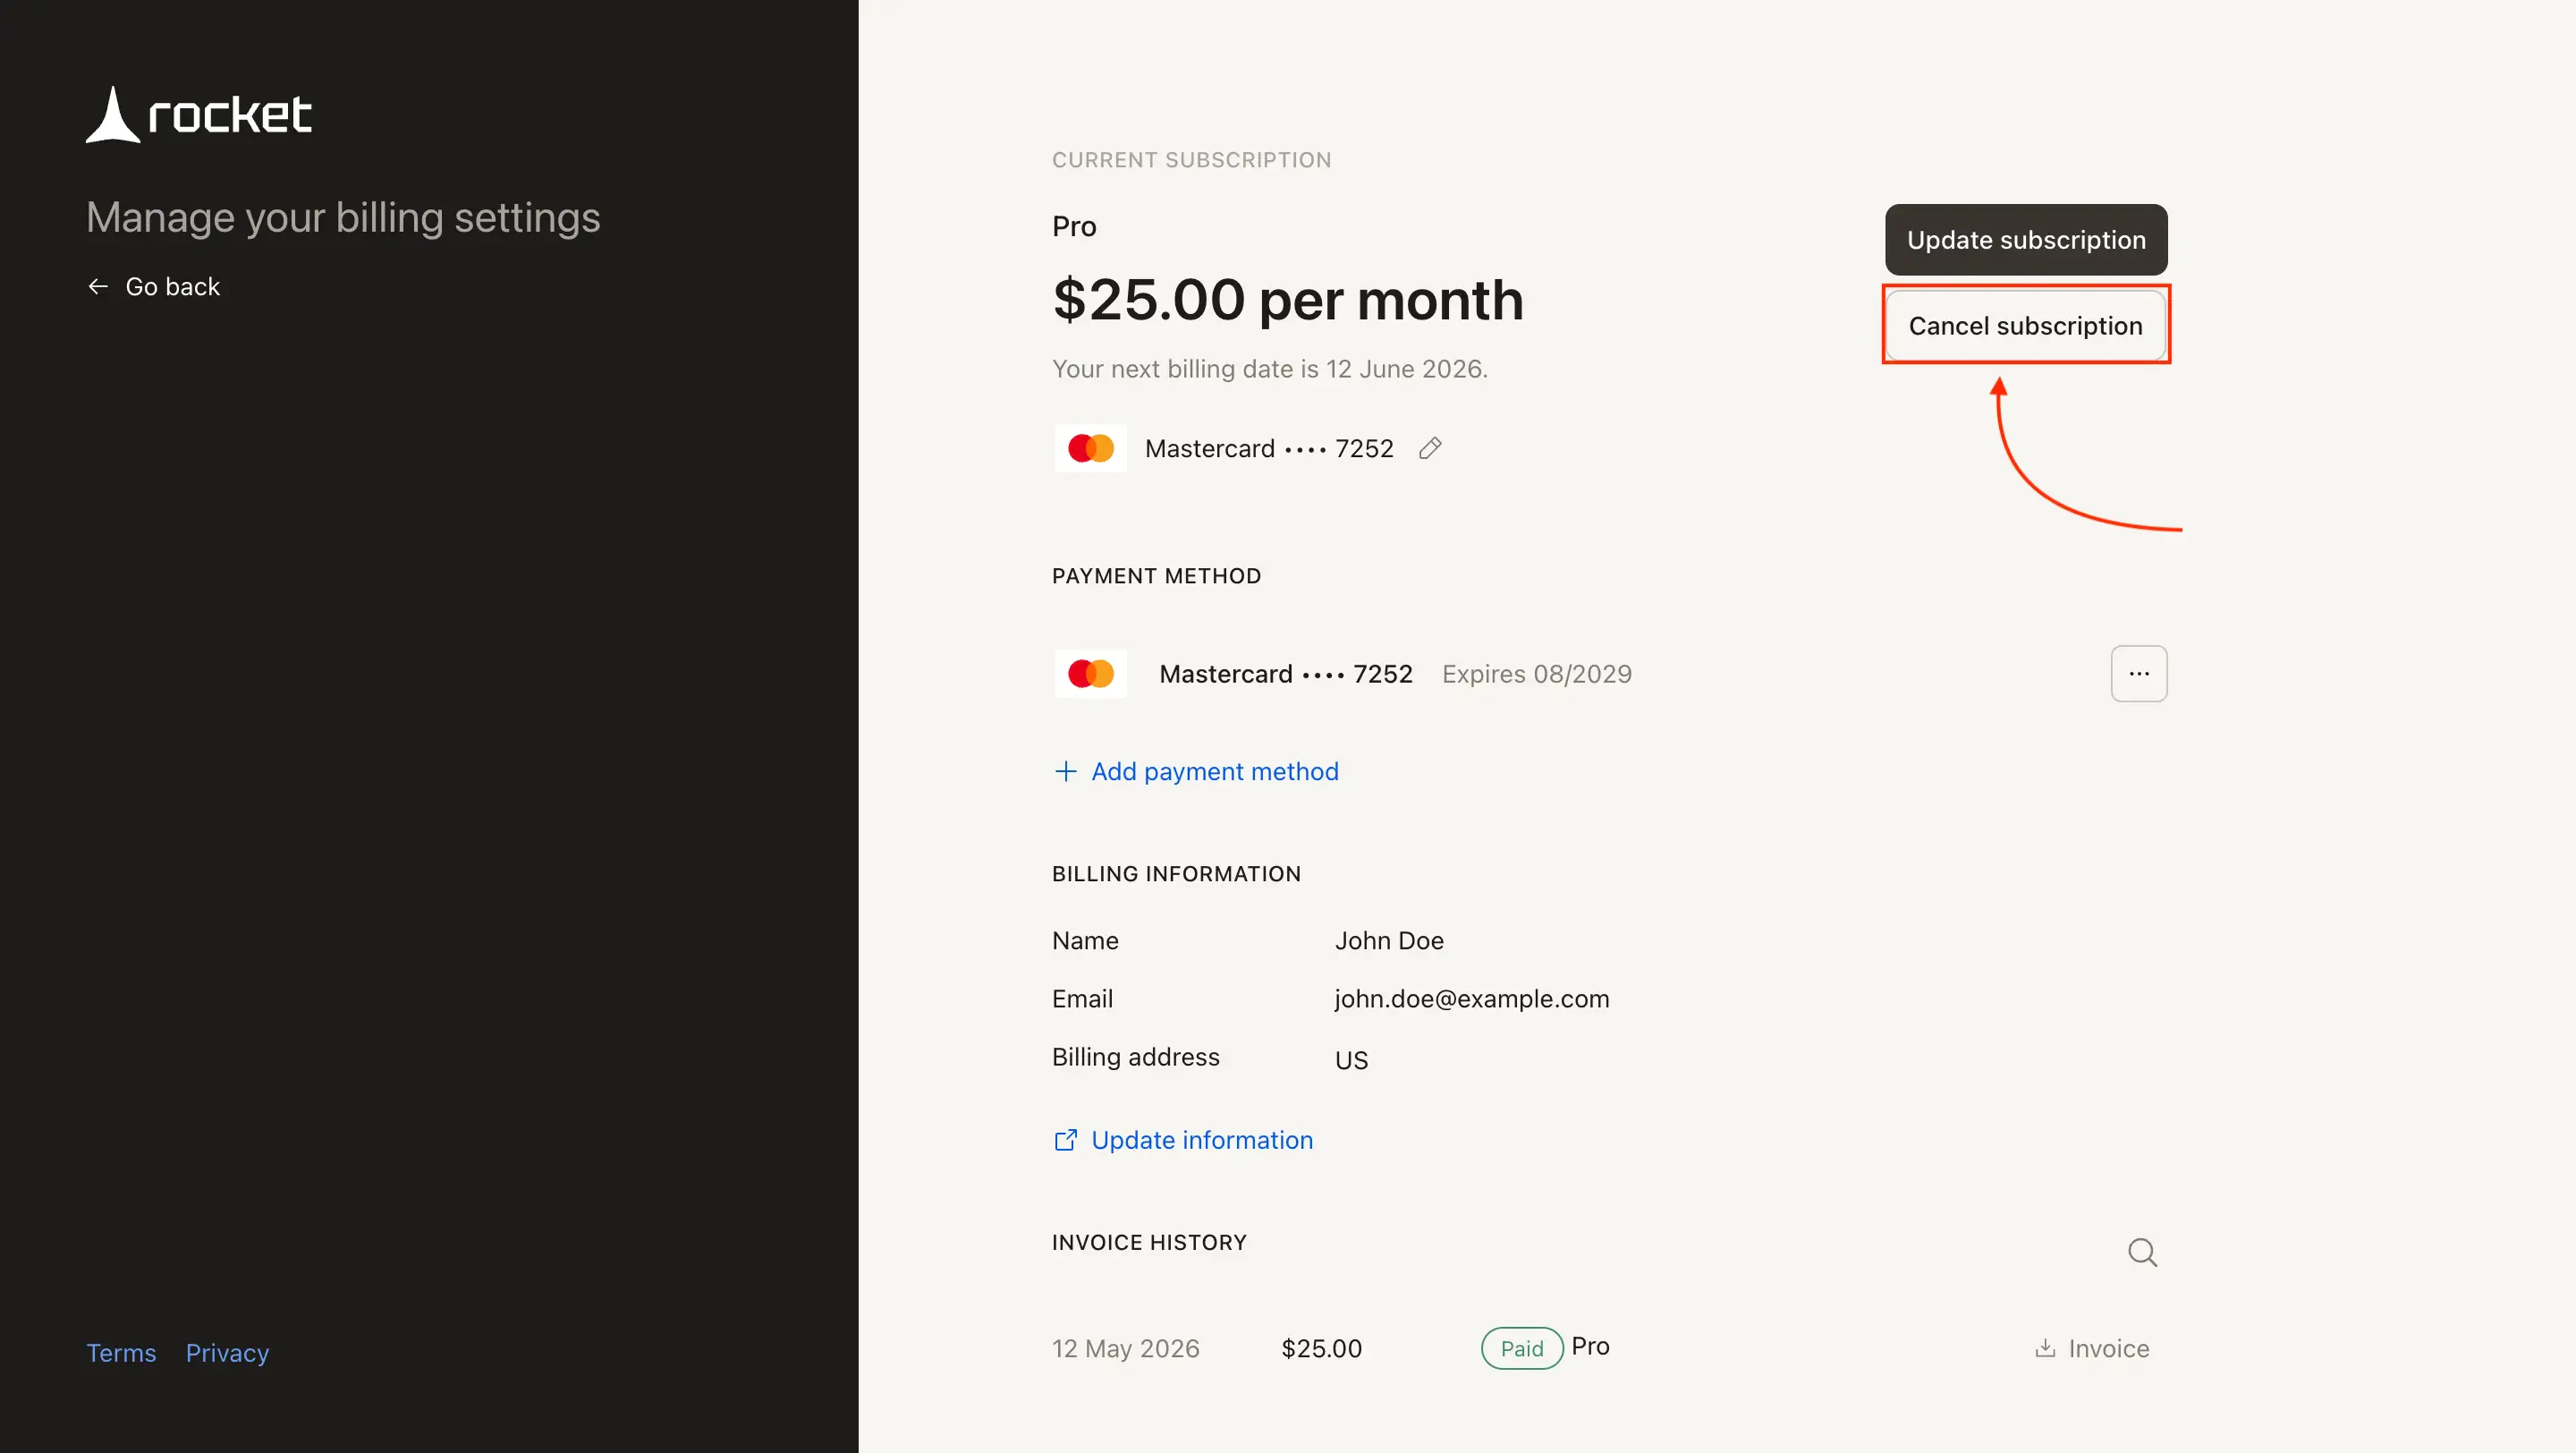
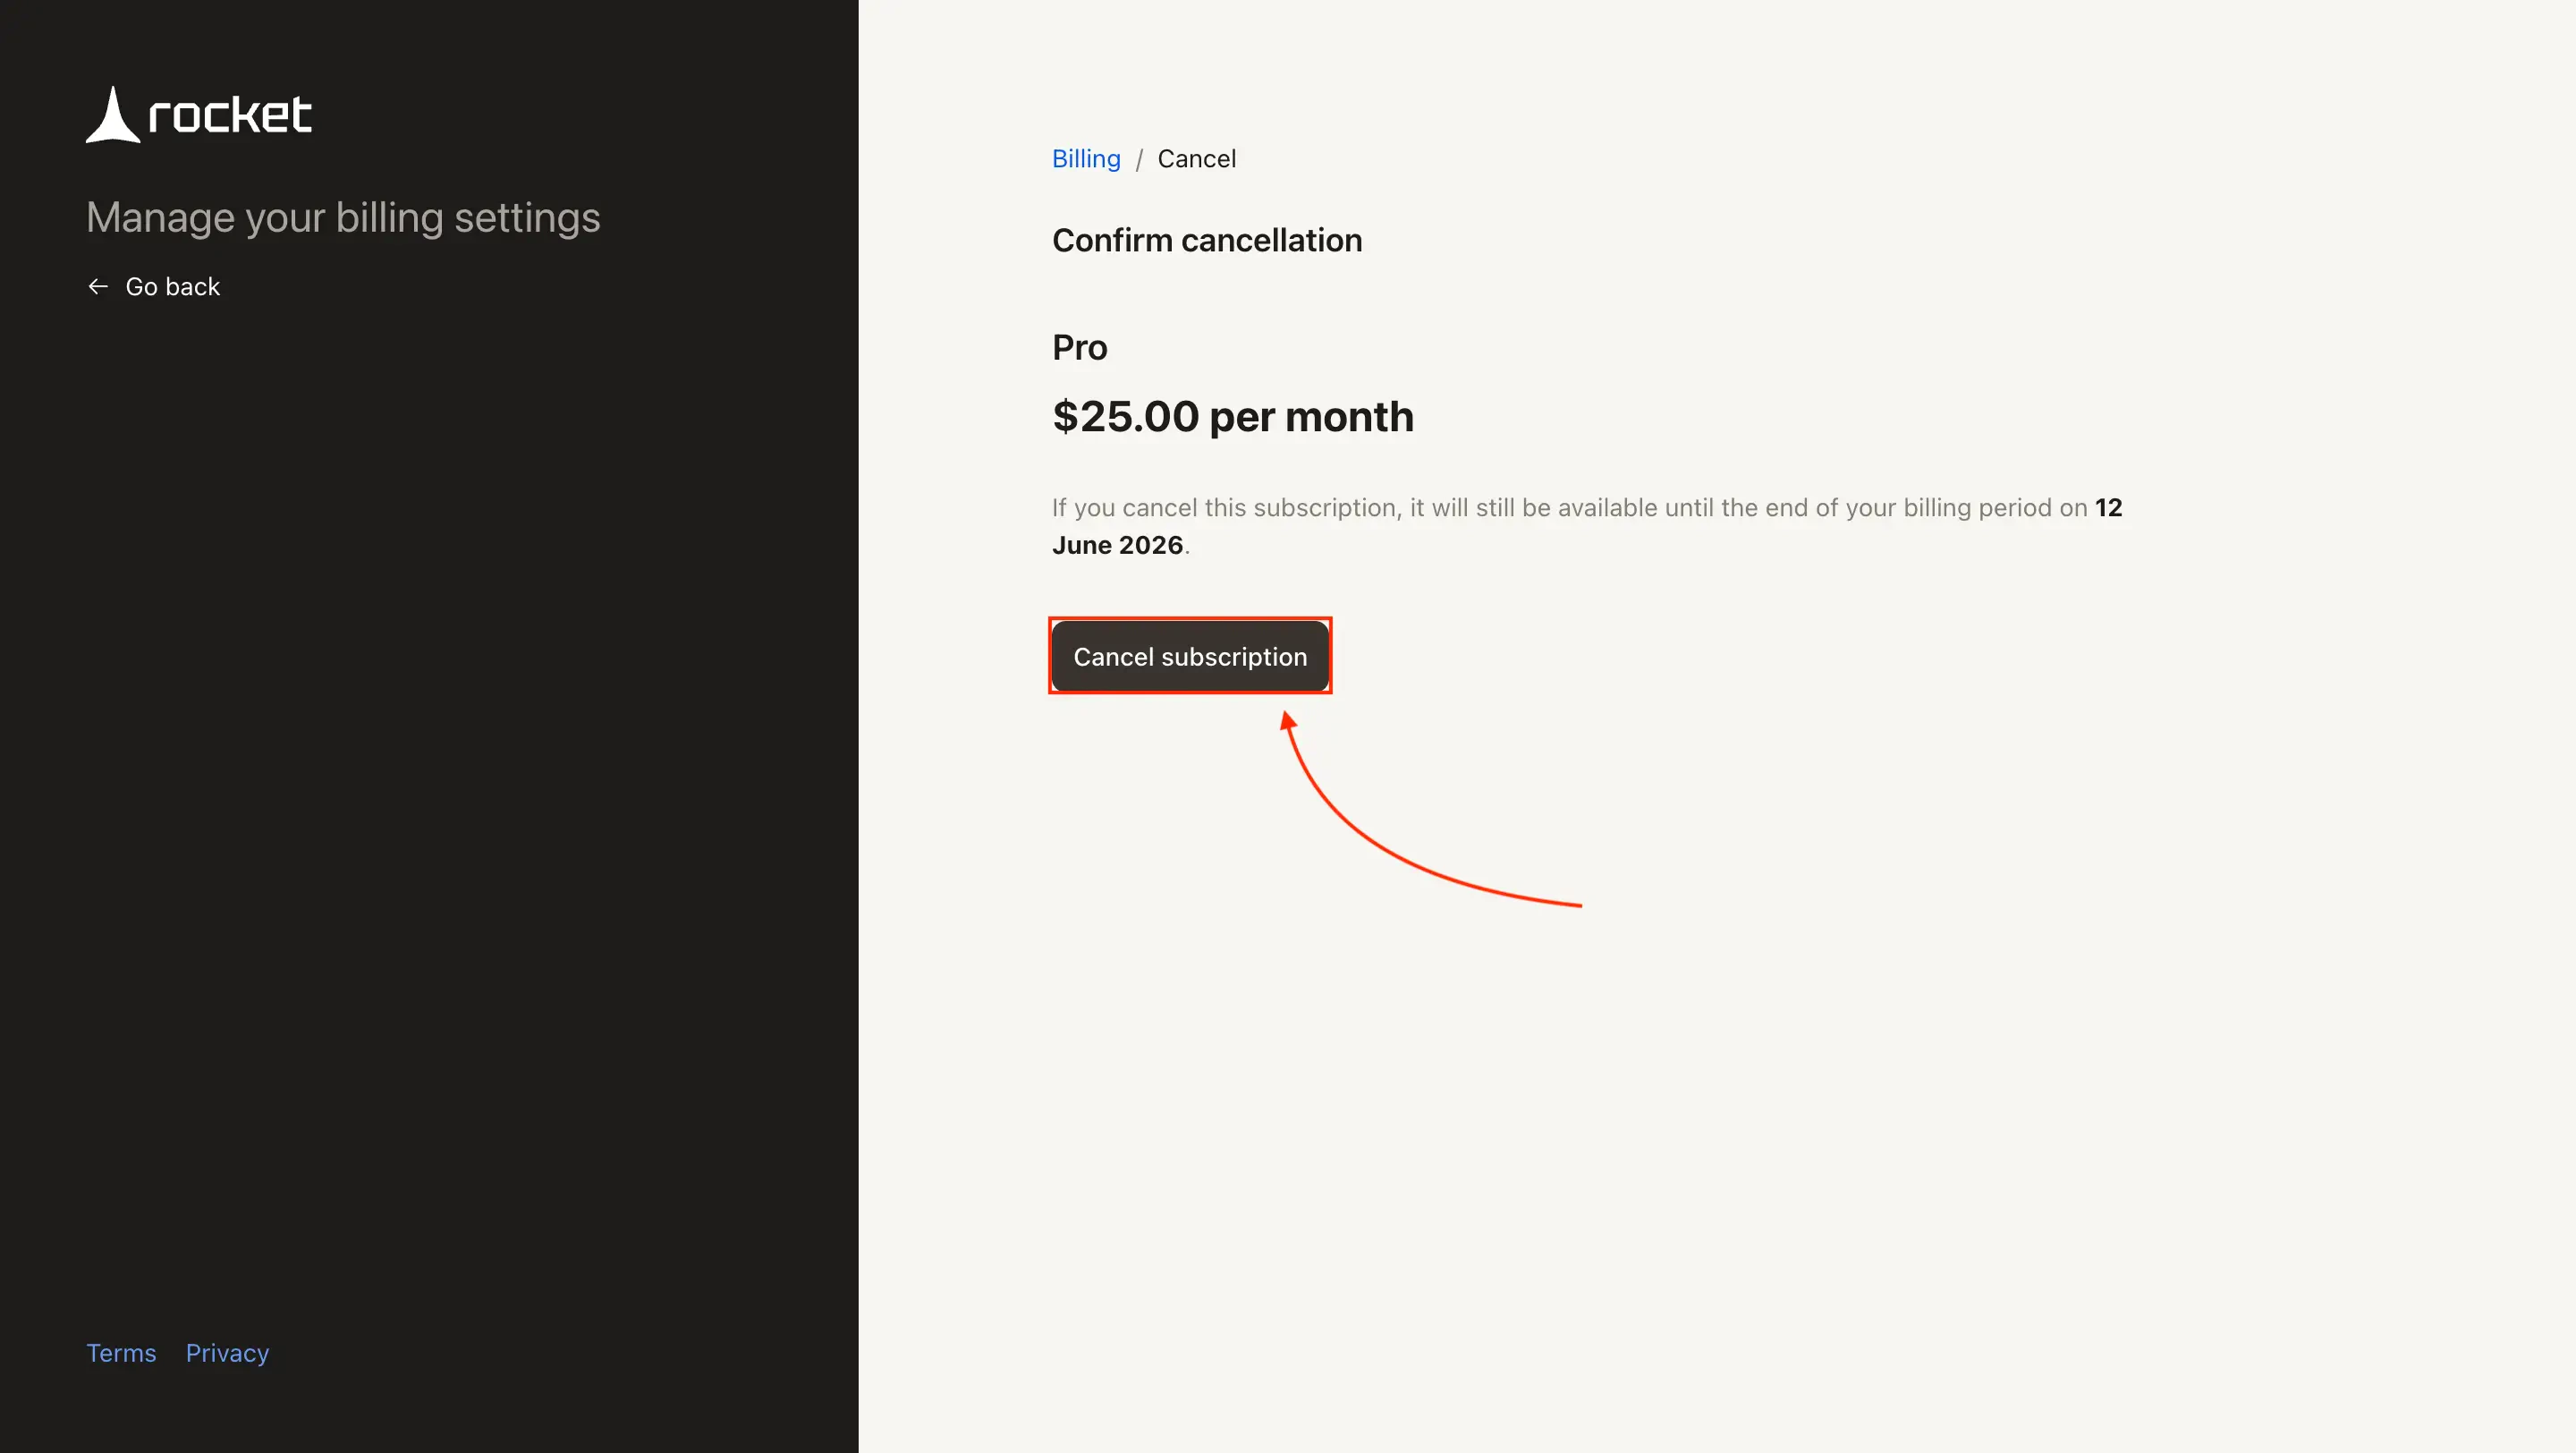
Cancel your subscription
Click Manage next to your current plan
Open Settings → Subscription and click Upgrade. In the modal, your current plan shows a Manage button. Click it to open the Stripe billing portal.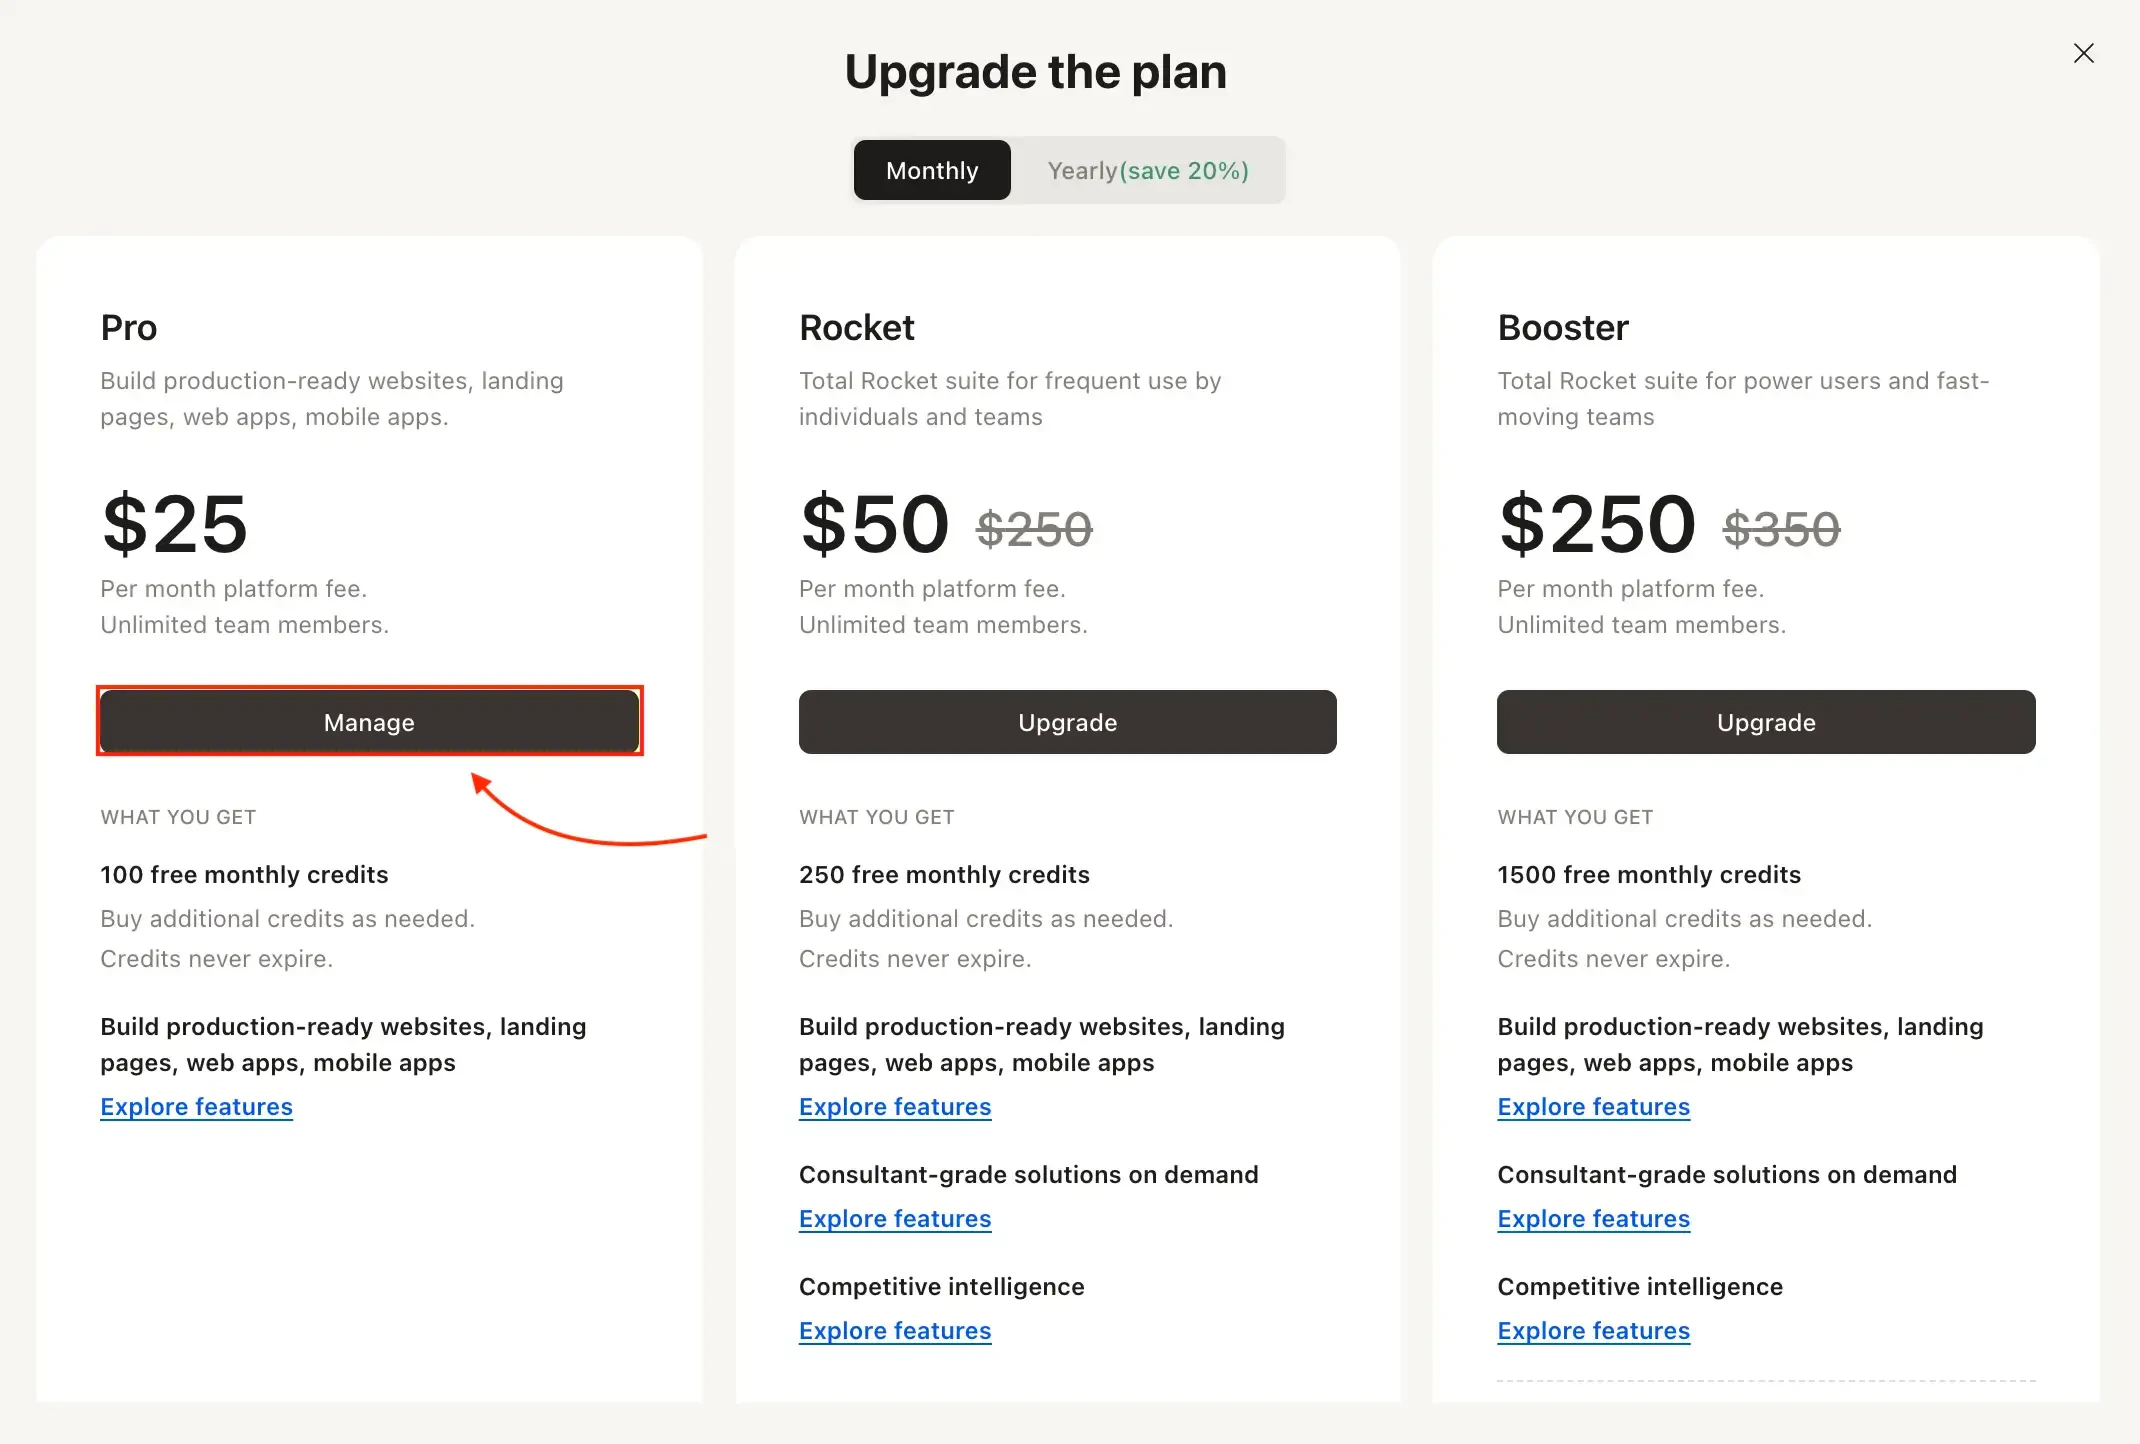
Downgrade your plan
To downgrade, click Manage next to your active plan in Settings → Subscription, then select a lower-tier plan in the Stripe billing portal.- Downgrades are scheduled for your next billing cycle.
- You keep your current plan and credit balance until then.
Update your payment method
Click Manage and go to Payment Method
Open Settings → Subscription and click Manage, then scroll to the Payment Method section. Click + Add payment method to add a new card, or use the three-dot menu on an existing card to delete it or set it as default.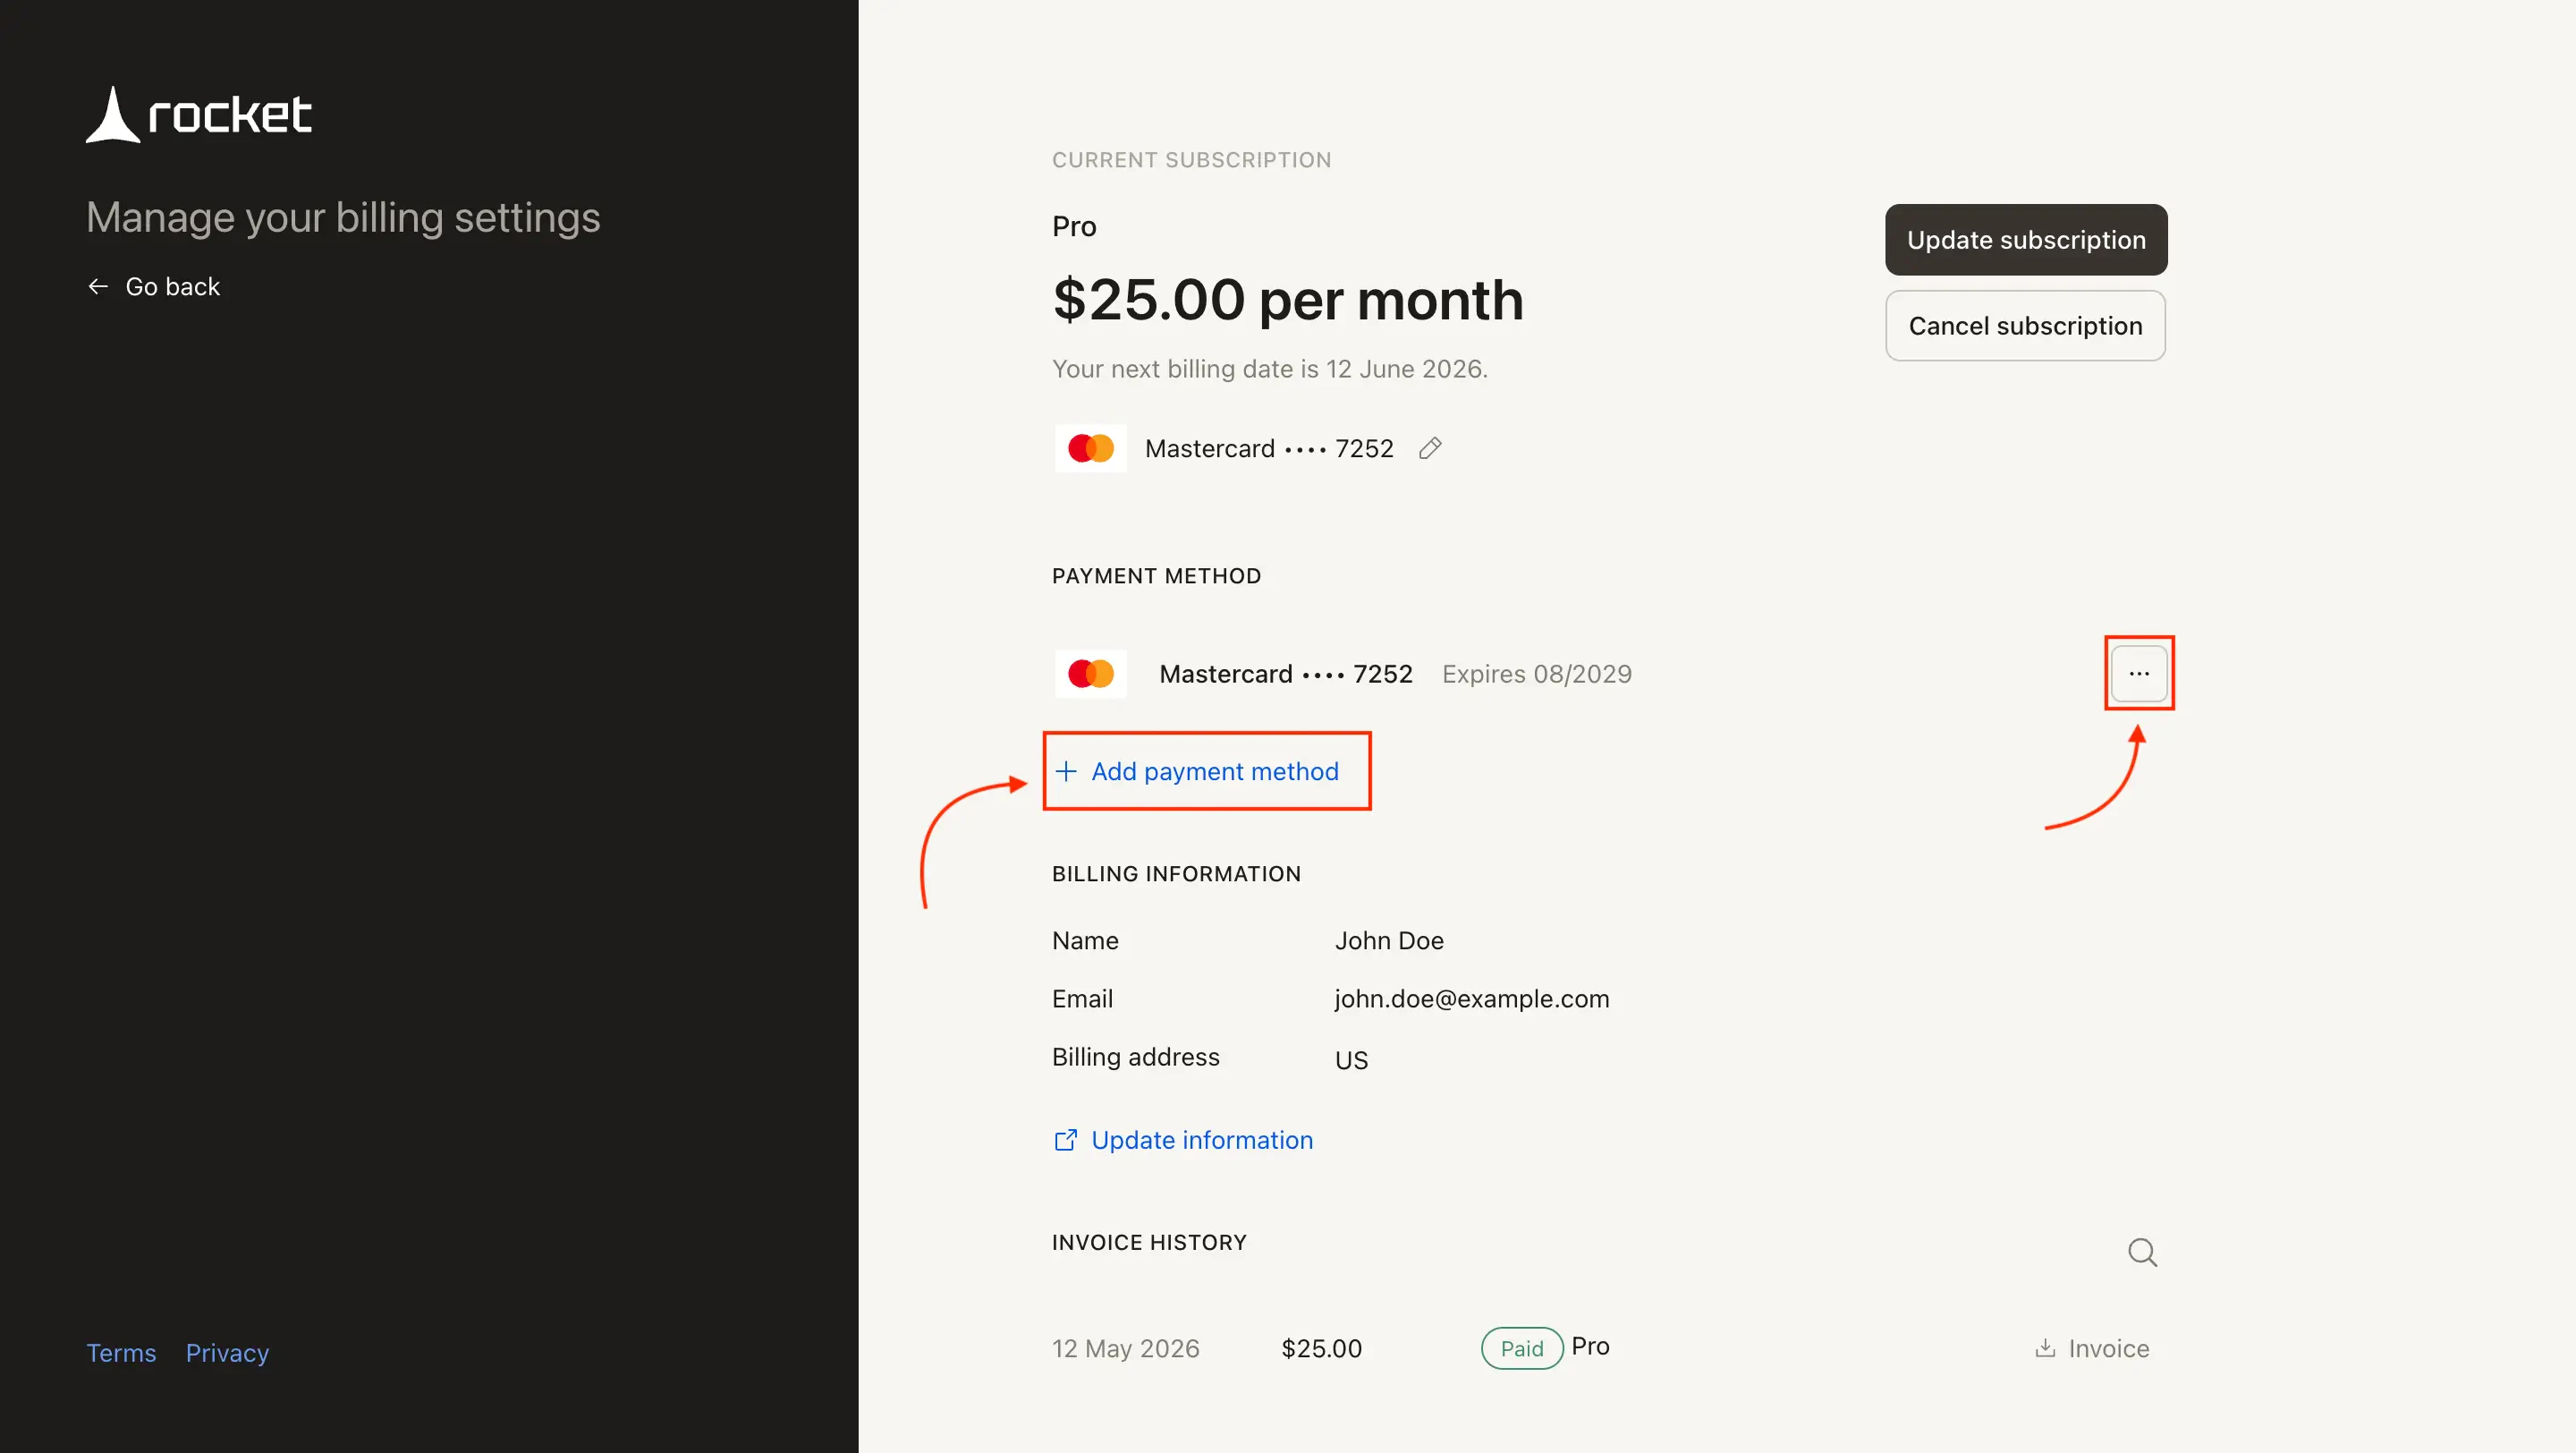

Update your billing information
Click Manage and go to Billing Information
Open Settings → Subscription and click Manage, then scroll to the Billing Information section and click Update information.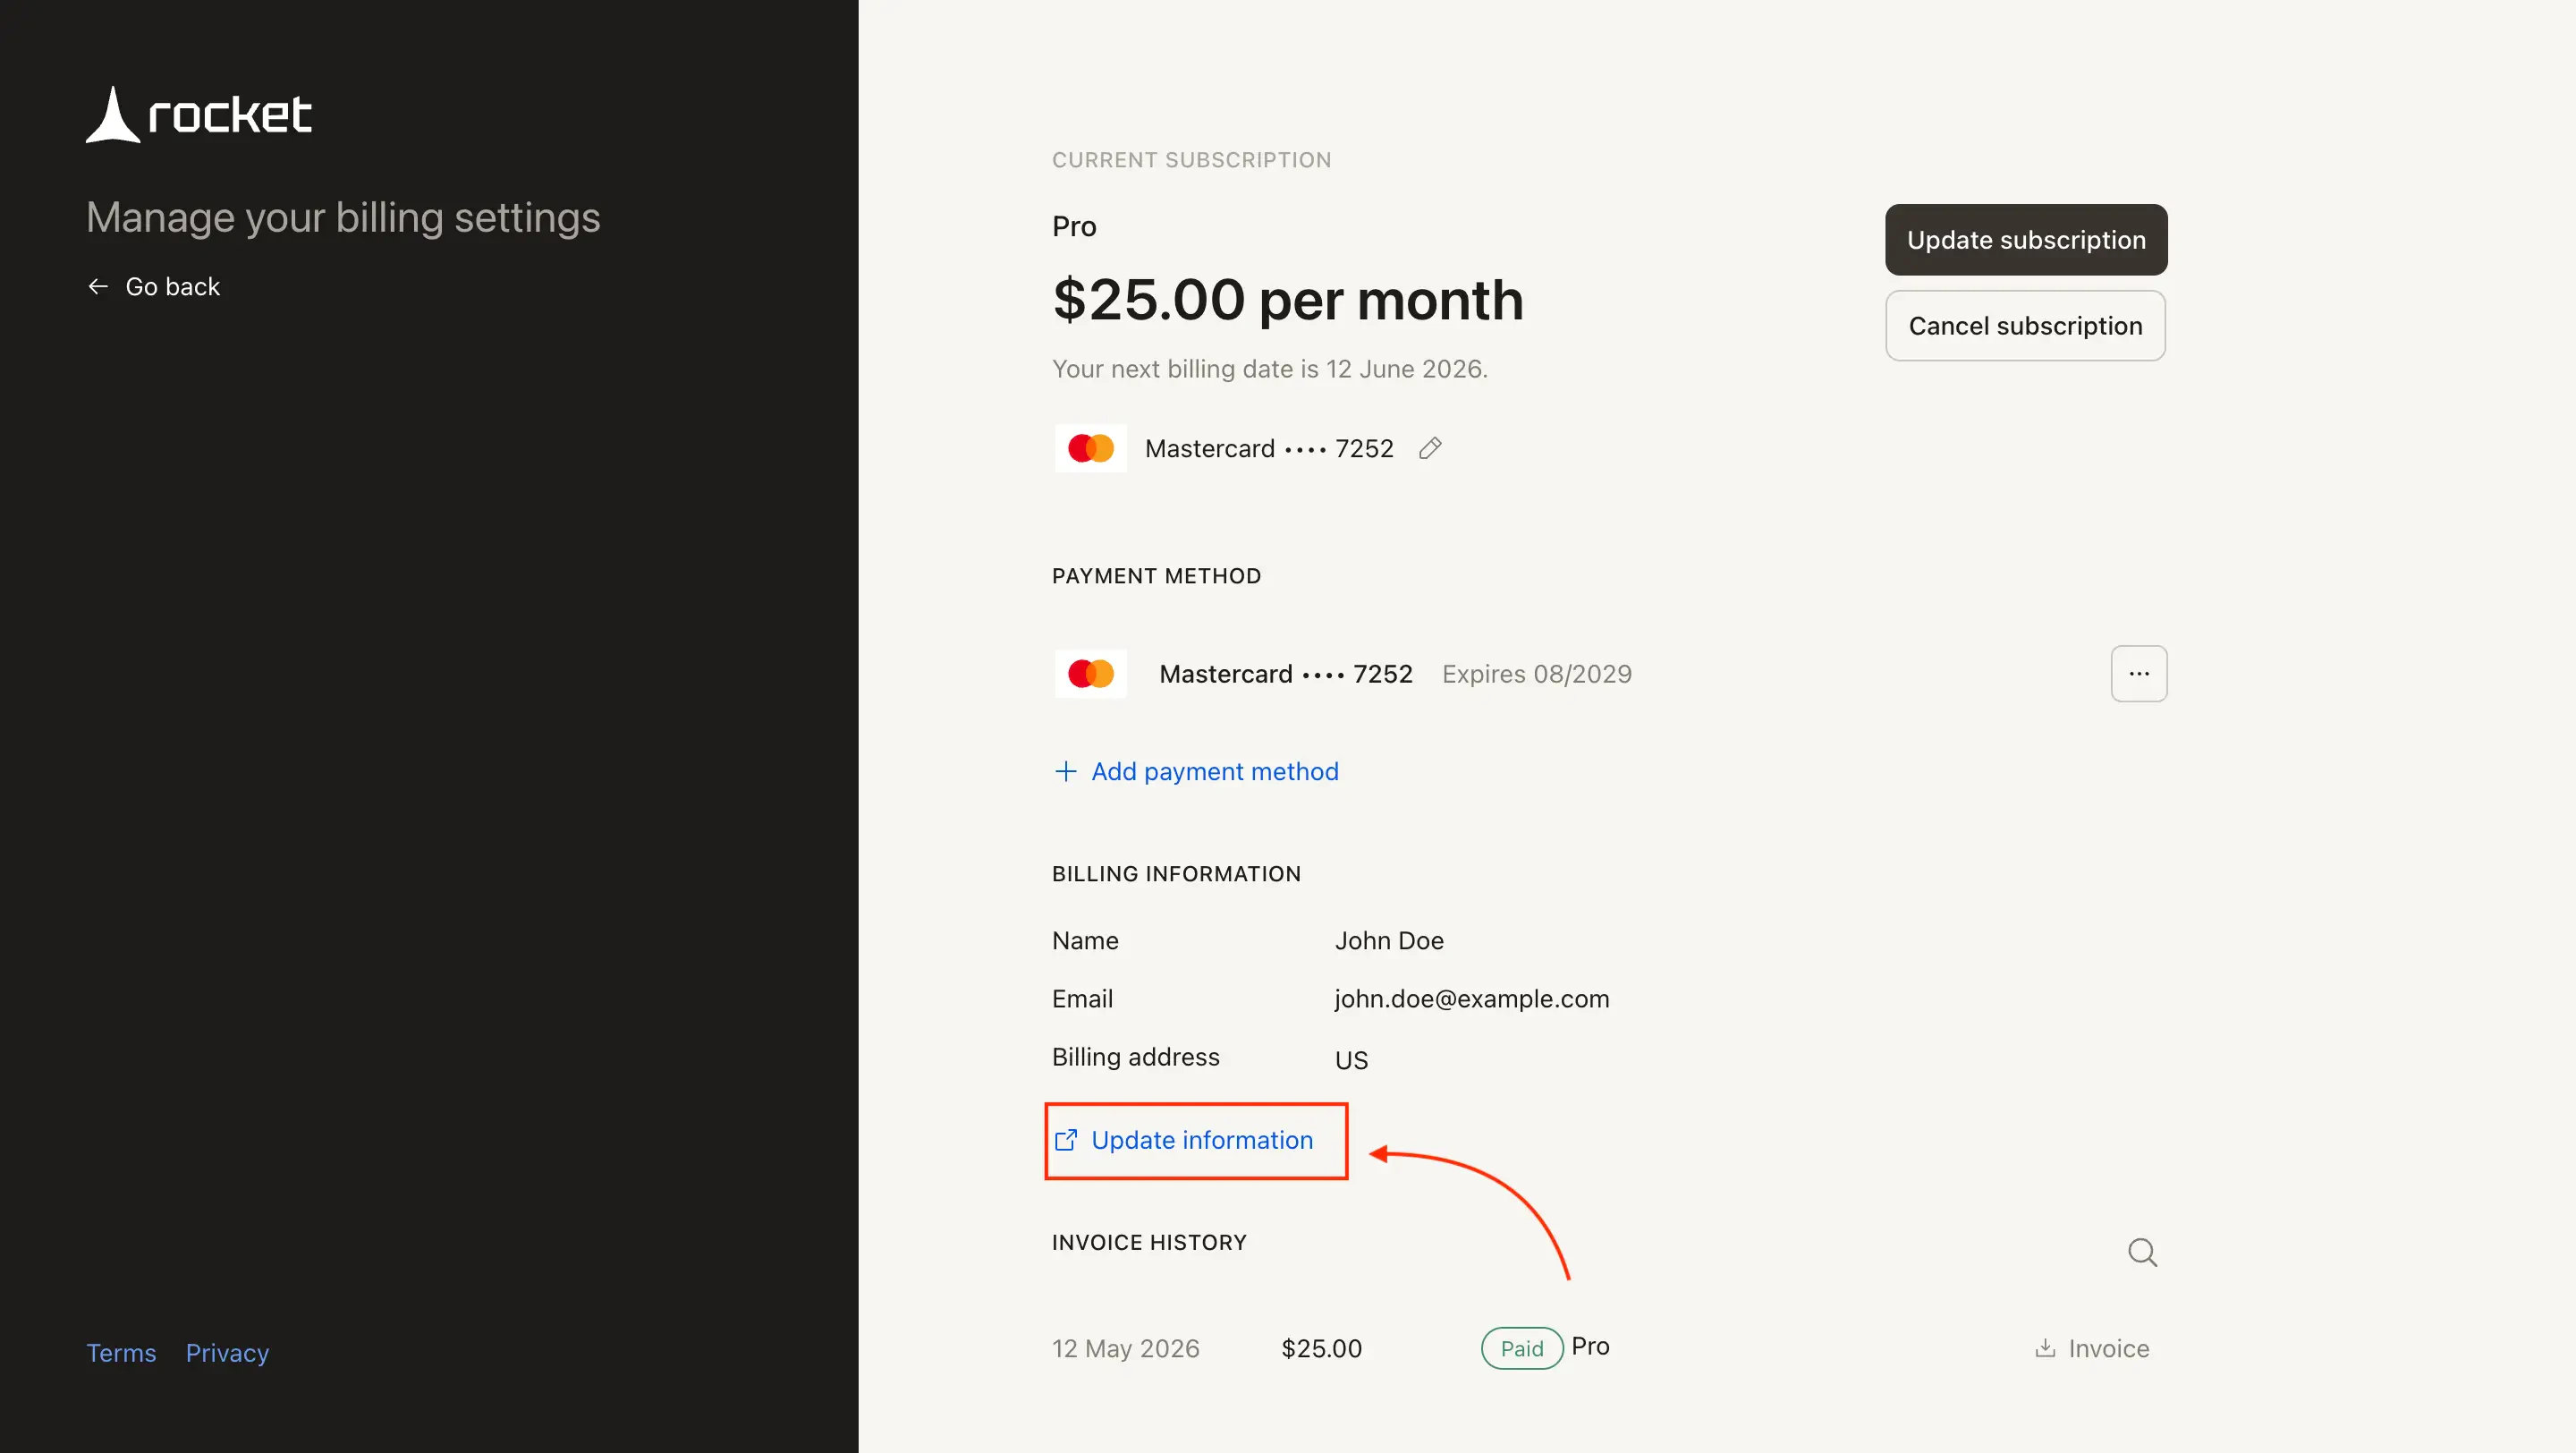
Download an invoice or receipt
Open Settings → Subscription and click Manage, then scroll to Invoice History. Each row shows the date, amount, and plan. Click Invoice to download.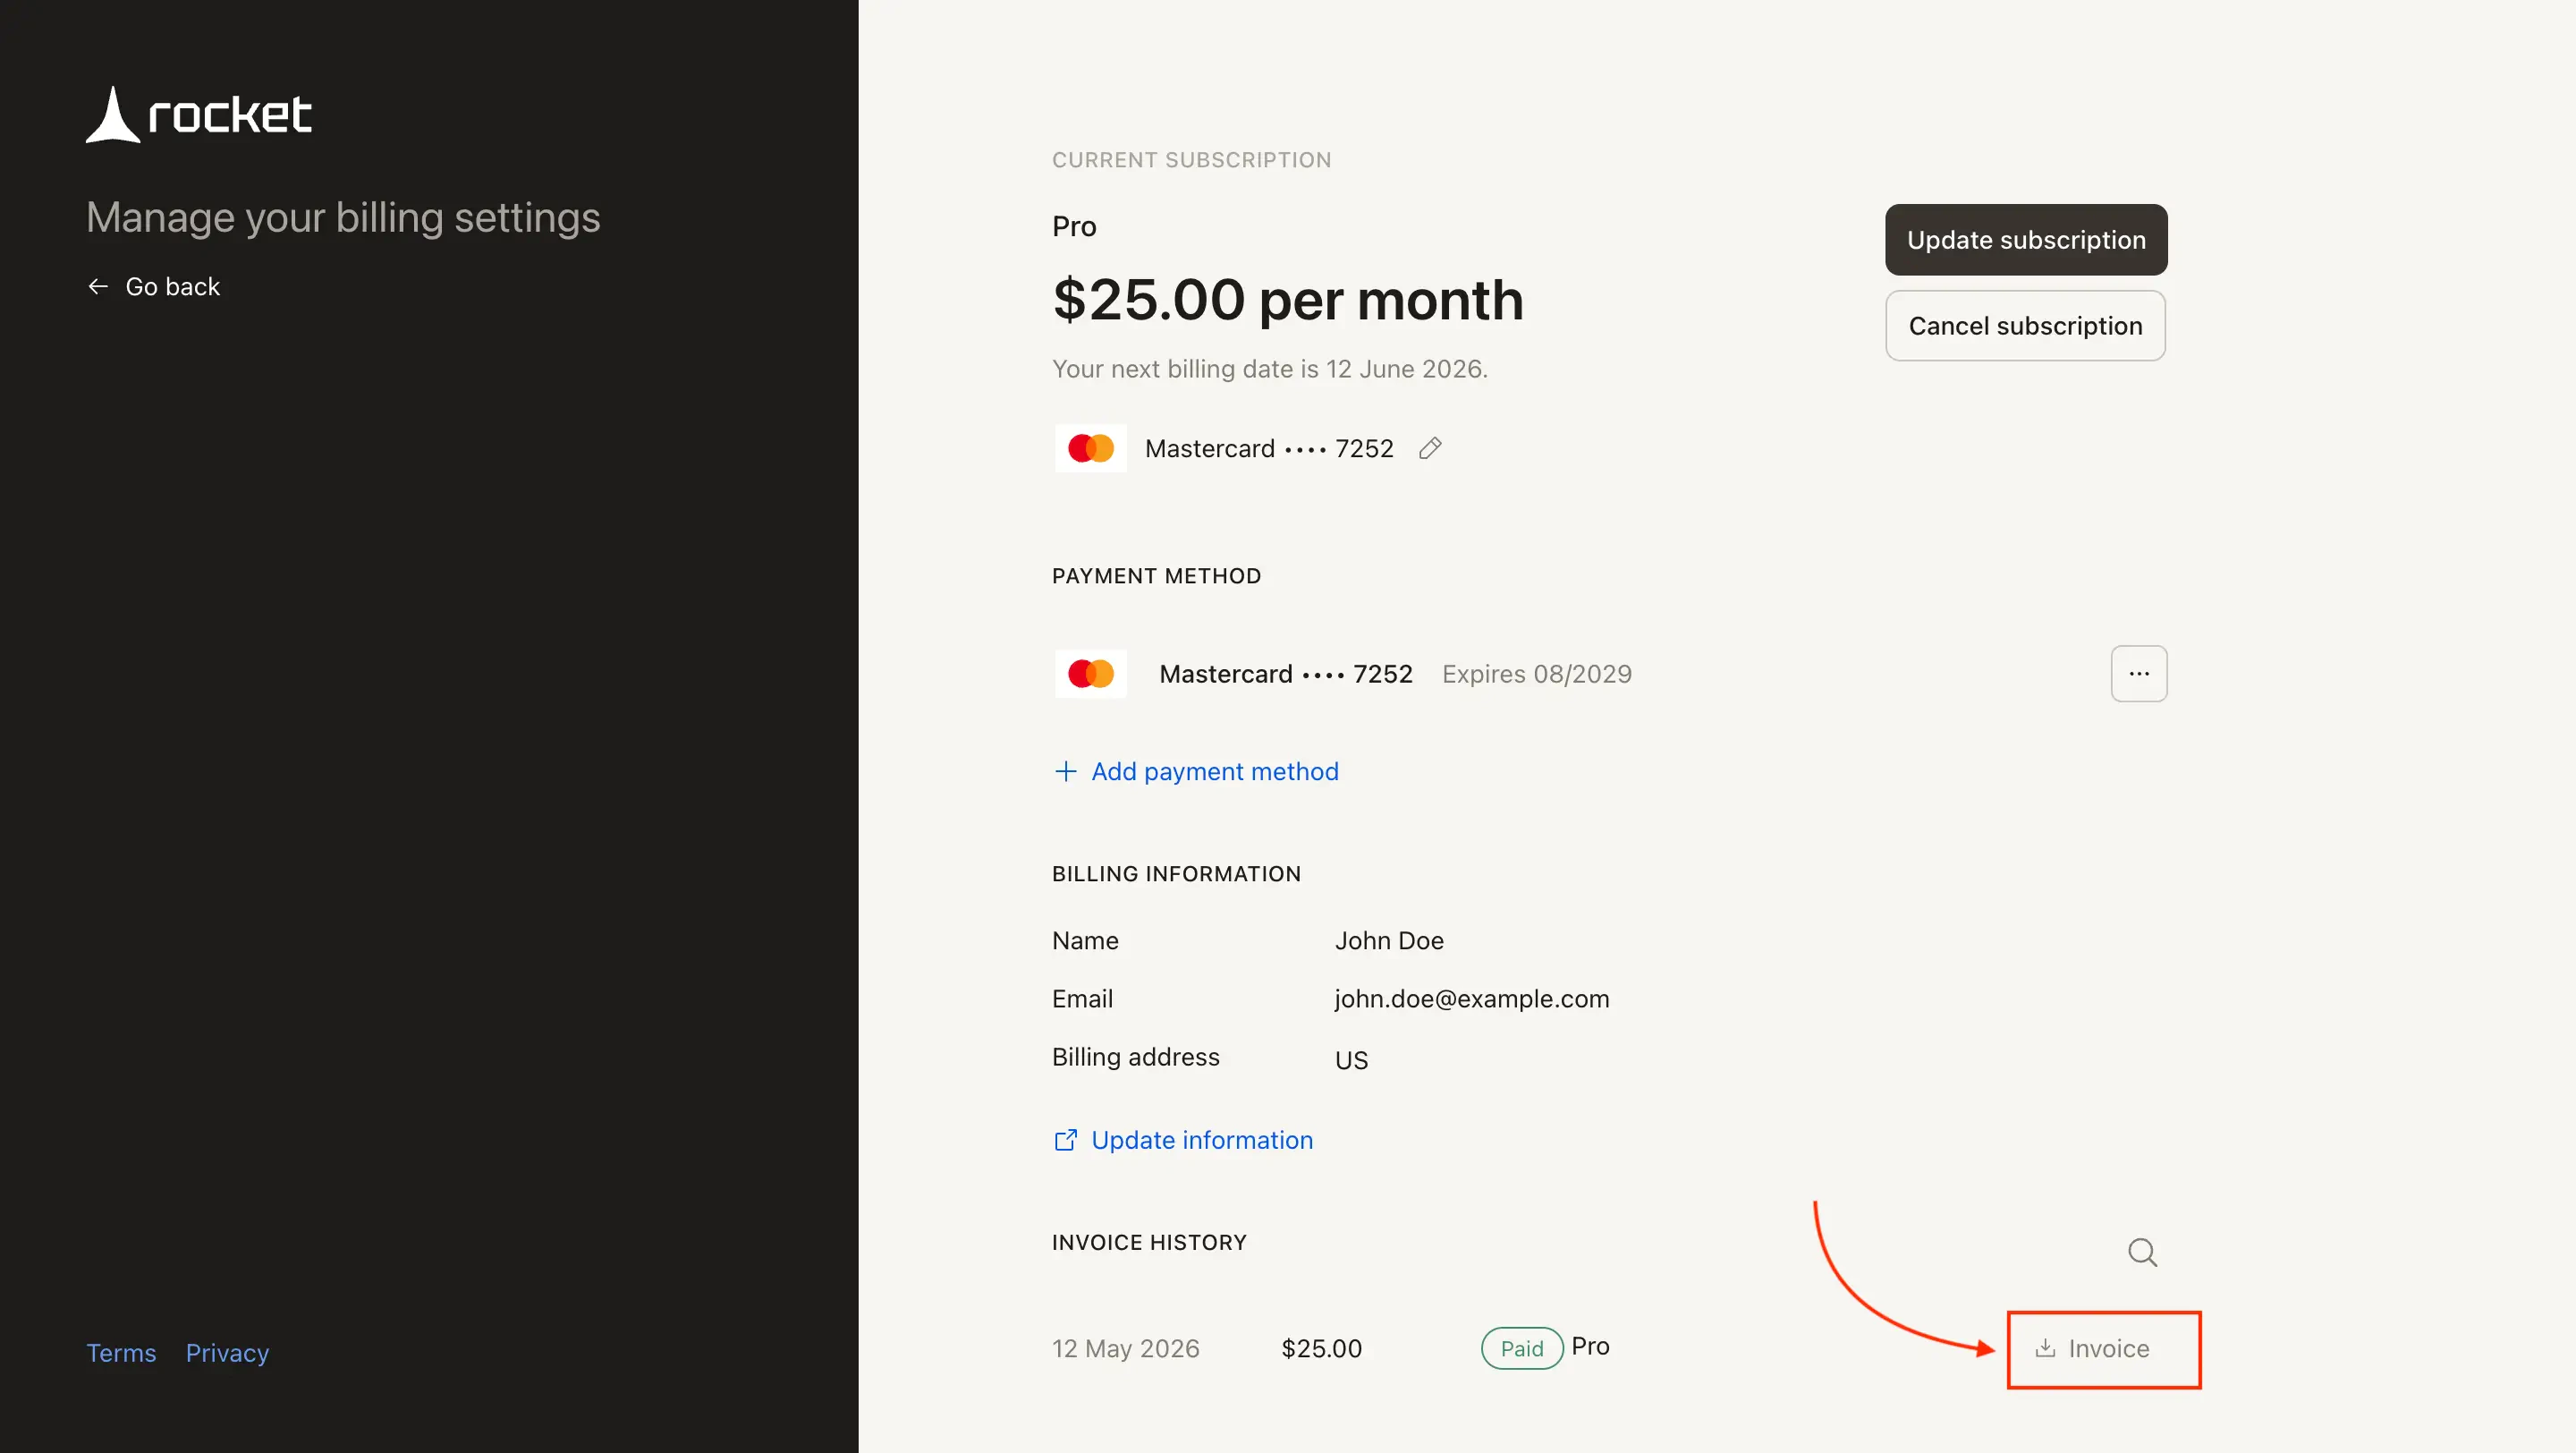
What’s next?
Pricing
Compare plans and see what’s included in each tier.
Understanding credits
Learn how credits work, rollover policies, and when to add credits vs. upgrade.