Customize your transactional emails. This guide covers finding and editing email templates in Supabase, updating subject lines and body content, and keeping placeholders like confirmation links working correctly.You need:
- A Supabase account with an active project
- Your Supabase account connected to Rocket
- Basic HTML knowledge if you plan to customize the email body
Edit email templates in Supabase
Open the Email settings
- In your Supabase project, go to Authentication in the left sidebar.
- Under Configuration, choose Emails.
- Switch to the Templates tab.

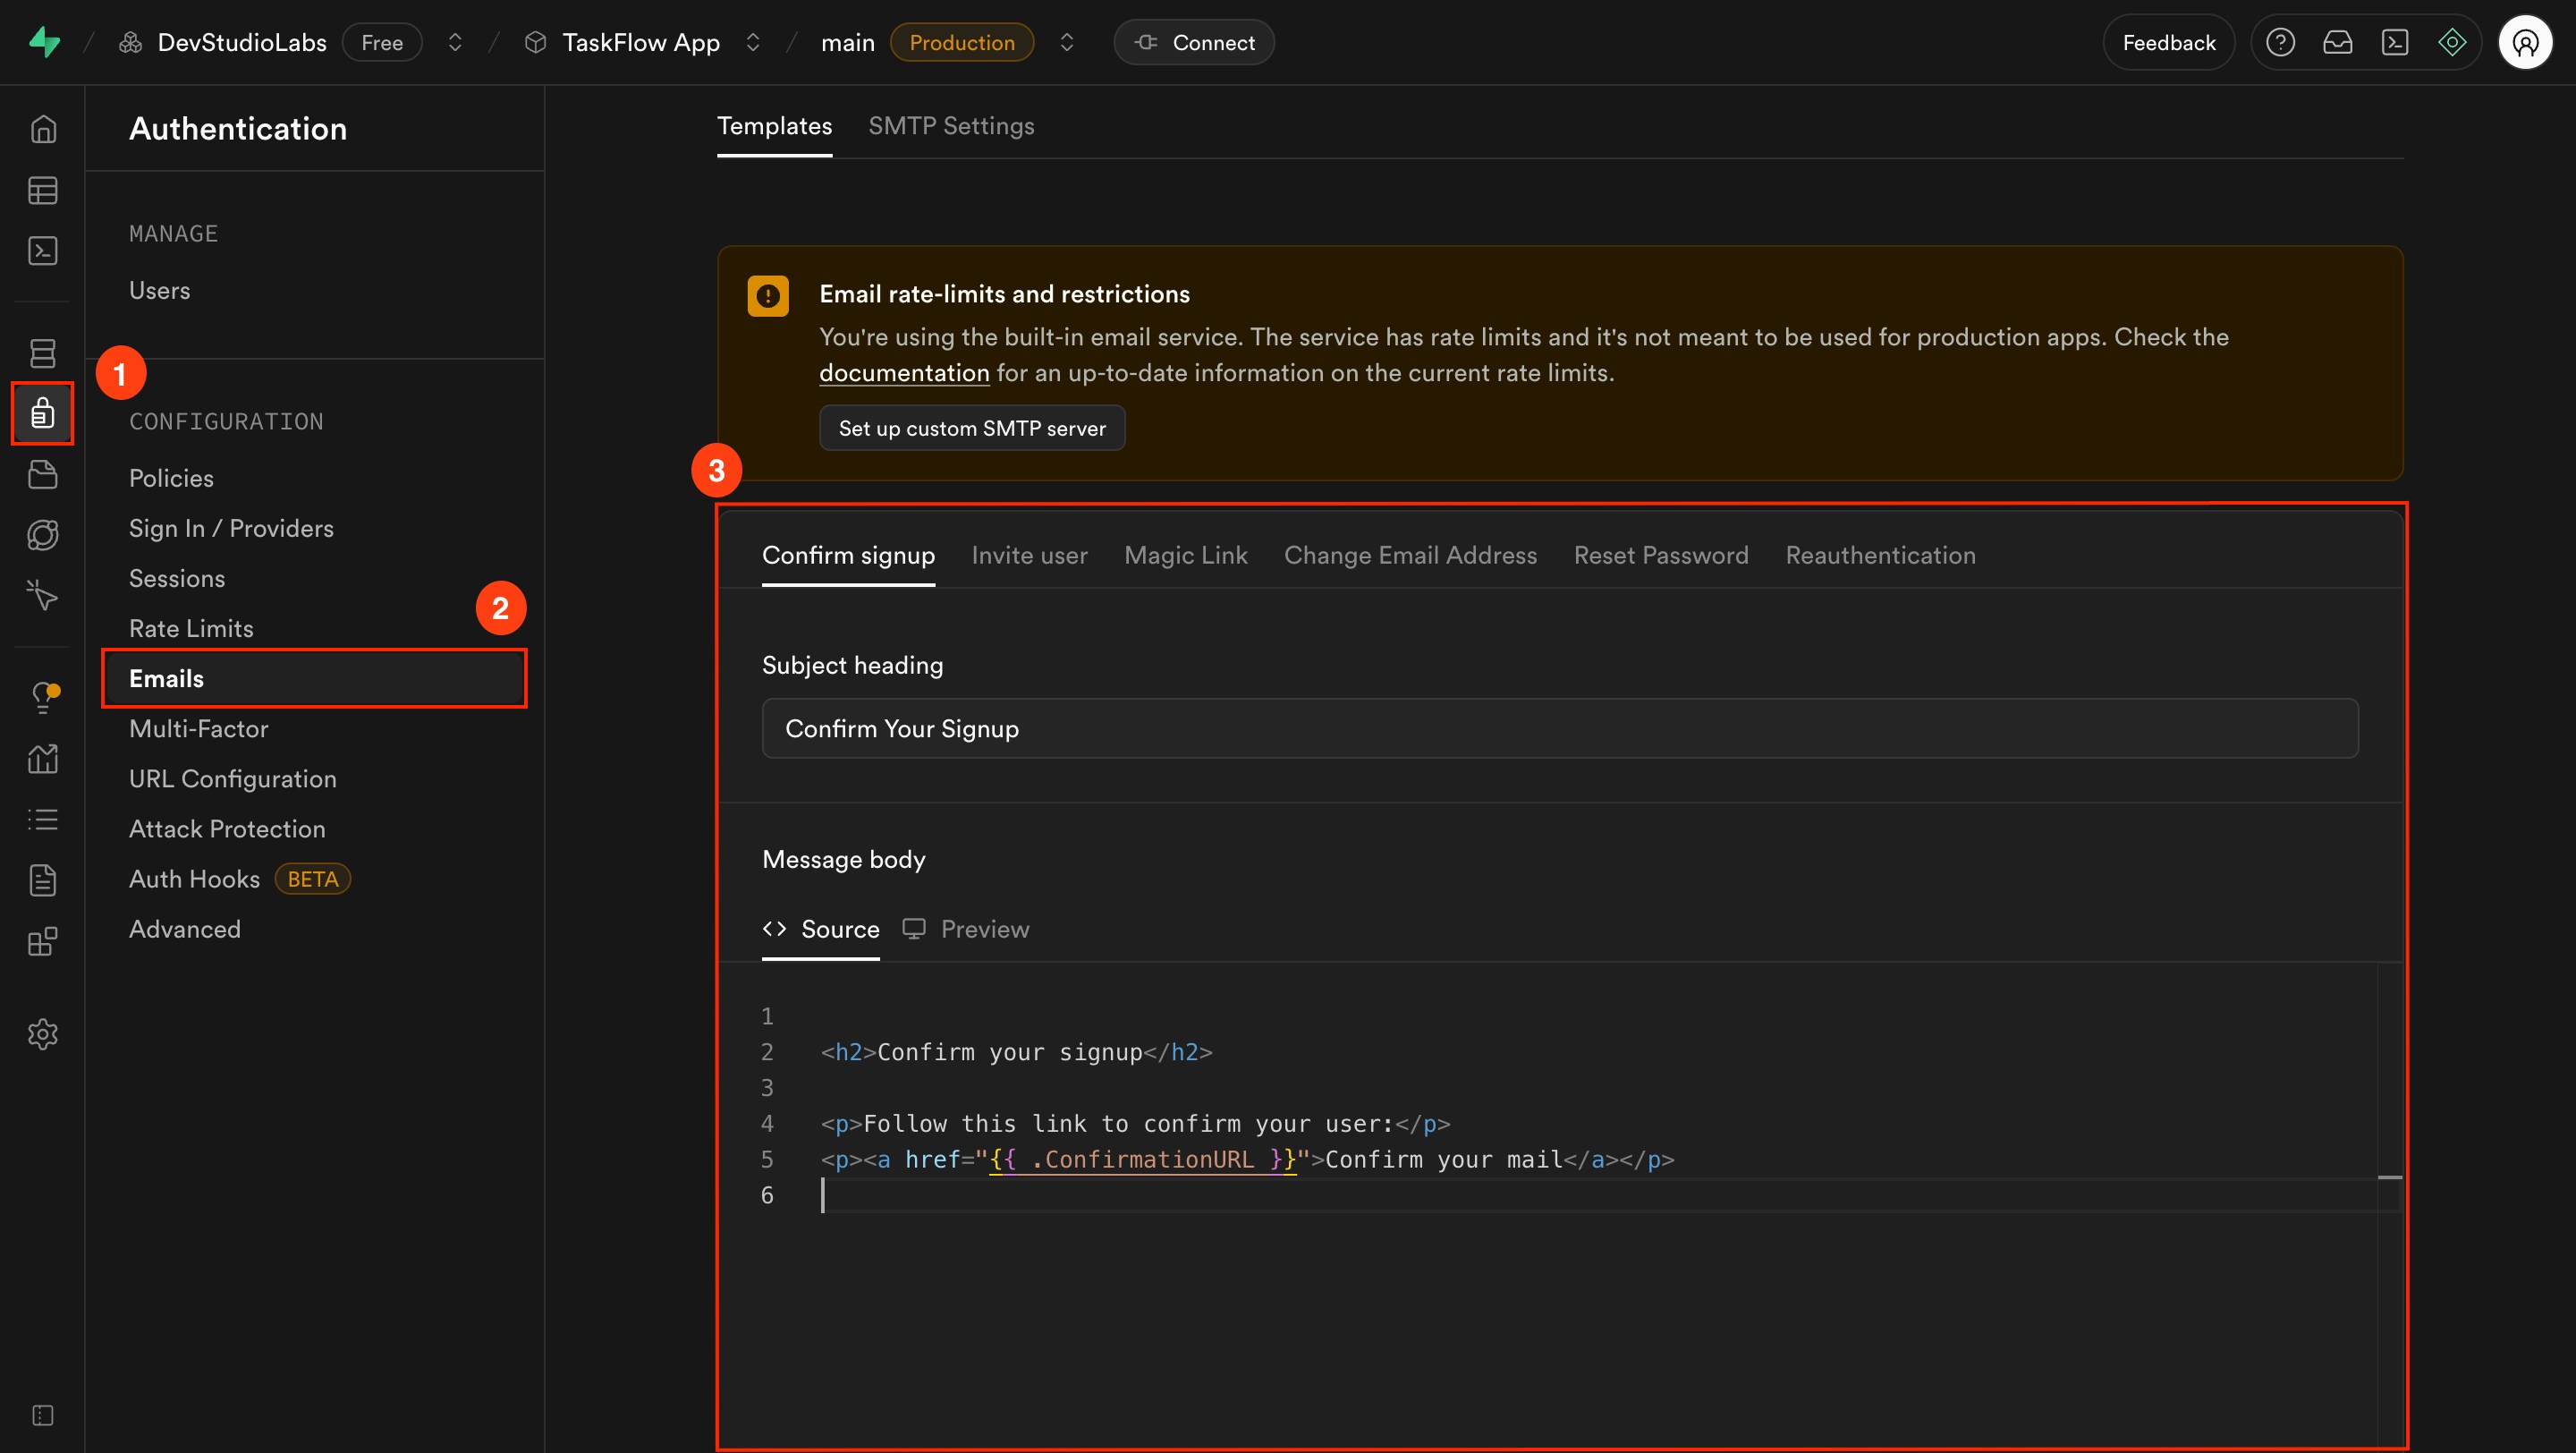
Select a template to edit
Click the template you want to customize, such as Confirm signup.
You can update the following:
- Subject line: What appears in the user’s inbox.
- Email body: The message content, written in HTML or plain text.
Keep placeholders like
{{ .ConfirmationURL }}. If removed, the email will not work as expected.Troubleshooting
1. Email still shows old content
What you will see:
You updated the template, but the email still shows the old message.
- Make sure you clicked Save in Supabase.
- Clear your email client’s cache (especially in webmail).
- Trigger a new signup or password reset. Old links will not refresh.
2. Links in the email are broken
What you will see:
The email arrives, but the link is missing or unclickable.
- Confirm you kept the placeholder variable like
{{ .ConfirmationURL }}in the template. - Double-check the Site URL in Supabase. It must match your Rocket app’s live domain.
Branded emails that work
Your Rocket app now sends custom, branded emails through Supabase that look right and function reliably.