Keep your Supabase schema in sync. This guide covers reviewing and pushing Supabase scripts as they appear, avoiding issues from skipped schema changes, and troubleshooting common push errors.You need:
- A Supabase project connected to your Rocket app
Not connected yet?
Follow the steps in our Supabase Integration Guide.
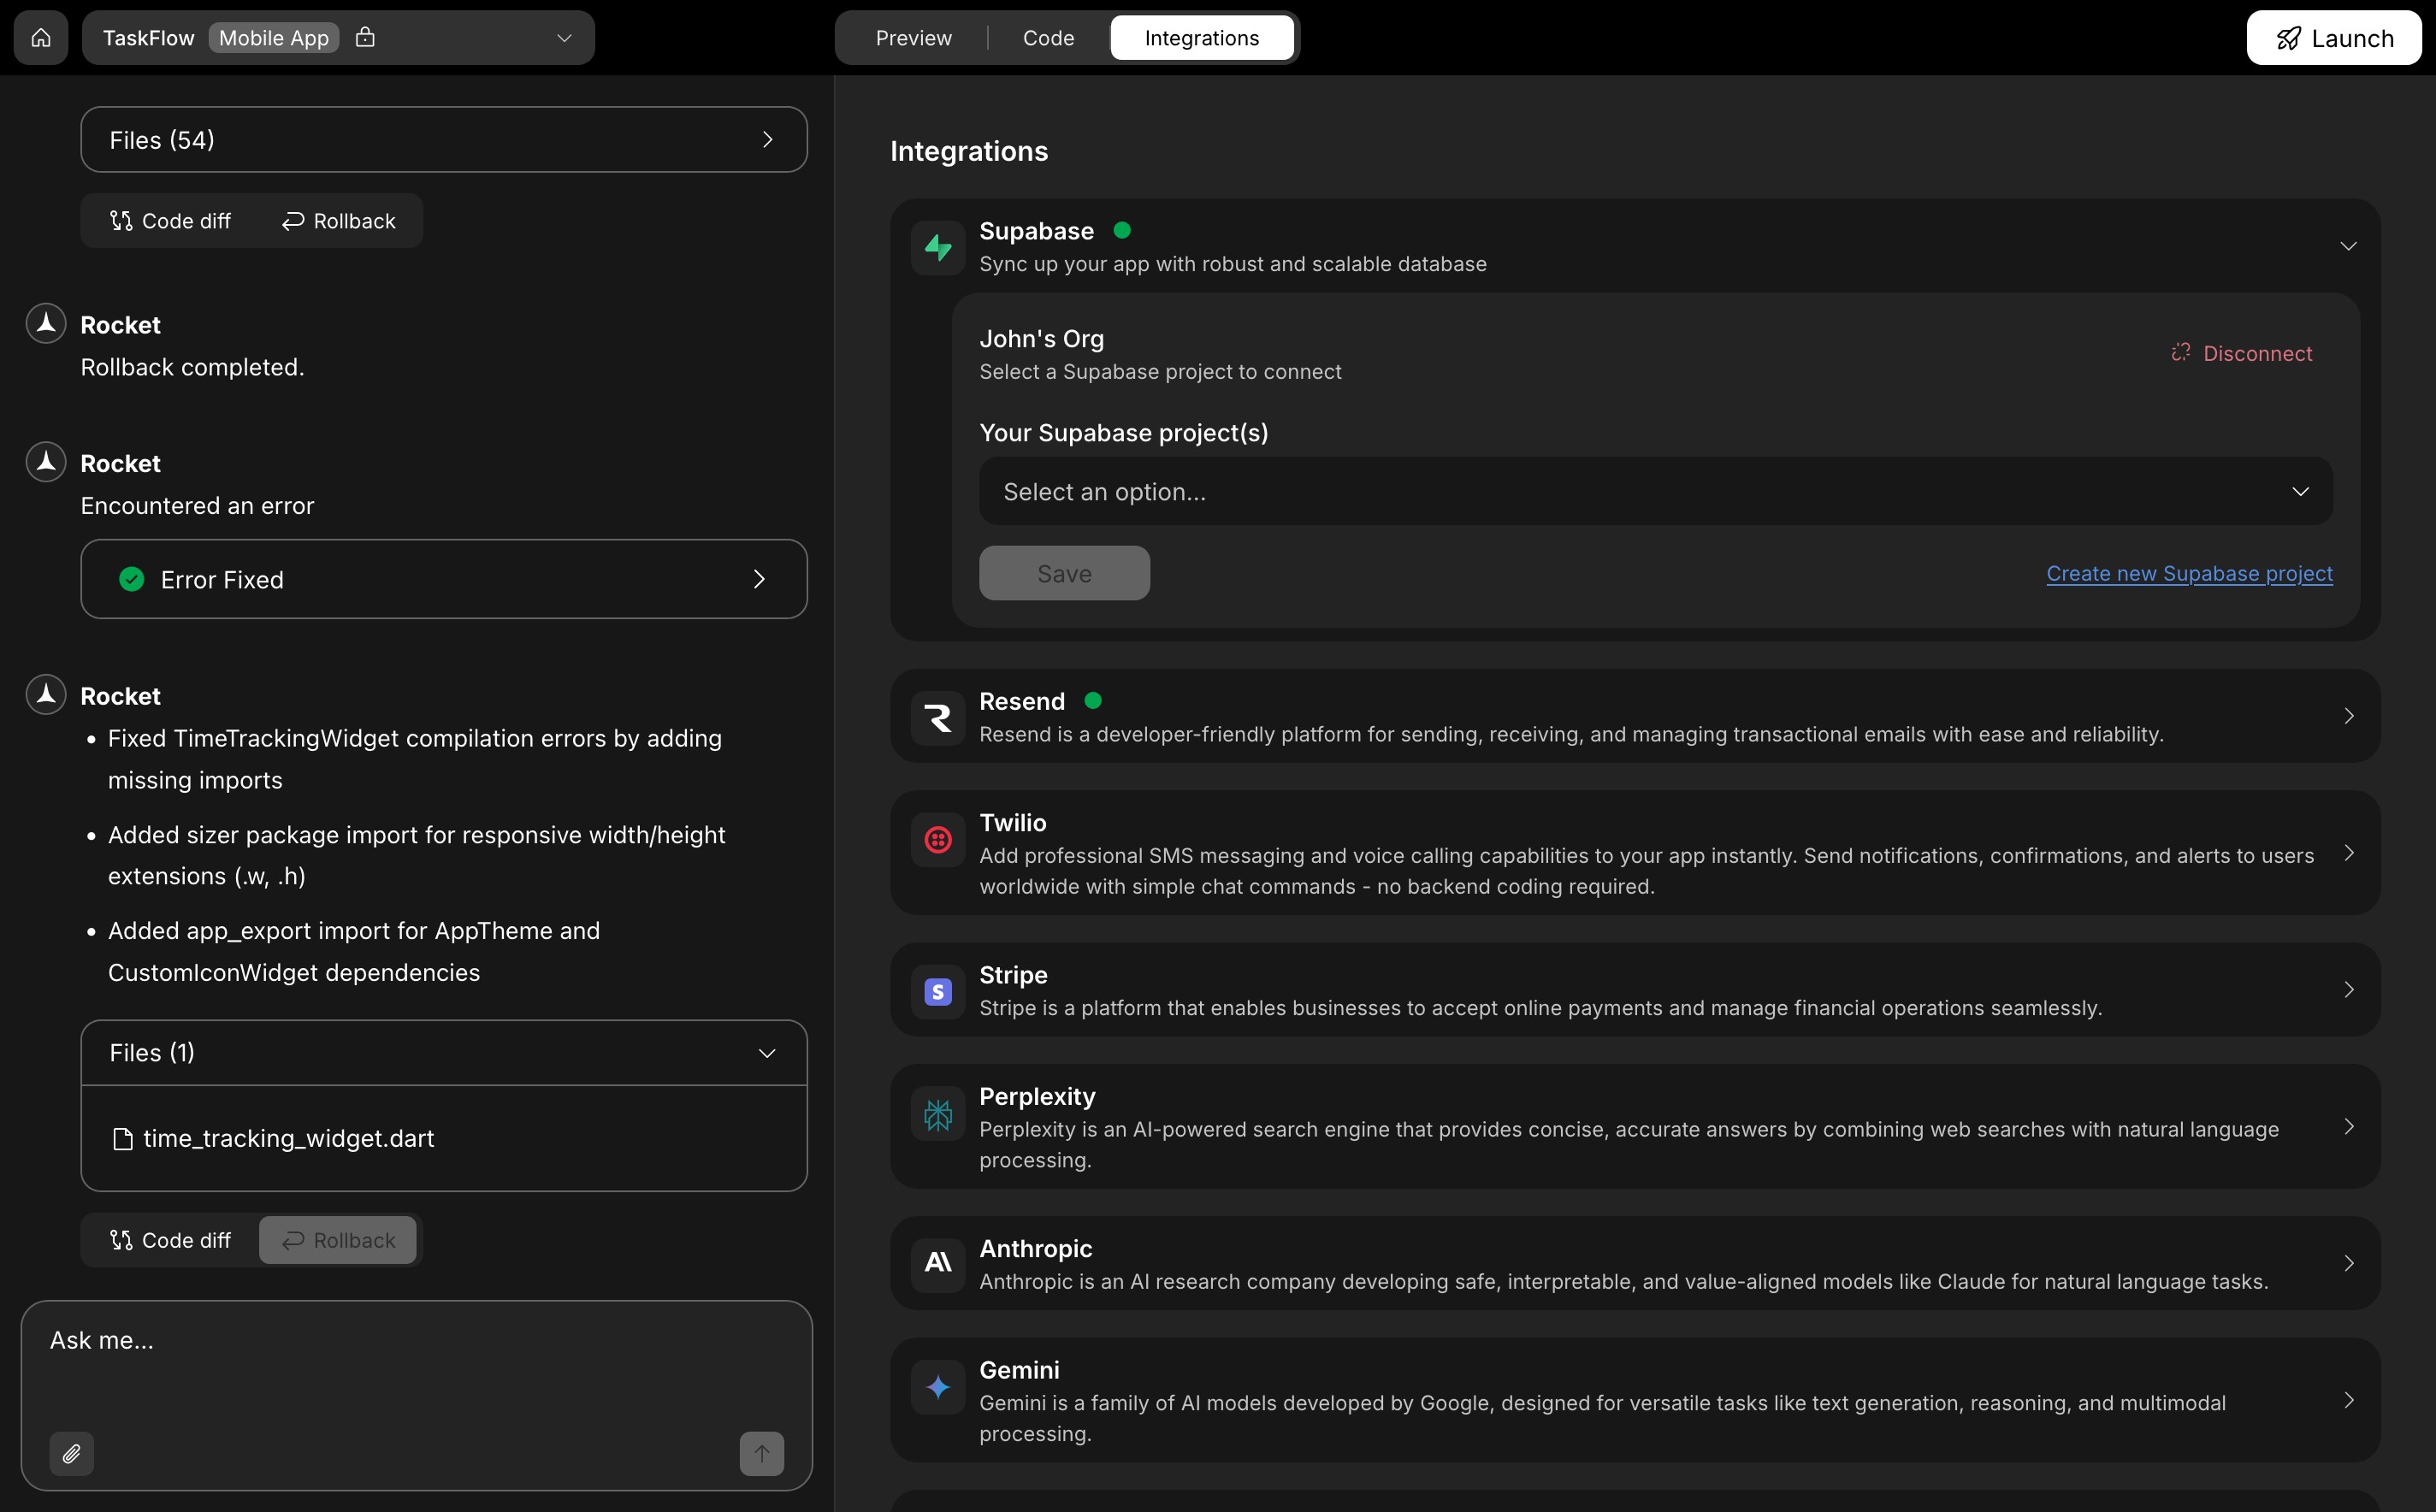
When Rocket generates a script
Whenever your app creates or updates tables, Rocket automatically generates a Supabase script. It appears in the chat window with a preview and two options: push or discard.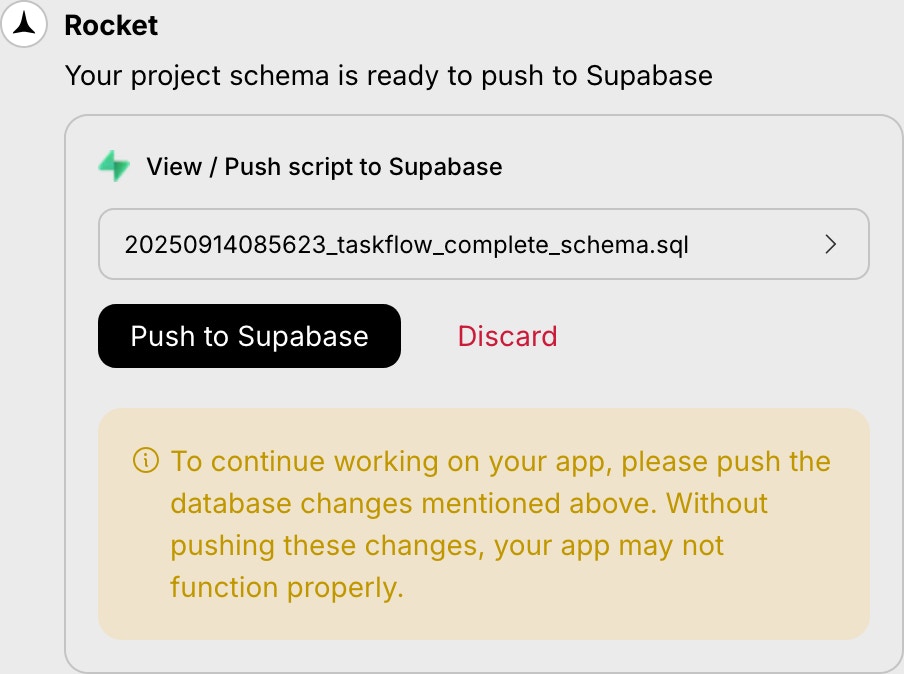

- A clickable script name to preview the schema.
- A Push to Supabase button to apply the changes.
- A Discard button to skip the script.
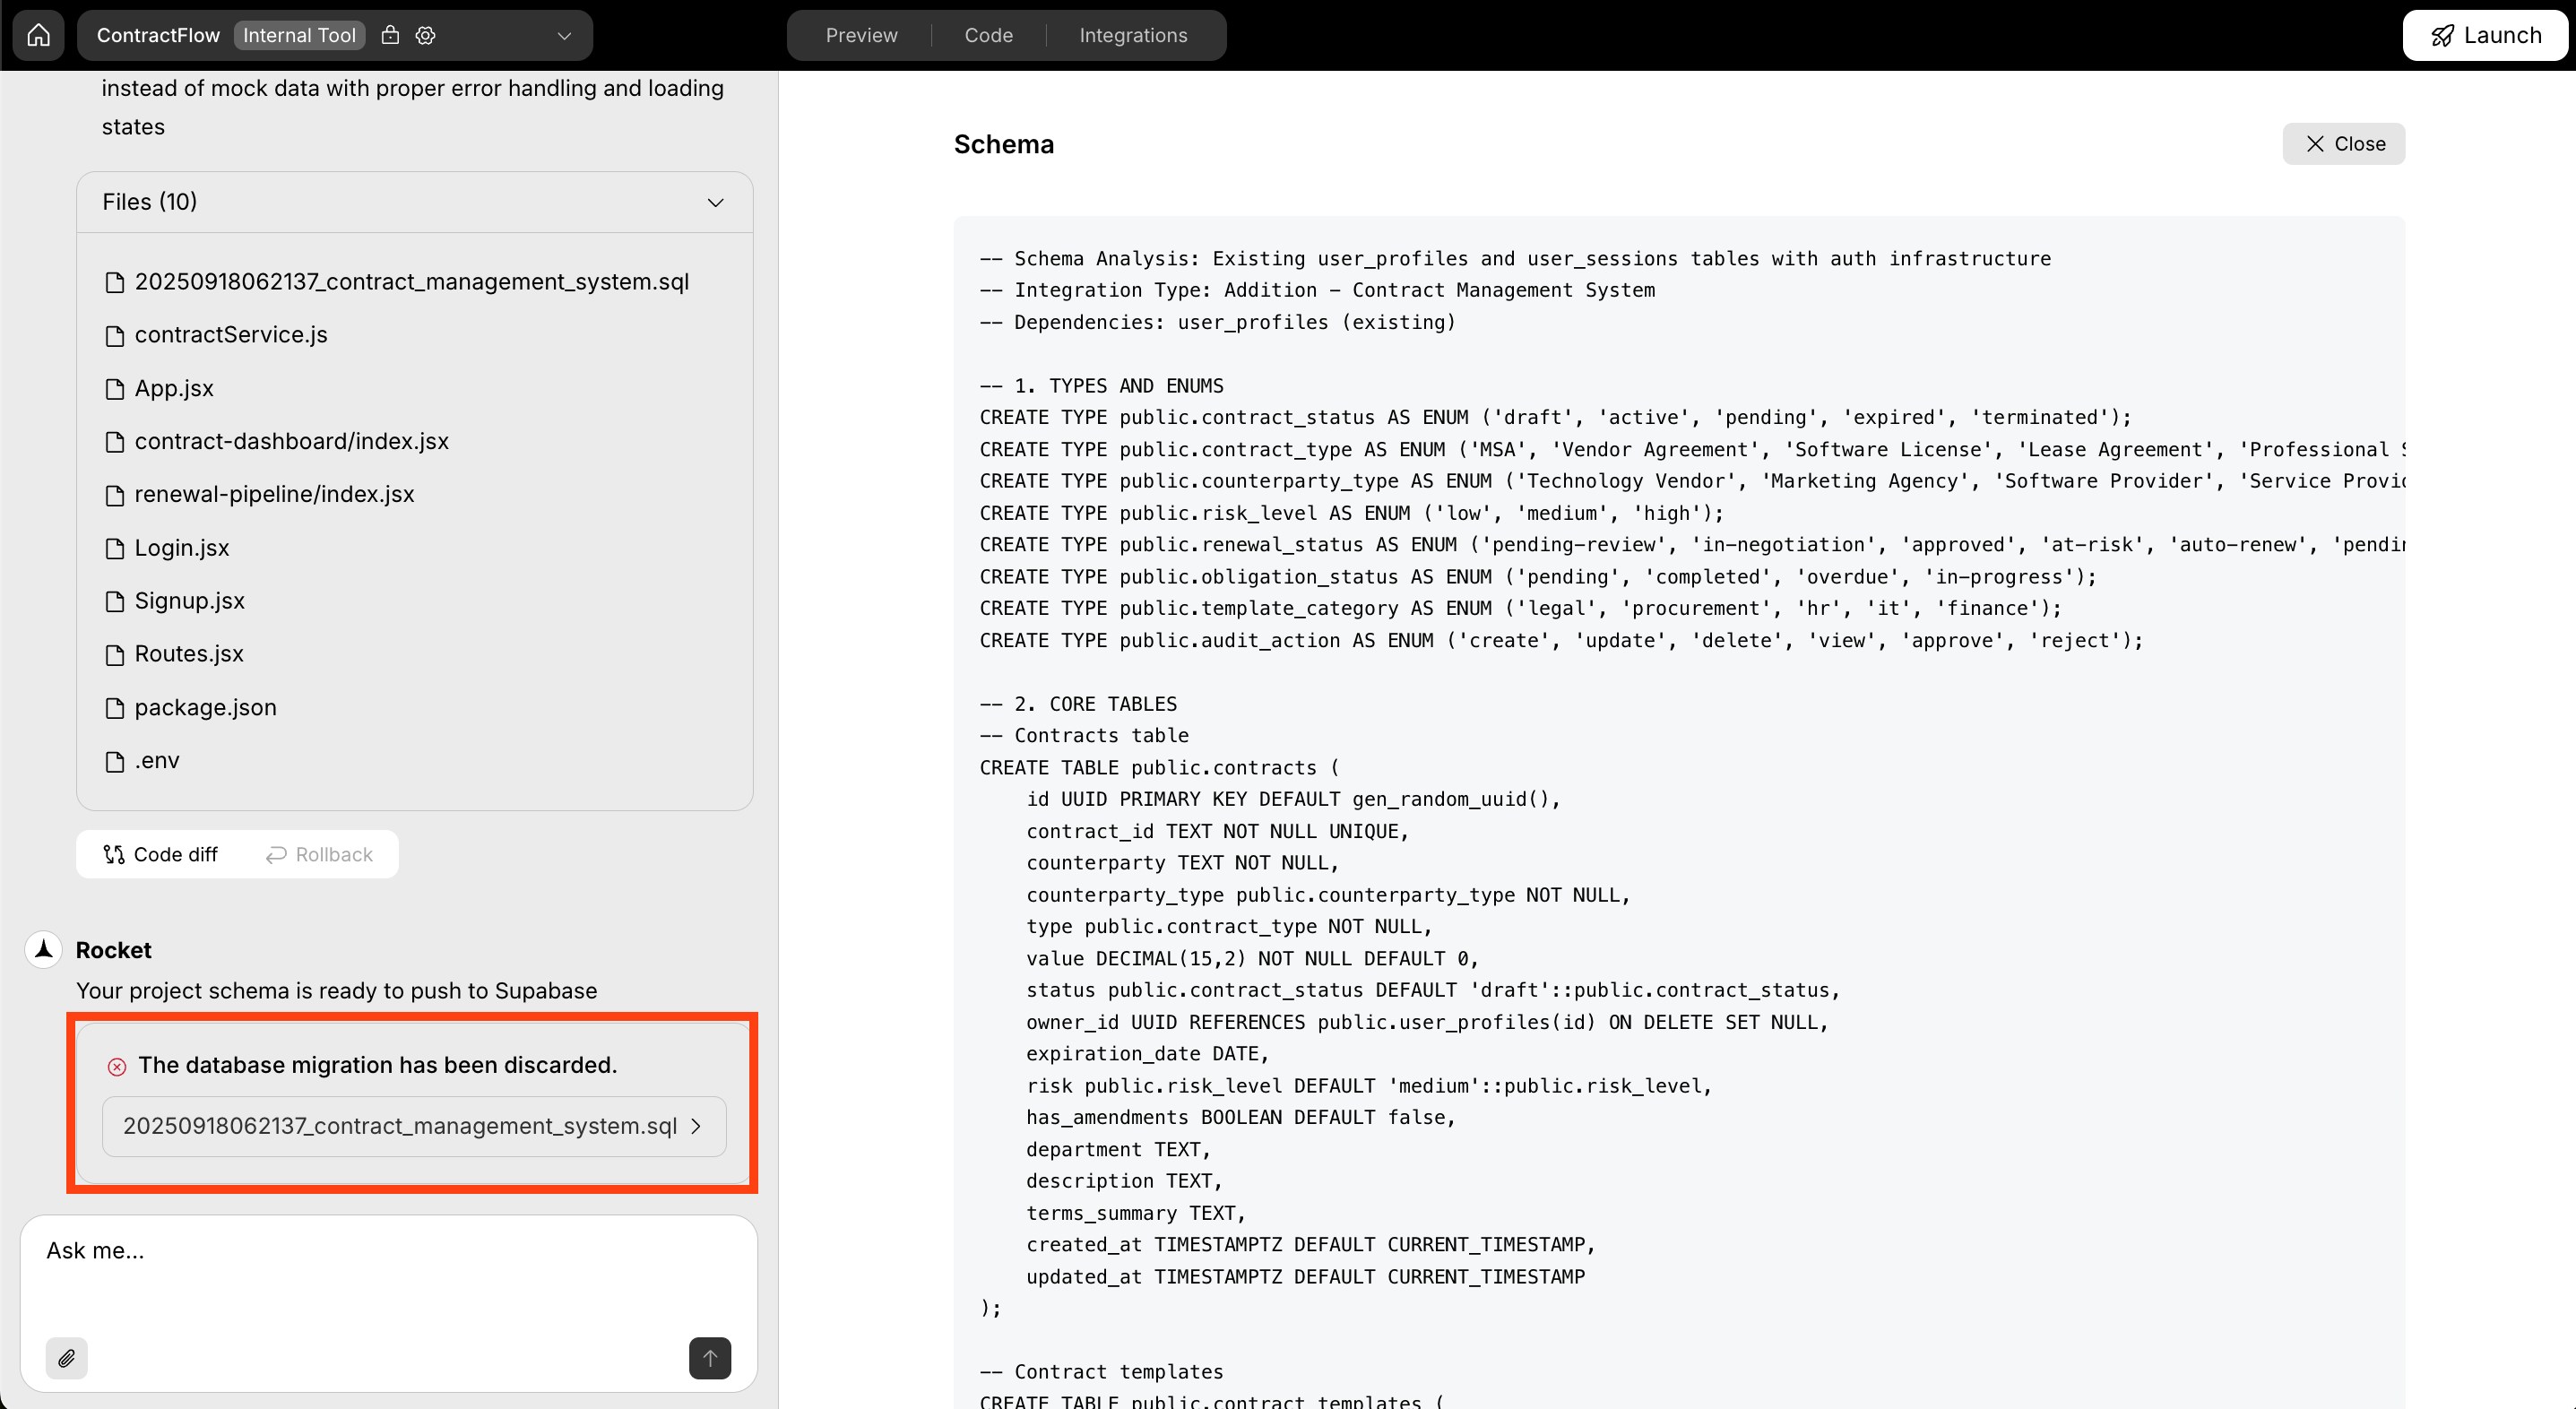
What happens if you skip it
If you ignore the popup, the changes will not apply to Supabase. Rocket does not automatically retry or reapply missed scripts. Push them as they appear to keep your schema in sync.Each script depends on previous changes. Push them in order to avoid conflicts.
Troubleshooting push errors
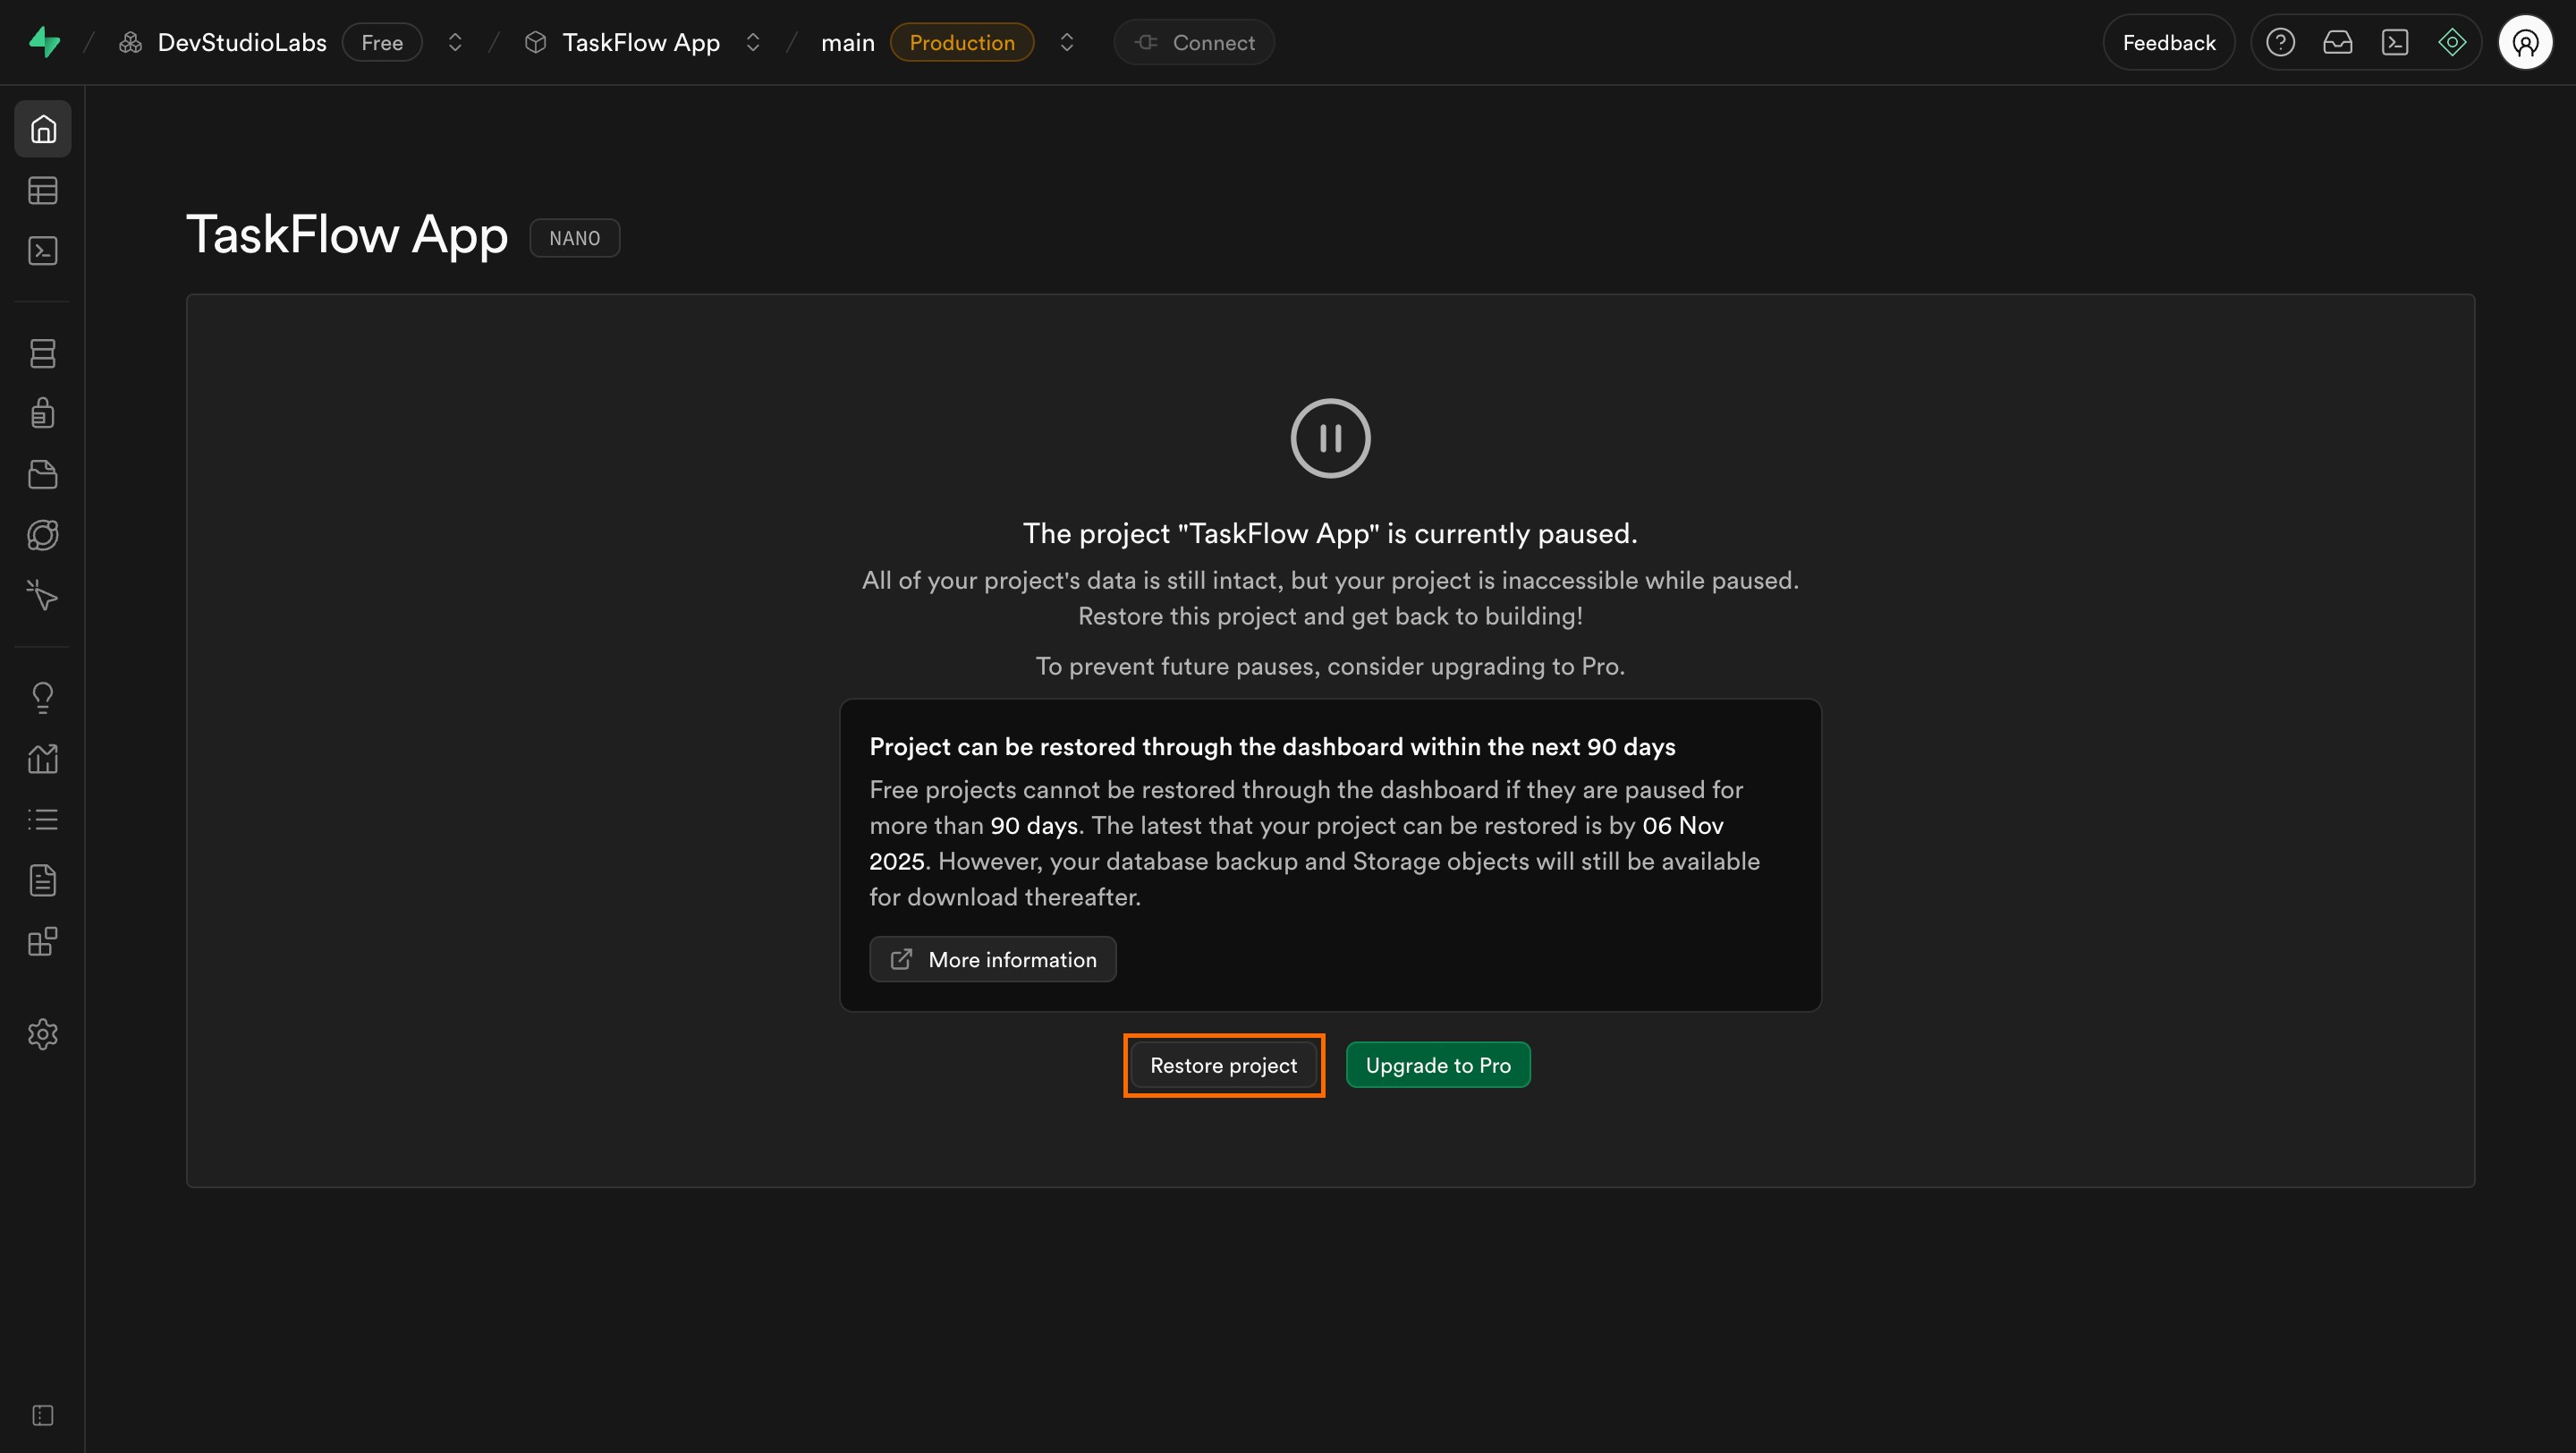
If a script fails to push, here is how to identify and resolve common issues.1. Supabase project is paused
What you will see:
“Your Supabase project is currently paused.”
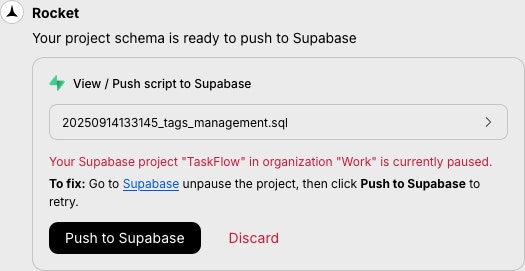
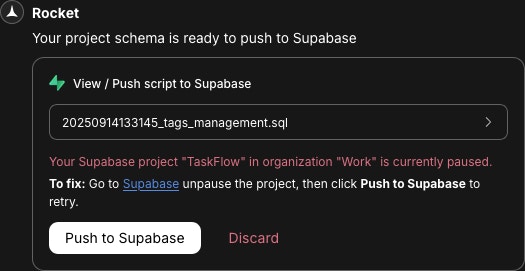
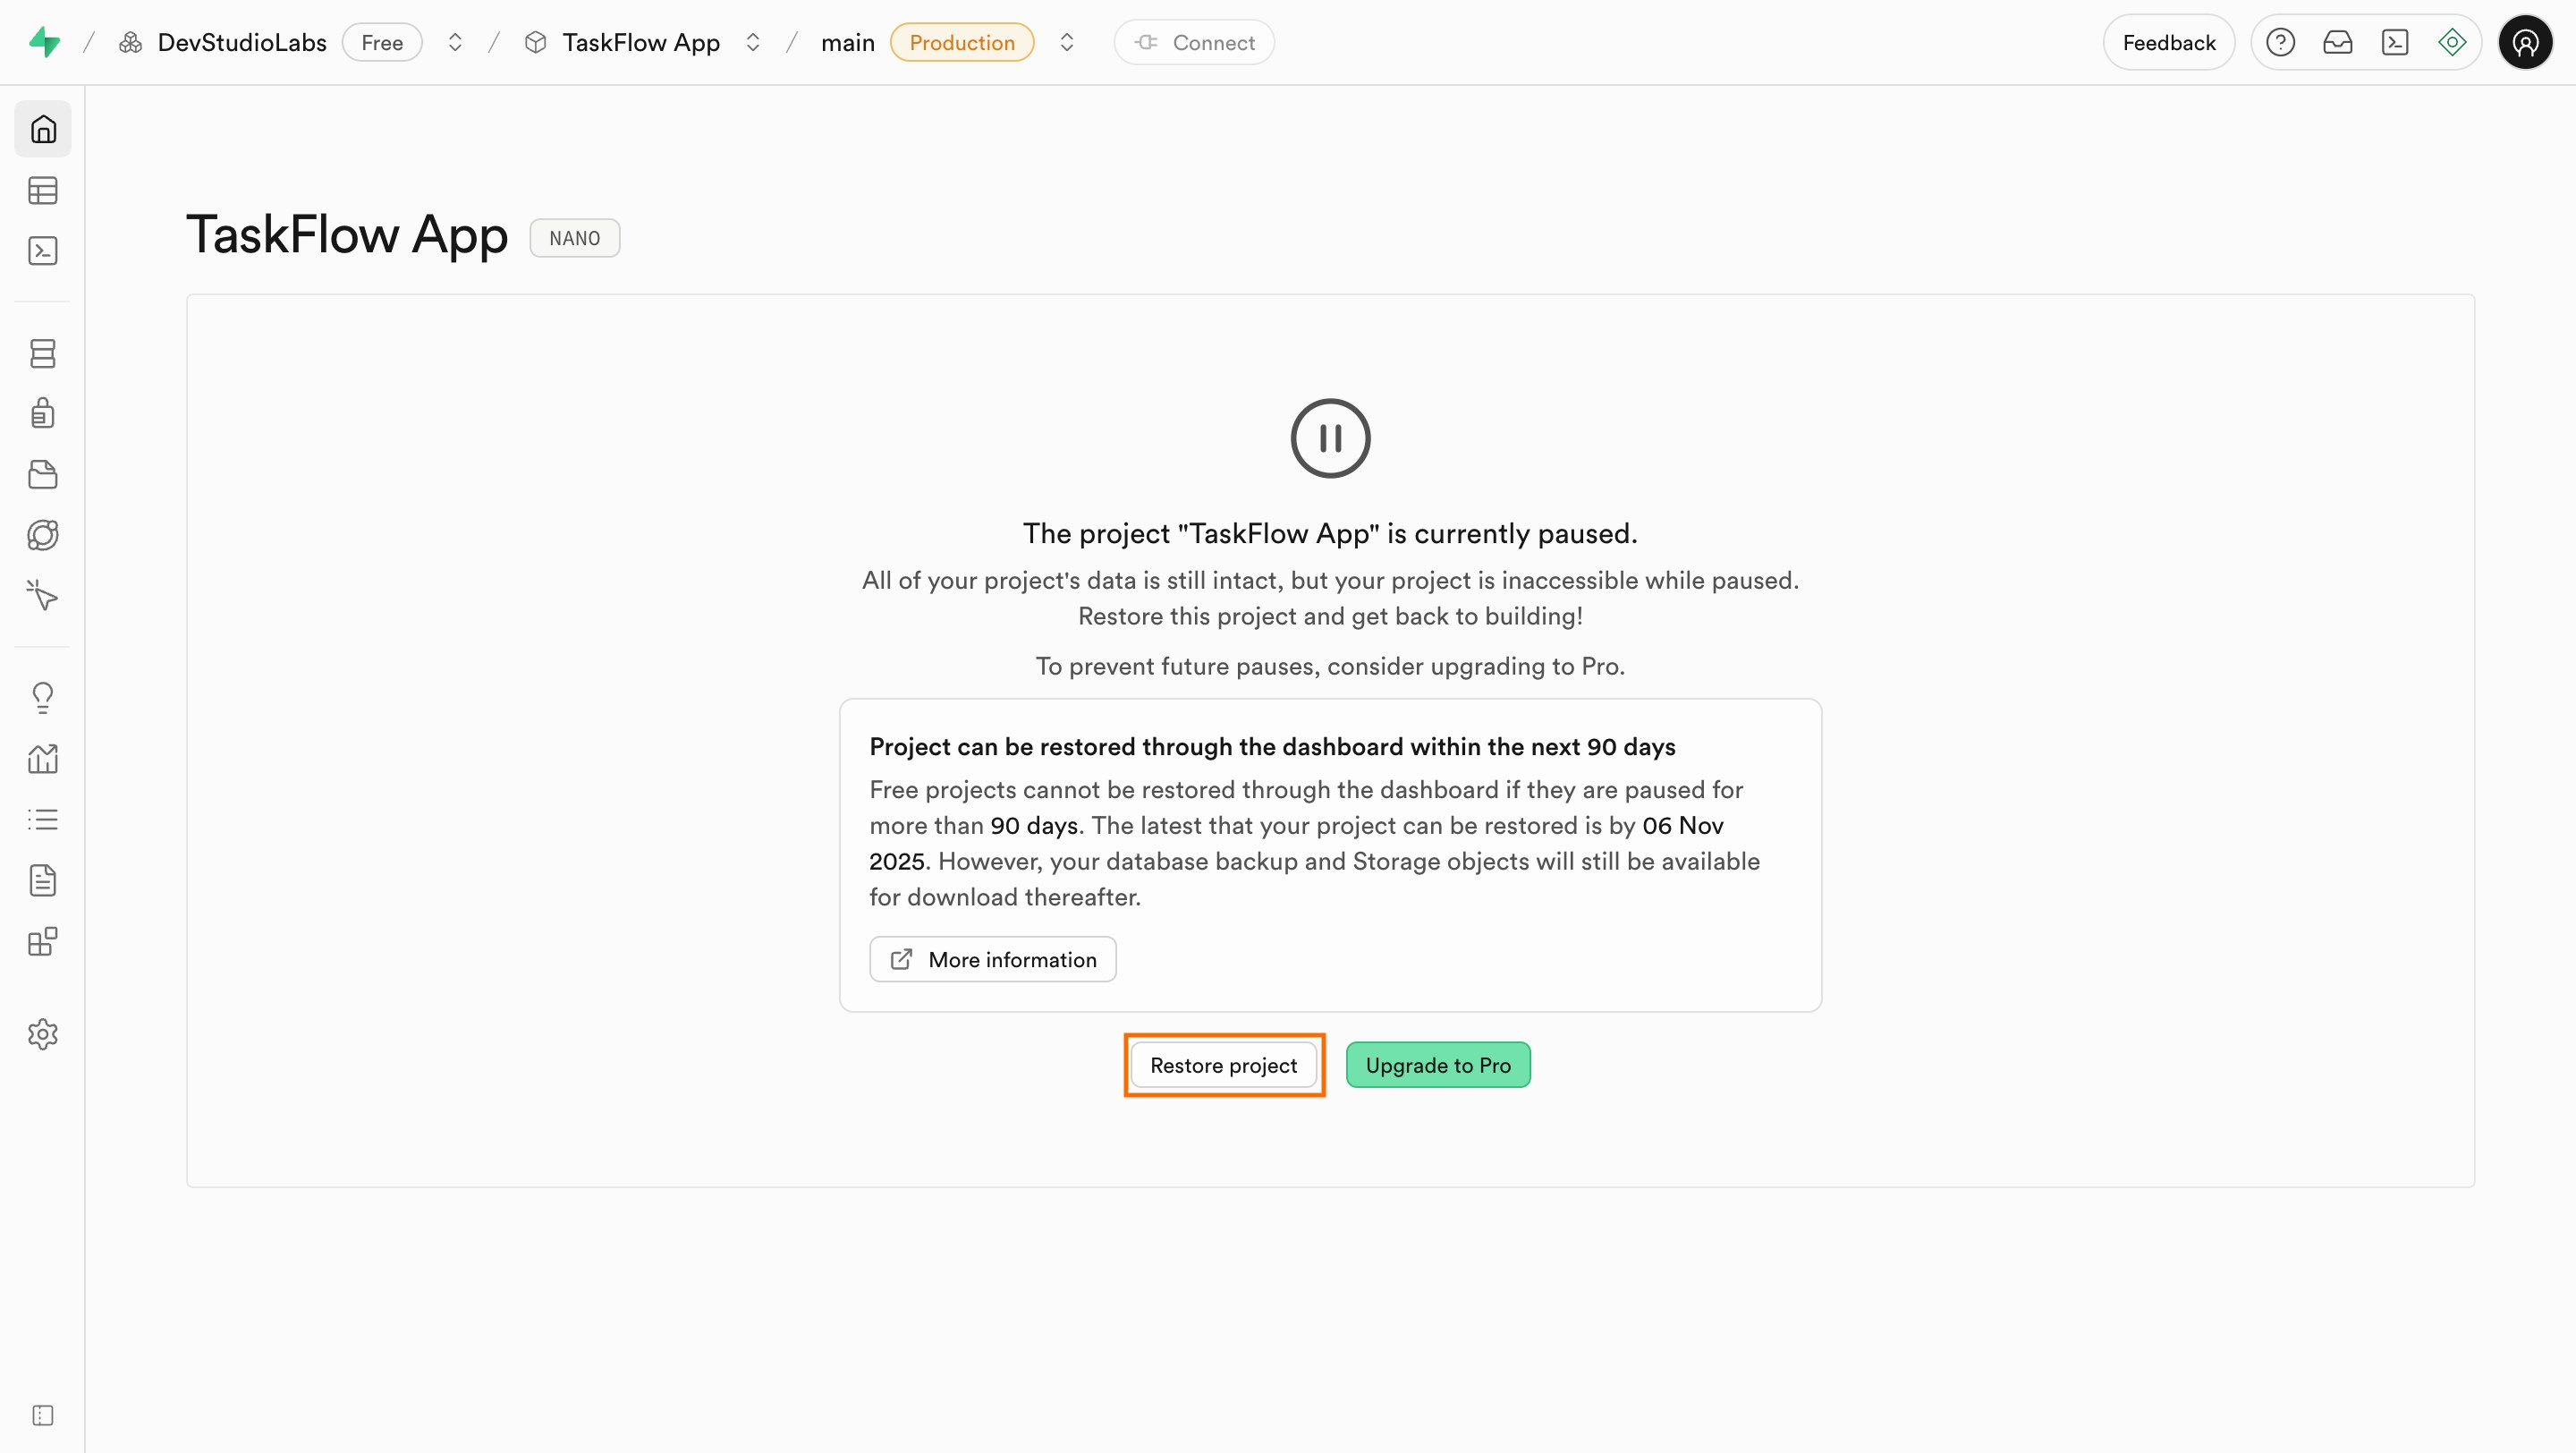
- Open your Supabase dashboard.
- Click Restore Project to reactivate it.
- Return to Rocket and push the script again.
2. Supabase project was deleted or disconnected
What you will see:
“Your connected Supabase project appears to be deleted.”
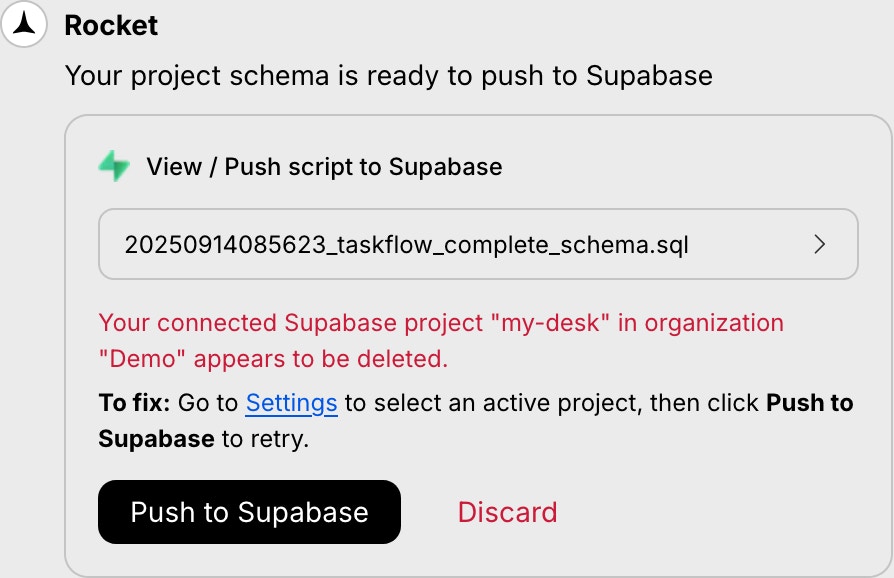
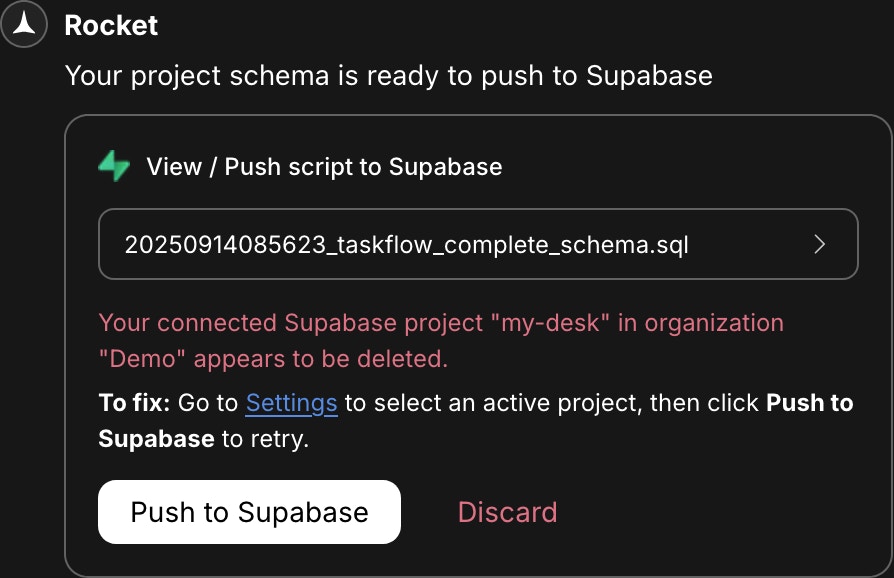
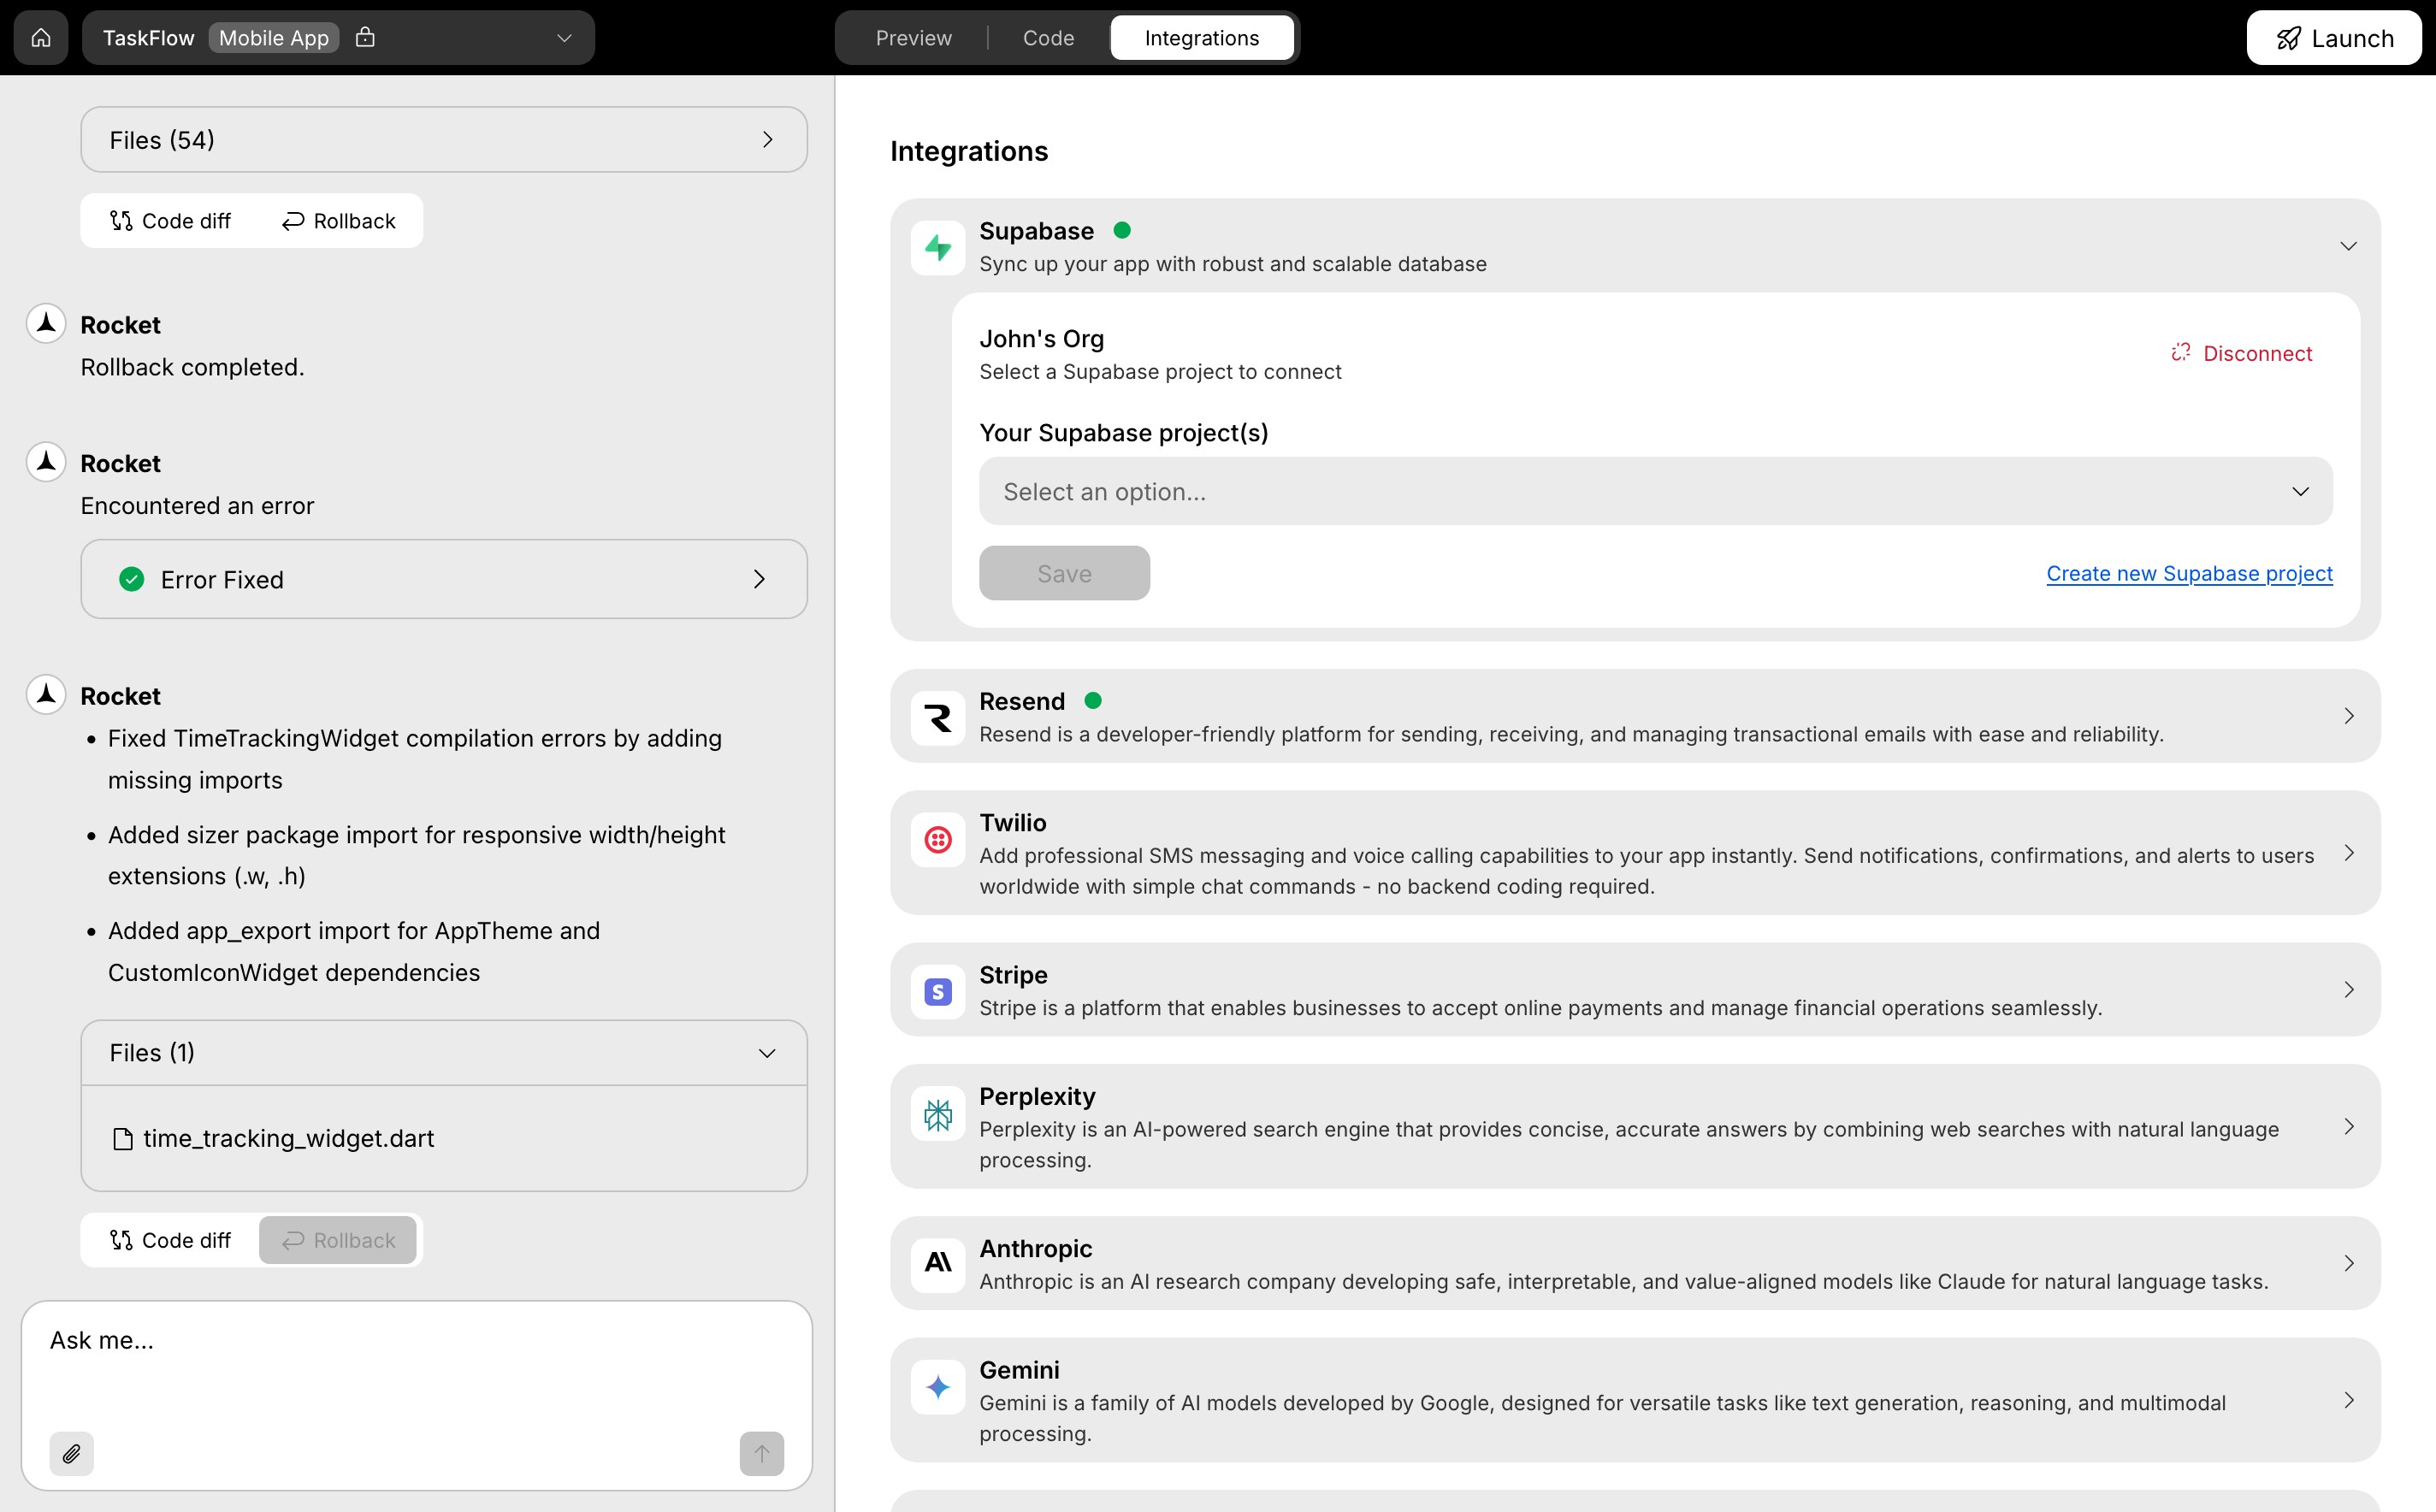
- In Rocket, go to Integrations → Supabase.
- Select a valid project from the dropdown.
- Click Save, then try pushing the script again.
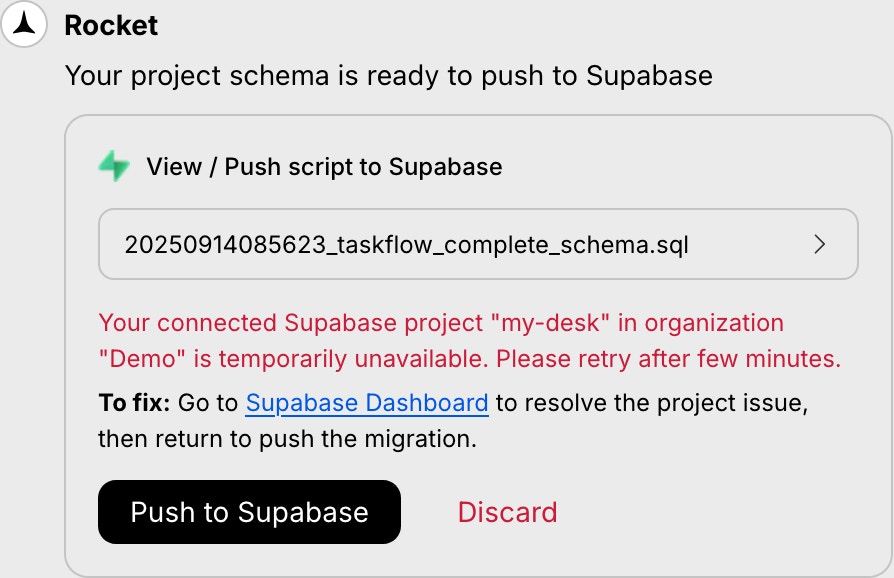
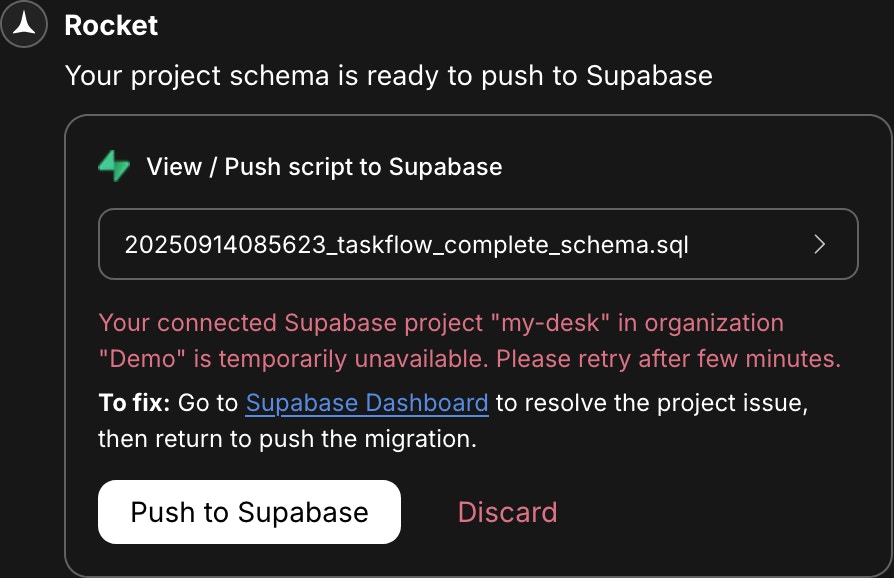
3. Supabase is temporarily down
What you will see:
“Your Supabase project is temporarily unavailable.”
4. The script has a schema error
What you will see:
An error message and a Fix it button.
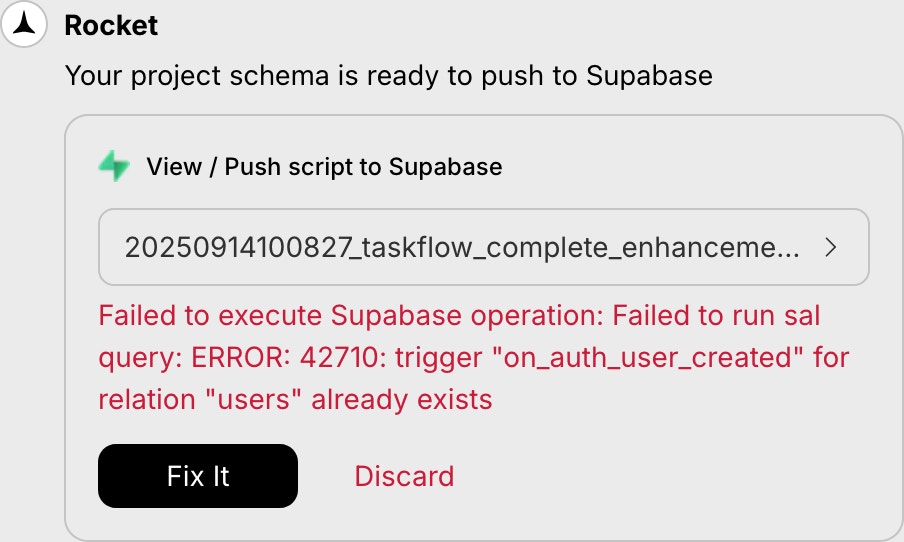
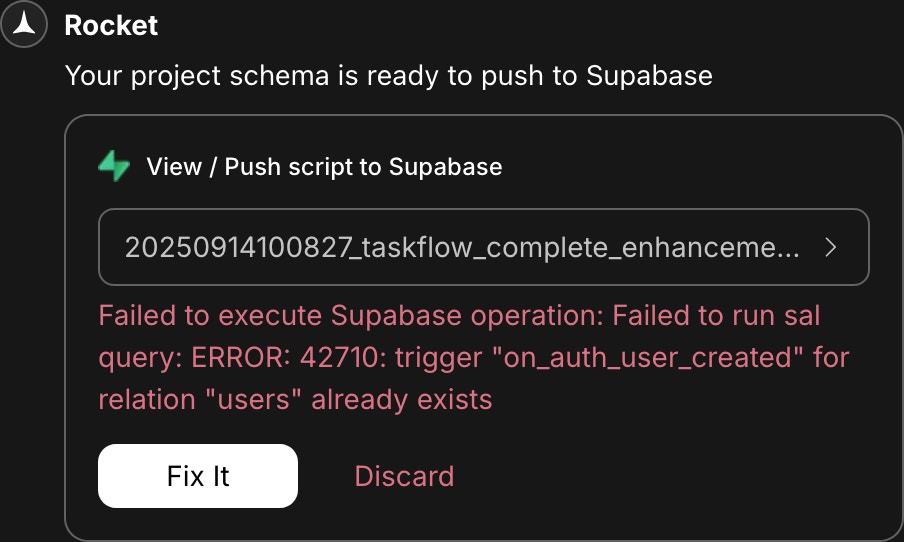
Rocket handles most schema issues, including naming conflicts, missing dependencies, and broken triggers.
Manually running a script
If you discarded a script and later want to apply it, you can run it manually in Supabase.- From the script popup: If it is still visible, click the script name to preview it, then copy the SQL.

OR
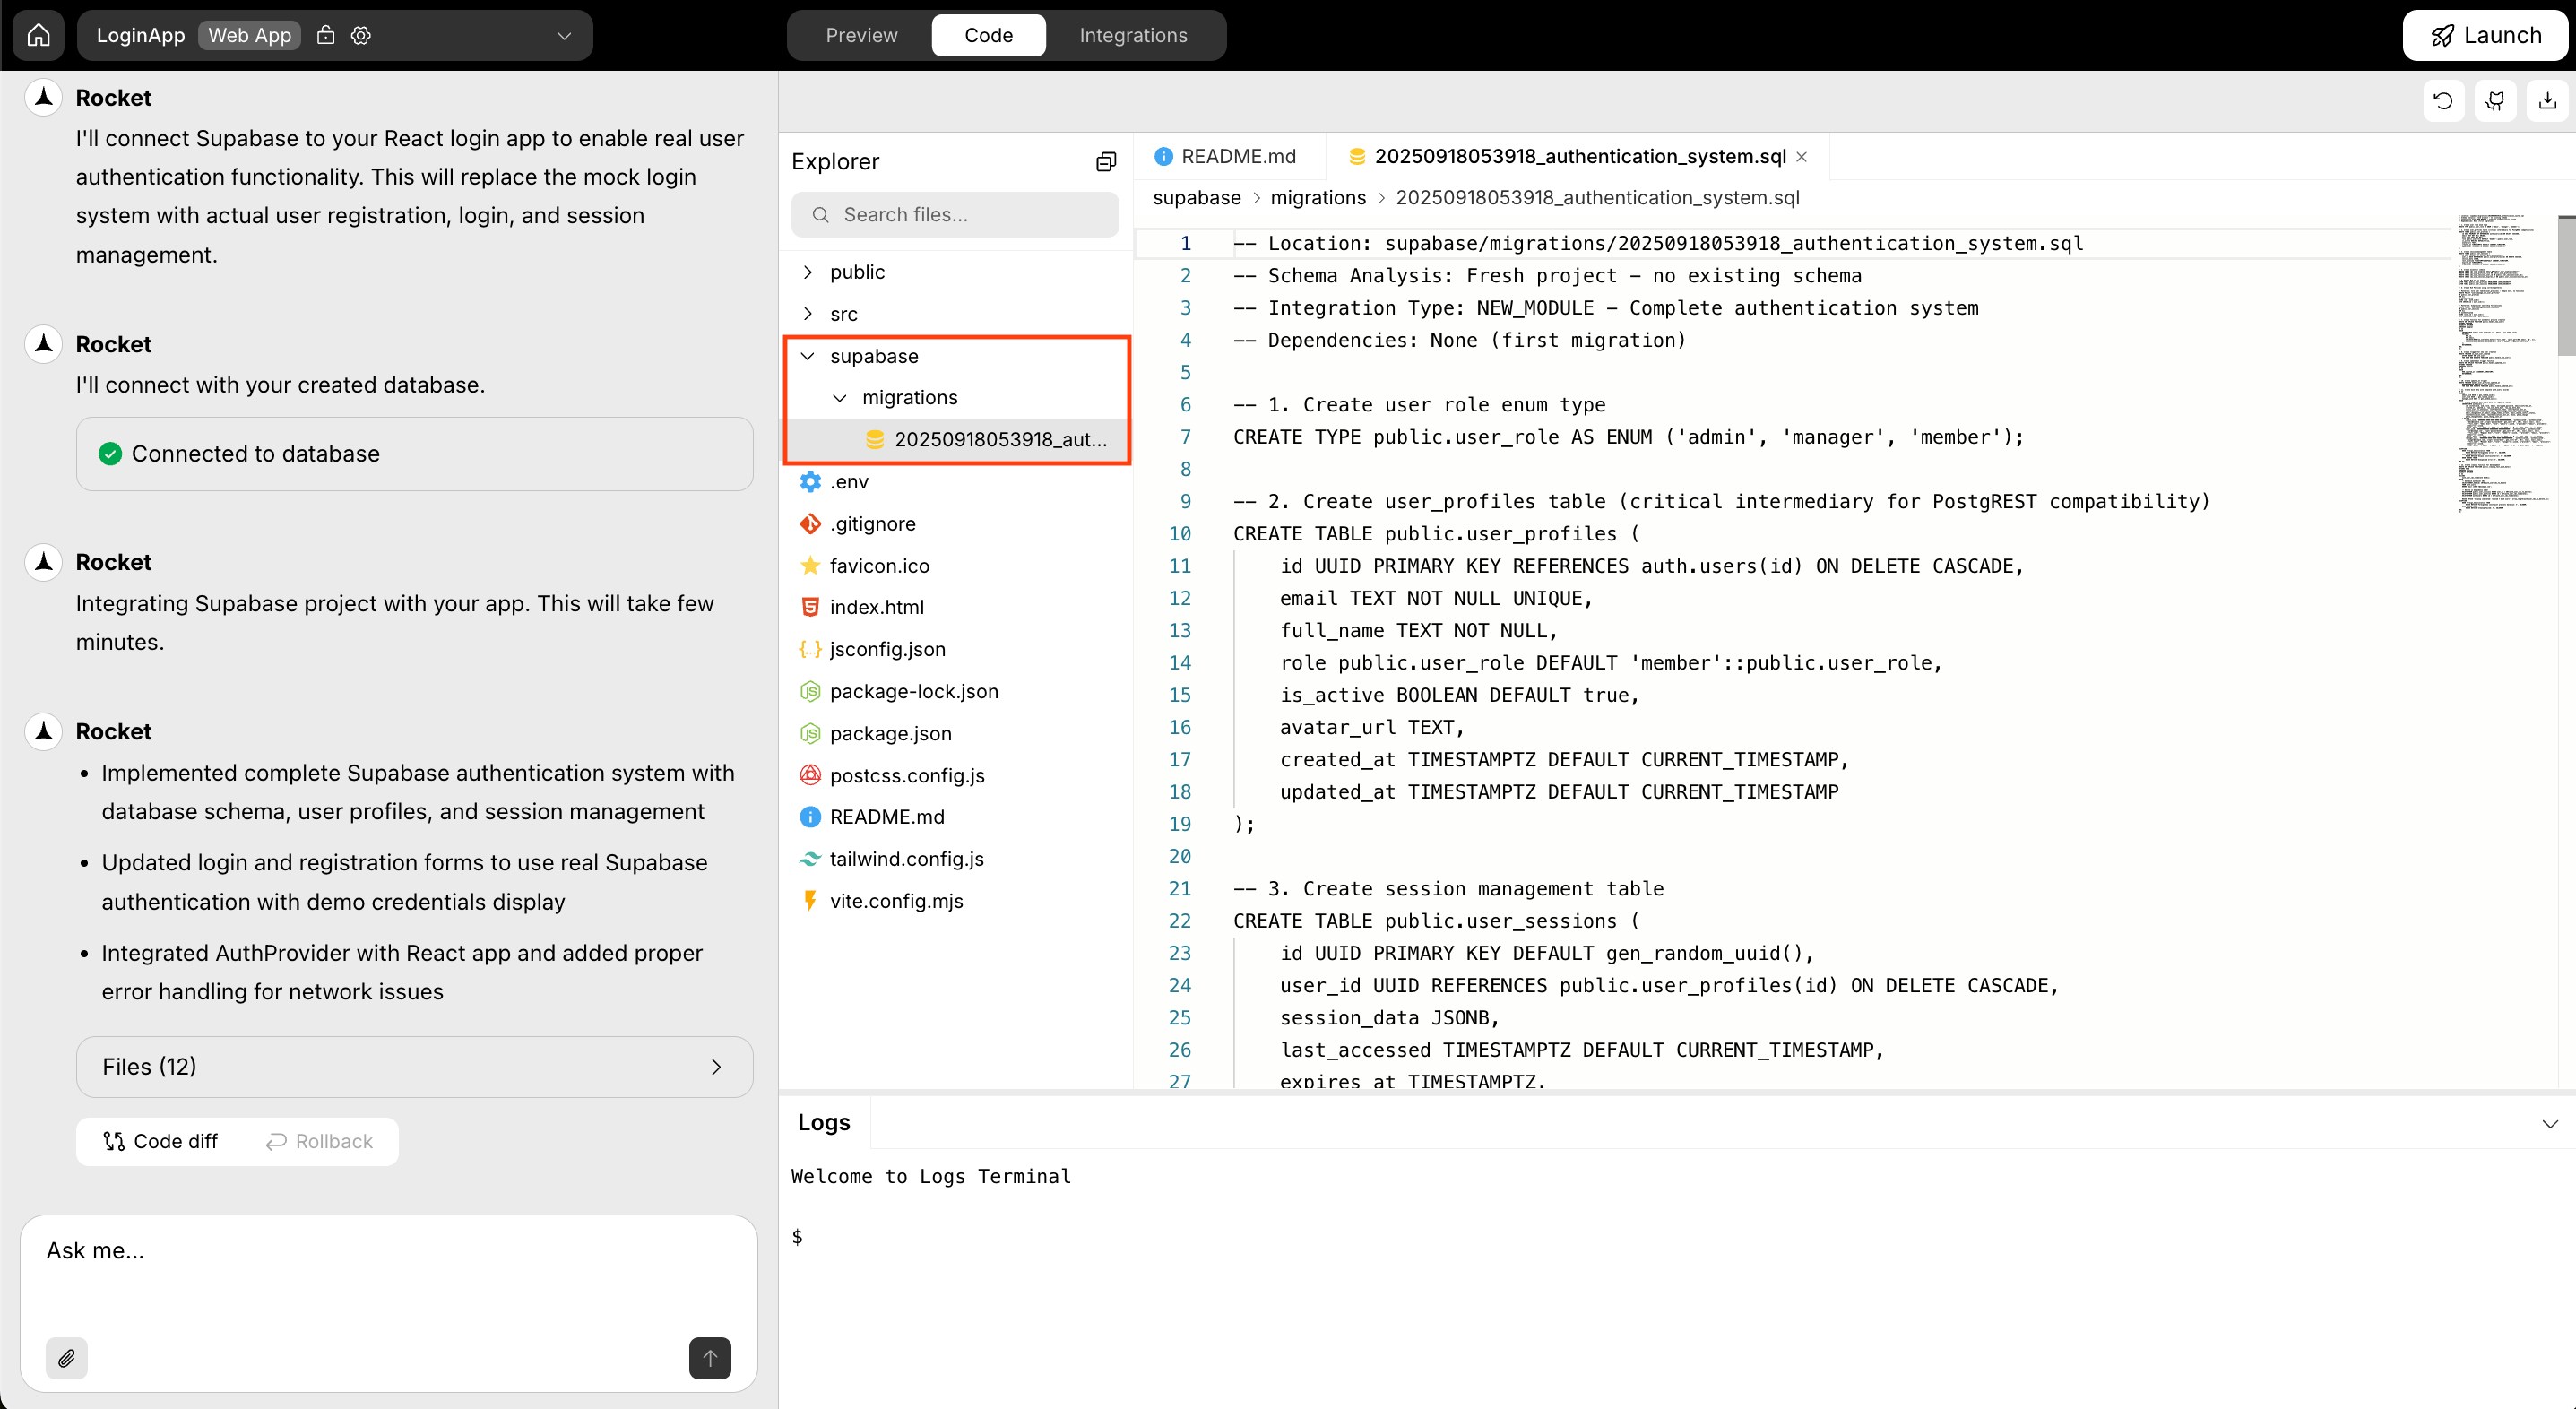
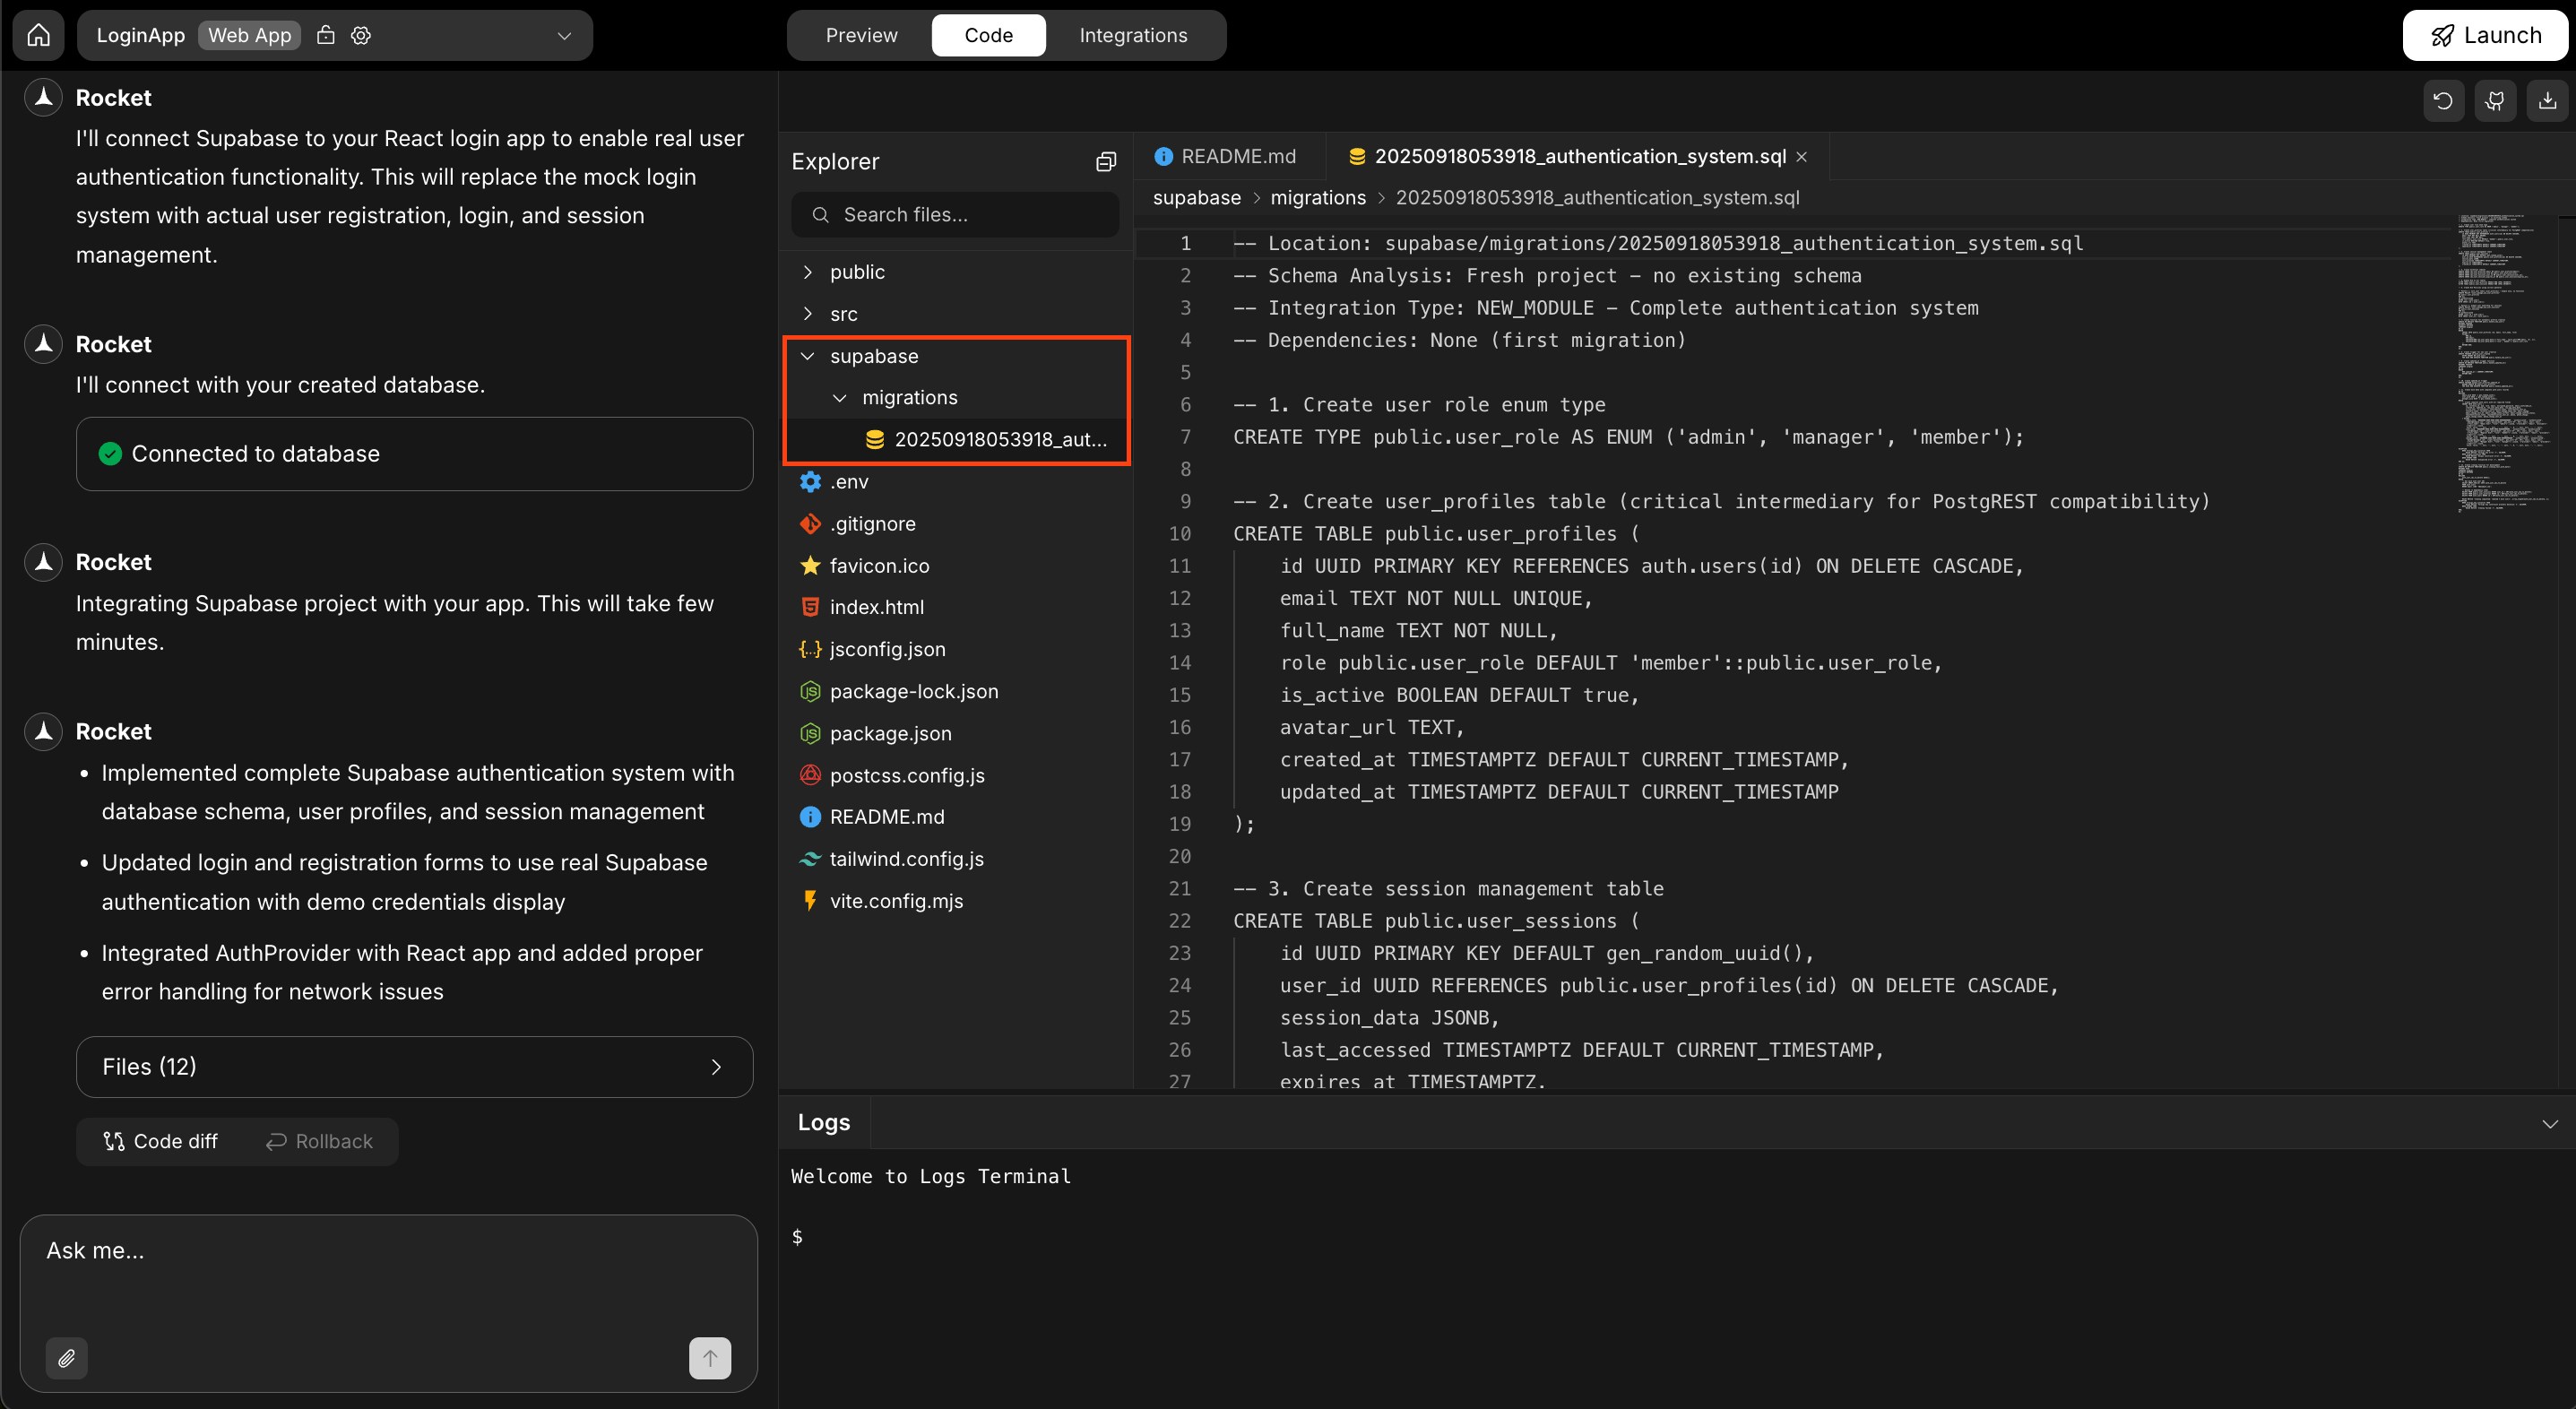
- From code view:
In Rocket, go to code view, then open the
supabase/migrations/folder. Each script is saved there with a name and timestamp. Copy the SQL from the script you want.
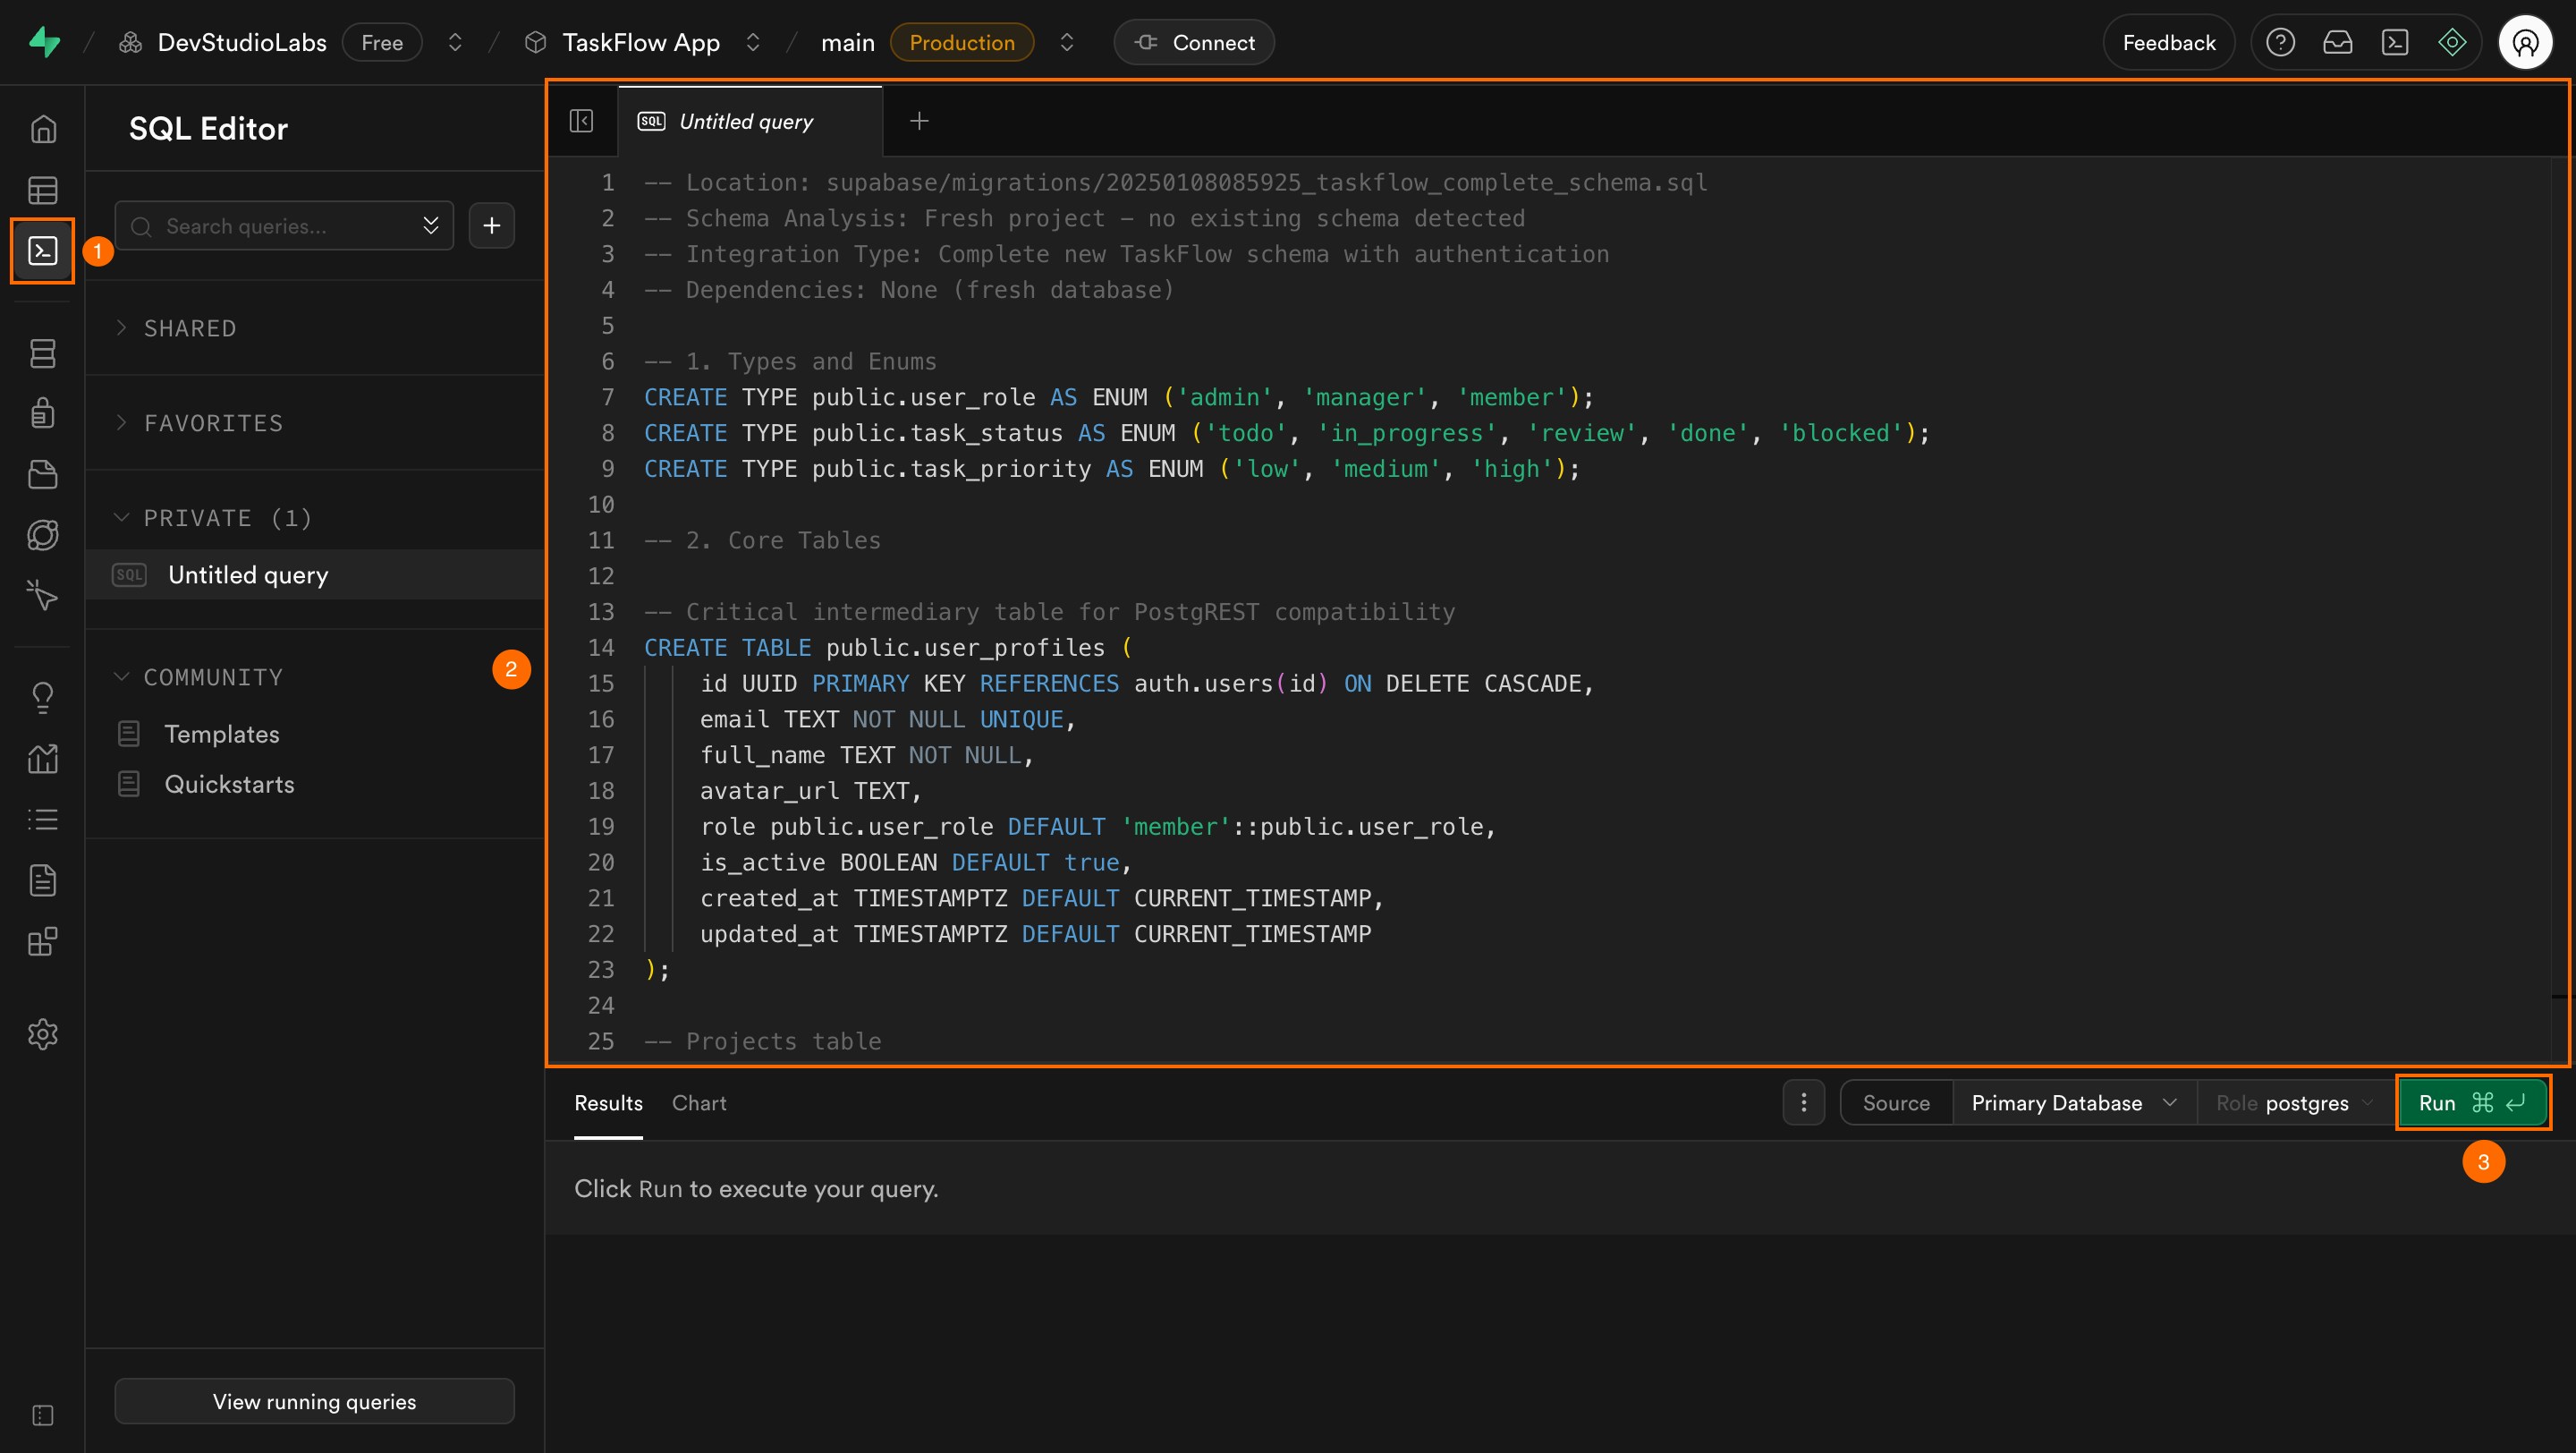
- Paste the SQL into the SQL editor in your Supabase dashboard and click Run.

If you change your connected Supabase project, you must run all scripts from the
supabase/migrations/ folder in sequence to match your app’s schema.Schema synced, app ready.
Every Rocket script keeps your app on track. Push as they appear to stay aligned and avoid surprises.