Add social sign-in to your app. This guide covers enabling social sign-in providers in Supabase, configuring provider settings correctly, and connecting them to your Rocket app for live authentication.You need:
- A Supabase account with an active project.
- Your Supabase account connected to Rocket.
- Your Rocket app’s live preview link or custom domain.
- Access to the developer console for your chosen provider (e.g., Google, GitHub, or Facebook).
Set up a social provider in Supabase
The steps below use Google as an example. The process is similar for other providers. For provider-specific instructions, refer to their documentation.Open the provider settings in Supabase
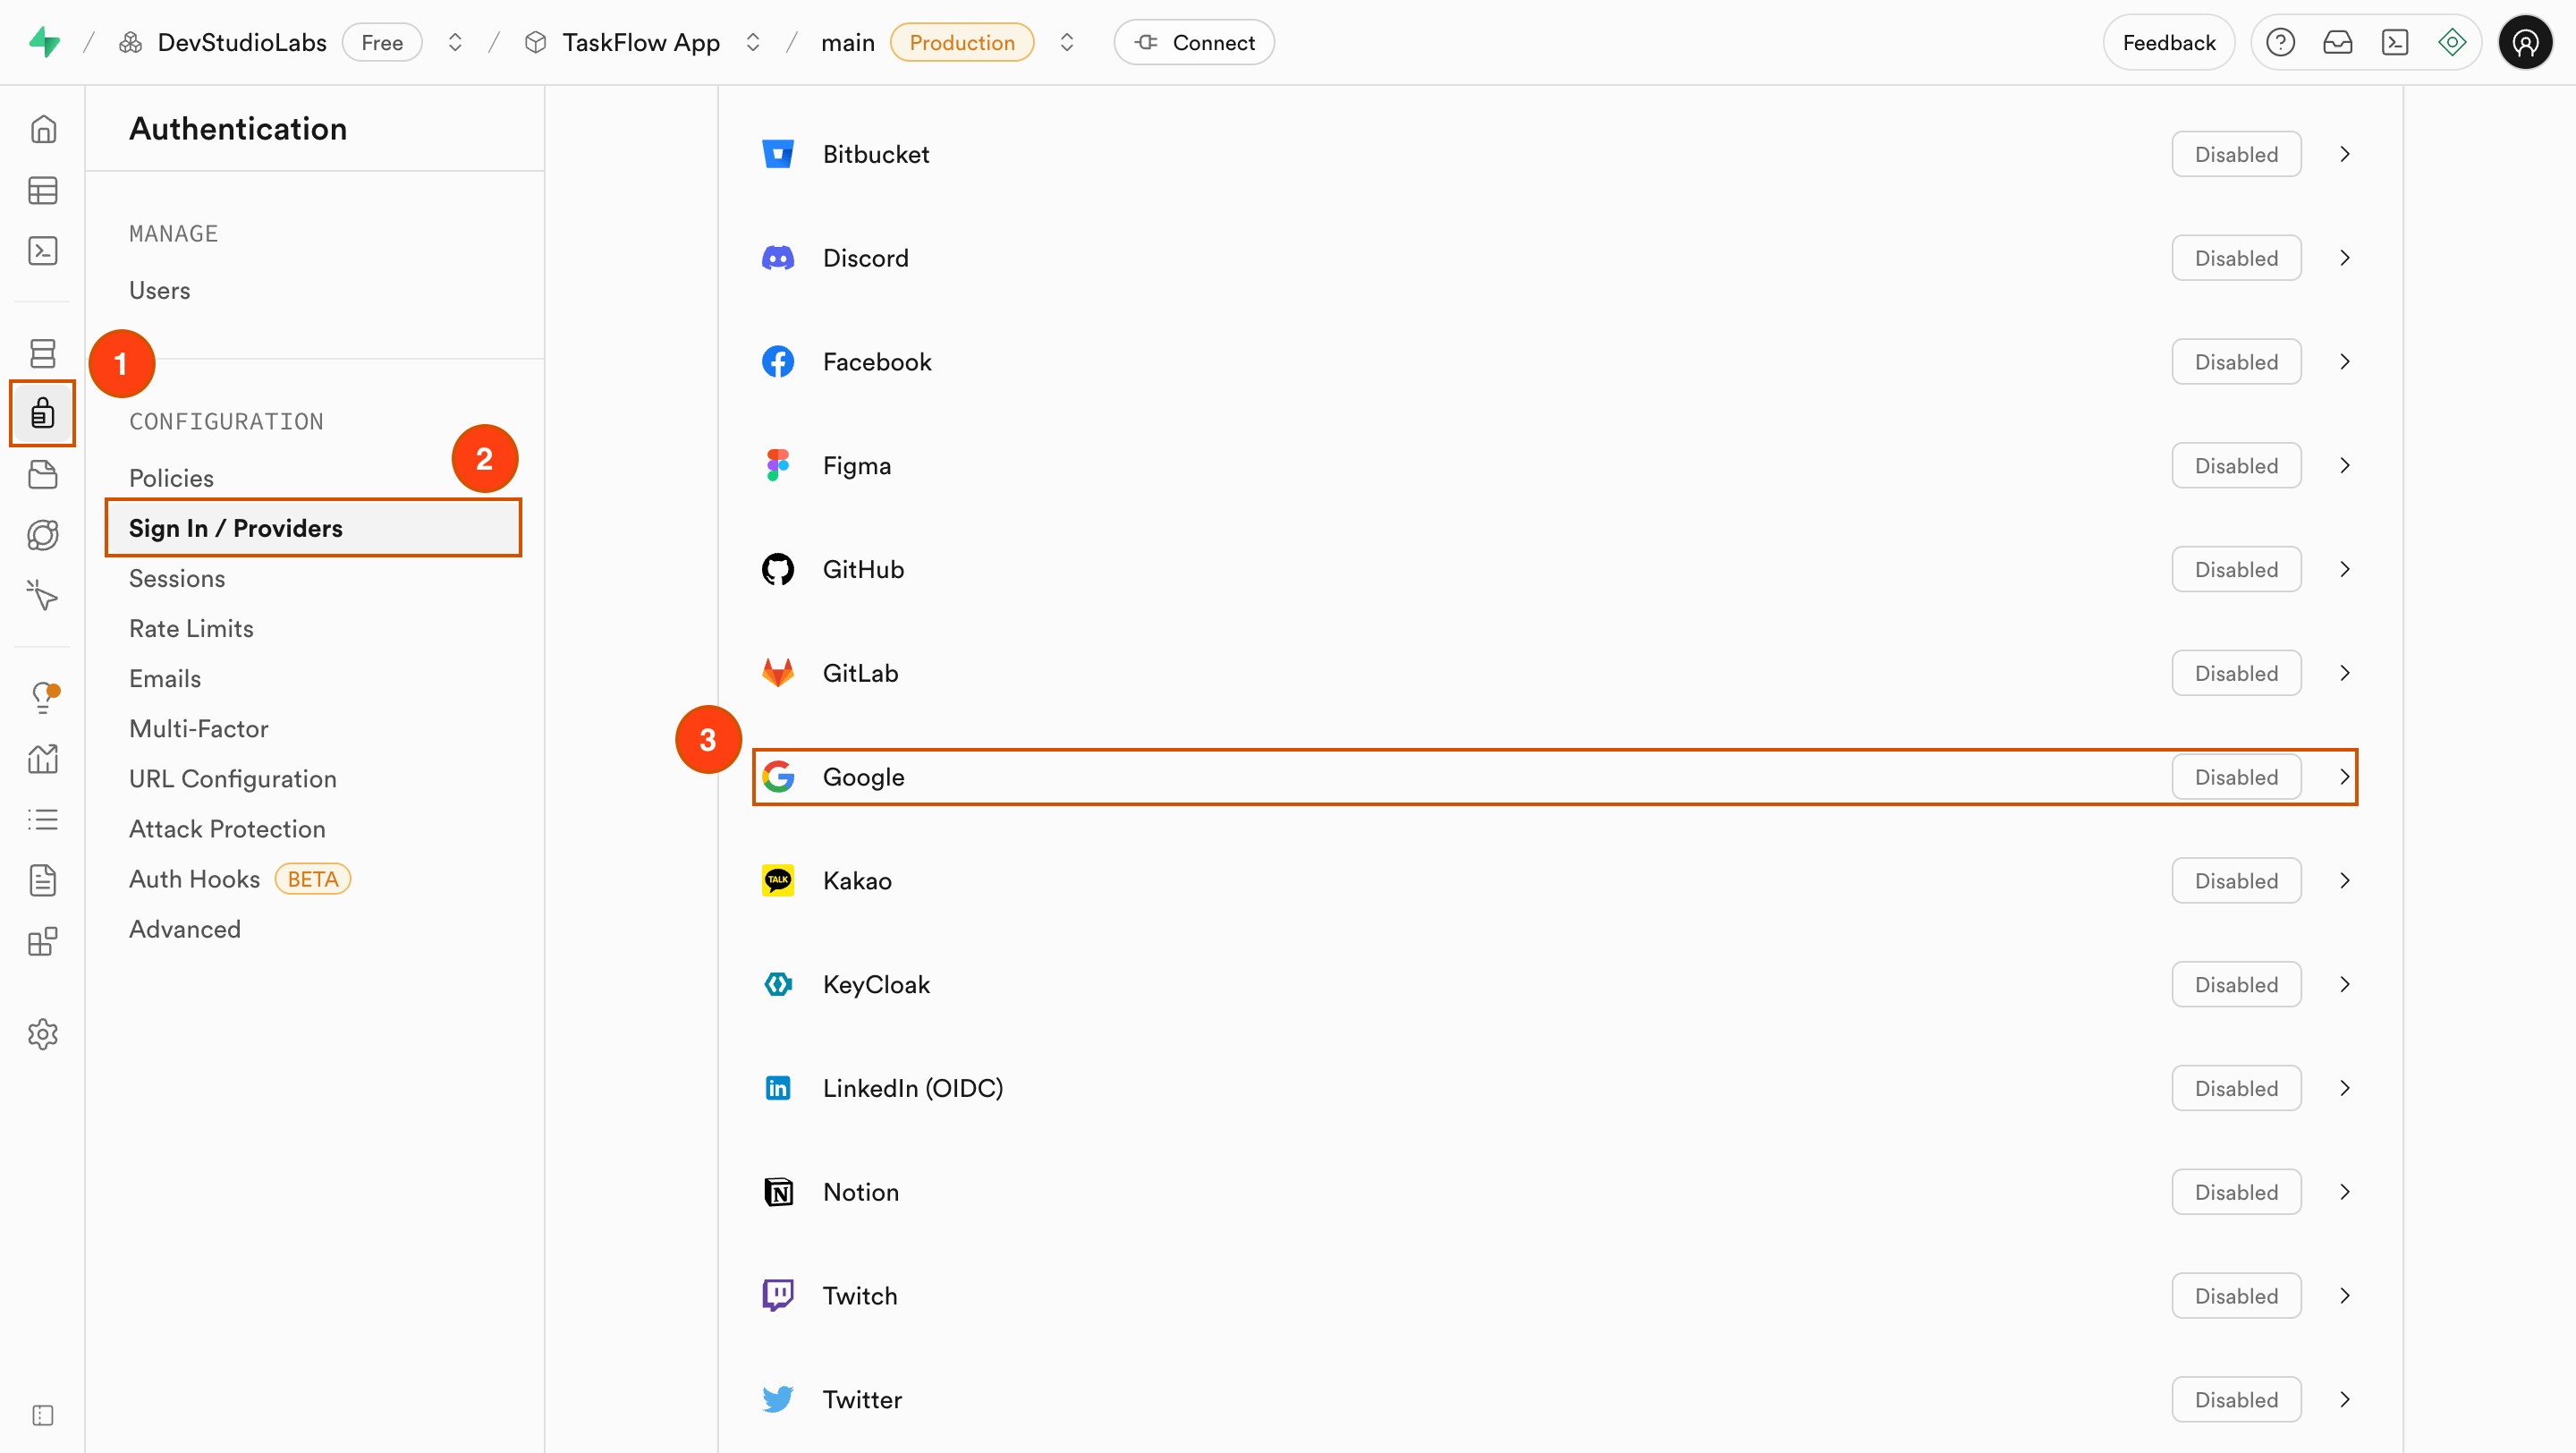
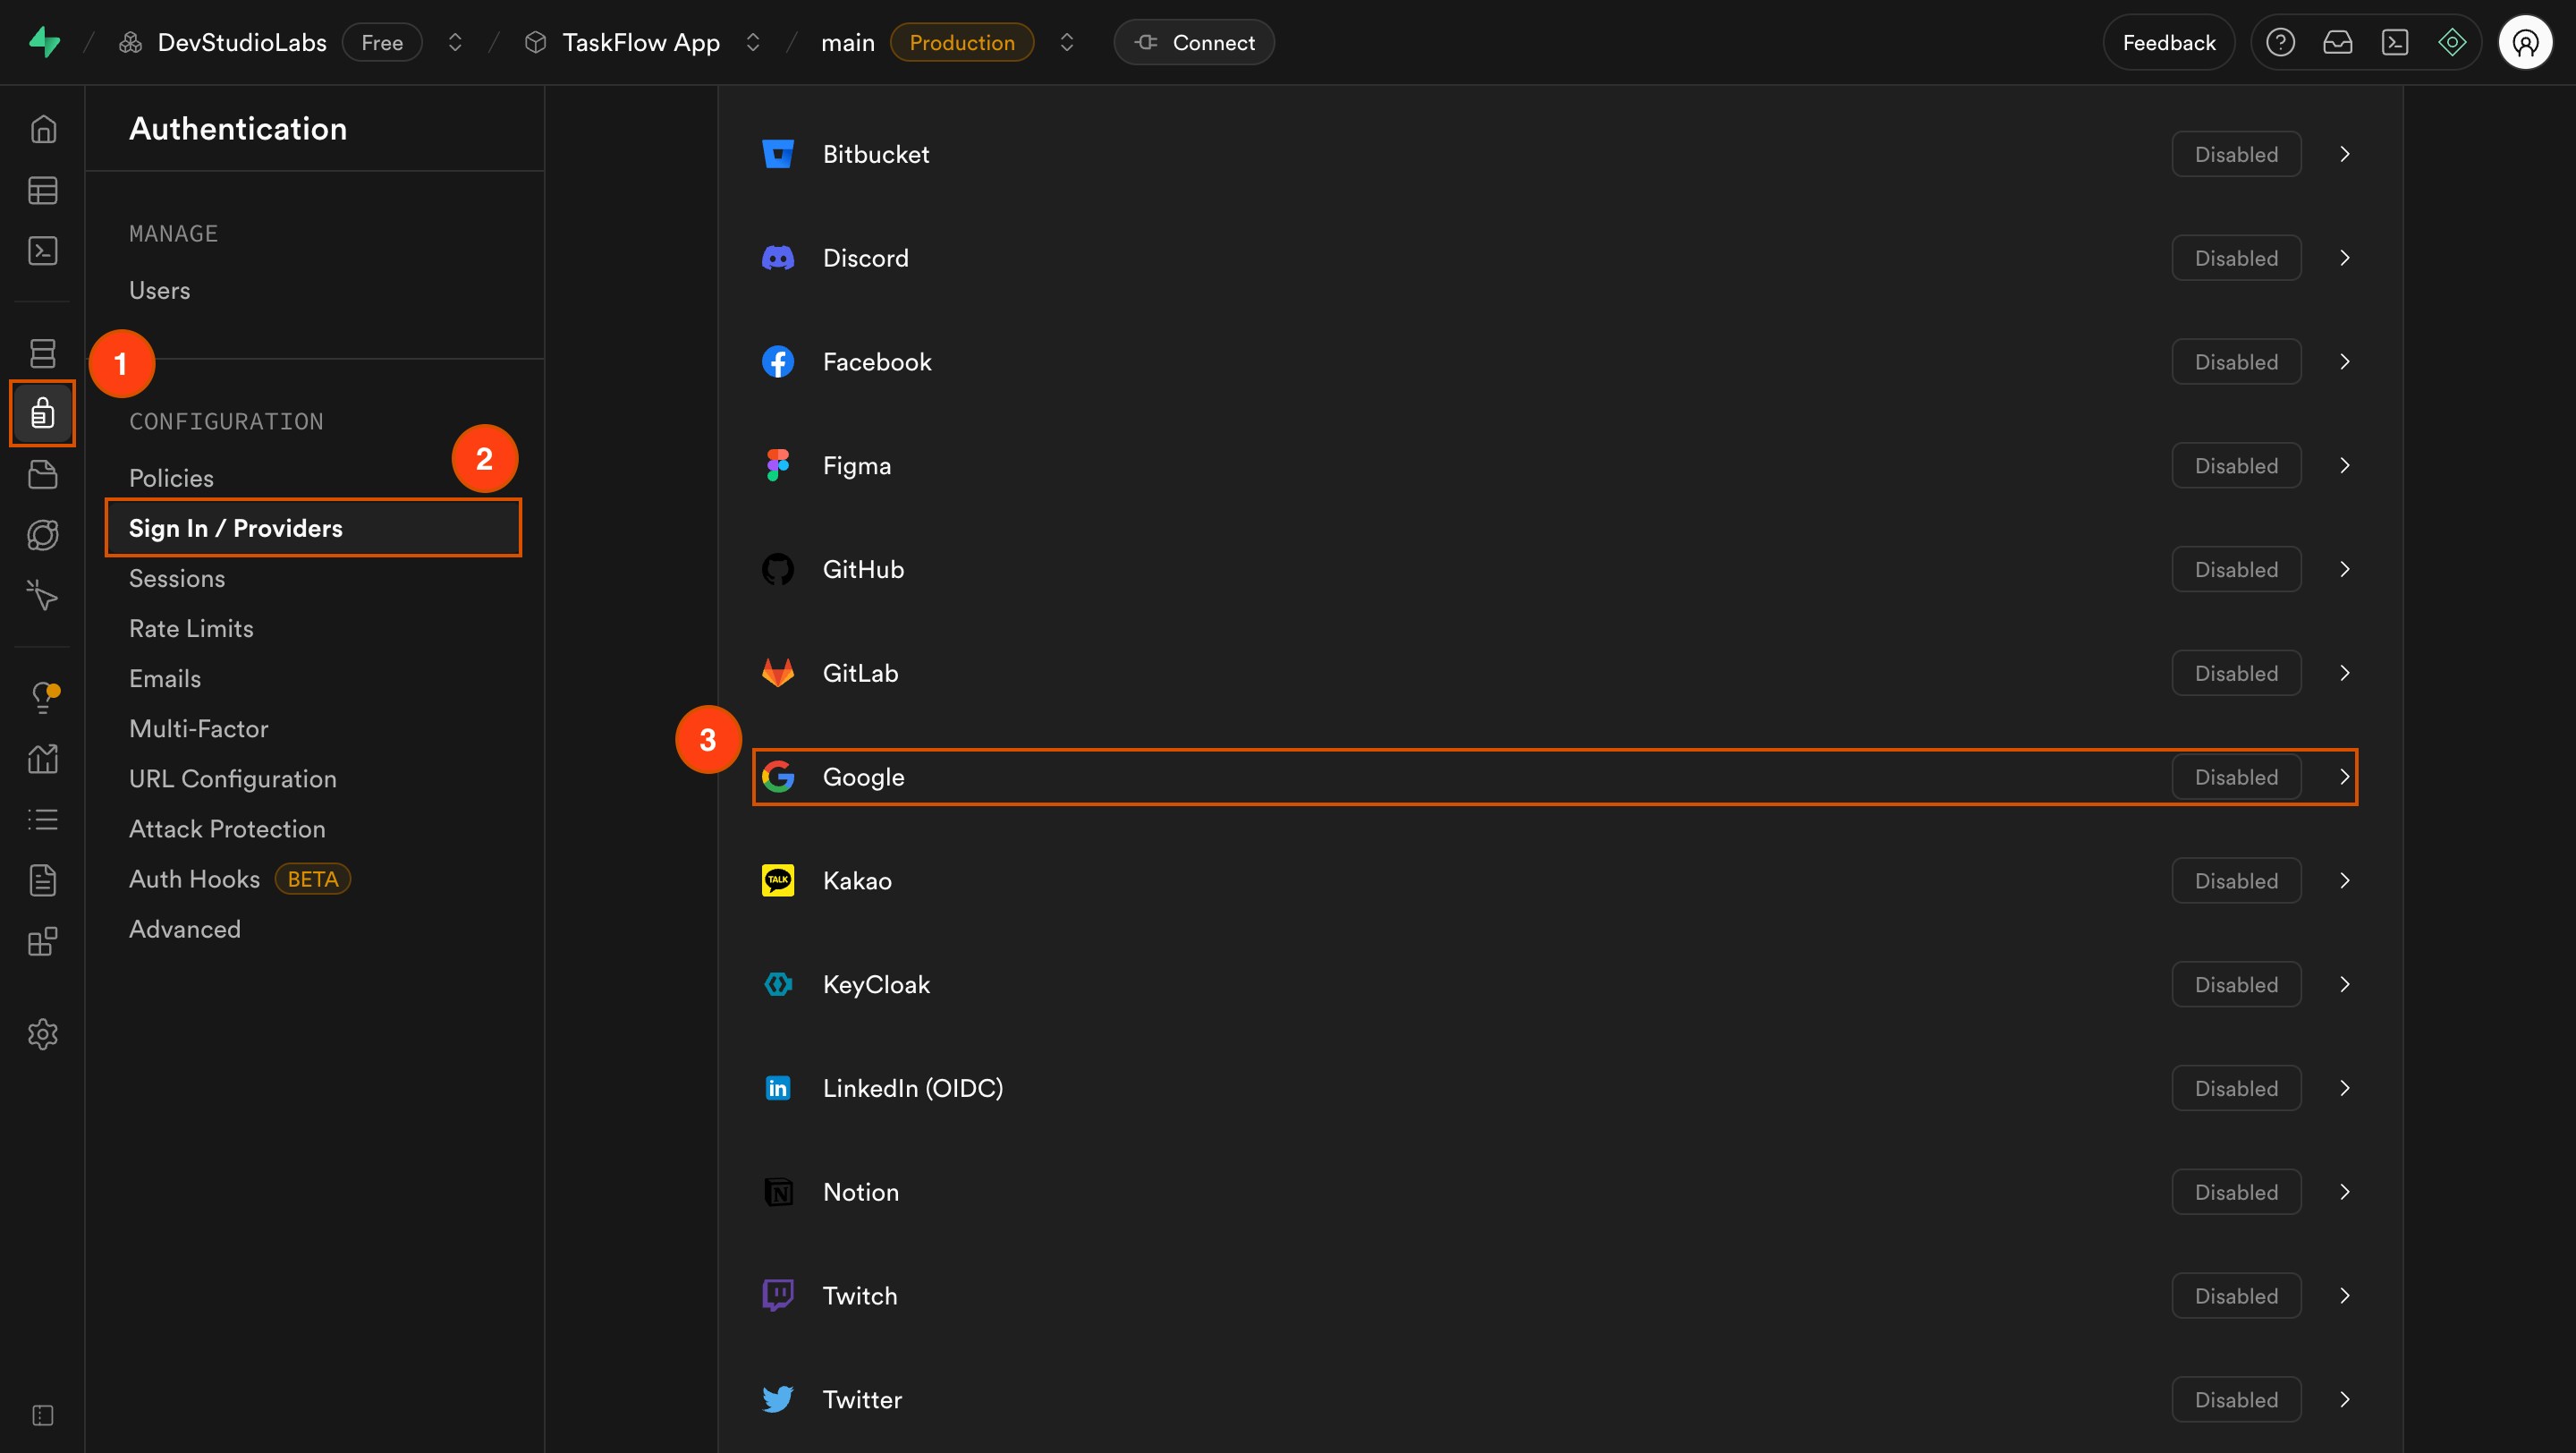
- In your Supabase project, go to Authentication from the left menu.
- Click Sign In / Providers.
- Select your provider. In this case, choose Google.
Create credentials in the provider console
In your provider’s developer console (e.g., Google Cloud Console):
- Create a new OAuth 2.0 Client ID and Secret.
- Under Authorized JavaScript origins, enter your Rocket app’s live preview URL or custom domain. Do not use localhost.
- Under Authorized redirect URIs, paste the Callback URL from Supabase.
Enter credentials into Supabase
Back in Supabase, on the selected provider’s settings page: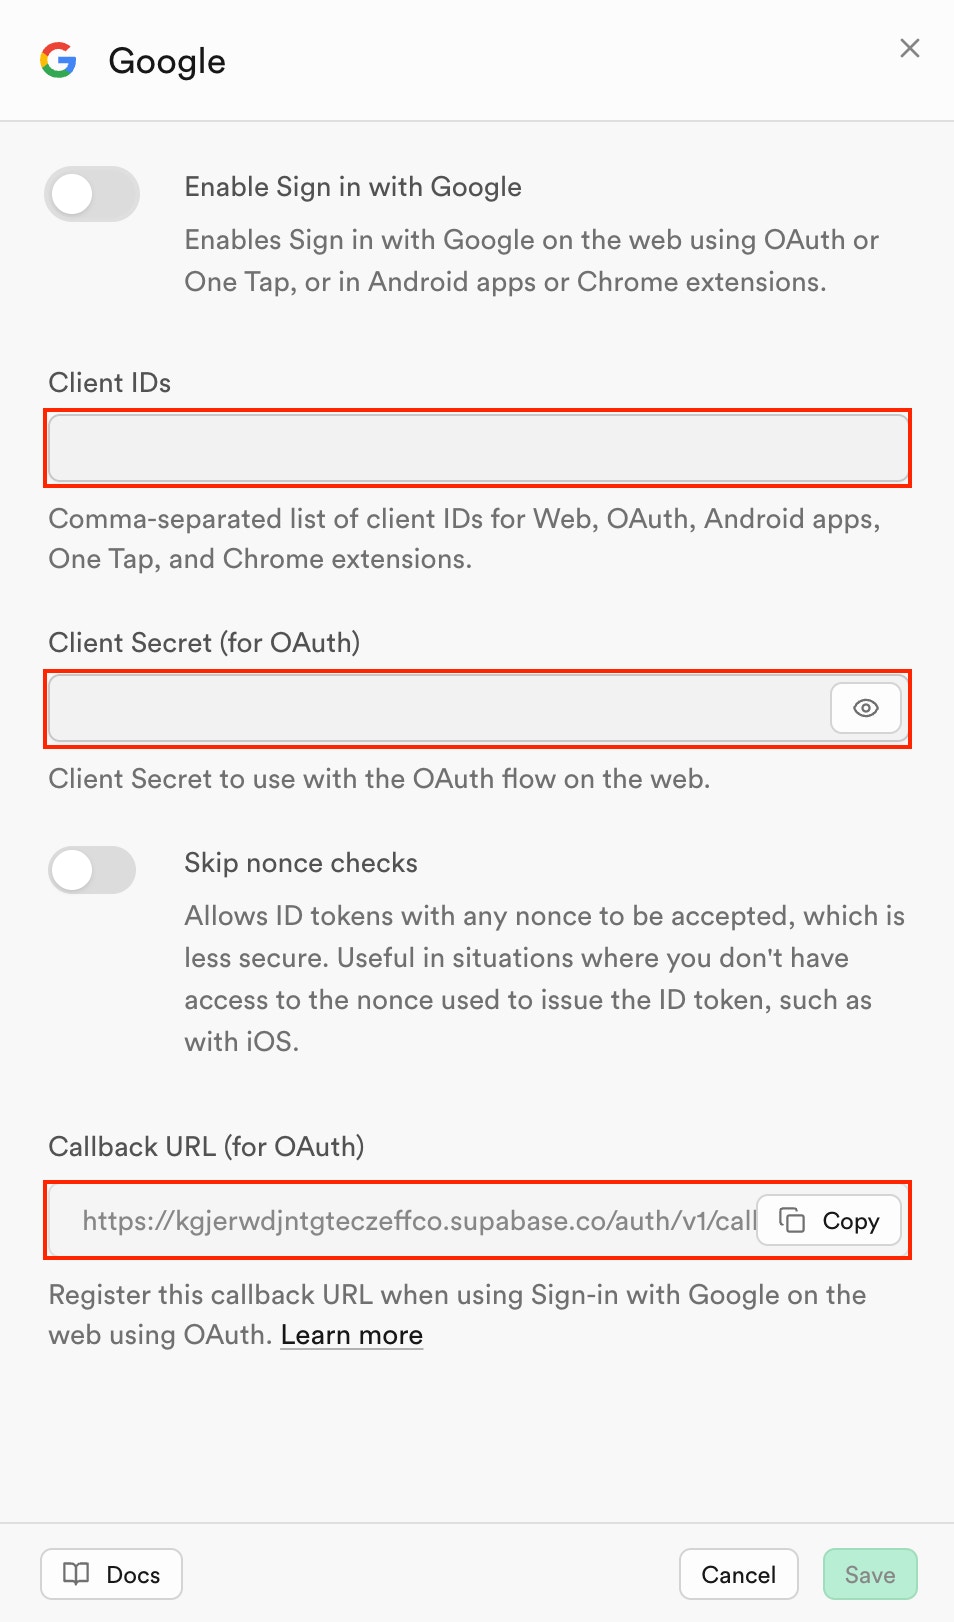
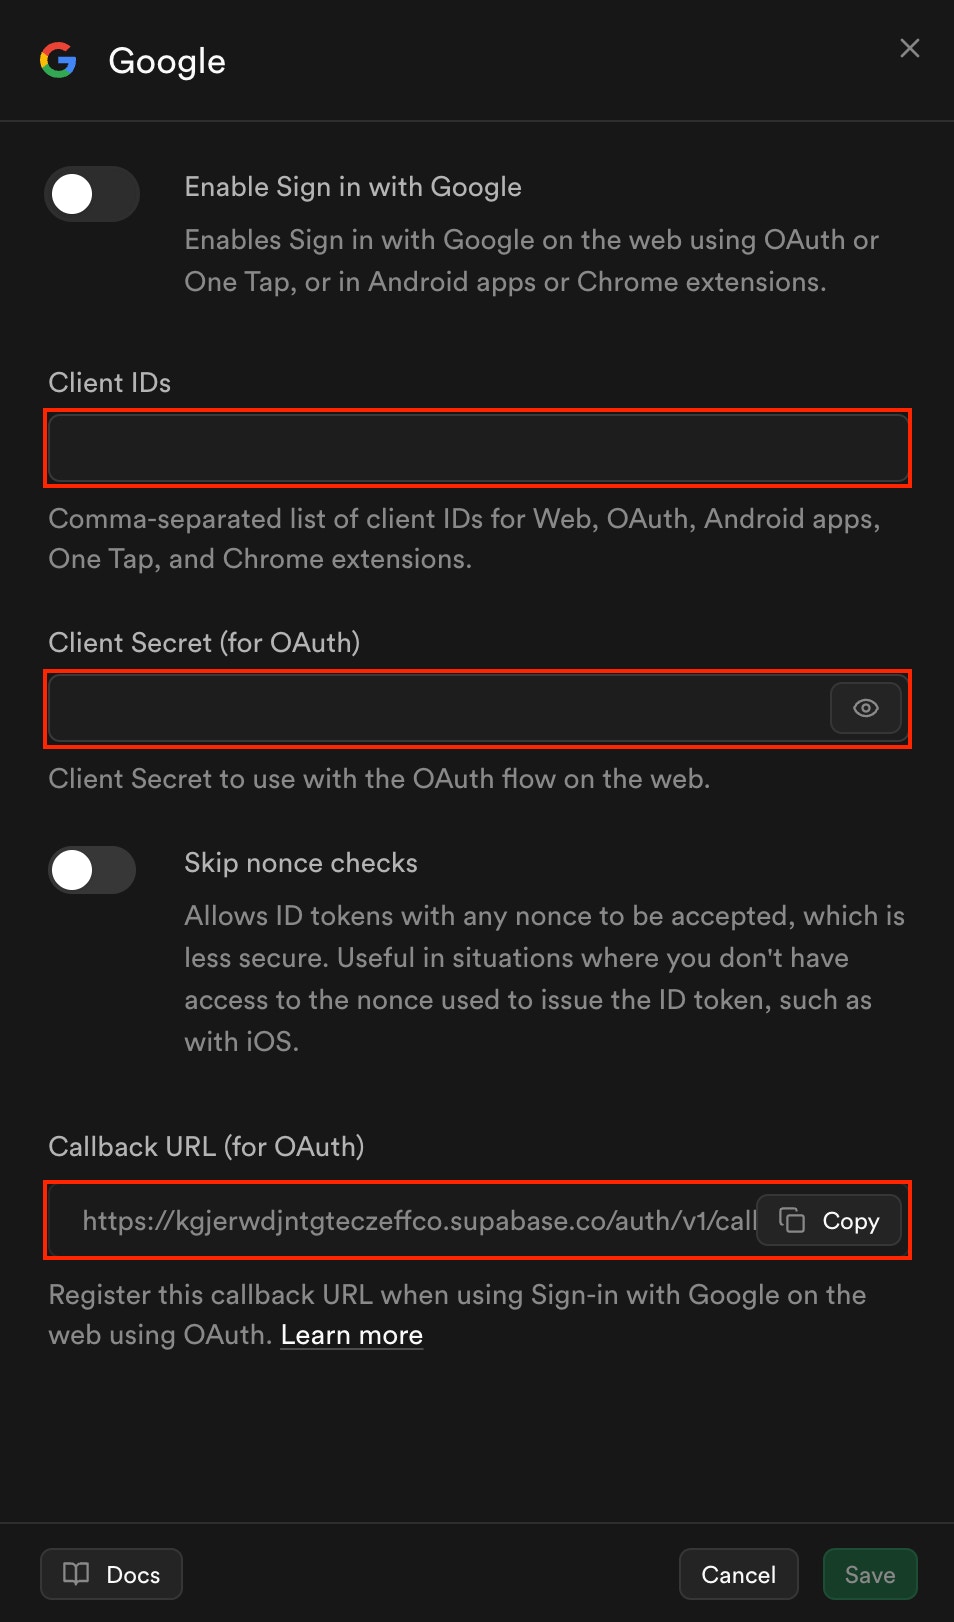
- Paste the Client ID into the first field.
- Paste the Client Secret into the second field.
- Copy the Redirect URL shown in the third field. Make sure this exact URL is also set in your provider’s console.
Always copy the callback URL directly from Supabase.
Each provider requires a unique format, and typos will break the flow.
Troubleshooting
1. OAuth error after clicking sign-in
Clicking the provider button opens an OAuth error page.- Check that the Authorized redirect URI in the provider’s console matches the Supabase callback exactly.
- Ensure the Authorized JavaScript origins includes your Rocket live preview or custom domain.
2. Redirected but not logged in
After login, you are redirected but remain unauthenticated.- Confirm Rocket is linked to the Supabase project where the provider is enabled.
- Test only using your live preview link or custom domain, not localhost.
Social sign-in done right
You have successfully added social authentication to your Rocket app using Supabase.