From first message to full app, all in chat. Rocket generates, edits, and evolves your project in a continuous, interactive thread.
In this guide, you’ll learn how to:
Watch Rocket generate and structure your app.
Compare changes, rollback versions, apply fixes, and explore files.
Iterate with natural messages and images. No coding required.
About the chat interfaceThe chat interface is your main workspace for building and iterating on apps. Describe what you want in plain English, and Rocket generates production-ready code automatically.
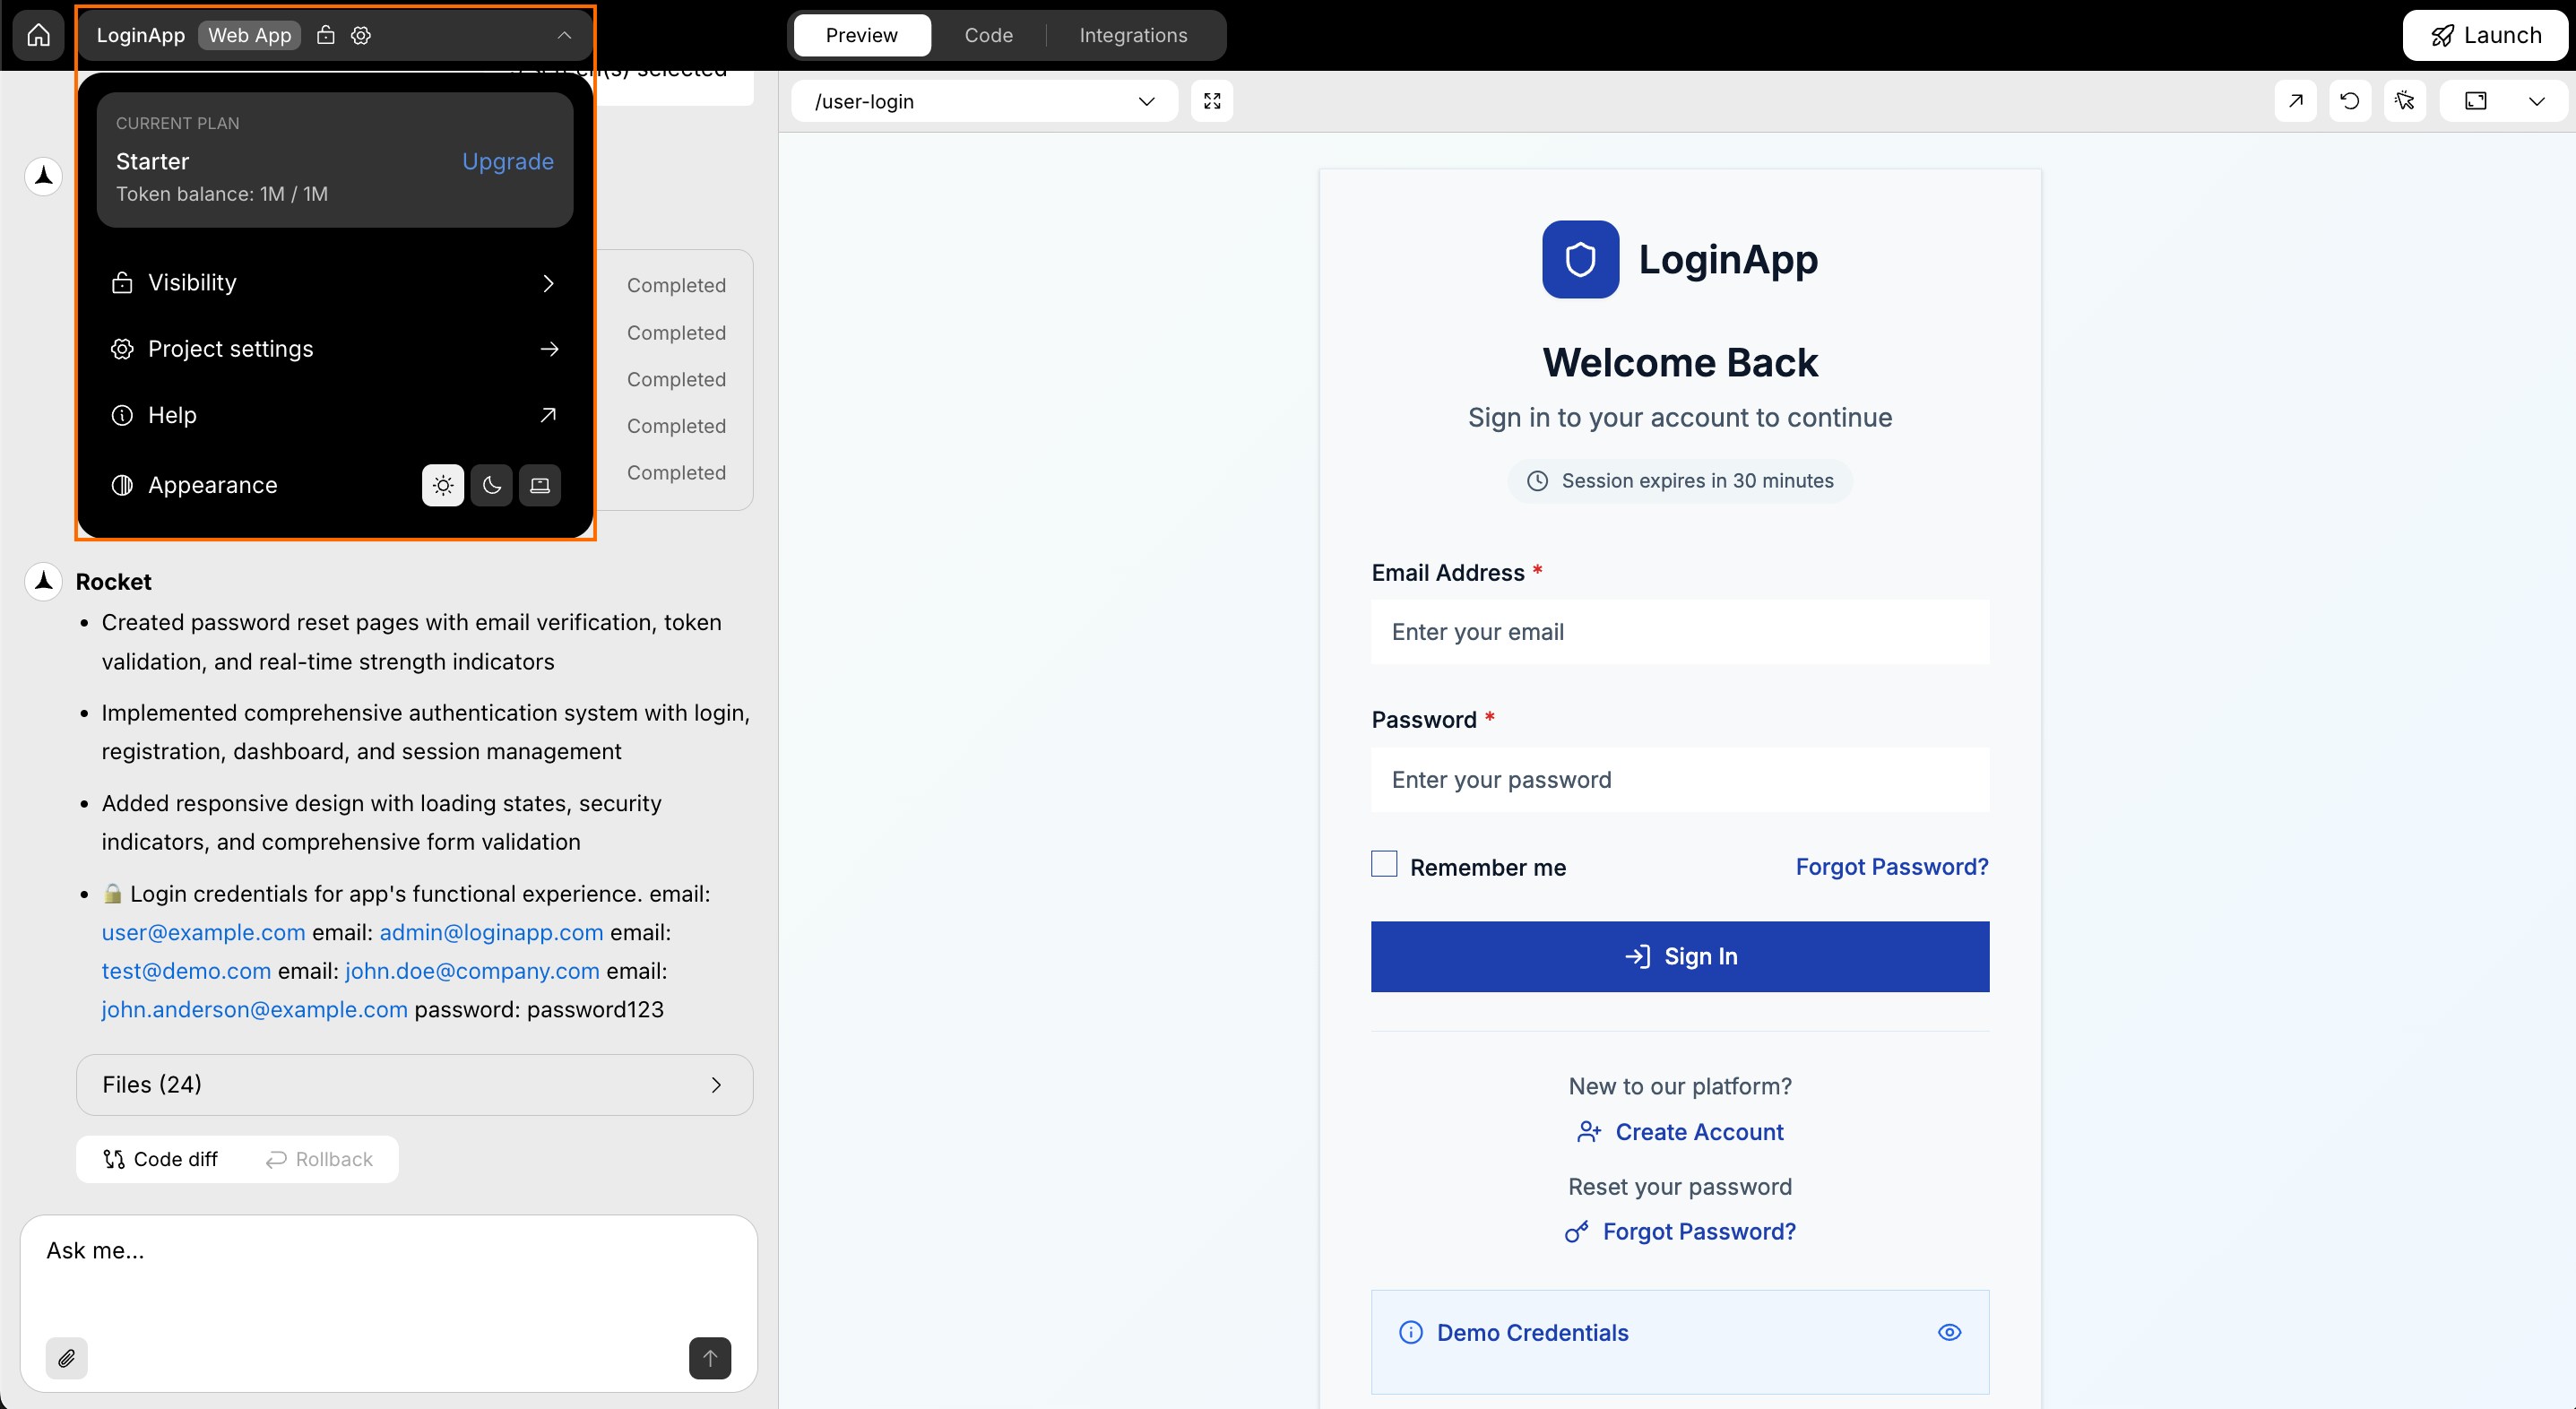
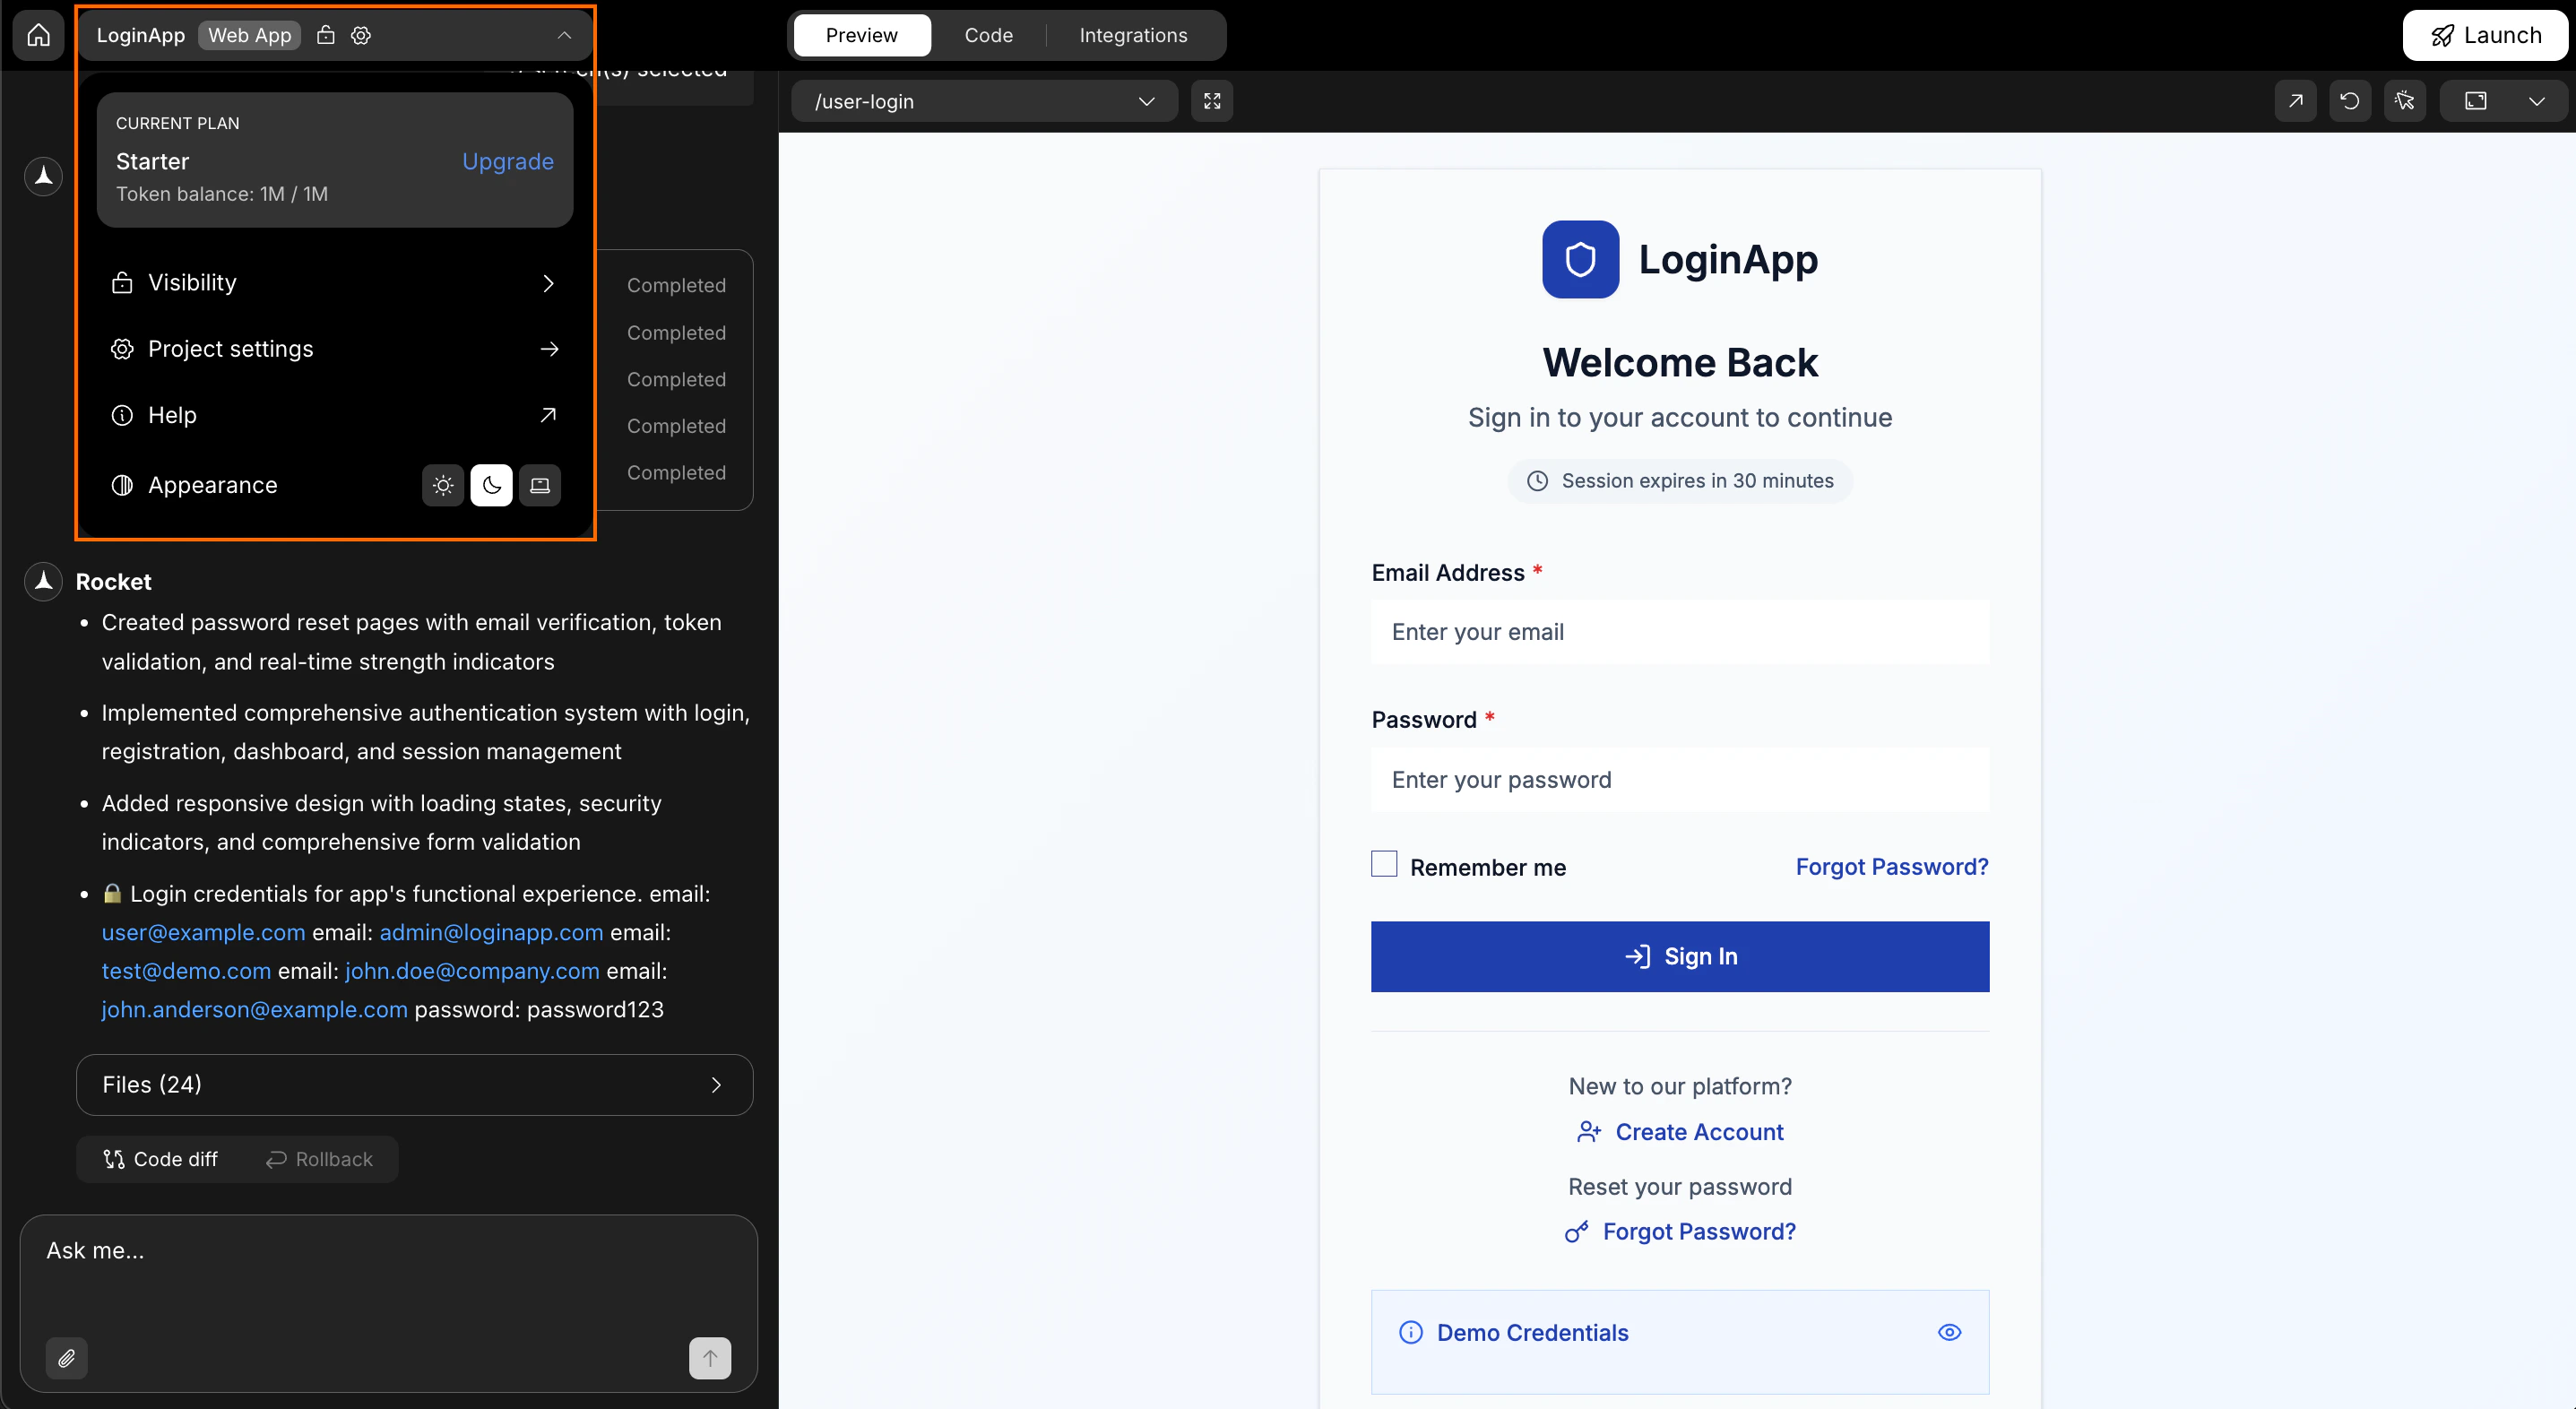
At the top of the chat window, you’ll see the App menu, showing your project name and category. Click it to open a quick-control panel with:
Plan & usage: See your plan, token balance, and upgrade options.
Visibility: Manage access, switch between public or private.
Settings: Edit integrations, preferences, and configuration.
Help: Jump to documentation or contact support.
Appearance: Switch between light, dark, or system UI.
This panel stays accessible in the header, so you can make changes anytime.Once generation starts, Rocket sets up everything for you. From folder structure to live previews, your app is ready to build on.
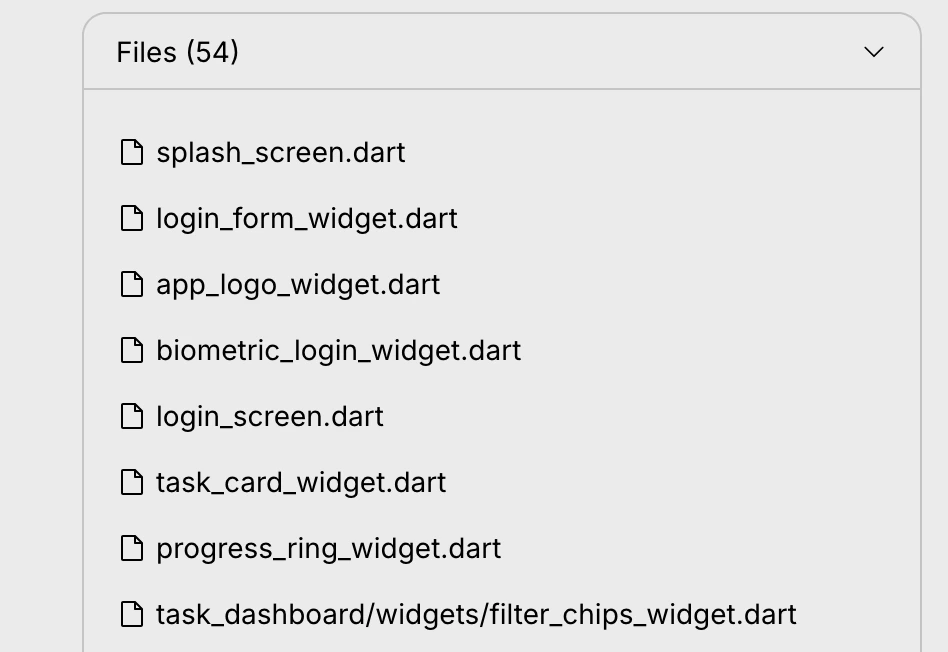
What is this? See exactly which files Rocket created or modified without opening the code view. This helps you understand what changed and track your project’s evolution.
Each generation message includes a Files (x) dropdown.
Click it to browse the files created from your prompt.
Success check: You’ll see a list of generated files under the message.
Fix errors instantly with Fix It
What is this? Rocket automatically fixes errors it detects in generated code, saving you time and tokens. No need to describe the problem or write fixes manually.
If Rocket runs into a code issue, it will try to fix it automatically.
If Rocket can’t fix it immediately:
You’ll see a message: Error(s) found in code.
Click to open the error window.
Select Fix It to try automatic repair.
Token tip: Fix It feature is free for paid users. No token consumption for errors detected and prompted by Rocket in the chat.
Success check: Rocket confirms with “Error fixed” once resolved.
Use Code diff to compare changes
What is this? Compare code versions side by side with color-coded highlights. See exactly what Rocket added or removed without reading through entire files.
How to use it:
Click Code diff under any updated code message.
Red = removed lines. Green = new lines.
Success check: Diff window opens with color-coded highlights.
Rollback to a previous version
What is this? Restore your app to any earlier version if a change didn’t work or you preferred a previous state. Like an undo button for your entire project history.
Use it when:
You liked an earlier version better.
A change introduced a bug.
You want to try something new, but keep a backup.
Warning: Rollback is permanent. You cannot undo it.
Tokens used in the restored version are not refunded.
How to use it:
Click Rollback on an older message.
Confirm when asked.
Rocket restores that version and updates your file tree.
Success check: Confirmation appears and your files are updated.
Message Rocket to update anything
What is this? The core feature of chat. Describe what you want in plain English, and Rocket updates your app. No coding knowledge required.
Examples:
“Fix the hero section layout.”
“Add a login screen.”
“Switch to dark mode.”
Attach image assets in chat
What is this? Upload images directly in chat for logos, backgrounds, or illustrations. Rocket automatically places them in the right location, so you don’t need to manage image files separately.
How to upload:
Click the icon at the lower left of the input box to upload an image. You can also drag and drop or paste an image into the chat box.
Describe where or how to use it.
Keep the file under 10 MB to speed up processing.
Examples:
Replace the logo on the splash screen.
Use this as the background for Home.
Update the product image on Checkout.
Add this avatar to the profile.
Rocket uploads and applies the image to the component you mention. No need to rename files or dig through folders.
Success check: Rocket confirms the update and reflects it in preview.
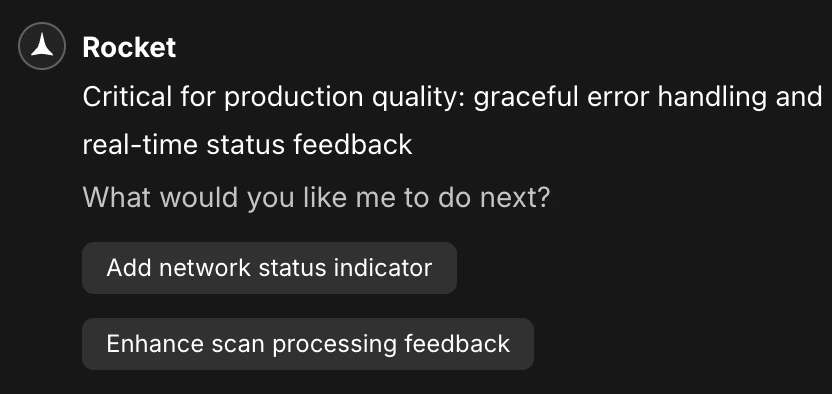
Smart suggestions
What is this? Rocket analyzes your project and suggests two personalized ideas for what to build next. Helps you discover features you might not have thought of.
Click any suggestion to convert it into a prompt in the chat input. Review the prompt, then press Enter to execute it and build the suggested feature.
Success check: Suggestions appear in chat, and clicking one converts it to a prompt ready to execute.
In the mobile app, you can access project settings and navigation through the header bar. Tap the more button in the header to access:
Project info: View project name, creation date, and delete option.
Help: Jump to documentation or contact support.
Mobile app limitation: Advanced settings like plan & usage, visibility, integrations, and appearance preferences are available in the web browser version. To manage these features, please use the web browser version of Rocket.
Once generation starts, Rocket sets up everything for you. From folder structure to live previews, your app is ready to build on.
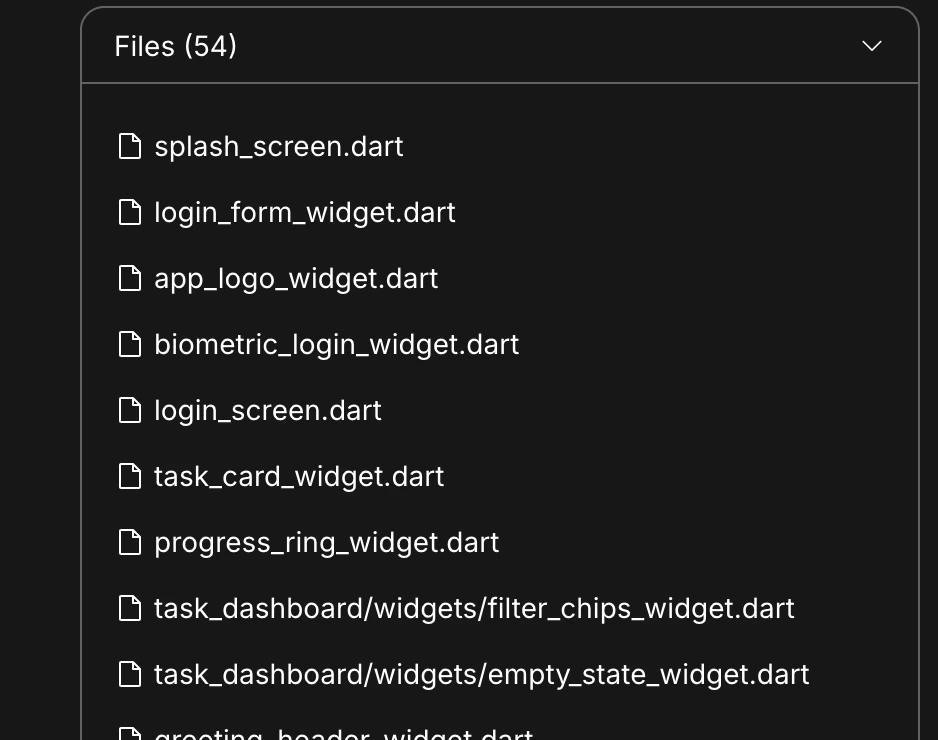
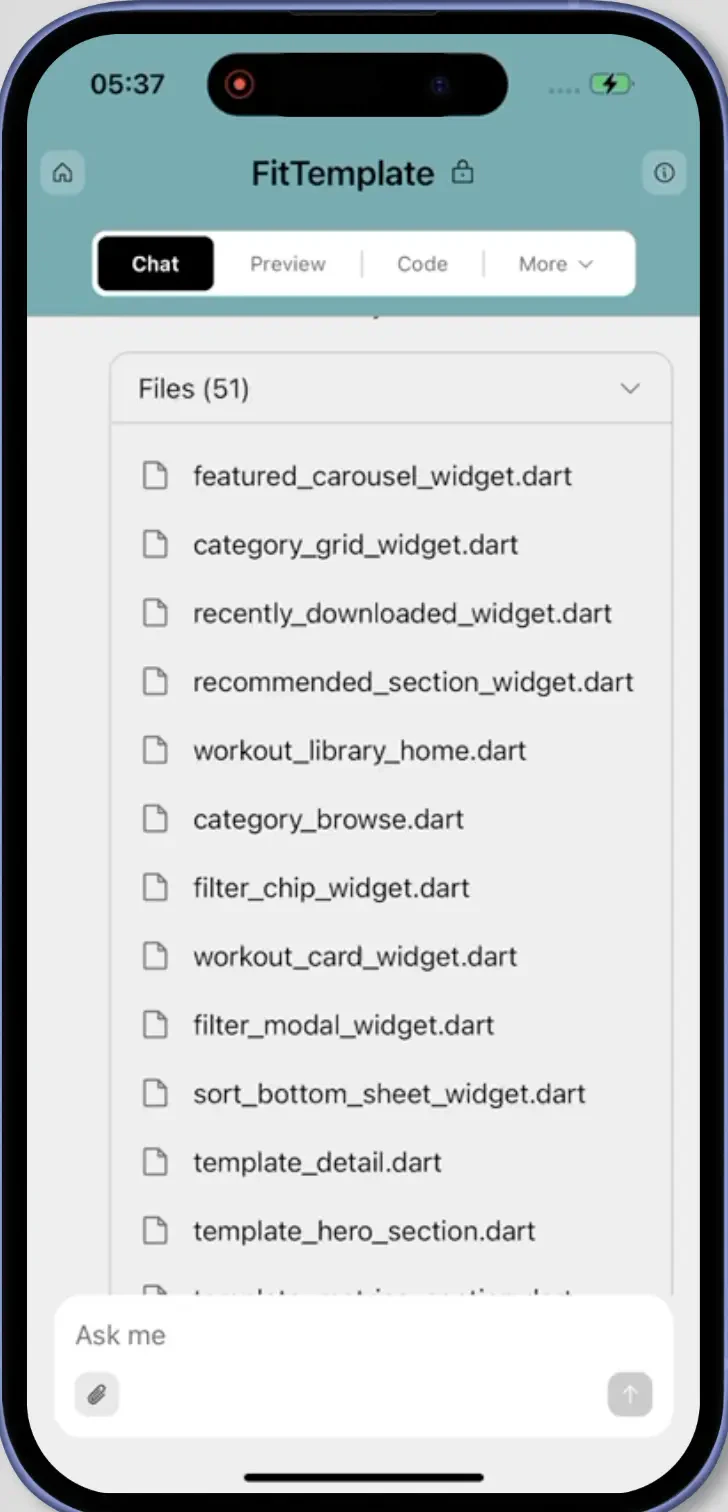
What is this? See exactly which files Rocket created or modified without opening the code view. This helps you understand what changed and track your project’s evolution.
Each generation message includes a Files (x) dropdown.
Tap it to browse the files created from your prompt.
Success check: You’ll see a list of generated files under the message.
Fix errors instantly with Fix It
What is this? Rocket automatically fixes errors it detects in generated code, saving you time and tokens. No need to describe the problem or write fixes manually.
If Rocket runs into a code issue, it will try to fix it automatically.
If Rocket can’t fix it immediately:
You’ll see a message: Error(s) found in code.
Tap to open the error window.
Select Fix It to try automatic repair.
Token tip: Fix It feature is free for paid users. No token consumption for errors detected and prompted by Rocket in the chat.
Success check: Rocket confirms with “Error fixed” once resolved.
Use Code diff to compare changes
What is this? Compare code versions side by side with color-coded highlights. See exactly what Rocket added or removed without reading through entire files.
Note: The Code diff interface is shared across web browser and mobile app platforms.
How to use it:
Tap Code diff under any updated code message.
Red = removed lines. Green = new lines.
Success check: Diff window opens with color-coded highlights.
Rollback to a previous version
What is this? Restore your app to any earlier version if a change didn’t work or you preferred a previous state. Like an undo button for your entire project history.
Use it when:
You liked an earlier version better.
A change introduced a bug.
You want to try something new, but keep a backup.
Warning: Rollback is permanent. You cannot undo it.
Tokens used in the restored version are not refunded.
How to use it:
Tap Rollback on an older message.
Confirm when asked.
Rocket restores that version and updates your file tree.
Success check: Confirmation appears and your files are updated.
Message Rocket to update anything
What is this? The core feature of chat. Describe what you want in plain English, and Rocket updates your app. No coding knowledge required.
Examples:
“Fix the hero section layout.”
“Add a login screen.”
“Switch to dark mode.”
Attach image assets in chat
What is this? Upload images directly in chat for logos, backgrounds, or illustrations. Rocket automatically places them in the right location, so you don’t need to manage image files separately.
How to upload:
Tap the icon at the bottom of the chat field. Choose Take Photo or Choose from Library to upload an image. You can also paste an image into chat.
Describe where or how to use it.
Keep the file under 10 MB to speed up processing.
Examples:
Replace the logo on the splash screen.
Use this as the background for Home.
Update the product image on Checkout.
Add this avatar to the profile.
Rocket uploads and applies the image to the component you mention. No need to rename files or dig through folders.
Success check: Rocket confirms the update and reflects it in preview.
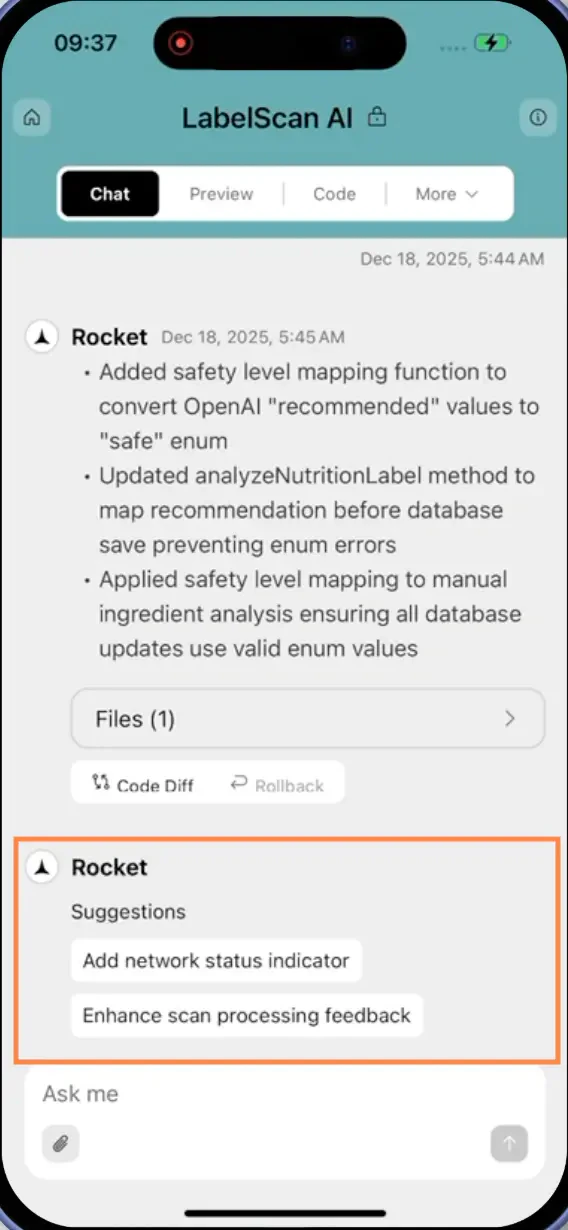
Smart suggestions
What is this? Rocket analyzes your project and suggests two personalized ideas for what to build next. Helps you discover features you might not have thought of.
Tap any suggestion to convert it into a prompt in the chat input. Review the prompt, then press Enter to execute it and build the suggested feature.
Success check: Suggestions appear in chat, and tapping one converts it to a prompt ready to execute.
You did it!
Your app is structured, generated, and evolving with Rocket chat.